How to Make Decorated RIP Coffin Cookies
These eerie little RIP coffin cookies are a Halloween classic, instantly adding a playful touch of fright to any dessert table.
updated from 2013
RIP COFFIN COOKIES STEP-BY-STEP
In this step-by-step tutorial, I’ll show you how to decorate RIP coffin cookies with just one icing consistency and two colors (brown and gray).

THINGS YOU NEED
- Get all the tools and supplies in Haniela’s Amazon Shop
- Coffin Cookie Cutter
- Gel Food Coloring – brown, black – to make gray
- Tipless Piping Bags
- Scribe Tool
- Basketweave Piping Tip #47
- Alphabet Impression Letters (optional)- use a tootpick to write the letters into the icing instead
- Palette Knife or a Spreader
- Edible marker – black
- Brown Petal Dust (optional) – to shade the icing for the weathered look
- Simple square or a small plaque stencil, optional – spread a thin layer of gray icing over the icing instead
This post contains Amazon affiliate links that earn me a small commission, at no cost to you. I only recommend products that I use and love. Learn more about my affiliate policy here.

ROYAL ICING COLORS AND CONSISTENCIES
I used royal icing to decorate cookies. You can use standard royal icing made with egg whites (there are 3 recipes using meringue, fresh egg whites, and pasteurized egg whites in a carton recipe), vegan icing (using aquafaba), or glaze icing.
- Brown Icing: thick consistency
- Gray Icing: piping to a thick consistency
RIP IMPRESSION TOOL
- To make the impression tool, you can use a set of three letters: RIP.
- Instead of using them individually, you can secure them onto a double-layered packaging tape (steps 1-6).
- Trim the excess rhe tape and voila, you have an impression tool you can use to create RIP in royal icing or fondant (steps 7-8).

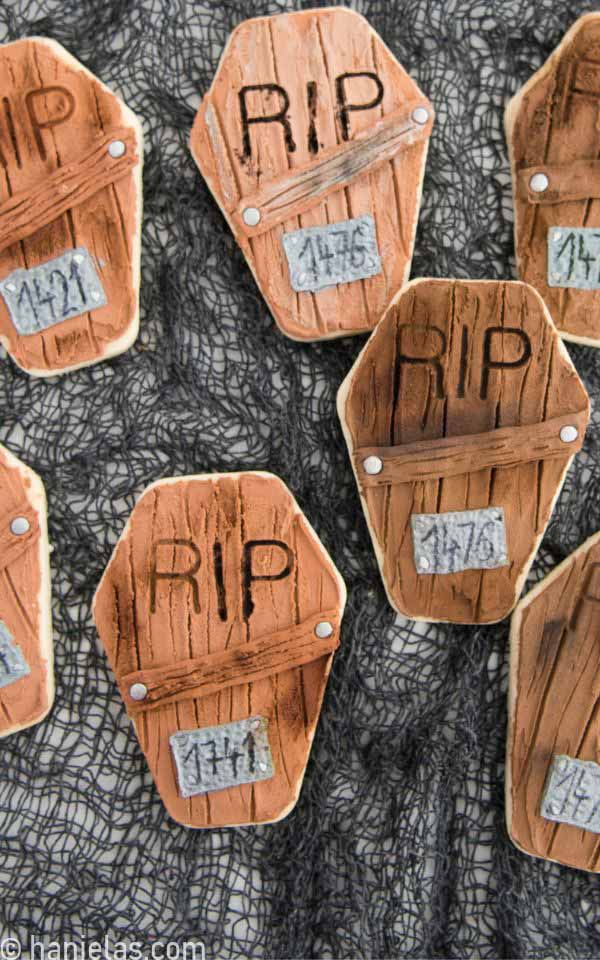
CREATE ROYAL ICING WOOD PLANKS
- Start by spreading thick-consistency brown icing across the cookie (step 1-2).
- Use a palette knife or a spatula to spread the icing evenly (steps 3-5).
- Then, to create wood planks, use a toothpick or a thick-style scribe tool and run the scribe through the icing in vertical lines (step 6).
- Wipe the tip of the tool after each time you run it through the icing. Don’t allow icing to crust. Move on to the next step (step 7).

RIP IMPRESSION
- To create a RIP impression in royal, you have two options:
- 1. Use a toothpick to write the letters in the soft icing – If you decide to write, be sure to use a toothpick or the pointy end of a thick bamboo stick. Wipe the tip of the toothpick after each line you make in the icing, to make sure that the letters are clearly visible.
- 2. Use the alphabet impression tool – When using the impression tool with alphabet letters, you can use cornstarch or cocoa powder. Using cornstarch or cocoa powder helps prevent your impression tool from sticking to royal icing. It acts as a barrier between the icing, and so it leaves you with a clear impression RIP in royal icing.
- How to use the Alphabet Impression Tool with Royal Icing
- Dip the letters in cornstarch or cocoa powder. Cocoa powder gives a darker appearance.
- Make sure that all three letters are evenly coated.
- Turn the impression tool over and gently push it into the icing, and then immediately lift it up to reveal the RIP impression.
- When using cornstarch, you will have some white powder residue on the letters. You can use a decorating bottle or a rubber air duster to remove the excess cornstarch.
- Let the icing dry for about 2 hours before continuing with the next stenciling step.


COFFIN PLAQUE
- To create the coffin plaque, you can use a simple stencil made out of Mylar sheet. If you don’t have a Myler sheet, you can also utilize a lid from sour cream or yogurt. Cut out a small rectangle with an exacto knife, and you can use it to create the plaque on your RIP coffin cookie.
- Position the stencil over the bottom of the cookie and spread a thin layer of thick consistency gray icing over the stencil, and then carefully lift the stencil up (steps 1-6).

- While the icing is soft, you can put four “nails” in the corners of the plaque.
- To make the nails, you can use broken up silver button sprinkles. Or you can make your own sprinkles or you can use cylindrical Jimmy sprinkles. pick up a small piece of a Sprinkle using tweezers and push it down into the icing in the corner of the rectangle

Pick up a small piece of a broken button sprinkles using tweezers and push it down into the icing in each corner of the rectangle (steps 1-4).

- Allow the gray sign to crust for about 5 minutes.
- Then, with a dull tool, make subtle indentations in the icing to create a hammered look – this can be a fondant shaping tool, or you can use a toothpick wrapped in food wrap (steps 1-3).

PIPED WOOD PLANK WITH NAILS
- To make the single wood plank with nails, I used a thick consistency brown icing and a basketweave piping tip #47.
- You can see that I turned the piping tip over so the side with teeth is facing down and the smooth side is facing up.
- Pipe a line of icing across the cookie. Clean up the edge with a palette knife (steps 1-3).
- And with a scribe tool or a toothpick, create impression lines in icing while it’s still soft to mimic woodgrain (steps 4-5).
- Gently push a small round silver button sprinkles into each end of the wood plank (steps 6-8).
- Allow icign to fully dry for 5 hours.

PAINT WITH EDIBLE SILVER PAINT
- If you have edible metallic paint, you can paint the plaque with silver paint. Or you can use dry form Silver Luster Dust mixed with Everclear or Vodka and paint the plaque with this mixture, using a food-only paintbrush (steps 1-5).

WEATHERED ICING LOOK WITH PETAL DUST
- You can create a weathered look by using chocolate or brown edible pedal dust and a dry food-only paintbrush.
- Sparingly apply the dust on the letters, around the wood plank with nails, and across the cookie to achieve the weathered look.
- Below, you can see what it looks like when applied to a RIP coffin cookie, where the rest in peace impression was made using cornstarch and cocoa powder.
- You can choose which one you prefer.


WRITE WITH EDIBLE MARKER
And lastly, put a finishing touch on RIP coffin cookie! Use a black edible marker and write the year on the gray-silver plaque.

I’ve seen RIP coffin cookies surface usually around October Halloween festivities, but also for cheeky occasions like “RIP birthdays” (a milestone celebration that pokes fun at getting older).
Do you want to stay updated about free cookie decorating tutorials, live events, classes, and products? Sign up for Hani’s Cookie Decorating Newsletter.
FROM THE PAST
Back in 2013, I decorated coffin cookies with marshmallow fondant. I used a woodgrain impression mat to achieve the textured look.

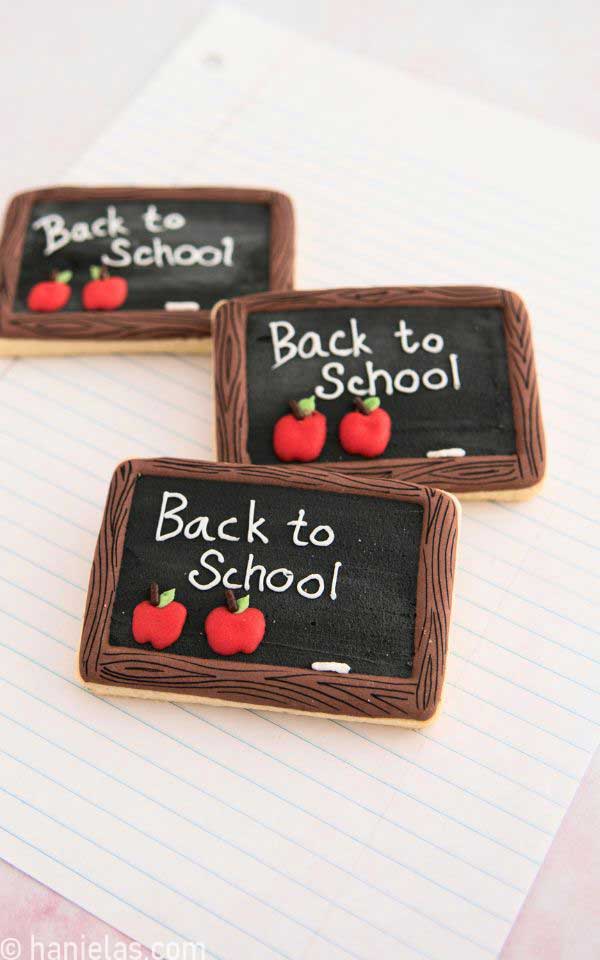
MORE HALLOWEEN RECIPE IDEAS
- Buttercream Halloween Sugar Cookies
- Easy Spiderweb Cookies
- Candy Corn Peppermint Patties
- Halloween Cupcakes
- Meringue Ghost Cake via Mom Loves Baking
- 10 Halloween Decorated Pumpkin Cookie Ideas
COOKIE DECORATING TOOLBOX
- Beginner’s Guide To Cookie Decorating
- Ultimate Guide to Cut-Out Cookies (tips, tricks, troubleshooting)
- Royal Icing Recipe
- Small Batch Royal Icing Recipe
- Cookie Icing Recipes (includes vegan royal icing, glaze, fondant)
- Guide To Royal Icing Consistencies with Visual Help(what is stiff, flood icing, etc.)
- How To Freeze Royal Icing
- How To Make Royal Icing Transfers
- Royal Icing FAQ ( for example: how to make black icing, color bleeding, storage, and more)
- How To Make a Cookie Cutter Template
- Ultimate Guide To Cookie Decorating Tools
I published this cookie decorating tutorial on October 6, 2013. On August 19, 2025, I updated this tutorial with new step-by-step photos, written instructions, and a video tutorial.

Hi, I’m Hani
Welcome!
Thank you for visiting Haniela’s. On my blog, you’ll find delicious sweet & savory recipes made with simple ingredients. Why not start a new adventure? Discover a world of cookie decorating with my step-by-step tutorials.

Hi, I’m Hani
Welcome!
Thank you for visiting Haniela’s. On my blog, you’ll find delicious sweet & savory recipes made with simple ingredients. Why not start a new adventure? Discover a world of cookie decorating with my step-by-step tutorials.