Mini Tart Shells Recipe
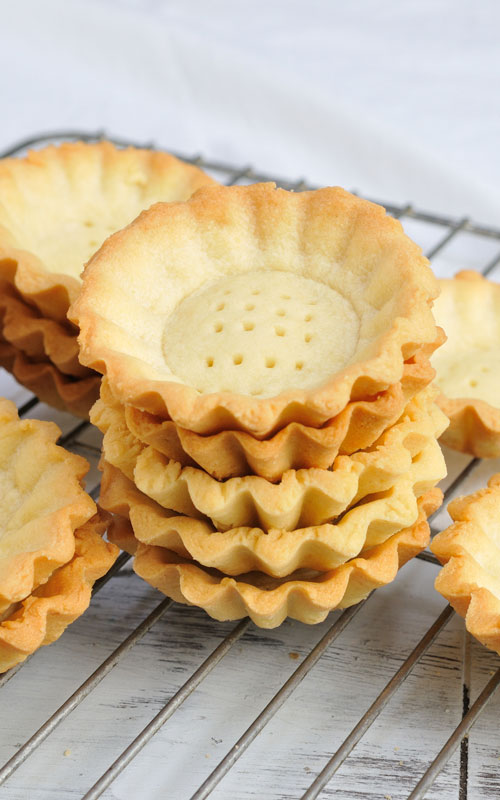
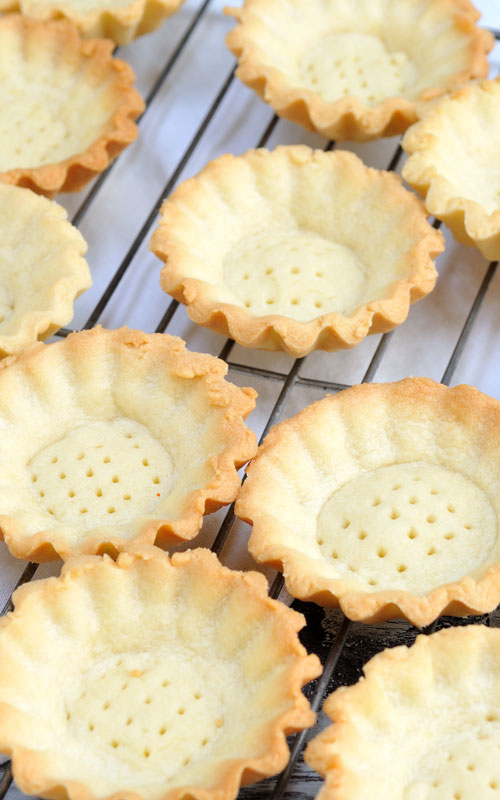
Today I’m going show how I make homemade Mini Tart Shells.
FEATURED COMMENT
“I’ve been searching for a really good cookie dough tart shell recipe and this one is amazing. Very delicate tasting and lovely texture. I filled half with coconut and half with lemon. Thank you, this is my go-to recipe for tart shells, and I will probably use it to make cookies as well. ” Joan
HOW TO MAKE MINI TART SHELLS
The main reasons why I love mini tarts shells is because of their size, versatility, convenience, and presentation possibilities. Mini tarts make the perfect canvas for so many desserts.
Cookie dough I use makes mini tarts with a tender crumb. It’s easy to work it and not only do I use it to make my homemade mini tart shells but I also use it as a base for my Linzer Cookies. And it is also a perfect recipe for cut out cute Rose Icebox Cookies. You can also try my chocolate version of this easy mini tarts shells recipe.
TO MAKE MINI TART SHELLS YOU NEED
- Mini Tart Shells Molds
- Dough EZ Rolling Mat
- Rolling Guides 1/8 inch – you can pick up paint stick at local hardware store or look at the lumber section for wood rods
- Fork
- NonStick Spray
- Vanilla Extract
This post containsThis post contains Amazon affiliate links that earn me a small commission, at no cost to you. I only recommend products that I use and love. Learn more about my affiliate policy here.
INGREDIENTS
- Butter – at room temperature, no need to use cold butter
- Powdered Sugar – produces tender crumb dough that doesn’t spread
- Egg Yolks or one whole egg – I use egg yolks as they yield a tender crumb dough. Though if you are low on egg you can use 1 whole egg.
- Vanilla Extract or Vanilla Paste
- All-Purpose Flour
- Salt
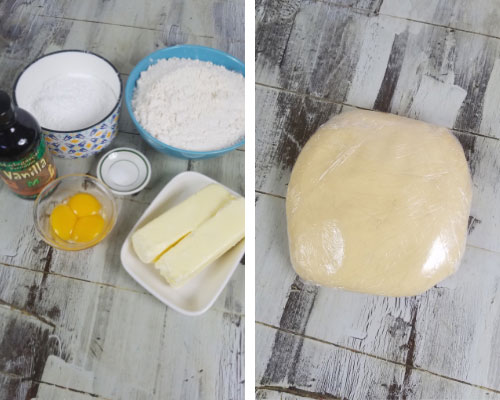
MINI TART SHELLS COOKIE DOUGH
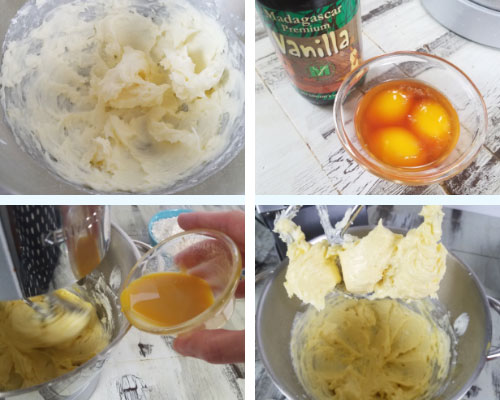
I start by creaming room temperature butter and powdered sugar. Then in a small dish I whisk together egg yolks and vanilla. Gradually beat it into the butter.
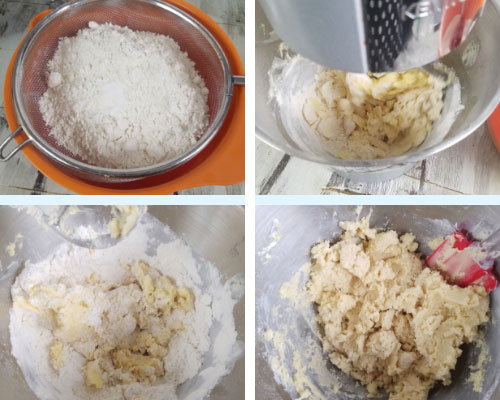
Sift flour and salt and gradually, with the mixer set to low speed mix in the flour. Scrape down the bowl and dump the dough onto a work surface. Gather dough into a ball. Flatten it into a disk. Wrap the disk into a plastic wrap and chill the dough for for 1 to 2 hours.
HOW TO SHAPE MINI TART SHELLS
I use small metal tart shell molds. Place them on a baking sheet and spray the molds with a nonstick spray. Set aside. If you don’t have mini tart molds, you can use a mini muffin pan instead.

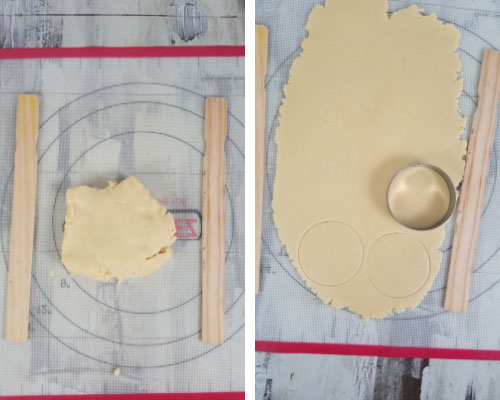
Start by rolling out slightly softened dough to about 1/8 inch thick. My molds are about 2.8-3 inches across at the widest opening. I used a 3-inch cutter to cut out cookie rounds and an oval shape cutter to cut out oval shapes, depending on the shape of your molds.
Press each cookie round into the metal mold. First, shape it with your fingers and then gently shape the inside using a spare tart mold.

I like to put a piece of food-safe plastic wrap over the bottom mold first. Then, gently press in the spare tart mold, aligning the fluted edge with the bottom tart mold edge. Clean up the edges.

BAKING
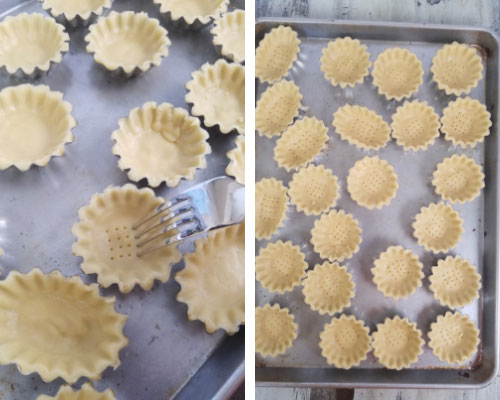
It is important to prick the unbaked shells so they don’t puff up in the oven. I use four prong fork. Chill shaped tarts for 15 minutes. Then bake chilled shells in the preheated oven at 350F for 12-14 minutes, until edges are lightly golden brown.
HOW TO UNMOLD TART SHELLS
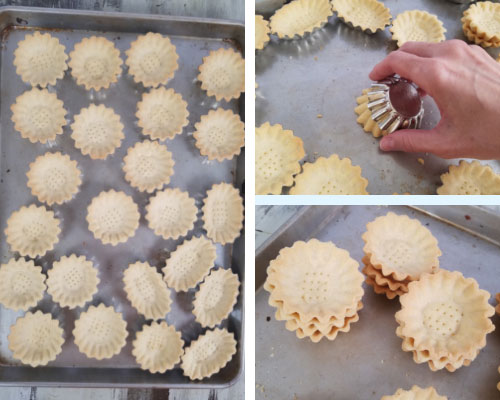
Let the baked tart shells cool for 10-15 minutes before removing them from the molds. Tap the edge of the mold on your work surface to release the mini tart shell.
HOW TO STORE MINI TART SHELLS
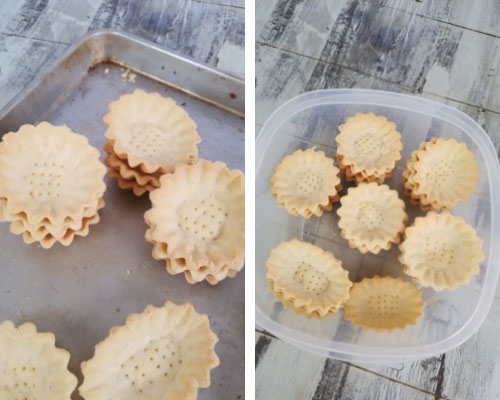
Baked shells can be stored in the fridge for up to a week. You can also freeze them for up to 3 months.
HOW TO USE MINI TART SHELLS
- Make mini tarts shells filled with Lemon Curd or try Raspberry Curd Meringue Tarts
- Fill the shells with chocolate mousse, top it with whipped cream and fruit.
- Spoon a Thick Caramel into the shell and pipe Ganache Swirl on the top
- Fill them with Pastry Cream or Whipped Cream and top them with fresh fruit.
- Brush them with melted chocolate before using a mousse filling.
PIN IT for later
MORE DELICIOUS RECIPES
- Raspberry Meringue Tarts with Chocolate Flamingos
- Recipe for Chocolate Tarts
- Chocolate Brownie Tart
- Almond Tart Shell
- Lemon Meringue Cheesecakes
- Tomato Puff Pastry Tart via It’s Not Complicated Recipes
- Unicorn Apple Hand Pies
Mini Tart Shells Recipe
Ingredients
TART SHELLS COOKIE DOUGH
- 3 cups All-purpose flour (430 grams)
- 1/8 tsp salt
- 1 1/4 cup powdered sugar (160 grams)
- 3 egg yolks (or use 1 large egg and1 teaspoon milk)
- 2 tsp vanilla bean paste or vanilla extract
- 2 sticks unsalted butter, at room temperature (226 grams)room temperature butter
Instructions
Tart Shell Dough Recipe
- Sift flour(3 cups/430 grams) and salt(1 /8tsp). Set aside.
- In the mixer fitted with a petal attachment beat unsalted, room temperature butter (2 sticks, 226 grams) and powdered sugar (1 cup and 1/4 cup) until smooth. In a small dish whisk together egg yolks (3 egg yolks) and vanilla bean paste or vanilla extract (2 tsp). Gradually beat egg yolk mixture into the creamed butter. Scrape the bowl few times as needed.
- On the low speed, gradually add flour mixture to butter mixture. Mix until it starts to come together. If the dough is too crumbly, add 1tsp milk. Do not overwork the dough. Invert the dough onto a clean work surface or into a large bowl and gather dough together with your hands into a ball. Then form the dough into a disk, wrap it in the foil and chill for 1 to 2 hours
Shape and Bake Mini Tart Shells
- Preheat oven to 350F.
- Place mini tart shell molds onto a baking sheet. Spray with a no-stick spray, set aside.
- Take out the chilled dough, and cut it in half. Let it soften for 5 minutes. Roll it out between 2 sheets of parchment or use Dough EZ Mat. Roll it out using 1/8-inch thick.
- Cut out as many rounds as you can. Gather scraps and re-roll. Shape the tarts as shown in the picture tutorial/video. Use a fork to prick the bottom of the shells. Chill unbaked tarts for 15 minutes. Bake at 350F for 12-14 minutes until golden around the edges.TIP: My mini tart molds are about 3 inches across at the opening. I used a 3.5-inch cutter to cut out my rounds.
- Let cool for 10-15 minutes before removing tarts from the molds. Turn the mold upside down and tap it firmly onto your work surface to release the shell.
- Let the tarts cool before filling.
Notes
- CAN I FREEZE MINI TART SHELLS DOUGH? Wrap the dough well in a food wrap and freeze in a ziploc bag for up to 3 months.
- CAN BAKED TARTS BE FROZEN FOR LATER? Absolutely. Freeze baked tarts in a container, not in a Ziploc bag. As a matter of fact, I always have some in the freezer. They saved many dinner parties. They defrost quickly and can be filled with whipped cream, fruit, custard, ganache, etc.
- DO I HAVE TO USE 3 EGG YOLKS? I like using three egg yolks as it produces tender dough. However, if you don’t have three egg yolks, you can use one whole large egg, and in case the dough is too crumbly, you can add 1 tsp of milk.
Did you make this recipe? Tag @hanielas on Instagram and hashtag it #hanielas
This post contains affiliate links that earn me a small commission, at no cost to you. I only recommend products that I use and love. Learn more about my affiliate policy here.




Hi Hani. I love you recipe and have used many times, thank you for sharing it. I’m wondering if you have any advice on how I might tweak the recipe so its a bit firmer and is less crumbly and has more of a ‘snap’ to it. A bit more biscuity than cookie texture. Any guidance would be appreciated.
Hi Joshua,
Happy Holidays! You can try to swap out powdered sugar for granulated sugar. If it’s crumbly, you can add 1 teaspoon of milk.
Do you always experience dough that is crumbly?
Should I follow the cups measurement, or the grams?
3 cups of flour (US) is 360-375g, not 430g.
Cheryl,
I’d recommend using 430grams.
When I measure 1 cup of flour using 236ml cup measure it weighs 143 grams. I’ve tested it many times. 🙂
I don’t sift before measuring with a cup.
Could i leave the unbaked dough in the fridge for longer than 2 hours or will it mess the dough up?
Hi Olivia,
It will be fine.
Hani
Hi Hani,
I would love to try this recipe in a mini muffin tin. I was wondering – do you think that instead of rolling out the dough and cutting circles, would it work to take a small piece of dough and press it into the tin?
I have seen other cookie tart shell recipes sometimes do this, but wondered your thoughts? It seems that would be a little easier/ more efficient if I’m making small mini muffin shells.
Thanks so much for your advice!
Hi Robyn,
Yes, it should work. I’d lightly grease a muffin pan with a nonstick spray. After they are baked, wait till the shell cool a little
before removing them from the muffing pan.
Hani, I have made your tart shells ad will be putting them in the freezer for a brunch I’m having. My question is – should I plan on filling the shells the morning of the brunch? Or, can I fill them with the pastry cream the night before? Thanks for your reply. Karen
Hi Karen,
Night before should be fine. If you are worried shells would get soggy you can brush them with melted chocolate. Yum.
Hi there! May i know how long can i freeze the baked tart shells? You mentioned 3 months for tart shell dough but missed out on the baked ones! 🙂
Hi Nicole,
thanks for visiting. I’ve had them in the freezer for 3-4 months no problem. I usually line the container with a food wrap and then I put the shells inside and close the container.
Happy Fall.
Hola, me encantó la receta, es sencilla y deliciosa, muchas gracias por compartirla.
Hola Maria, muchas gracias. Me alegra que te guste la receta. Hornear feliz.
I want to do a no bake cheesecake in these for a church brunch. Can I fill them the night before, or will they be soggy? Personally, I’d just eat the tart shells, they really look good! I’ve shamefully had my little baby tart pans for 10 years and haven’t used them yet…
Hi LeAnn,
I’d suggest brushing the inside with melted chocolate. I filled them with strawberry mousse before, brushing them with white chocolate was really helpful.