Decorated Coffee Cup Cookies
Surprise your coffee loving friends with these Decorated Coffee Cup Cookies.

HOW TO MAKE DECORATED COFFEE CUP COOKIES
COFFEE CUP COOKIE CUTTER TEMPLATE
I don’t own a coffee mug cookie cutter and so I optioned to hand-cut my cookies using a knife and a cardstock template instead. Check the tools section at the bottom of this post for supplies you need to make coffee cup cookies.
Learn how to make cookie cutter templates and how to hand-cut cookies using them.
Slide rolled out cookie dough onto a cutting board. Place a cookie cutter template on the top. With an exacto knife or a pen blade cut out cookie shapes.
TIP: If you plan on shipping cookies, I’d recommend leaving the handle whole. It’s sturdier that way and less prone to breaking.

Cut out as many shapes as you can then carefully lift up the scrap cookie dough around cut-outs. Gather dough and re-roll.

Since I wasn’t shipping these anywhere I decided to cut out middle of handle pieces, too. Use a small offset spatula to carefully pick up cut-out cookies and transfer them onto a baking sheet lined with parchment or perforated mat.
Bake cookies at 375F for 10-11 minutes. Allow to cool completely before decorating.
TIP: If your cookies get too soft, chill them and then transfer cookies onto a baking sheet. They are less likely to get misshaped when they are chilled.

DECORATE COFFEE CUP COOKIES WITH ROYAL ICING
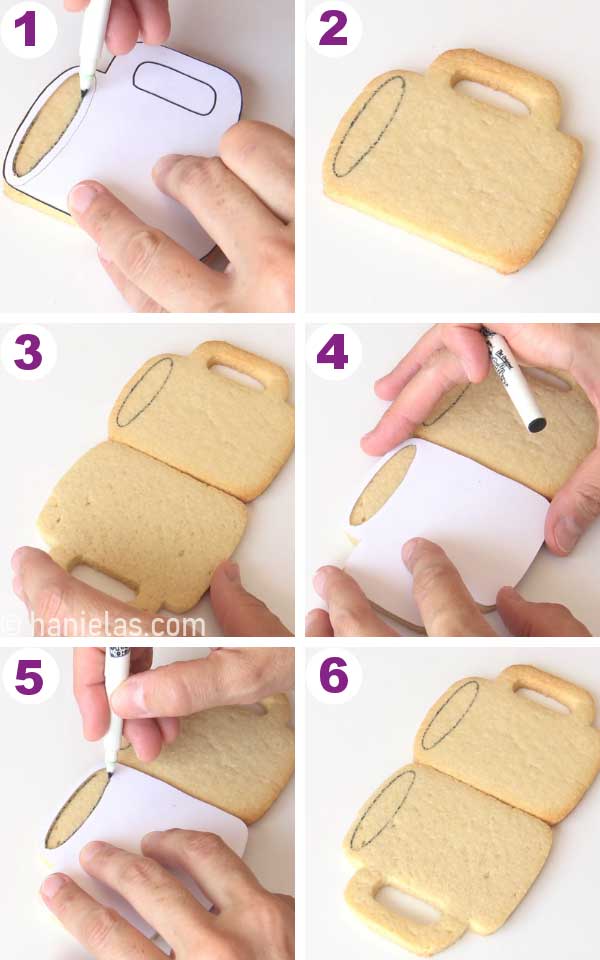
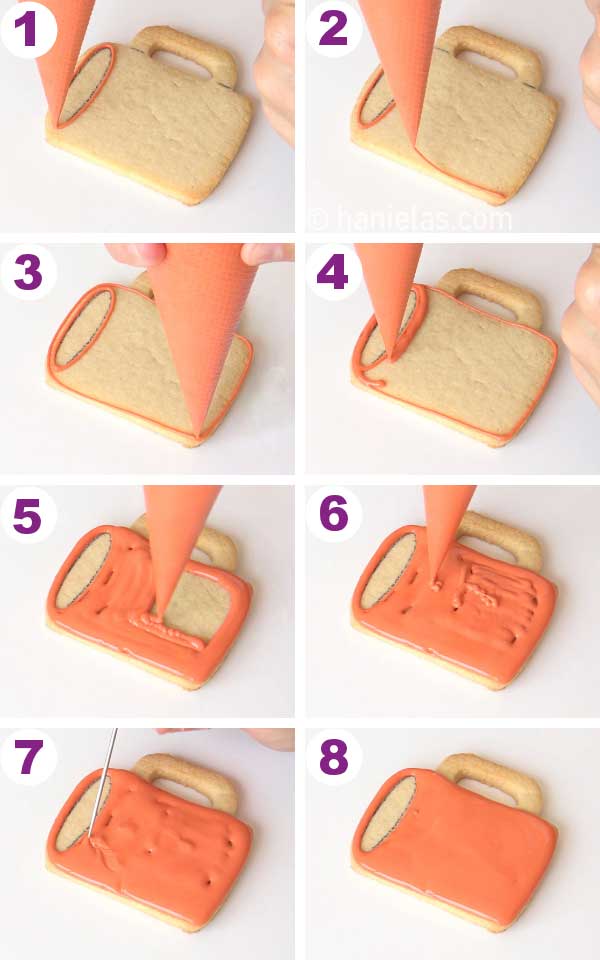
Trace the rim of the cup’s outline onto a cookie, using a template and an edible marker (steps 1-6).
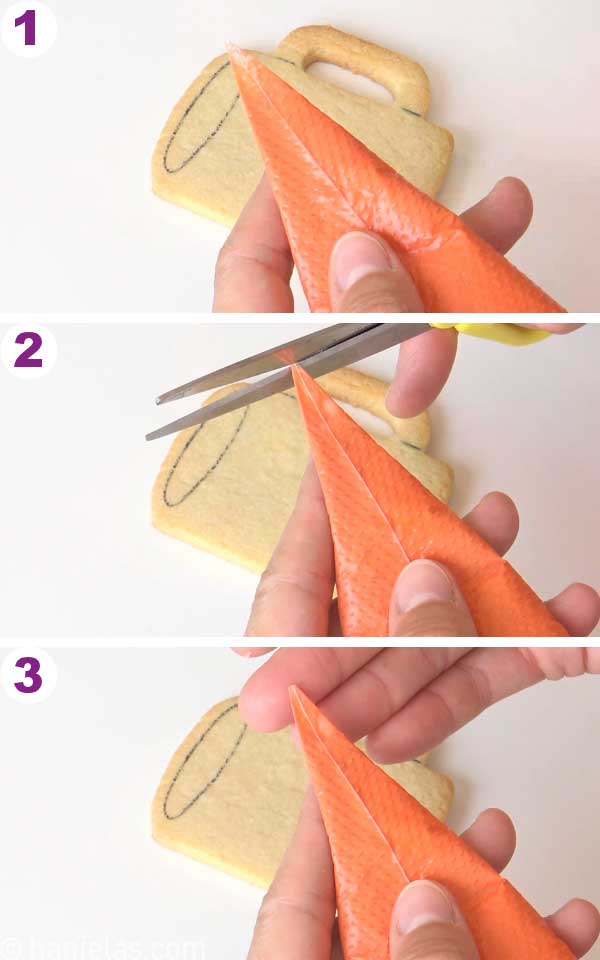
To cut a tipless piping bag press the bag down in the middle where the seam is. Cut straight across. It’s better to cut a smaller opening and then make it bigger.
Outline and flood the cup with 15-second consistency terra cotta colored royal icing. Use a scribe to smooth the icing. Allow to crust for 30 minutes.
To mix terra cotta royal icing use either straight from a bottle Terra Cotta Food Gel color by Americolor. Or color icing with orange and add a minuscule amount of brown gel food coloring.
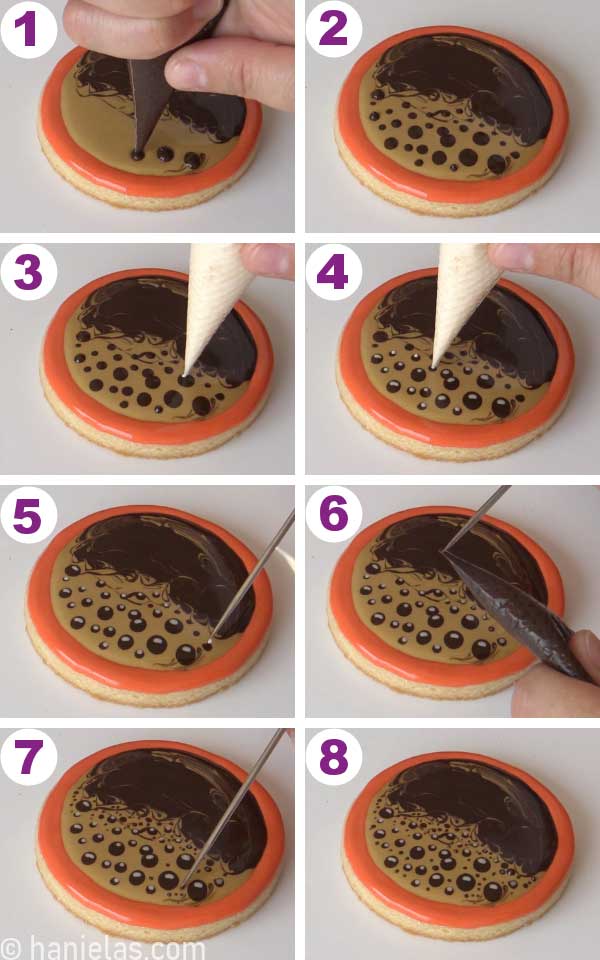
HOW TO CREATE REALISTIC COFFEE BUBBLES WITH ROYAL ICING
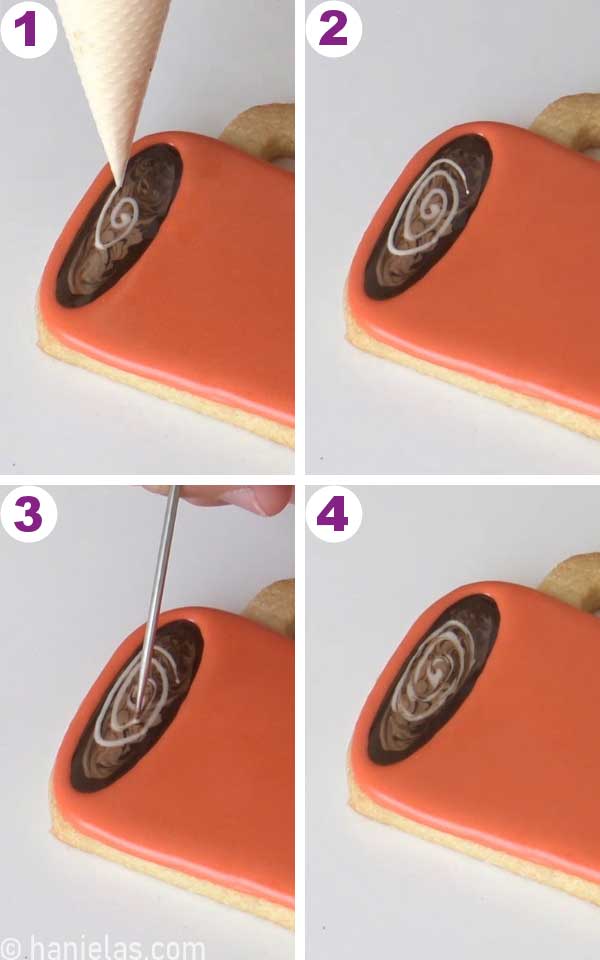
With a 20-second consistency icing flood the outer edge with dark brown icing and middle with light brown icing (steps 1-4). Marble 2 colors together (steps 5-6). Don’t allow icing to crust. Immediately continue with the next step.

Take light ivory icing of 15 to 20-second consistency icing and pipe a swirl onto the wet icing (steps 1-2). Run the tip of a scribe tool thru the swirl, to disturb the swirl slightly, so the edges are not too crisp (steps 3-4). Don’t let the icing crust. Immediately continue with the next step.
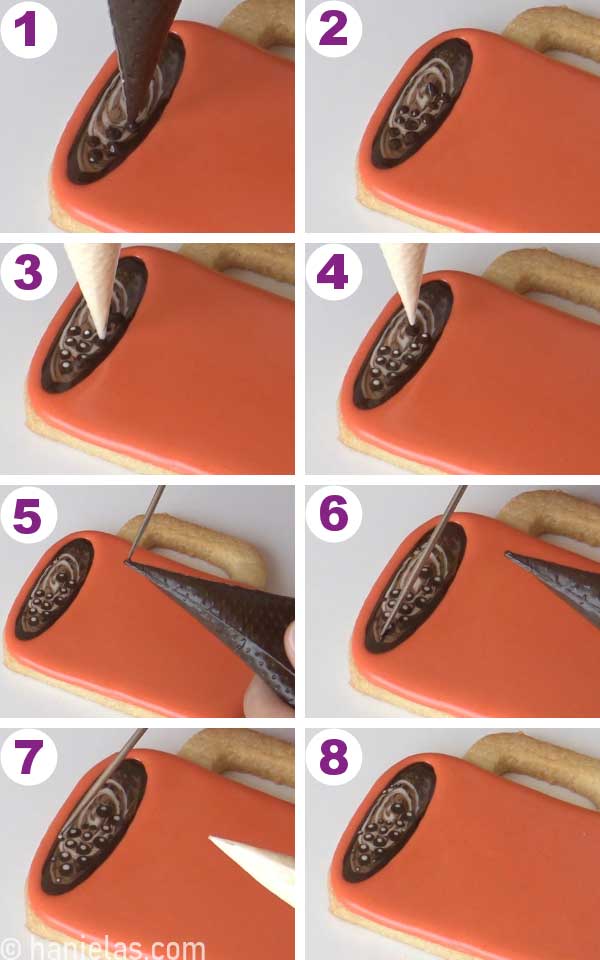
With dark brown icing pipe the dots of various sizes onto the wet icing (steps 1-2). Immediately pipe white reflection dots onto the dark brown dots. Keep in mind placing the reflection dots in the same direction on each dark brown dot (steps 3-4).
To make tiny dots use a scribe to pick up icing and carefully place it onto the wet icing. For tiny brown dots it’s not necessary to add white reflection. Let icing crust well.
PREVENT CRATERING IN ROYAL ICING
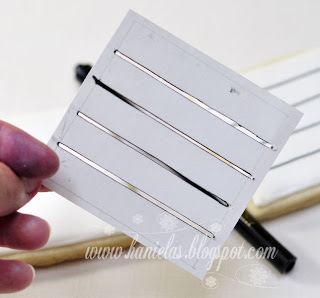
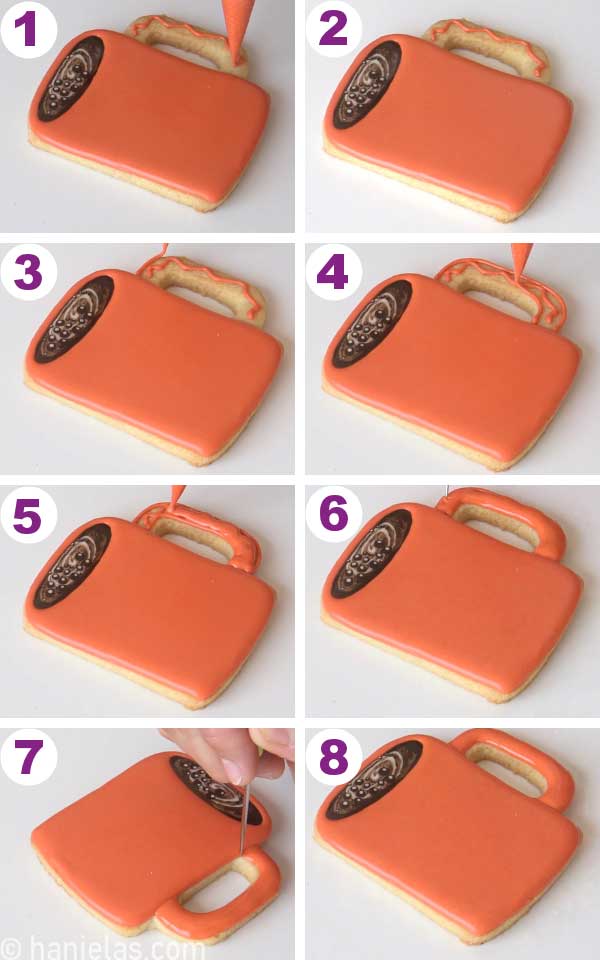
Pipe a zic zac line in the middle of the handle and let it crust. This zic zac line is going to help fight cratering. Zic zac line acts as a support beam to keep the icing piped on top of it from sinking in (steps 1-2).
Once crusted outline and flood the handle with 15 to 20 second consistency royal icing. Shape the icing with a scribe tool (steps 3-8). Let icing dry.
STENCILING WITH ROYAL ICING
I decided to use a stencil to create a beautiful design on a coffee cup.
Stencil I used is from designer stencils. I couldn’t find this exact stencil in their online inventory, but there are tons of great stencils you can use instead.
Secure stencil over the cookie with dry icing on the top. Use either a stencil holder or old-fashioned magnets to keep stencil from shifting (step 1-2). Pipe thick white icing on a spreader or a spatula (step 3).
Spread icing over the stencil in a thin, even layer (4-6). Carefully lift the stencil and reveal beautifully stenciled design (step 7-8).

COFFEE FLAVORED ROYAL ICING
These coffee themed cookies are a perfect treat for a coffee lover. And to make them extra special use coffee flavored royal icing to decorate.
To make coffee flavored royal icing you can use coffee extracts or use instant coffee/espresso dissolved in water to prepare royal icing. The amount of coffee depends on how much coffee flavor you want. Also, keep in mind coffee is brown and it will cause the icing to take on a light brown tint.
Start with 1 teaspoon of instant coffee per Small Batch Royal Icing.

SIMPLE COFFEE INSPIRED COOKIES
I also made round cookies and I decorate them using wet-on-wet coffee bubble technique.
To create an even rim on the outside use a smaller round cutter and I trace the outline onto the cookie with an edible marker (steps 1-2).
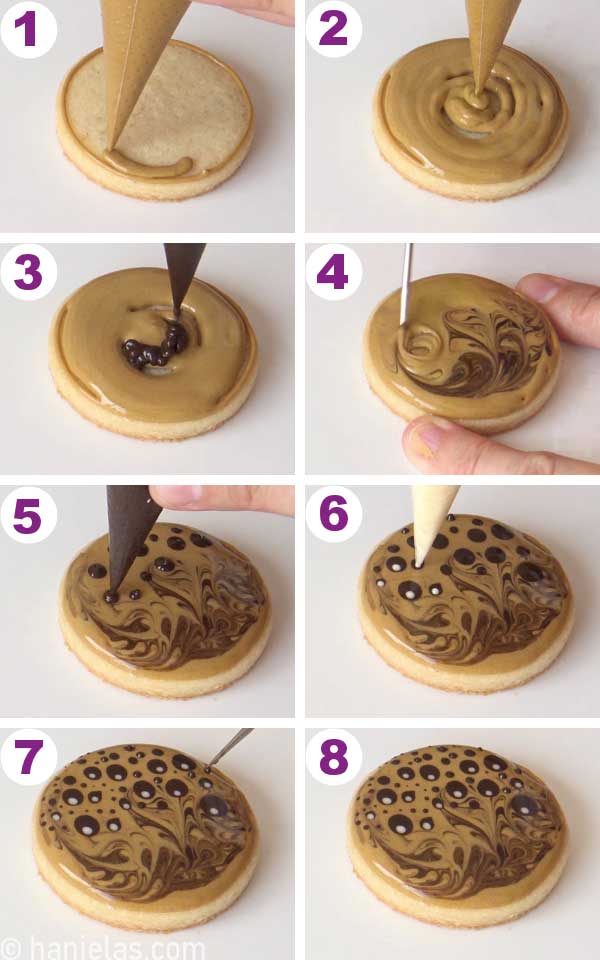
Then pipe a zic zac line in the middle of the rim section and let it crust. This will help fight the cratering in royal icing (step 3). Once it crusts outline and flood this section with 15-second consistency terra cotta royal icing (steps 4-6). Allow icing to crust.

Pipe dark and light brown icing onto a cookie and immediately marble icing with a scribe tool (steps 1-8).

Immediately pipe dark dots onto the light brown icing. It’s important not to let icing crust, it needs to be still wet. You’ll notice dark dots sinking into the light brown icing (steps 1-2).
And then pipe white dots onto the dark dots. Place the reflection dots on dark dots facing in the same direction (steps 3-4).
To add small dots, use a scribe tool (steps 6-8).
To create a simple latte art/coffee heart you can pipe a heart shape in the middle, fill it with dark brown and flood the surrounding area with light brown (steps 1-5). Use a scribe and lightly blend the edge of the heart into the light brown (steps 6-8).
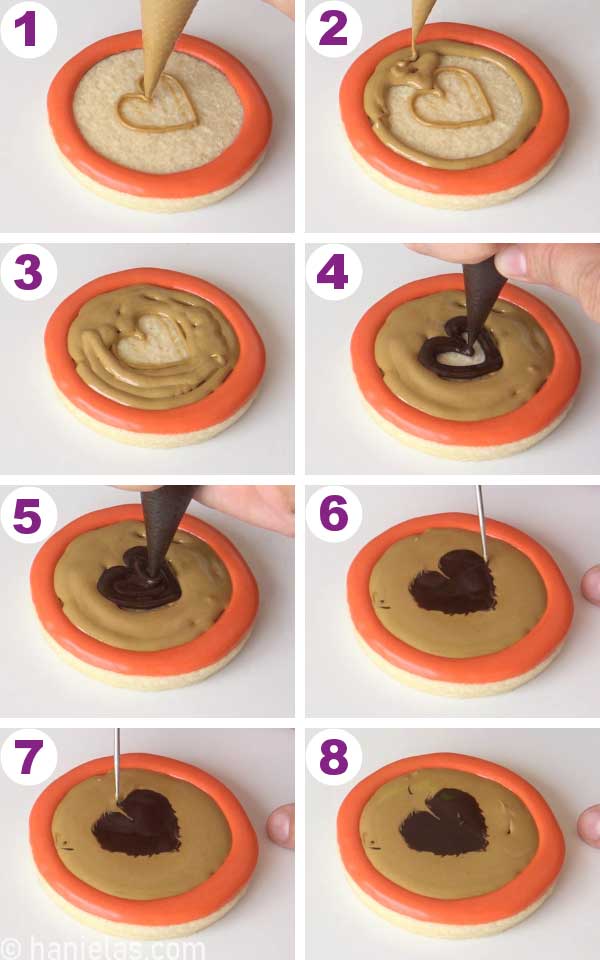
And now use wet-on-wet technique to create coffee bubbles around the heart.

In this last design I created coffee bubbles on a round cookie.
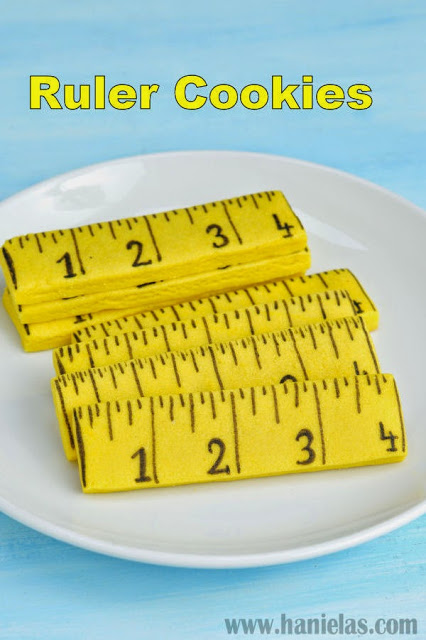
Here is a fun idea! Flavor cookies with seasonal flavors like pumpkin spice or make gingerbread cookies instead. Get creative.

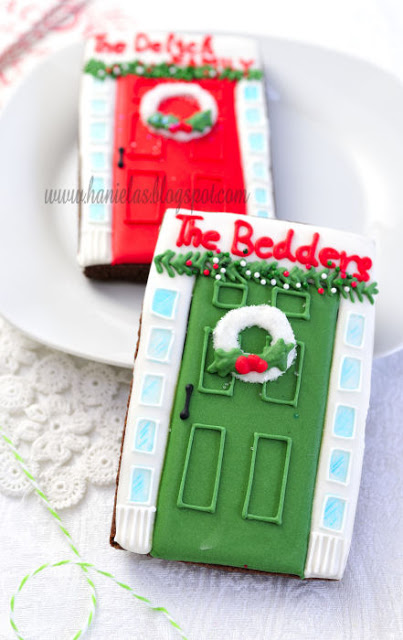
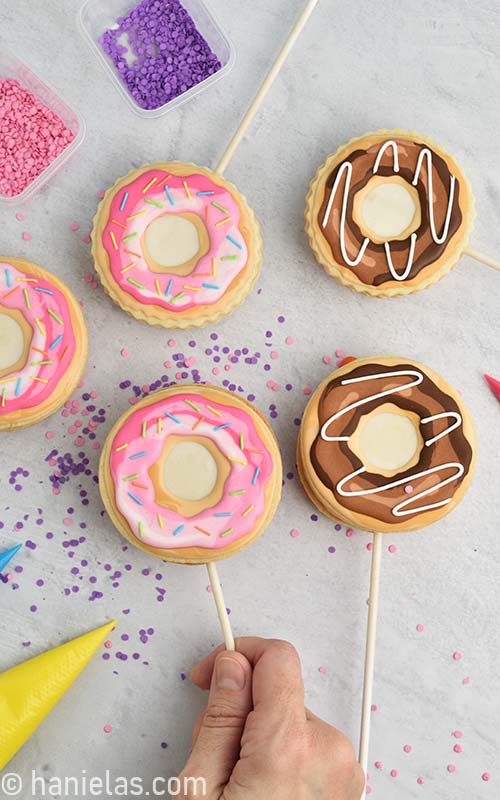
These donuts cookies would also pair nicely with coffee themed cookies.
TO MAKE DECORATED COFFEE CUP COOKIES YOU NEED
- RECIPES
- Cut-Out Sugar Cookies Recipe and Troubleshooting
- Vegan Cookies
- Gluten Free Cookies
- Royal Icing
- Vegan Royal Icing
- TOOLS
- Template Shop
- Get the all the tools in my Amazon Shop
- Scribe Tool
- Food Gel Colors: terra cotta by Americolor or use orange and brown to create terra cotta, brown gel color
- Round Cookie Cutter
- Stencils
- Useful Tutorials
- Ultimate Guide to Royal Icing Consistency

Hi, I’m Hani
Welcome!
Thank you for visiting Haniela’s. On my blog, you’ll find delicious sweet & savory recipes made with simple ingredients. Why not start a new adventure? Discover a world of cookie decorating with my step-by-step tutorials.

Hi, I’m Hani
Welcome!
Thank you for visiting Haniela’s. On my blog, you’ll find delicious sweet & savory recipes made with simple ingredients. Why not start a new adventure? Discover a world of cookie decorating with my step-by-step tutorials.