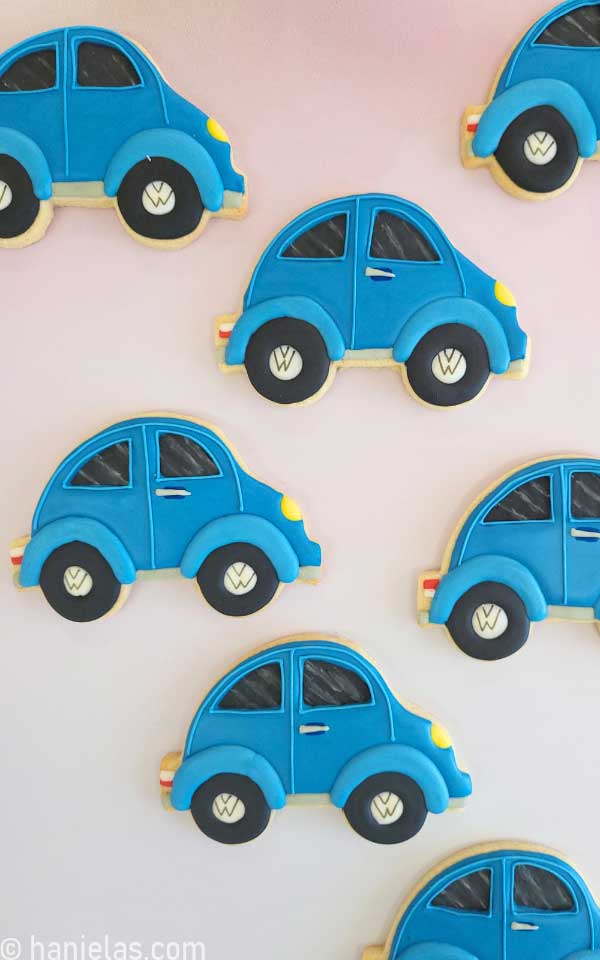
VW Beetle Cookies
Since it’s rolled off the production in 1938, timeless design of VW Beetle has captured the hearts of people around the globe, myself included. It’s friendly, charming appearance makes it a perfect canvas for cookies and cakes. Today I’ll share with you step-by-step tutorial on how to decorate nostalgic VW Beetle Cookies.
updated from 2013
HOW TO DECORATE VW BEETLE COOKIES WITH ROYAL ICING
- Beginner’s Guide To Cookie Decorating
- Ultimate Guide to Cut-Out Cookies (tips, tricks, troubleshooting)
- Royal Icing Recipe
- Small Batch Royal Icing Recipe
- Cookie Icing Recipes (includes vegan royal icing, glaze, fondant)
- Guide To Royal Icing Consistencies with Visual Help(what is stiff, flood icing, etc.)
- How To Freeze Royal Icing
- How To Make Royal Icing Transfers
- Royal Icing FAQ ( for example: how to make black icing, color bleeding, storage, and more)
- How To Make a Cookie Cutter Template
- Ultimate Guide To Cookie Decorating Tools

WHAT YOU NEED TO MAKE VW BEETLE COOKIES
- VW Beetle Cookie Cutter – I used Ann Clark Cookie Cutter
- Decorating Template (via Haniela’s Template Shop)
- Edible Markers: brown, black, blue
- Gel Food Colors – royal blue, black, yellow, red
- Piping Bags – I used tipless piping bags
- Scribe Tool
- Paintbrush – I love this Wilton Set!
This post contains Amazon affiliate links that earn me a small commission, at no cost to you. I only recommend products that I use and love. Learn more about my affiliate policy here.
ROYAL ICING
Did you know that the most popular VW beetle colors are white and black, with blue being the 3rd most popular color? I’m unsure if I’m living under the rock but I have never seen white VW Beetle, have you?
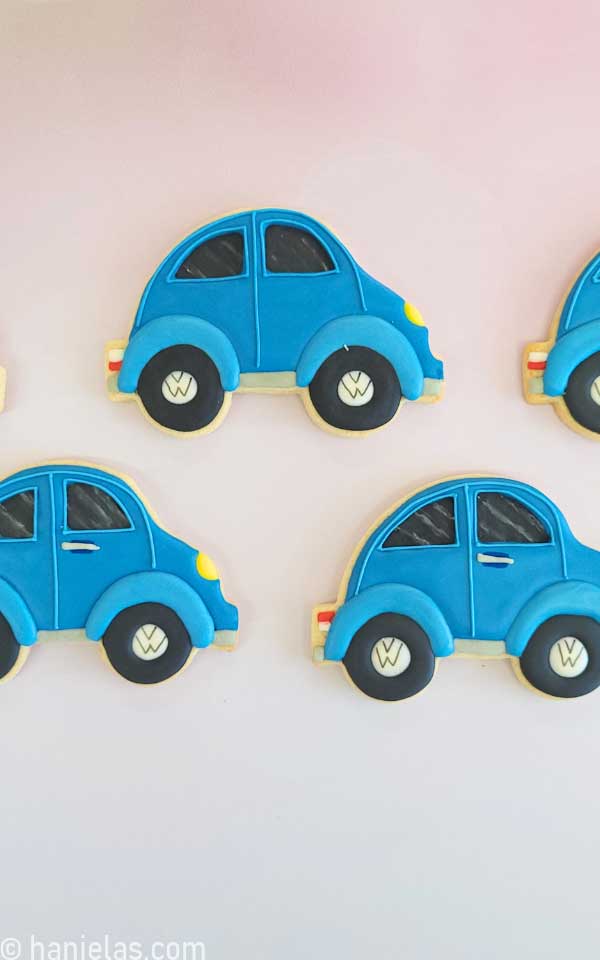
I planned on making red car cookies but ultimately decided to make blue VW Beetle Cookies instead.
- Royal Icing Colors
- 2 Shades of Blue – color royal icing with royal blue gel color and a touch of black (use dark blue for the body (15-second consistency) and to outline (piping consistency), use lighter blue for a fender (20-second consistency)
- Red (20 second consistency)
- Yellow (20 second consistency) – lemon yellow with a touch of orange
- Light Gray (20 second consistency) – use minuscule amount of black to color white icing
- Black (20 second consistency) – windows and tires
- White ( 20 second consistency) – window shading, tires

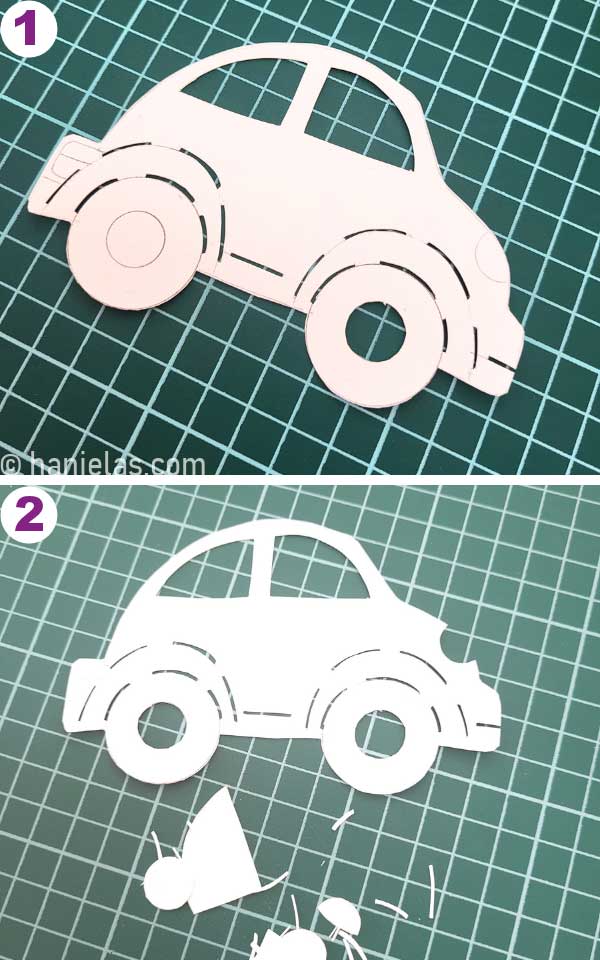
VW BEETLE DECORATING TEMPLATE
I created a simple cardstock template to help streamline the decorating process. I printed the template onto cardstock and cut it out with an exacto knife. Check the tools section at the top of this page, for the template details.
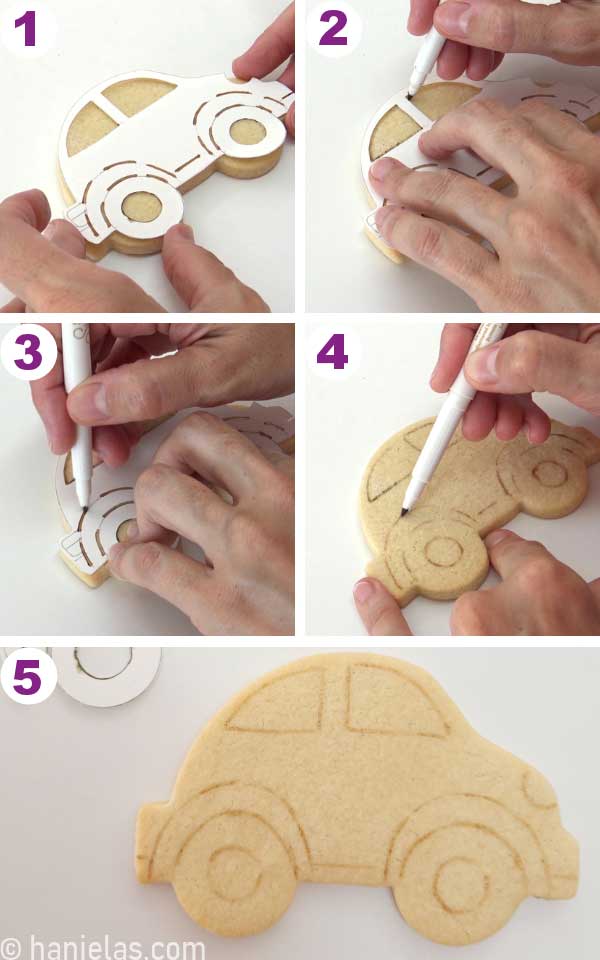
TRACE TEMPLAE OUTLINES WITH AN EDIBLE MARKER
Align the template with the cookie and trace the outlines onto the cookie using an edible marker.
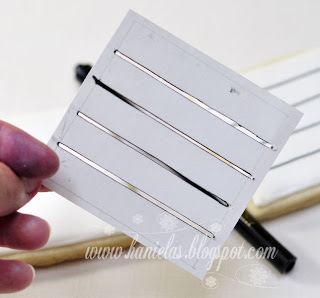
HOW TO PREVENT CRATERS IN ROYAL ICING
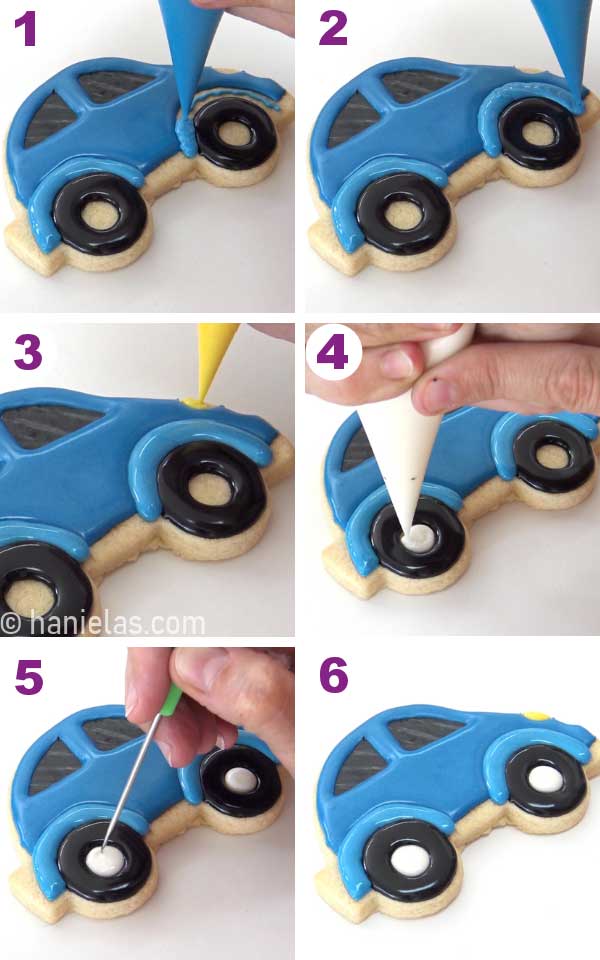
To prevent crater formation in royal icing I used a simple technique – first I piped a zic zag line onto sections that are most likely to develop craters – tires and fender sections (steps 1-2). Before you can fill these sections with icing you need to let support lines crust, then you can pipe over them (see the next picture slide).
To decorate windows, I used a simple decorating technique that attributes to depth. Brush a thin layer of black icing onto the windows. Then pipe three lines of white icing across each black window and use a damp paintbrush to shade the windows. Let icing crust (steps 3-8).

DECORATE TIRES
Now that the black line inside of the tires is crusted (lines are no longer shiny), pipe an outline and flood both tires with 20-second consistency black icing (steps 1-6). Let the icing crust.

FLOOD THE COOKIE
Once window sections are crusted over, if needed use a smaller template and reinforce the window outlines, again, with a tip of a metal scribe (steps 1-3).

Outline the window frames with darker blue icing of 15-second consistency and pipe the outline along the outer edge. Then flood the inside of the cookie with blue icing. Use a scribe to smooth and distribute the icing evenly (steps 1-6). Let the icing crust.

Now that the tire and body (main section) are crusted, it’s time to flood the fender (areas above the tires). Use lighter blue icing of 20-second consistency. Increase the pressure, squeeze the piping bag so more icing comes out, and fill the fender sections. Carefully use a scribe tool to smooth imperfections ( steps 1-2). Then fill in the headlight with yellow icing (20-second icing) and rims with white icing (20-second icing). Let icing crust.
PIPE DETAILS
Let’s finish VW Beetle Cookies. Now we can add details. Flood the bottom rocker panel with 20-second consistency gray icing (steps 1-3).

Pipe taillights with 20-second consistency red and white icing. Pipe small rectangular shapes next to each other. Accentuate corners with a scribe tool (steps 1-3).

Outline the car with dark blue piping consistency icing (steps 1-3).

DOOR HANDLE
You can skip to step 3, or if you want, you can tap into your inner artistic spirit and create depth using a marker. I first filled the rectangular section with a blue marker (steps 1-2). Then pipe a small triangular handle with gray icing across the dark rectangle (steps 3-6).

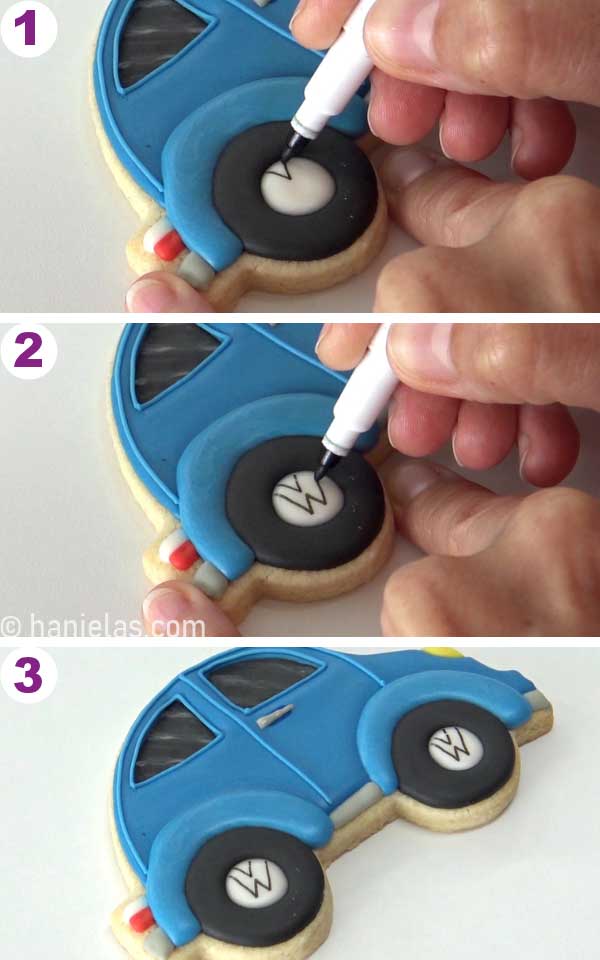
DRAW VOLKSWAGEN LOGO
Lastly, we’ll make the Volkswagen logo. Before you can draw the logo onto the royal icing, you need to make sure the icing is dry. Allow icing to dry for 6-8 hours, then use a black edible marker and write V; then, write W below (steps 3).
Subscribe to Haniela’s Cookie Club on Patreon and get access to exclusive and ad-free tutorials, templates, sneaks peeks, and more.
MORE FUN COOKIE DECORATING TUTORIALS
- Patriotic Seashell Cookies
- Gingham Flower Cookies (cookie pops)
- Watercolor Elephant Cookies
- Airplane Cookies
Did you make these Decorated Cookies? Tag @hanielas on Instagram and hashtag it #hanielas
2013 DECORATE COLORFUL VW BEETLE COOKIES
I decorated first VW Beetle cookies in 2013, long before I acquired a beetle cookie cutter. Hence I used a cardstock template to hand-cut cookies.
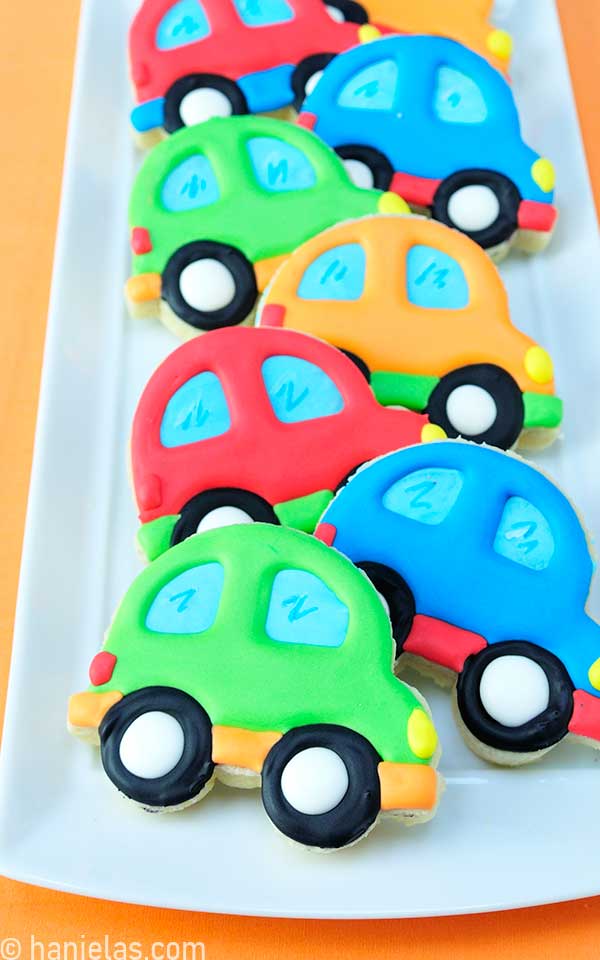
VW Beetle Cookies can be packaged individually or as part of a gift set, making them a fun and memorable present. I made these colorful car cookies to help celebrate 1st Birthday.

This post was originally published on February 24th, 2013. On June 19th, 2023 I updated this post with new step-by-step pictures, and written instructions.

Hi, I’m Hani
Welcome!
Thank you for visiting Haniela’s. On my blog, you’ll find delicious sweet & savory recipes made with simple ingredients. Why not start a new adventure? Discover a world of cookie decorating with my step-by-step tutorials.

Hi, I’m Hani
Welcome!
Thank you for visiting Haniela’s. On my blog, you’ll find delicious sweet & savory recipes made with simple ingredients. Why not start a new adventure? Discover a world of cookie decorating with my step-by-step tutorials.