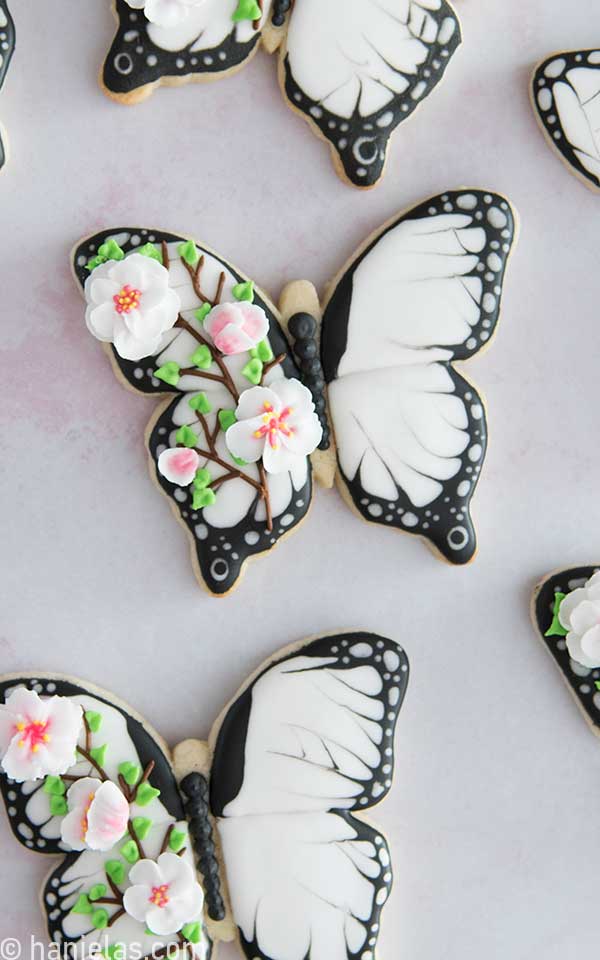
Cherry Blossom Butterfly Cookies with Royal Icing
Decorated floral butterfly cookies with royal icing are a dreamy addition to any spring, birthday, and wedding cookie platter. In this tutorial, I’ll show how to include a flower element with a simple butterfly design that’s arresting, cheerful, elegant, and one-of-a-kind, just like a butterfly feeding on the nectar out in a meadow of flowers.
DECORATED FLORAL BUTTERFLY COOKIES STEP-BY-STEP
- Beginner’s Guide To Cookie Decorating
- Ultimate Guide to Cut-Out Cookies (tips, tricks, troubleshooting)
- Royal Icing Recipe
- Small Batch Royal Icing Recipe
- Cookie Icing Recipes (includes vegan royal icing, glaze, fondant)
- Guide To Royal Icing Consistencies with Visual Help(what is stiff, flood icing, etc.)
- How To Freeze Royal Icing
- How To Make Royal Icing Transfers
- Royal Icing FAQ ( for example: how to make black icing, color bleeding, storage, and more)
- How To Make a Cookie Cutter Template
- Ultimate Guide To Cookie Decorating Tools
Subscribe to Haniela’s Cookie Club on Patreon and get access to exclusive and ad-free tutorials, templates, sneaks peeks, and more.
THINGS YOU NEED
- Butterfly Cookie Cutter
- Gel Food Coloring: black, green, yellow, pink
- Royal Icing Flowers (cherry blossom, roses, daisies, daffodils)
- Edible Markers
- Tipless Piping Bags
- Scribe Tool
This post contains Amazon affiliate links that earn me a small commission, at no cost to you. I only recommend products that I use and love. Learn more about my affiliate policy here.

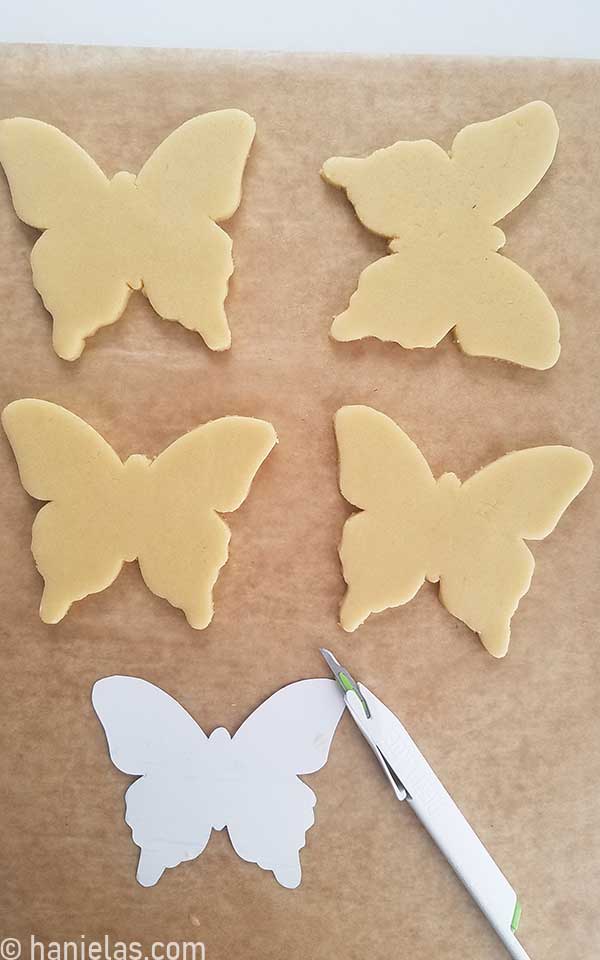
BAKE COOKIES
Prepare the cookies using your favorite cut-out cookie recipes or one of these tested recipes. To cut out cookies, use a butterfly cookie cutter or make your own cookie cutter template.
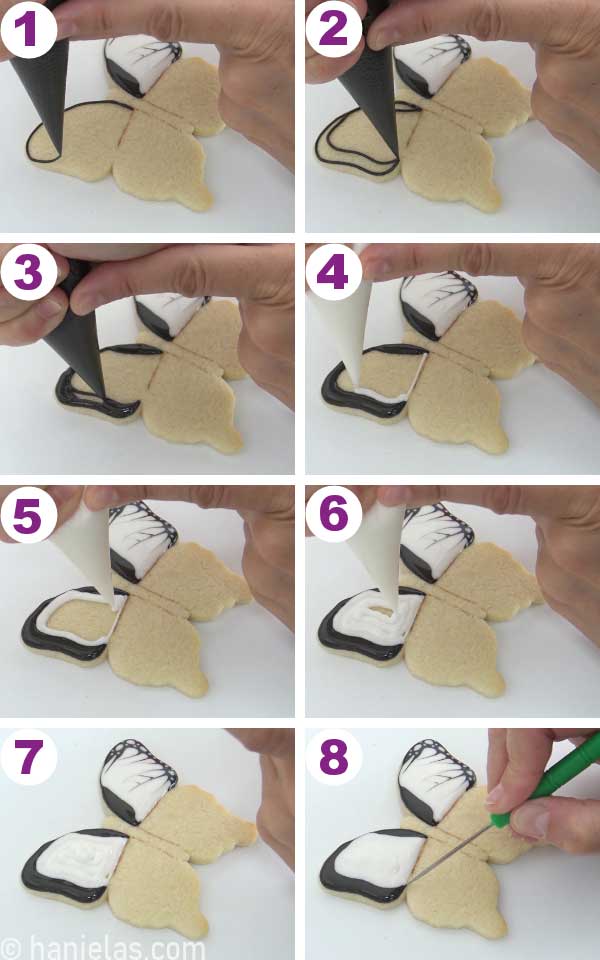
ROYAL ICING COLORS AND CONSISTENCIES
- Black Icing: 15-second consistency (wings), soft piping consistency (body)
- White Icing: 15-second consistency
- Brown Icing: piping consistency (branches)
- Green Icing: piping consistency (leaves)
DESIGN PLAN
Draw the piping guide using an edible marker. Divide the cookie into sections and leave a small gap between the wings.

HOW TO PIPE A SIMPLE WING BUTTERFLY PATTERN
I used the wet-on-wet royal icing decorating technique to create a simple wing butterfly pattern.
Start by making a thick border with black icing (15-second consistency), fill this area with black icing (steps 1-3), and immediately fill the inner area with white icing (steps 4-6). Then, use a scribe to shape the icing while wet (steps 7-8). Follow with the next step immediately.

Here comes the fun part of shaping the icing into the characteristic butterfly design. Use the tip of a scribe tool or a toothpick. Pull the black icing slowly into the white, wiping the tip of the scribe after each time you run the tip of the scribe through the icing (steps 1-6). Pipe dot and oval shapes into the black icing (steps 7-8).

We’re going to repeat the same thing on the left wing.
Try to mirror the right-wing pattern on the left wing. After this step, let the icing crust for 30 minutes before moving on to the next set of bottom wings. Letting the area crust will help define the wings’ top and bottom sets.

BOTTOM BUTTERFLY WINGS
Outline the bottom wing and create a thick border filled with black icing (15-second consistency). Immediately fill the inner area with white icing (15-second consistency), and use a scribe tool to shape the icing while wet (steps 1-8).

Here is a close-up of shaping icing with a scribe tool. In the picture below, I slowly pull the black icing into the white, making it flush with the white area (steps 1-2).

Repeat the wet-on-wet pulling technique to create the butterfly wing pattern (steps 1-5). Try to mirror the pattern, along with the dots and oval shapes you pipe into the black icing (steps 6-8).

BUTTERFLY BODY
Use soft piping consistency icing to pipe the butterfly body. I decided to pipe graduated dots. Starting from the head and decreasing the size of the dot towards the bottom of the body (steps 1-6).

FLORAL BUTTERFLY COOKIE DESIGN
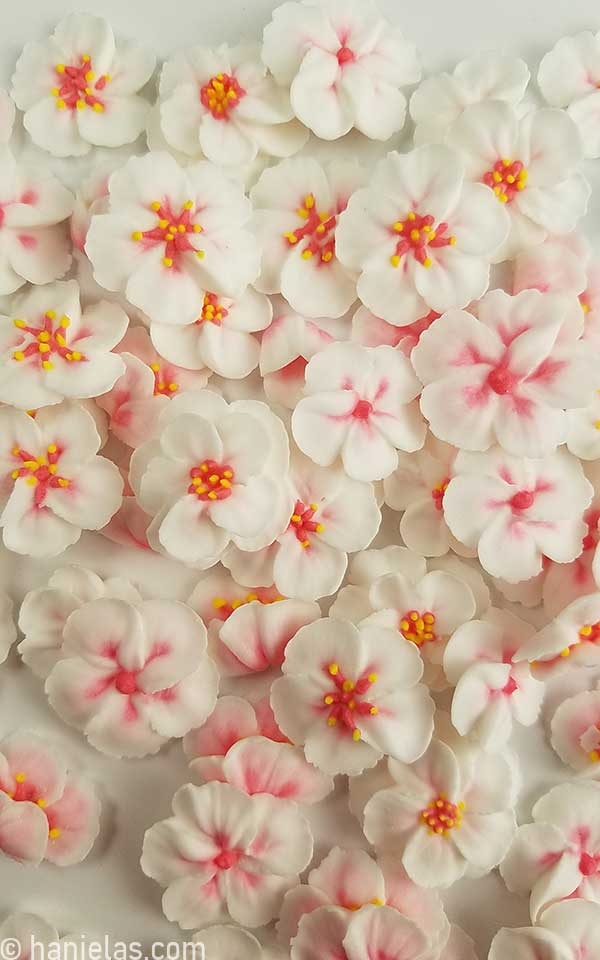
Depending on the flowers you choose to embellish your butterfly cookie, you can pipe a brown branch or a green stem. I recently made pretty royal icing cherry blossoms and decided to use them in this cookie decorating project.
Pipe brown branches using piping consistency icing (steps 1-8).

PIPE ROYAL ICING LEAVES
You can pipe the leaves using a small leaf piping tip or easily make a leaf tip by cutting a V-shaped opening on your decorating bag.
Pipe small green leaves onto the brown branches. Use green icing of piping consistency to pipe the leaves (steps 1-3).

EMBELLISH WITH ROYAL ICING FLOWERS
Here are the cherry blossom flowers I made! Aren’t they gorgeous! You can make your cherry blossoms, too.
To attach pre-made royal icing flowers onto the branches, use a small amount of royal icing as glue (steps 1-3).

VIDEO TUTORIAL
Do you want to stay updated about free cookie decorating tutorials, live events, classes, and products? Sign up for Hani’s Cookie Decorating Newsletter.
COOKIE DISPLAY IDEA
I had the idea of displaying these floral butterfly cookies around piped branches with icing. If you were to make a cake and use cookies to decorate it like this, I think it would look amazing!

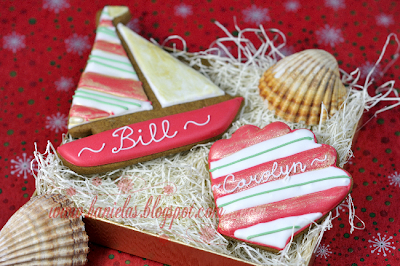
MORE FLORAL COOKIE IDEAS
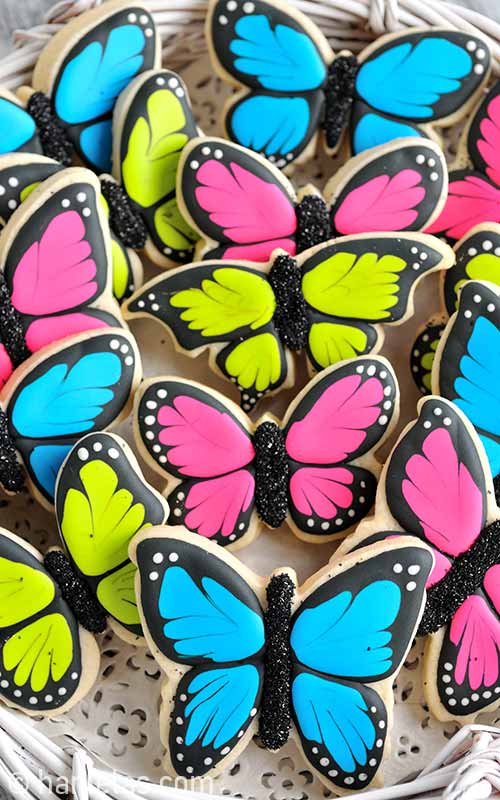
MORE BUTTERFLY IDEAS


Hi, I’m Hani
Welcome!
Thank you for visiting Haniela’s. On my blog, you’ll find delicious sweet & savory recipes made with simple ingredients. Why not start a new adventure? Discover a world of cookie decorating with my step-by-step tutorials.

Hi, I’m Hani
Welcome!
Thank you for visiting Haniela’s. On my blog, you’ll find delicious sweet & savory recipes made with simple ingredients. Why not start a new adventure? Discover a world of cookie decorating with my step-by-step tutorials.