How To Make Royal Icing Cherry Blossoms
Icing flowers can elevate your cookie, cake, or macaron designs to a new level. Cherry blossoms are mesmerizing to witness. Soft, delicate blossoms create breathtaking landscapes. Their blooming periods are short but can last much longer when you make them with icing. Let me show you how to make royal icing cherry blossoms.
HOW TO PIPE CHERRY BLOSSOM WITH ROYAL ICING
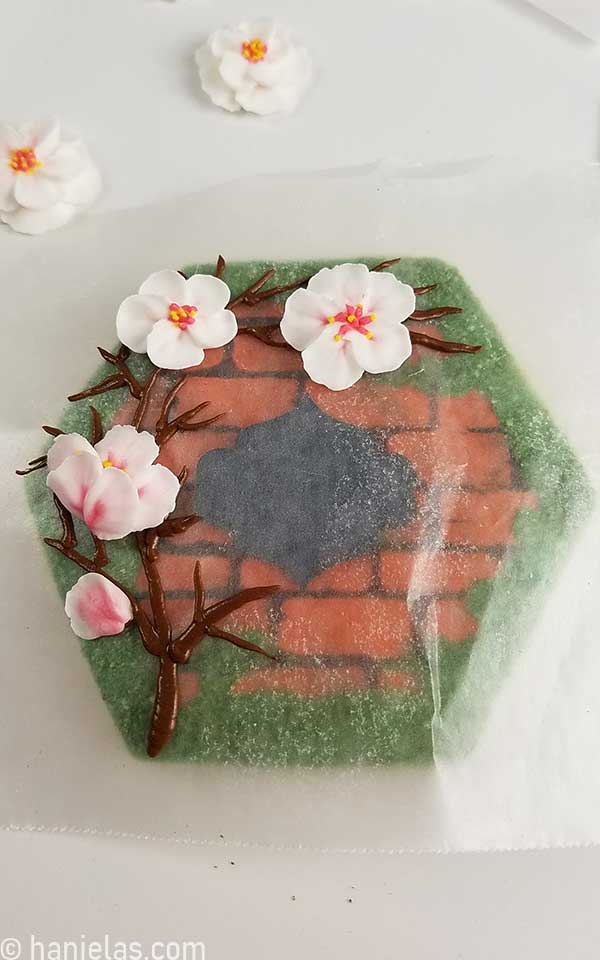
Today, I’ll show you how to make three styles of cherry blossom flowers with royal icing. I used these flowers to embellish my dreamy floral butterfly cookies.
Subscribe to Haniela’s Cookie Club on Patreon and get access to exclusive and ad-free tutorials, templates, sneaks peeks, and more.
TO MAKE ROYAL ICING CHERRY BLOSSOMS YOU NEED
- Small Batch Royal Icing
- Get all the supplies in my Amazon Shop
- Parchment or Wax Paper Squares
- Flower Nail
- Petal Piping Tip #101 for larger flower use #102 #103
- Food Gel Color: Lemon Yellow, Pink
- Scribe Tool or Paintbrush (optional)
- Shop Templates (digital download)
This post contains Amazon affiliate links that earn me a small commission, at no cost to you. I only recommend products that I use and love. Learn more about my affiliate policy here.
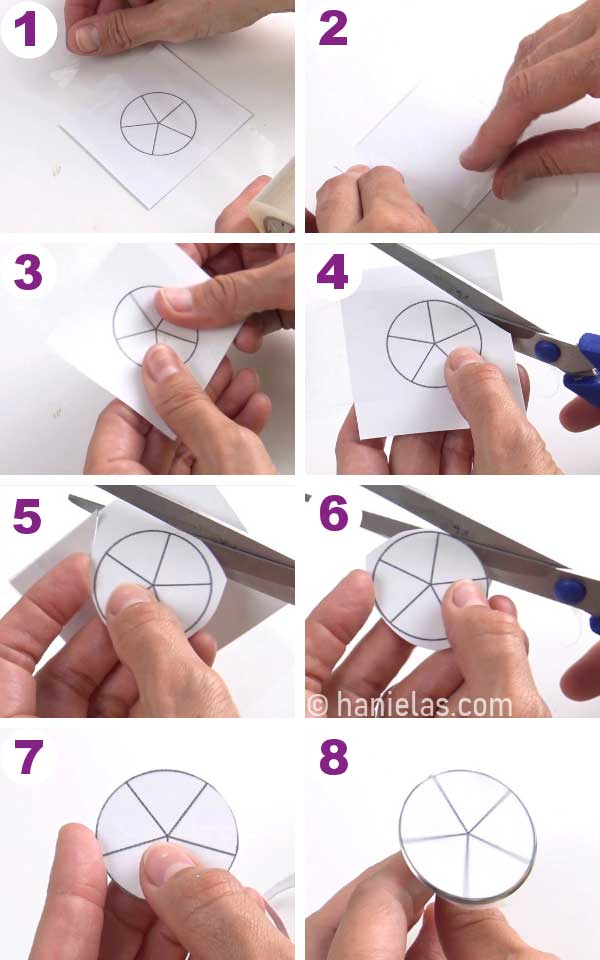
PIPING TEMPLATE
Prepare the cherry blossom piping template. Print the template onto cardstock (step 1), tape clear packaging tape over it from both sides and cut it out (steps 2-7). Secure it onto a flower nail with a double-sided tape (step 8).
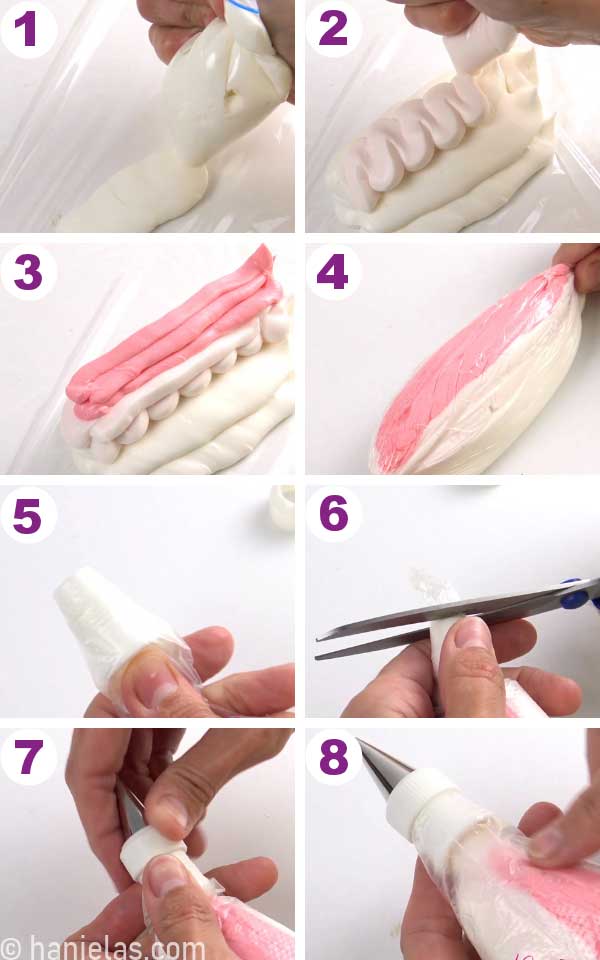
PREPARE TWO-TONE ICING PIPING BAG
You can use this royal icing layering method to make the cherry blossoms with pink centers.
- Spread or pipe white icing onto a food wrap (step 1), and then pipe a small amount of pink icing on top of the white. Most of the icing should be white, and pink is an accent color.
- If you’d like to achieve an ombre effect, use two shades of pink. Start with light pink (step 2) and then pipe darker pink on top of it (step 3). The majority of the icing should be white.
- Make a pouch (step 4).
- Fit the piping bag with a coupler, and slide the cone part of the coupler into the decorating bag.
- Insert the icing pouch into a piping bag and pull it through the coupler piece. Trim the end of the icing pouch (step 6) and attach piping tip #101.
- Use a ring part of a coupler to secure the petal tip onto the piping bag (step 7). Attach the decorating tip so that the narrow end of the piping petal tip is aligned with the white icing and the wide end is aligned with the pink icing (step 8).
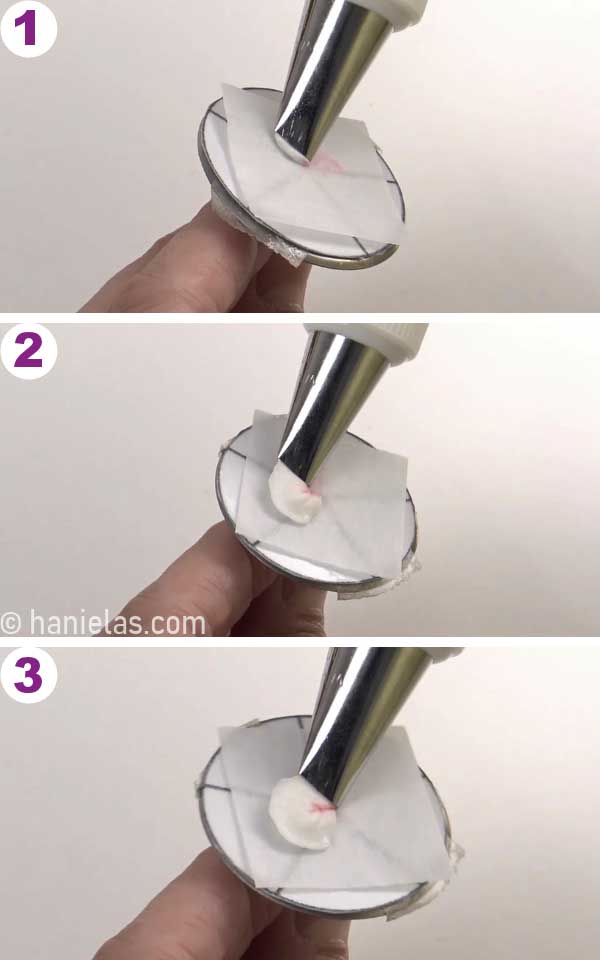
HOW TO PIPE A SINGLE PETAL
These cherry blossom flowers are made by piping several petals onto the flower nail, one by one. Let’s break it down to a single petal.
- To pipe a single petal, hold the piping bag at about a 45-degree angle, with the wide end of the tip nearly touching the center of the piping template/flower nail (step 1).
- Squeeze the piping bag and slowly rotate the nail counterclockwise (to the left), letting the icing fan out (step 2).
- To conclude the petal, slowly move the piping tip toward the starting point, decrease the pressure on the piping bag, and pull away. There is your first petal (step 3).
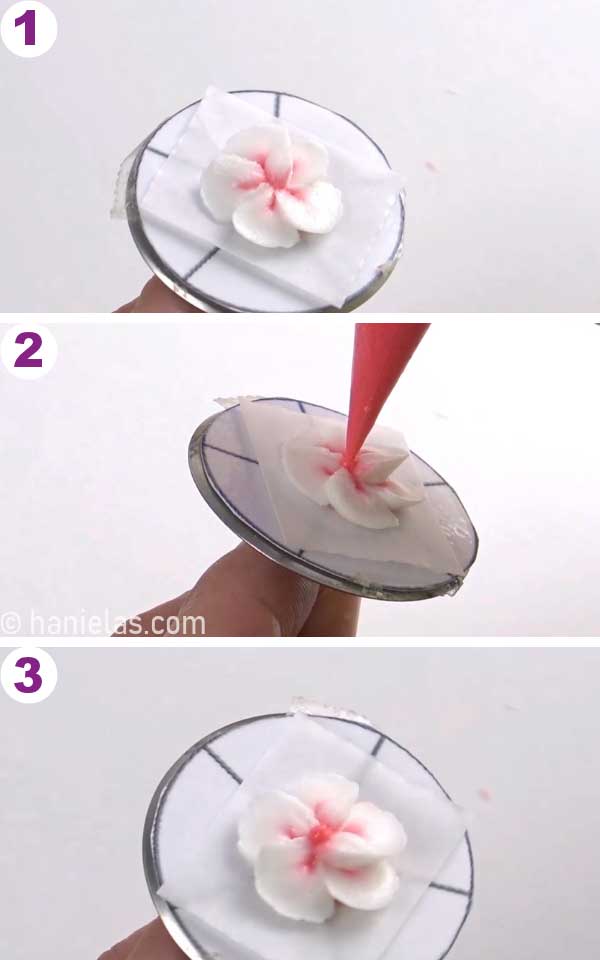
BASIC CHERRY BLOSSOM
The basic cherry bloom has five petals; however, some species can have more than 20 petals.
Use the piping guide to help you determine the size of the petals. Pipe petals between the lines you see on the piping guide, slightly overlapping or touching the adjacent edges of the previous petals to create cohesion.

Use pink icing to make a dainty center. Pipe a dot in the center of the flower. Let dry.
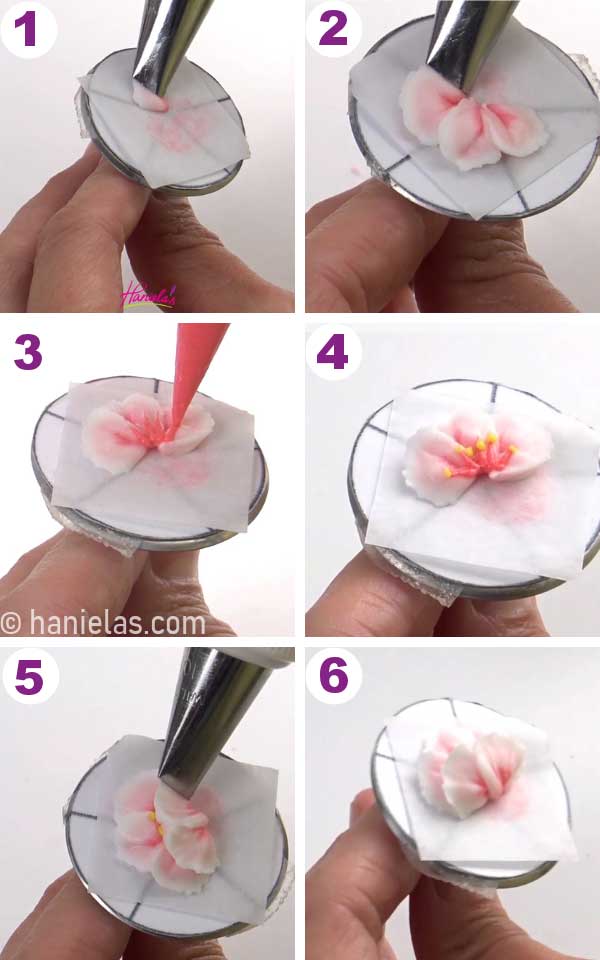
DOUBLE CHERRY BLOSSOM
These double cherry blossoms consist of two sets of petal layers. Start by piping a five-petal flower (steps 1-8).

Continue piping the second set of petals on top of the first set, making them smaller than the bottom set (steps 1-3).

Lastly, pipe the center. Use pink icing to pipe small dots around the middle, then pipe some yellow dots in the center (steps 1-5).

PARTLY OPEN CHERRY BLOSSOM
- Partly open flowers are easy to make.
- Pipe three petals (steps 1-2).
- Then, pipe the flower stamens with pink and yellow icing—short pink lines with yellow dots at the end (steps 3-4).
- Pipe two petals and layer them onto the previous petals, partly overlapping them (steps 5-6)
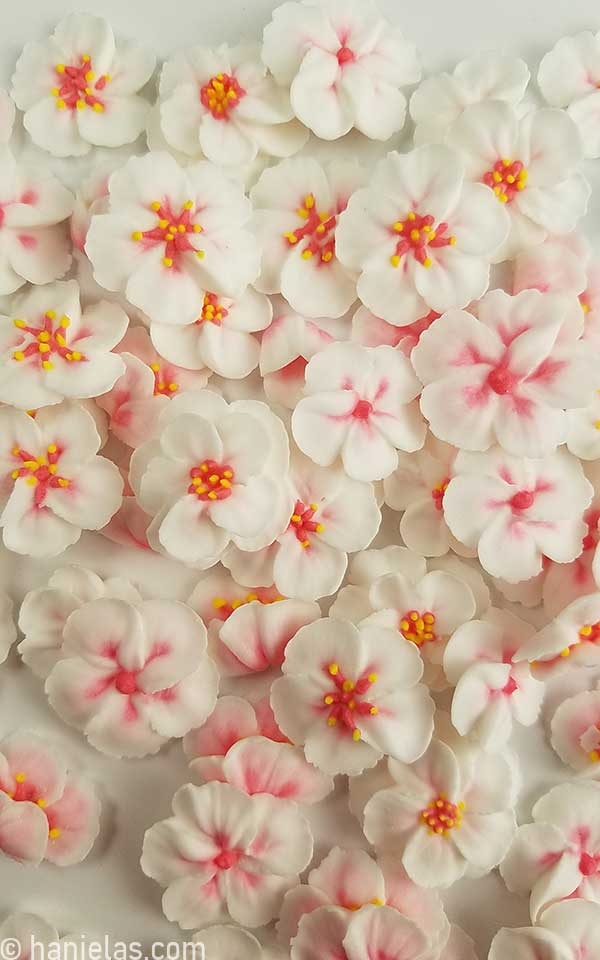
LET FLOWERS DRY
Allow the flowers to dry fully for 8-12 hours. Large flowers might need even more time for the icing to dry fully.

HOW TO STORE SUGAR ROYAL ICING FLOWERS
You can store flowers attached to the parchment squares or remove them from the parchment and store them between layers of paper towel sheets or food wrap to help mitigate friction. Store royal icing flowers and decorations in an airtight container, away from direct sunlight and moisture. Learn more about Royal Icing Transfers.

VIDEO TUTORIAL
Do you want to stay updated about free cookie decorating tutorials, live events, classes, and products? Sign up for Hani’s Cookie Decorating Newsletter.
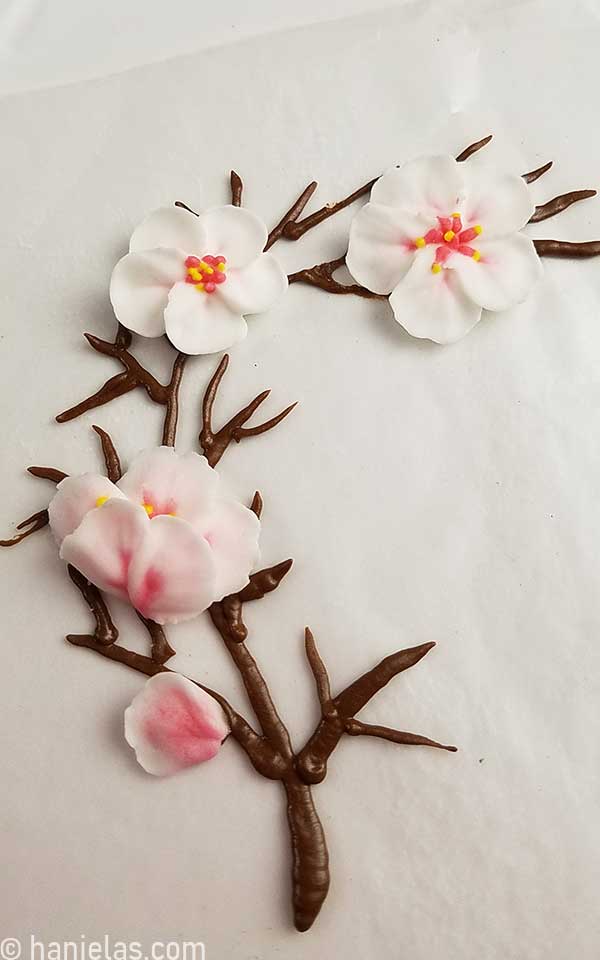
HOW TO USE ROYAL ICING FLOWERS
Cherry blossom, just like other piped sugar flowers, can be used as embellishments in cookie and cake decorating.

BUTTERCREAM FLOWERS
In addition to royal icing, you can also use buttercream to make buttercream cherry blossoms. Instead of letting buttercream dry, you can freeze it, and once frozen, it’s easy to attach to a cake.
That’s how I made buttercream flowers for my Cherry Blossom Cake. You can use Swiss Buttercream, Italian Buttercream (via Sugar Geek Show), American Buttercream, German Buttercream, Ermine Buttercream or Crusting Buttercream.
MORE ROYAL ICING FLOWERS
- Simple Daisy Flowers
- Royal Icing Succulents
- Pansy Flowers
- Ruffled Royal Icing Flowers (via Lila Loa)
- How to Pipe Royal Icing Roses
- Royal Icing Butterflies
Did you make these Decorated Cookies? Tag @hanielas on Instagram and hashtag it #hanielas

Hi, I’m Hani
Welcome!
Thank you for visiting Haniela’s. On my blog, you’ll find delicious sweet & savory recipes made with simple ingredients. Why not start a new adventure? Discover a world of cookie decorating with my step-by-step tutorials.

Hi, I’m Hani
Welcome!
Thank you for visiting Haniela’s. On my blog, you’ll find delicious sweet & savory recipes made with simple ingredients. Why not start a new adventure? Discover a world of cookie decorating with my step-by-step tutorials.