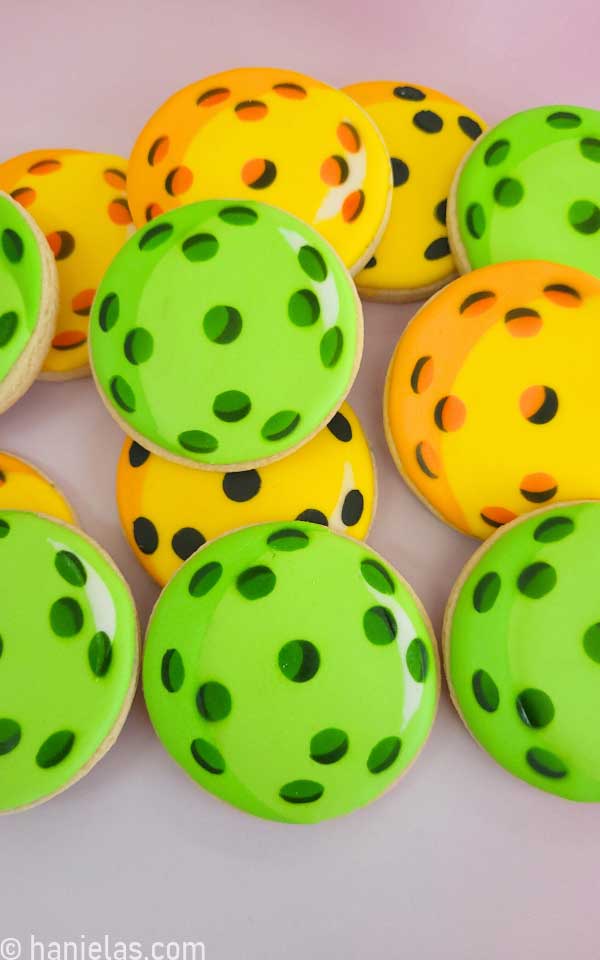
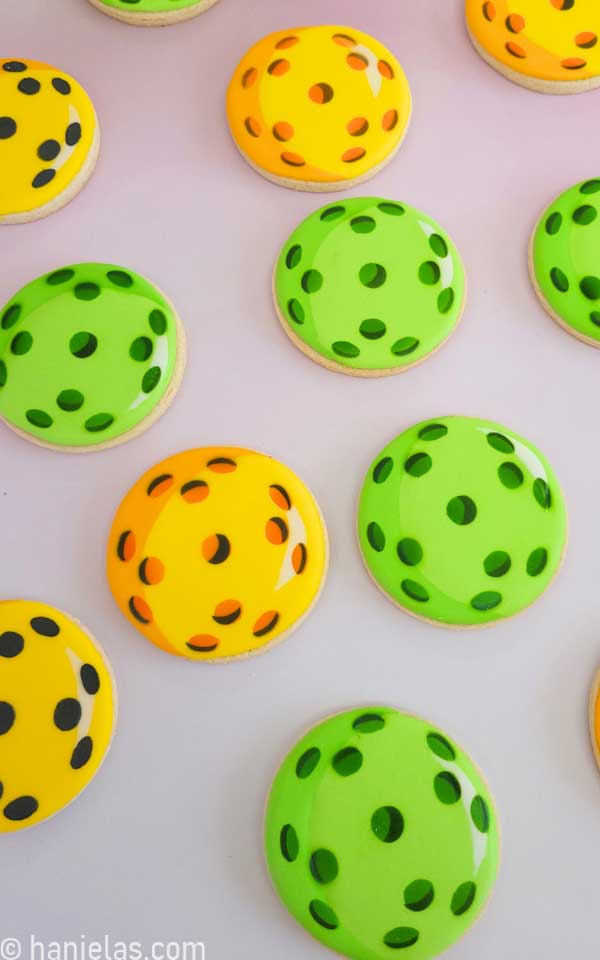
Pickleball Cookies
After many requests from readers, I put together step-by-step cookie decorating tutorial on how to make deliciously fun decorated pickleball cookies.
DECORATED PICKLEBALL COOKIES STEP-BY-STEP
- Beginner’s Guide To Cookie Decorating
- Ultimate Guide to Cut-Out Cookies (tips, tricks, troubleshooting)
- Royal Icing Recipe
- Small Batch Royal Icing Recipe
- Cookie Icing Recipes (includes vegan royal icing, glaze, fondant)
- Guide To Royal Icing Consistencies with Visual Help(what is stiff, flood icing, etc.)
- How To Freeze Royal Icing
- How To Make Royal Icing Transfers
- Royal Icing FAQ ( for example: how to make black icing, color bleeding, storage, and more)
- How To Make a Cookie Cutter Template
- Ultimate Guide To Cookie Decorating Tools
THINGS YOU NEED TO MAKE DECORATED PICKLEBALL COOKIES
- Round cookie cutter – I used a 3-inch cookie cutter
- Stencil – you can make your own stencil either from mylar (4 or 6 mil) plastic sheet or cardstock. Cardstock is not as durable as mylar.
- Digital Stencil Templates – available in my template shop
- Gel Food Colors: neon or electric green gel colors (chefmaster or americolor brands), you can also prepare neon green by coloring royal icing with lemon yellow gel color and then add a minuscule amount of leaf green to it and mix well.
- Airbrush Colors: leaf green, yellow, black
- Airbrush
- Stencil Holder or Magnets

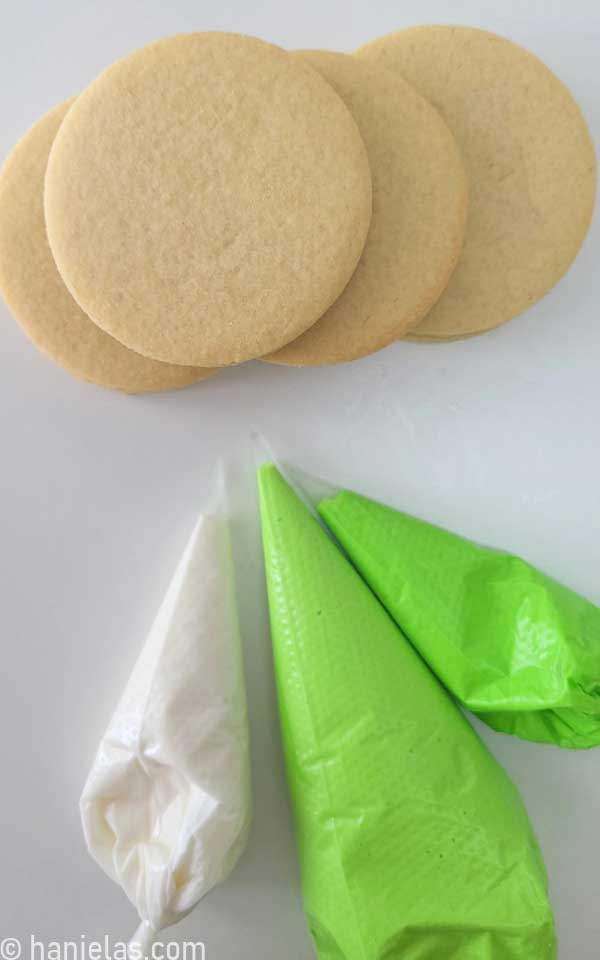
COOKIES AND ROYAL ICING
To make the cookies I used cut-out cookie recipe and royal icing to decorate.
First, you need to bake the cookies. I used my Sugar Cookie Recipe and a 3-inch cookie cutter to cut out shapes. If you follow gluten-free or vegan diet you can try my vegan and gluten-free recipes for cut out cookies.
Pickleballs are manufactured in a vast range of colors. However, the most popular are bright yellow and neon green (via Mass Pickleball Guide). I made both yellow and neon green pickleball cookies.
Let’s unpack the neon green color. You can use available electric green or neon green gel food colors (Americolor or Chefmaster) to color icing. But, if you don’t have either of these, you can color your royal icing with lemon yellow gel color and then mix in a minuscule amount of leaf green.
FLOOD COOKIES
Decorating with royal icing is very simple. Use a template to trace the guide onto a cookie (steps 1-3). Then ice the larger portion of the cookie with light 15-second consistency neon green royal icing. You can gently tap the cookie on a surface to level the icing and use your scribe tool to distribute it evenly. It’s important that icing is evenly spread over the cookie so you can create an uniform airbrushed layer. Fill in any dimples with additional icing and smooth it (steps 4-8).

Immediately fill the smaller, crescent-shaped section with darker neon green 15-second icing. Use a scribe tool to move and shape the icing (steps 1-4). Next, switch to white icing and pipe a highlight into the light green layer. Again, this white icing needs to be 15-second consistency so it sinks into the base layer. Pipe a small crescent on the edge and fill it with the icing. Shape the crescent with a tip of a scribe tool (steps 5-8). After this step, you need to let the icing dry. Drying can take 6-8 hours.

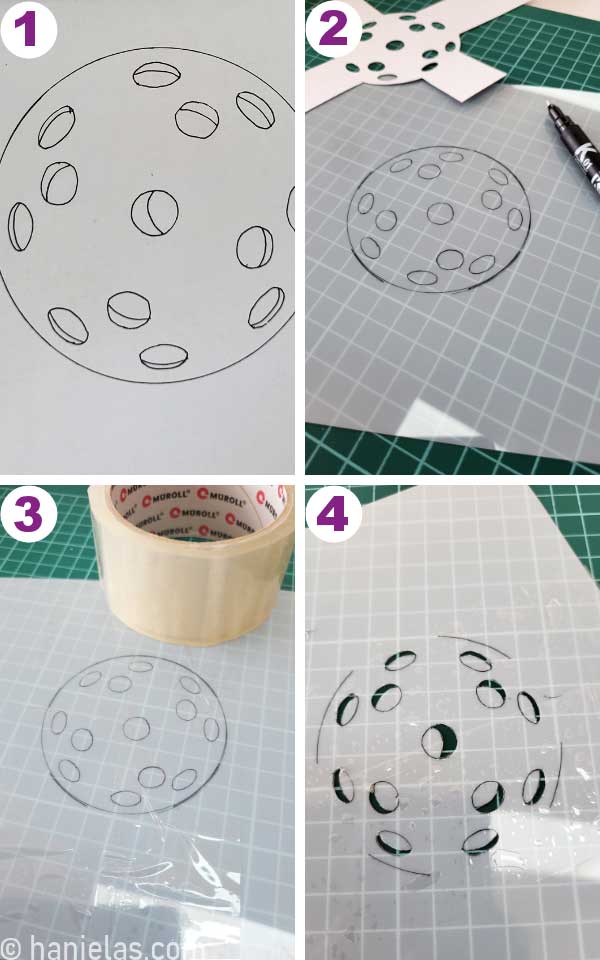
PICKLEBALL COOKIES – HOW TO MAKE A MYLAR STENCIL
For this project you need 2 stencils. First stencil has oval shaped holes, and the second one has crescent cut-out shapes.
In this tutorial I use a homemade stencil from mylar sheet. You can utilize cardstock, too. Keep in my cardstock is not as durable as mylar and it can tear or get wet easily. Digital stencil templates are available in my template shop (please check the tools section at the top of this page)
This is how you need to proceed when you make a stencil using a mylar sheet by hand. Trace the template onto the mylar using a fine-tip marker or calligraphy pen. Next, tape over it so the freshly traced outline doesn’t smudge. Then place the mylar with the tranced image onto a cutting board or use an exacto knife and carefully cut out the stencil. You need to move slowly so you don’t cut yourself (steps 1-4).
STENCIL HOLDERS FOR DECORATING
When you airbrush cookies with food coloring, you need something to hold the stencil while you airbrush the pickleball cookies. You can use a stencil holder, or if you don’t have one grab some magnets instead (steps 1-3).

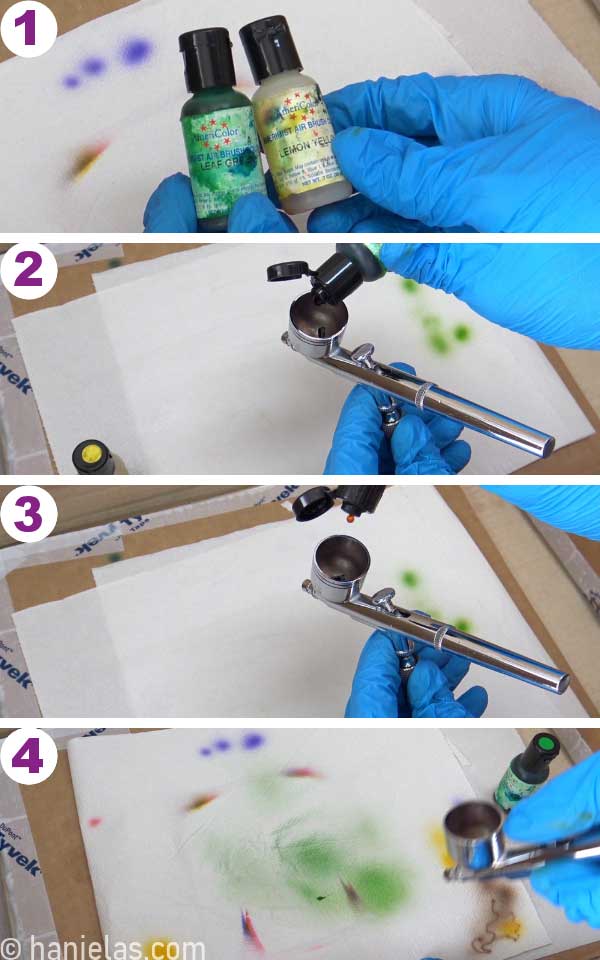
NEON GREEN AIRBRUSH COLOR – MIX AIRBRUSH COLORS
It’s time to airbrush the cookies. Let’s start with the airbrush food color you need. I wanted to match or get as close as possible to the neon royal icing color. To do that, I turned to leaf green and lemon yellow airbrush colors. I deposited one drop of green and 3-4 drops of yellow to a color cup. Give the airbrush gun a little side-to-side shake to mix two colors. Then test the final green color, and spray the color onto the paper towel. If you like the color that’s coming out you can go ahead and airbrush the cookies (steps 1-4).
AIRBRUSH PICKLEBALL COOKIES
Place the cookie onto a flat surface covered with a paper towel. Snuggly lay the stencil with oval-shaped holes onto the dry icing (steps 1-2). Airbrush over all the holes with an even layer. Try to airbrush with several light coats instead of one heavy coat (steps 3-6). Let the airbrushed color dry for 5 minutes before the next step.

In the next step, take the second stencil with cut-out crescent shapes. Align the crescent shapes with the oval shapes that are airbrushed on the icing. Crescent should overlay one side of the oval shape (steps 1-2). Then airbrush over the crescent shapes with black airbrush color (steps 3-8).

HOW TO WASH A MYLAR STENCIL
After you are done airbrushing, wash the stencils under warm running water. Then air-dry or pat dry them with a kitchen towel/paper towel. Store stencils flat until next time.

MORE SPORT COOKIES
- Decorated Basketball Cookies
- Tennis Cookies
- Soccer Cookies
- Baseball Cookies
- Simple Golf Cookies via Sweet Sugarbelle
These decorated pickleball cookies are more than just a sweet treat; they are a celebration of the game of pickleball!

Hi, I’m Hani
Welcome!
Thank you for visiting Haniela’s. On my blog, you’ll find delicious sweet & savory recipes made with simple ingredients. Why not start a new adventure? Discover a world of cookie decorating with my step-by-step tutorials.

Hi, I’m Hani
Welcome!
Thank you for visiting Haniela’s. On my blog, you’ll find delicious sweet & savory recipes made with simple ingredients. Why not start a new adventure? Discover a world of cookie decorating with my step-by-step tutorials.


Thanks!
My pleasure.
Love the Pickleball cookies. I purchased your pattern and appreciate your tutorial. I am wondering if you have gel color recommendations for the yellow balls?
Hi Lynnette,
Thank you. I’m happy to hear you like the tutorial.
I suggest using neon yellow/electric yellow, and for the sharing, you can add a touch of orange to it.
Hope it helps.
Happy Decorating. Hani