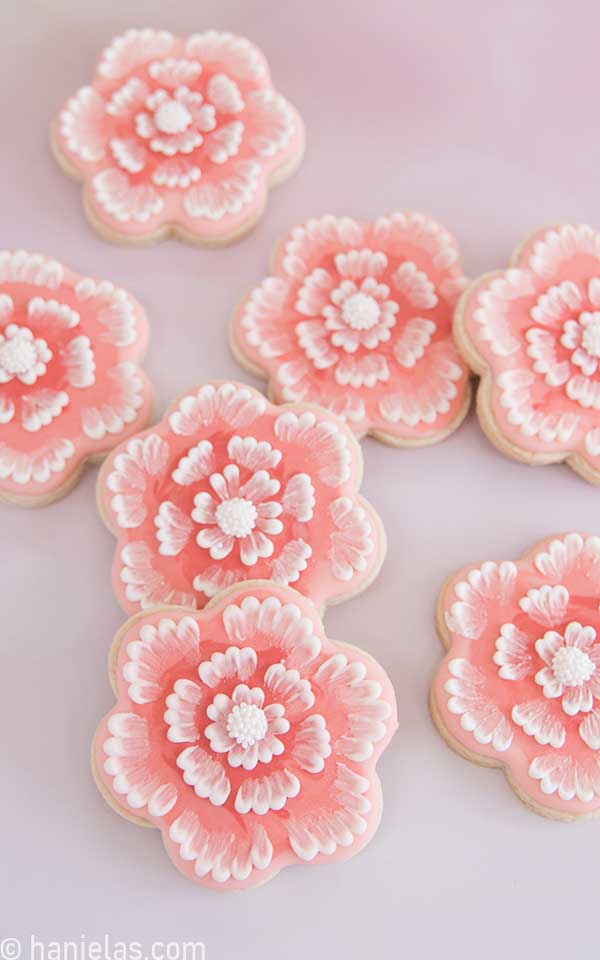
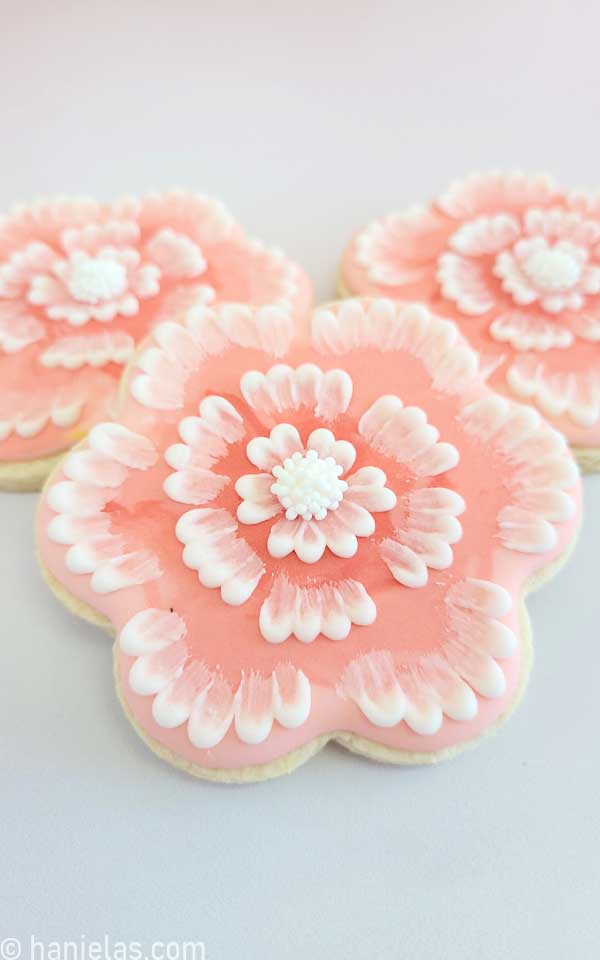
Easy Brush Embroidery Flower Cookies
Highly visually appealing brush embroidery cookies can look complicated to make. In this step-by-step cookie decorating tutorial, I’ll show you an easy brush embroidery technique to create eye-catching brush embroidery flower cookies.
updated from 2014
HOW TO MAKE EASY BRUSH EMBROIDERY FLOWER COOKIES
Before we get started, let me explain what exactly is brush embroidery. Well, derived from embroidery stitching, brush embroidery is a decorating technique used on cakes and cookies. It involves piping lines or dots of icing and then using a damp paintbrush to brush away a portion of icing from the piped line to create movement, depth, and texturized designs. This popular technique is also applicable with a variety of mediums to create artwork.
- Beginner’s Guide To Cookie Decorating
- Ultimate Guide to Cut-Out Cookies (tips, tricks, troubleshooting)
- Royal Icing Recipe
- Small Batch Royal Icing Recipe
- Cookie Icing Recipes (includes vegan royal icing, glaze, fondant)
- Guide To Royal Icing Consistencies with Visual Help(what is stiff, flood icing, etc.)
- How To Freeze Royal Icing
- How To Make Royal Icing Transfers
- Royal Icing FAQ ( for example: how to make black icing, color bleeding, storage, and more)
- How To Make a Cookie Cutter Template
- Ultimate Guide To Cookie Decorating Tools
TO MAKE SIMPLE BRUSH EMBROIDERY FLOWER COOKIES YOU NEED
- Flower Cookie Cutter – cutter is from Wilton Flower Cutter Nesting Set. Similar daisy shape will work.
- Paintbrush – in this tutorial I used a small square paintbrush from Wilton Paintbrush Set
- Water
- Paper Towel or Kitchen Towel
- Get Food Colors: pink and orange to make salmon color
- Piping Bags
- Round Piping Tip #3
- White Nonpareils Sprinkles
This post contains Amazon affiliate links that earn me a small commission, at no cost to you. I only recommend products that I use and love. Learn more about my affiliate policy here.
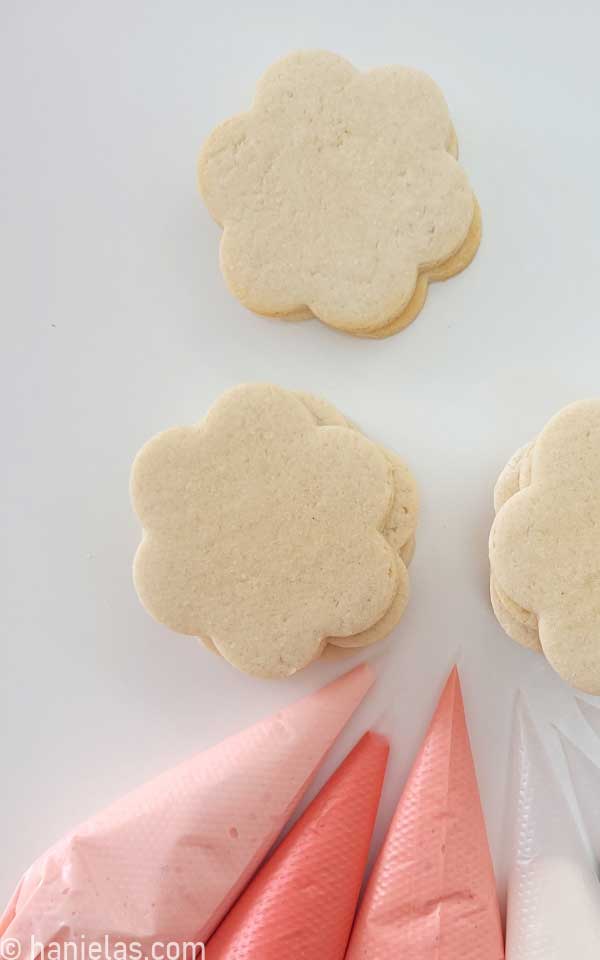
COOKIE AND ROYAL ICING
First, you need to make the cookie dough, bake the cookies and prepare royal icing. In this tutorial, I use salmon-colored and white royal icing. To get this lovely salmon-like color, I first color icing with pink gel food coloring. Then I add a touch of orange. Please don’t worry about this step; you can use any color. You can switch things around. Get creative.
PREPARE FLOWER CENTERS – ROYAL ICING TRANSFERS (RIT)
I’ve used pre-made flower centers in the past to make Gingham Flower Cookie Pops. They are quite simple to make.
- First, prepare a template. Draw several parallel lines on a piece of paper, about 3/8 inch apart.
- Place a piece of flat wax paper, parchment or acetate on top of the template.
- Use 25-second consistency icing and pipe dots between the lines (steps 1-2). Immediately dust them with white nonpareils, covering dots completely in an even layer (steps 3-4).
- Gently lift wax, parchment, or acetate, holding two corners, and allow excess nonpareils to fall into a small bowl (step 5).
- Place the sheet with freshly piped dots onto a flat tray. Allow flower centers to dry overnight (step 6).

Once the icing dries, you can remove flower centers from the backing sheet (steps 1-3).
TIP: You can prepare RIT-royal icing transfers ahead of time. Days, weeks and even months in advance is fine. Store them in an airtight container away from a direct sunlight and moisture, until ready to use.

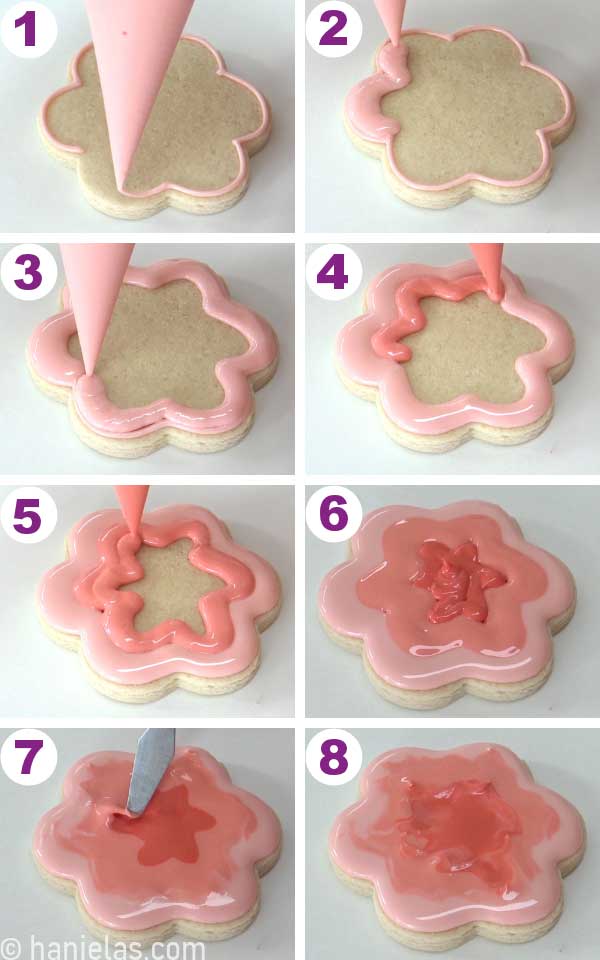
FLOOD COOKIES – MARBLED OMBRE ROYAL ICING DESIGN
Start outlining with the lightest shade of salmon-colored icing, move on to the darker shade, and flood the middle with the darkest of them all (steps 1-6). After that, use a small palette knife to blend the edges, creating a marbled design. Once you finish this step, place a freshly iced cookie onto a flat tray and let the icing dry overnight (6-8 hours).
PIPING TIP AND PAINTBRUSH FOR BRUSH EMBROIDERY
In this tutorial, I use a round piping tip #3 and thicker piping consistency icing to create a brush embroidery design. Avoid using icing that is too stiff or too runny.

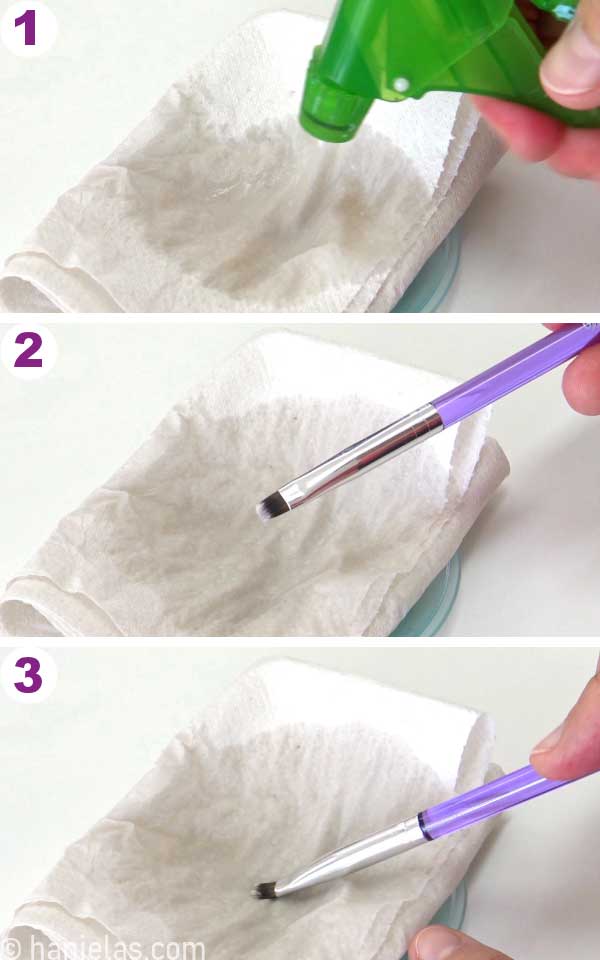
The type of paintbrush is important. Using a paintbrush with long bristles provides you with a very little control; use a paintbrush with short bristles. I like to use a small square brush turned sideways to create brush embroidery.
Remember to clean the paintbrush frequently: dip it in water and blot it on a paper towel to remove excess moisture.
BRUSH EMBROIDERY TECHNIQUE
Usually, when creating brush embroidery with icing, line of icing is piped but in this simplified technique I use easy dotted method. Follow the curvature of the flower shape and pipe large dots on the edge (step 1). Take a damp paintbrush and brush each dot inwards, making sure the dots connect (steps 1-4). Continue with th rest of the cookie (step 5-6).

Now that the first layer is finished, you can continue with the second row of brush embroidery. If needed, create a piping guide – I use the tip of my metal scribe to scratch the surface. Stagger the second layer-pipe four dots below the first row between two petals (steps 1-5). After that, repeat with the last layer. Decrease the amount of dots to two (steps 5-8).
TIP: Remember to frequently dip the brush in water and blot it onto a paper towel.
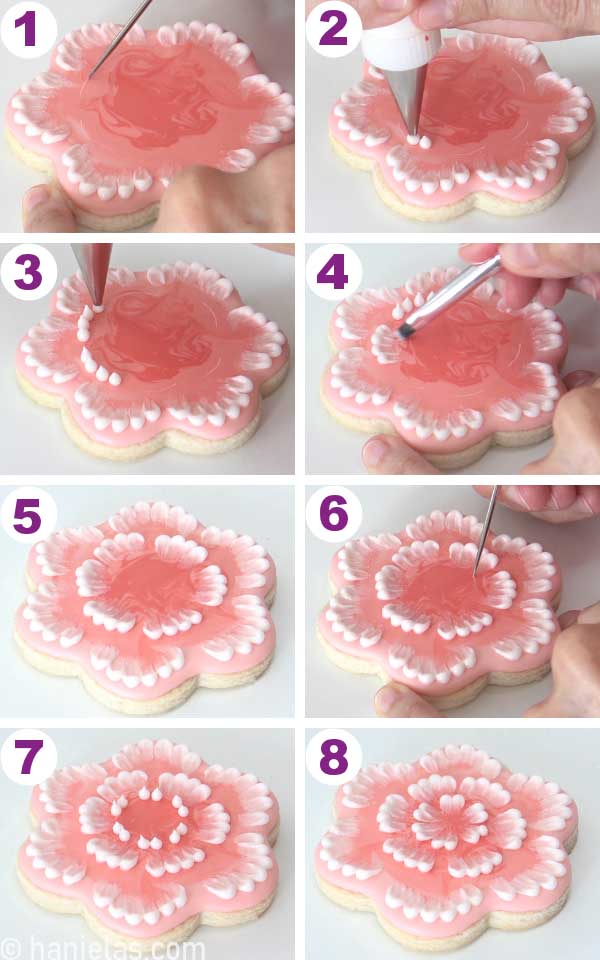

GLUE FLOWER CENTER ONTO A COOKIE
Remember flower centers you made earlier? Now it’s the time to use them. Pipe a small dot of white icing in the middle of the flower and then attach a small flower center. Gently push it down to make it stick.

BRUSH EMBROIDERY COOKIE DECORATING SUCCESS TIPS
- Lack of depth, detail and definition
- This can happen when the initial line or dot of icing is too small.
- When your icing is too runny.
- Or when the paintbrush is too wet.
- Uneven lines – if possible, use a piping tip to pipe the lines/dots.
- Jagged, rough edges – most likely icing is too thick or your paintbrush is dry. Avoid using very stiff icing. Remember to frequently dip the brush in water and blot it onto a paper towel.
Did you make these Decorated Cookies? Tag @hanielas on Instagram and hashtag it #hanielas
Subscribe to Haniela’s Cookie Club on Patreon and get access to exclusive and ad-free tutorials, templates, sneaks peeks, and more.
This cookie decorating tutorial was originally published on April 11th, 2014. On June 28th, I updated this tutorial with new step-by-step photos and detailed written instructions.

Hi, I’m Hani
Welcome!
Thank you for visiting Haniela’s. On my blog, you’ll find delicious sweet & savory recipes made with simple ingredients. Why not start a new adventure? Discover a world of cookie decorating with my step-by-step tutorials.

Hi, I’m Hani
Welcome!
Thank you for visiting Haniela’s. On my blog, you’ll find delicious sweet & savory recipes made with simple ingredients. Why not start a new adventure? Discover a world of cookie decorating with my step-by-step tutorials.