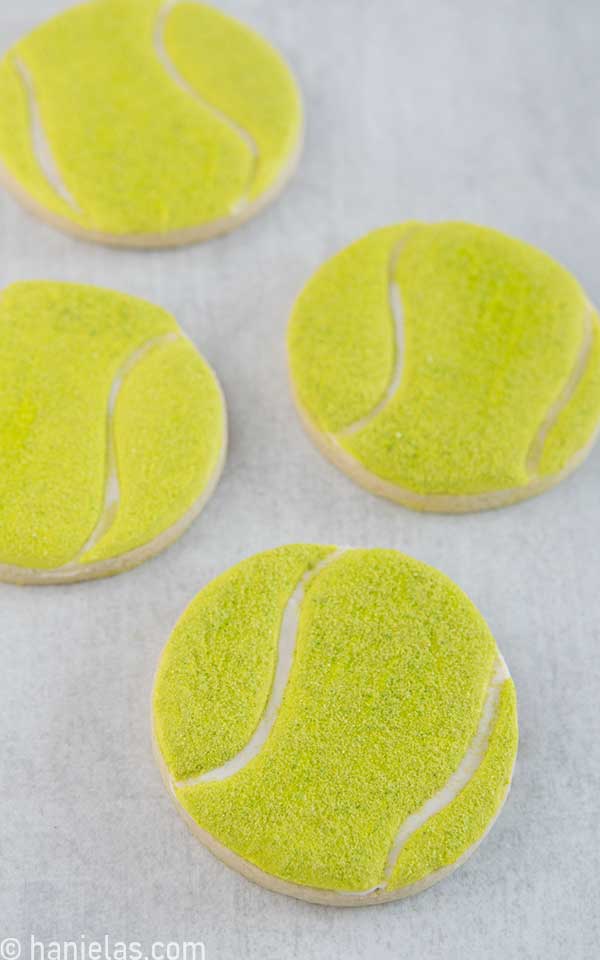
Tennis Ball Cookies
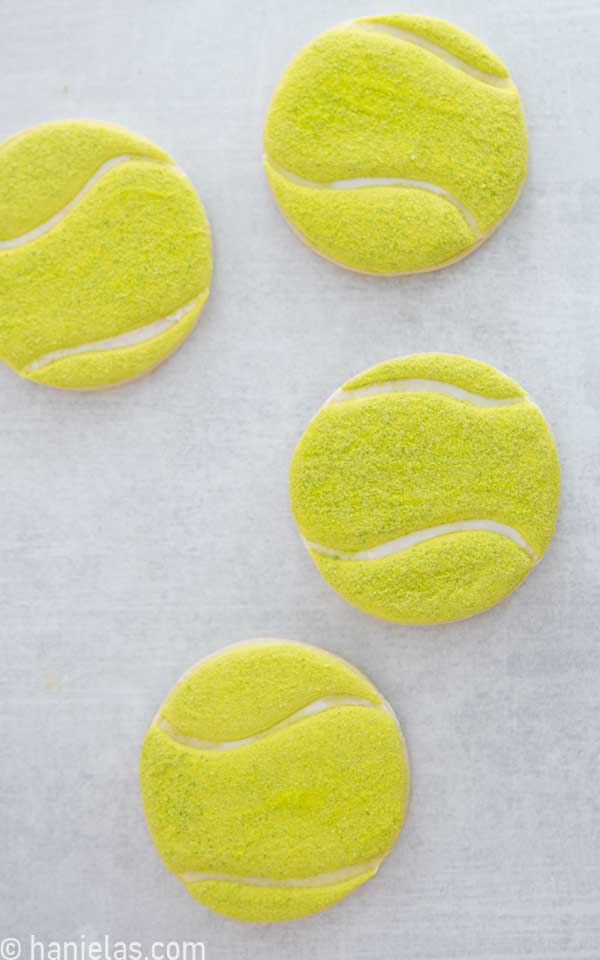
Are you headed to a tennis party? Bring these decorated Tennis ball cookies with you, and you’ll be an instant match-winner. Follow my step-by-step tutorial on how to make tennis ball cookies.
HOW TO DECORATE TENNIS BALL COOKIES
Tennis Ball Fuzz
First, let’s talk tennis ball fuzz, shall we? What is it? Tennis ball fuzz is made out of wool, nylon, and cotton. It’s not there just for the looks. Felt is a functional part of the ball. It keeps the ball from going super fast and slows it down. It allows for a better racket grip and uniform bounce on different surfaces, and most of all felt surface provides for a better spin, a key part of any tennis match.

Tennis Ball Color
Before the fluorescent yellow color, tennis balls used to be white. But because the white ball was hard to follow on the television, they changed the color to yellow-green, making it easier to spot.
How to Make Tennis Ball Fuzz for Cookie Decorating
- There are a couple of ways to create fuzz on tennis ball cookies:
- Sanding Sugar
- Texture Royal Icing
- Fine Colored Sugar – this is the option I used, as it imitated the felt texture really well.
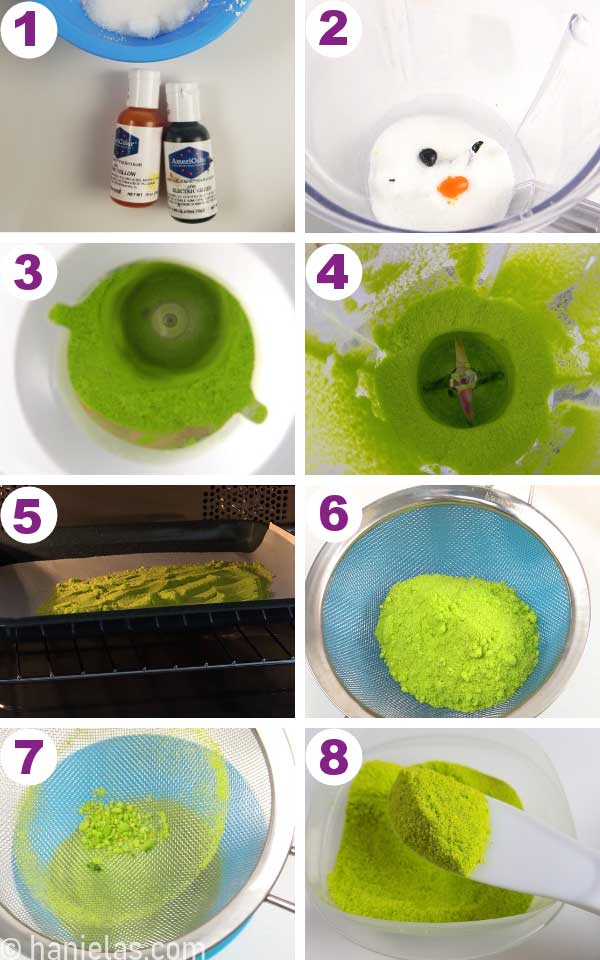
To prepare fine-colored sugar I used white granulated sugar, corn starch, and electric yellow and green concentrated food gel colors.
I used 1 cup of granulated sugar and 1 to 2 teaspoons of corn starch.

Pour about 1 cup of granulated sugar into a food blender, a small chopper, or a coffee grinder; add about five drops of yellow gel color and one drop of green gel color (steps 1-2). Pulse the blender until sugar is pulverized and homogeneous in color. If you’d like to intensify the color of the sugar, add a little more gel color.
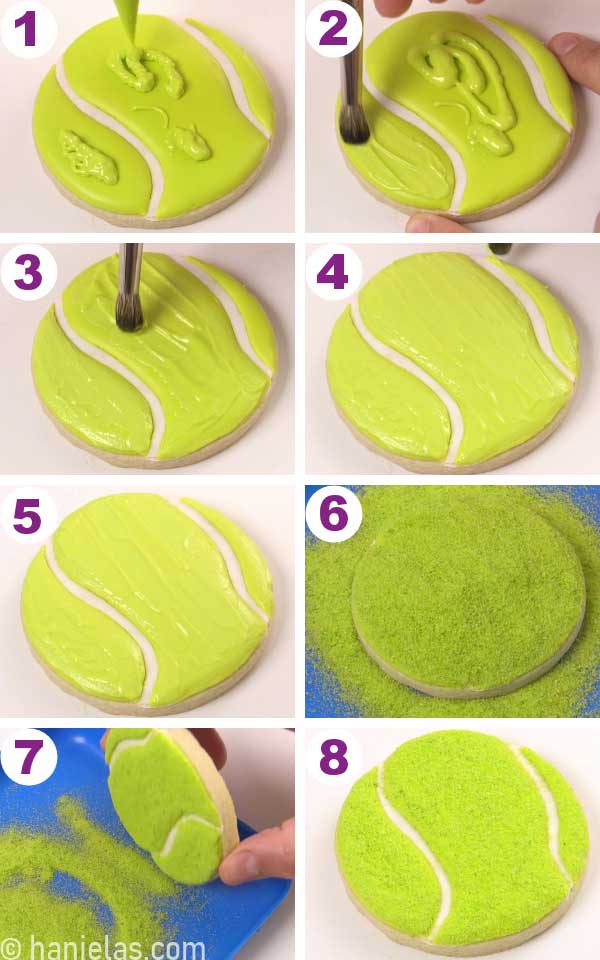
Pour colored, pulverized sugar onto a baking sheet/tray lined with parchment. Dry the sugar in the oven at 86F-100F (30C-40C) for about 20 minutes (step 5). Then, let it cool, sift it and store it in an airtight container (steps 6-8).
Decorate Tennis Ball Cookies with Royal Icing
- I used two icing colors to decorate tennis ball cookies:
- White
- Yellow with a green hue – color icing with yellow and add a minuscule amount of green gel color (for the best results, use electric gel food colors, or lemon yellow and leaf green)
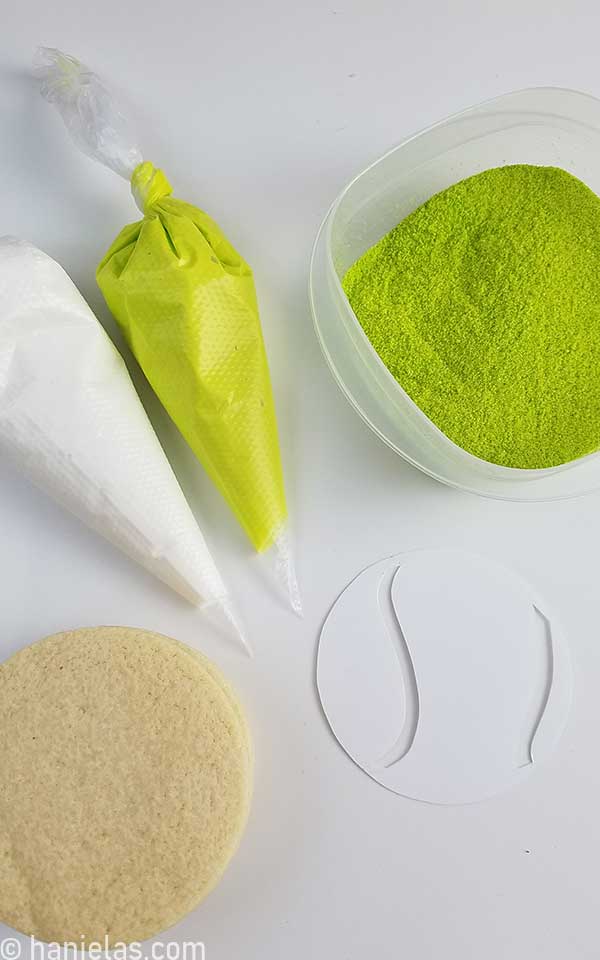
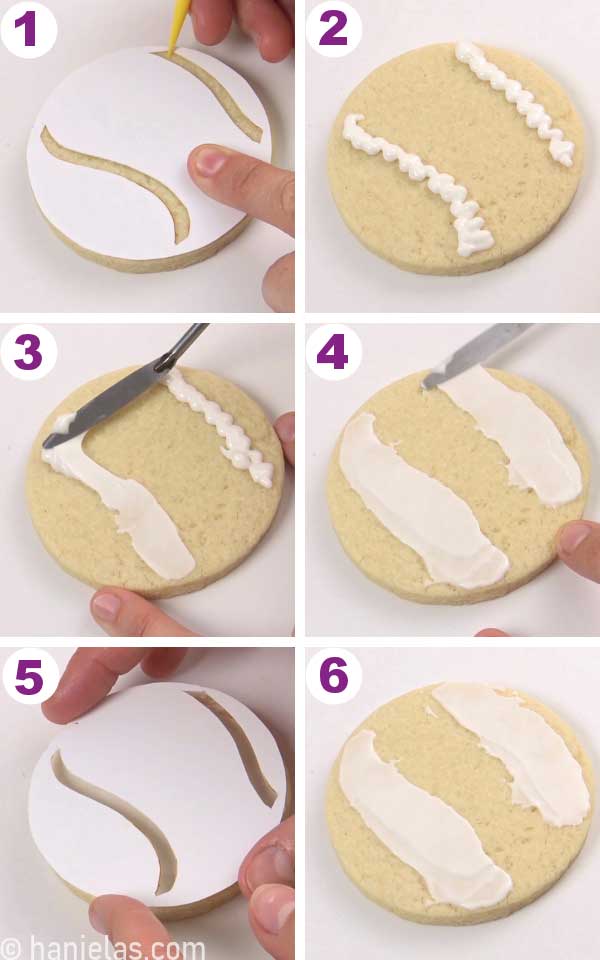
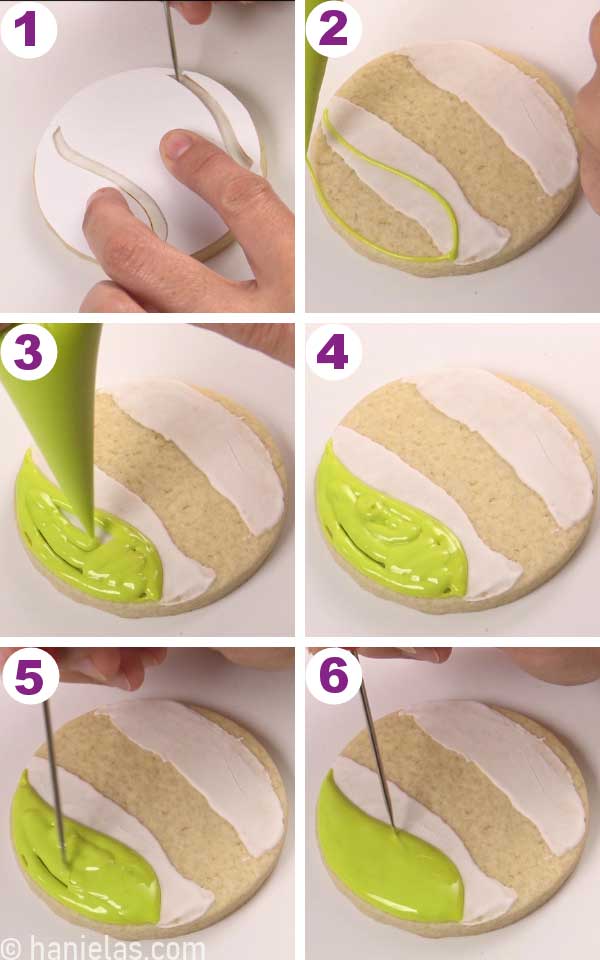
I used a handy template to trace the seam outlines onto the cookie. Instead of using an edible marker, I scratched the cookie’s surface with a scribe (step 1). Then I spread a thin layer of white icing over the seam sections (steps 2-4). Place the template over the cookie and double-check if the seam sections are fully iced with white icing (step5). Before the next step, let the white icing dry for an hour or 2 (steps 5-6).
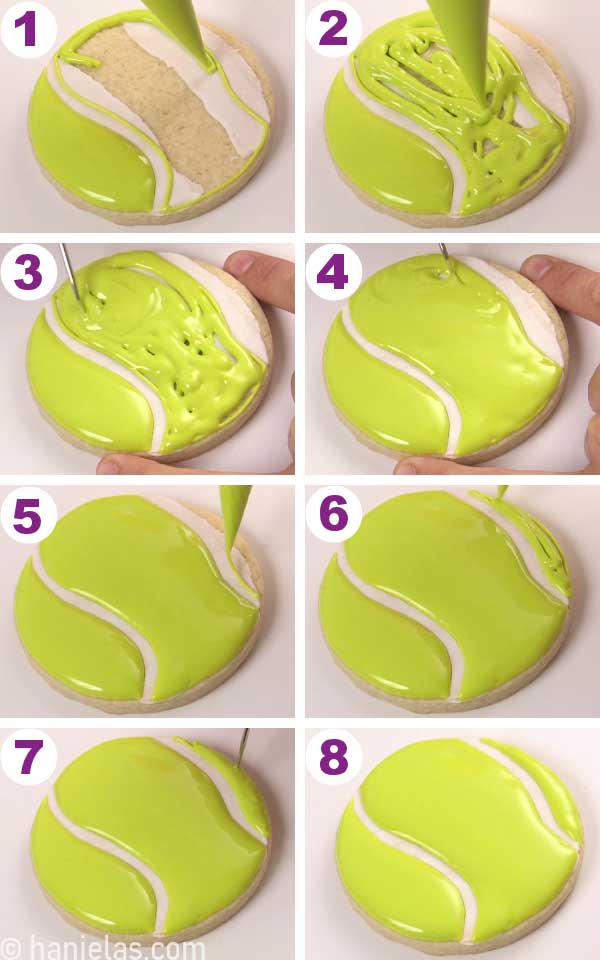
With a scribe, I traced the outline of the tennis ball seams onto the icing by gently scratching the surface of the white icing layer (step 1). Using a yellow/green 15-second consistency icing, follow the guides, outline, and flood the side section, leaving the white seam section white (steps 2-4). Smooth and shape the icing with a scribe while wet (steps 5-6).
Outline and flood the remaining sections, skipping over the white sections (steps 1-8). Let the icing dry overnight.
How to apply fuzz on tennis ball cookies
Brush a thin layer of flood icing (same icing as for the base) onto the dry base layer (steps 1-5). Immediately dust the surface with fine-colored sugar ( step 6). Gently shake off excess onto a tray. Let dry for a couple of hours (steps 7-8).
- MORE SPORT DESSERTS
- Soccer Ball Cookies
- Basketball Hoop Cupcakes
- Football Cookies
- Easy Football Cake via Crazy for Crust
- Soccer Rice Krispie Cake
- Basketball Cookies
To Make Decorated Tennis Ball Cookies You Need
- RECIPES
- Classic Sugar Cookies
- Fresh Lemon Royal Icing
- Vegan Sugar Cookies
- Vegan Royal Icing
- Gluten-Free Sugar Cookies
- TOOLS
- Shop all the tools in my Amazon Shop
- Round Cookie Cutter
- Americolor Brand Gel Food Colors: electric yellow, electric green, or yellow and leaf green
- Tipless Piping Bags
- Scribe
- White Granulated Sugar
- Chopper, blender, or a coffee grinder
- Bead Tray
- Food-only Paintbrush
- Palette Knife (optional, use a brush instead)

Hi, I’m Hani
Welcome!
Thank you for visiting Haniela’s. On my blog, you’ll find delicious sweet & savory recipes made with simple ingredients. Why not start a new adventure? Discover a world of cookie decorating with my step-by-step tutorials.

Hi, I’m Hani
Welcome!
Thank you for visiting Haniela’s. On my blog, you’ll find delicious sweet & savory recipes made with simple ingredients. Why not start a new adventure? Discover a world of cookie decorating with my step-by-step tutorials.


Wonderful tutorial! I made these for my daughter’s tennis team Senior Night. The cookies came out spectacular!!! Thank you!
Hi Mary Ann,
That’s fantastic. Congratulations!
Have a great day!
So complicated!!!!
Mine were not nearly as perfect as yours…surprised there aren’t more responses like this.
I spent hours on these and, well, at least they tasted good. 😂
Hello Susan,
I’m glad you like the taste.:-)
And, of course, I’m sorry to hear you didn’t enjoy the process as much :-), perhaps using sanding sugar would work faster for you, as you can achieve similar texture with sanding sugar or skip it all together.
This “felt” technique can be use of other designs, too.
Have a great day.
Very helpful tutorial! Thank you!
Thank you.
Excited to try these for a tennis banquet! How did you make the template for the white lines?
Hi Stephy,
I traced the cutter outline onto the cardstock and made the slits with an exacto knife.
Is the sugar supposed to resemble powder sugar?? Mine is super fine with no granulated anymore.
Hi Heidi,
yes, it’s quite fine.
I tried the sugar on my cookies, but found it was either too finely ground, or too humid here, or both. I just couldn’t get an even covering.
Beautiful job though+
Hi Emily,
I’m sorry to hear that. Maybe next time, you can try using colored granulated sugar, hopefully it will give you better results.
Thank you for stopping by.
Do you think a name could be added on top of the sugar or is it too powdery even once dry?
I’ve done some piping on bears (made with the same technique) but I did it before I added the top sugar, color was the same as base so not idea for the name.
I think you can use a small brush and
dust off some of it to make room for the name.
Would this work to apply the sugar to the freshly flooded green areas? Or is it a must to let it dry and then paint to apply the sugar?
Hi Annette,
with sanding sugar it will work, however with this fine powder-sugar it is a bit trickier, as it partly sinks in and some gets
dissolved in the royal icing due the moisture. There is still some texture. I recommend testing it on a wax paper and letting it dry to
see if it will suffice your desired look.
This is a great tutorial! Thank you! I noticed that you mentioned corn starch and have an associated picture but then it wasn’t included in the ingredients list. Is there an amount that you use that you could share that it looks like you add in prior to mixing the color?
Hello,
I add about 1 to 2 teaspoons per 1 cup of granulated sugar. Thank you.
Exactly what size cookie cutter did you use in this photo?
Hi Jill,
3 inch.
Hani
Do these work for individually bagged cookies?
Hi Shiela, yes, it should be fine.