
Peanut Butter Thumbprint Cookies with Jam and Chocolate
With one easy dough, you can make three classic peanut butter cookies.
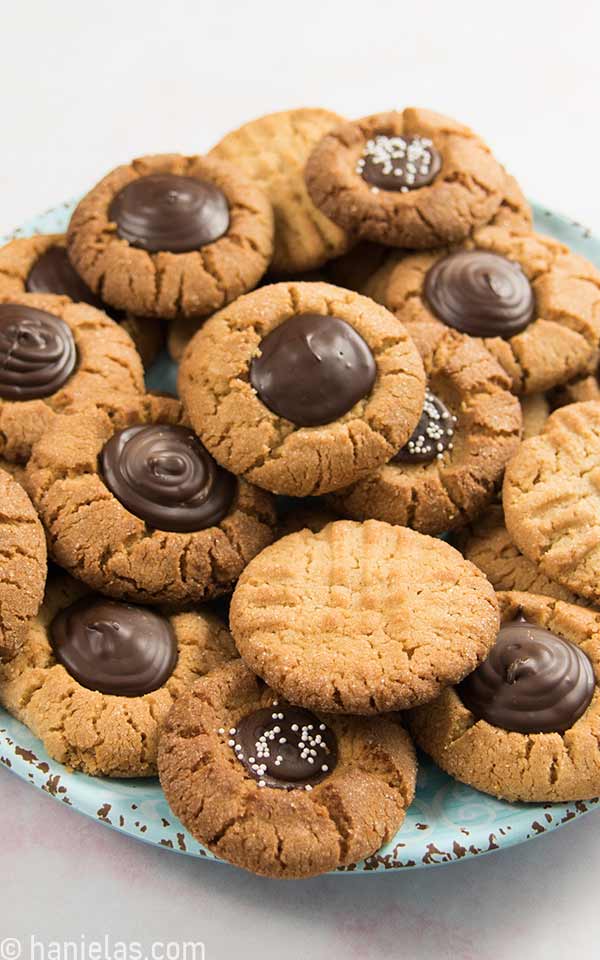
WHAT MAKES THIS RECIPE GREAT
- 3 Cookies, 1 Dough: I love that I can make 3 different peanut butter classics with this recipe.
- Thumbprints: Roll in sugar, make an indent, bake, then fill with jam and chocolate.
- Criss-Cross Cookies: Roll in sugar or sprinkles, flatten with a fork in a crosshatch pattern.
- Peanut Butter Blossoms: Roll in sugar, bake, then press a chocolate kiss or other chocolate candy into the center while the cookies are still warm.
- My favorite trick: I use a small silicone wine stopper to make the thumbprints. It creates a perfectly round indentation without sticking to the dough.
- PB & J upgrade: This recipe takes the Peanut butter & jelly combination up a notch with chocolate.
- Soft and chewy: Cookies are soft and slightly chewy, with plenty of peanut butter flavor.
INGREDIENTS
- Butter
- Brown Sugar
- Granulated Sugar
- Smooth Peanut Butter
- Egg
- Vanilla Extract
- Flour
- Baking Soda
- Salt
- Vanilla Sugar or Granulated Sugar – Topping
- Chocolate, Hershey Kisses, Fruit Preserve (I love using cherry)
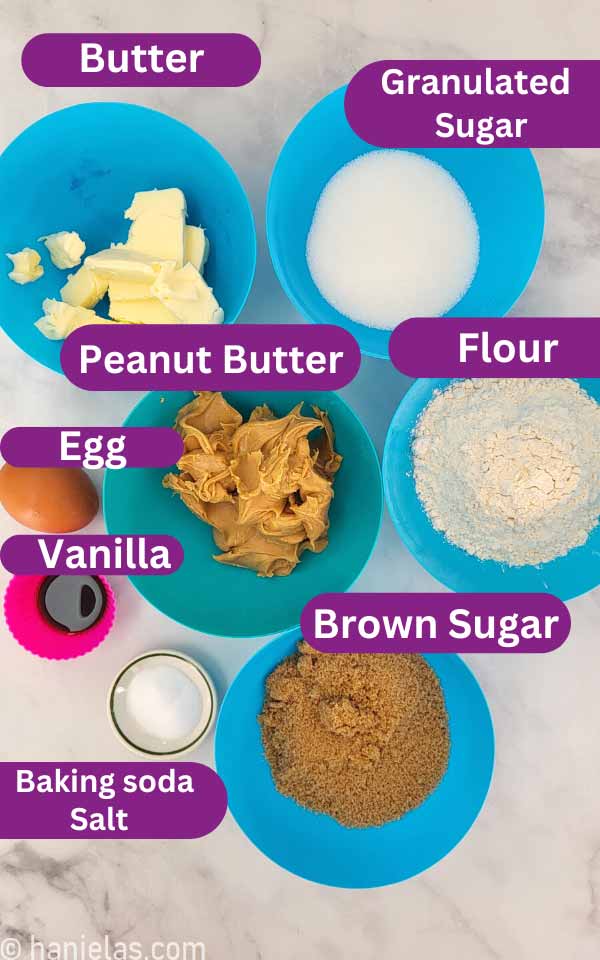
COOKIE DOUGH
Before you begin, bring the butter, eggs, and peanut butter to room temperature.
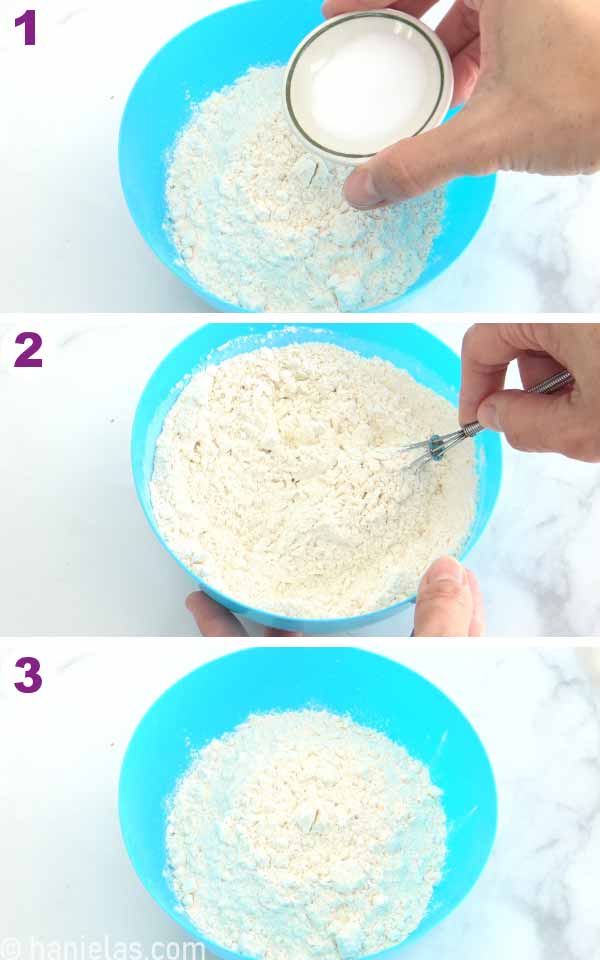
In a medium-size bowl, whisk together the all-purpose flour, baking soda, and salt. Baking soda encourages cookies to spread slightly and become chewier. Learn more about baking powder and baking soda (via myrecipes.com)
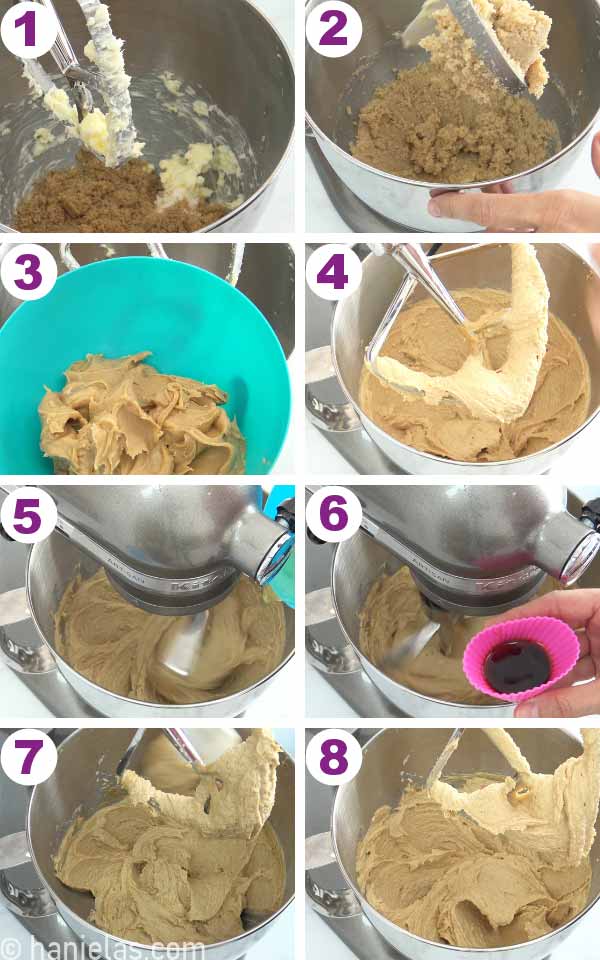
In a stand mixer fitted with the paddle attachment, cream the butter and both sugars until well combined. After about 5 minutes, the mixture should be fluffier and lighter in color. Add the smooth peanut butter, beat well, then add the egg and Vanilla extract.
Scrape down the sides of teh bowl as needed to fully combine.
CHILL THE SOFT DOUGH
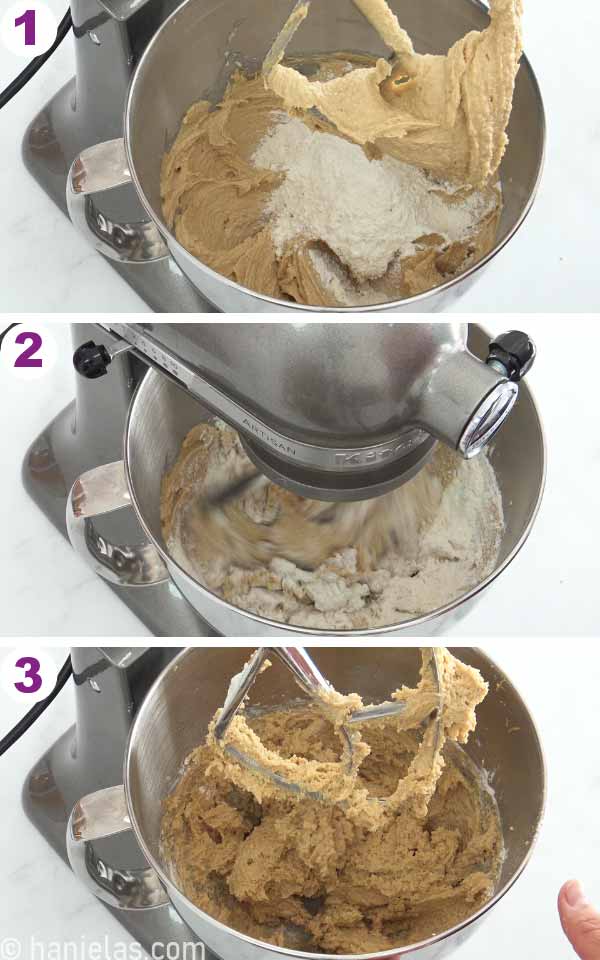
This peanut butter cookie dough is soft. Don’t be tempted to add more flour. Too much flour can make the dough crumbly and hard to shape, yielding dry cookies. Instead, chill the dough.
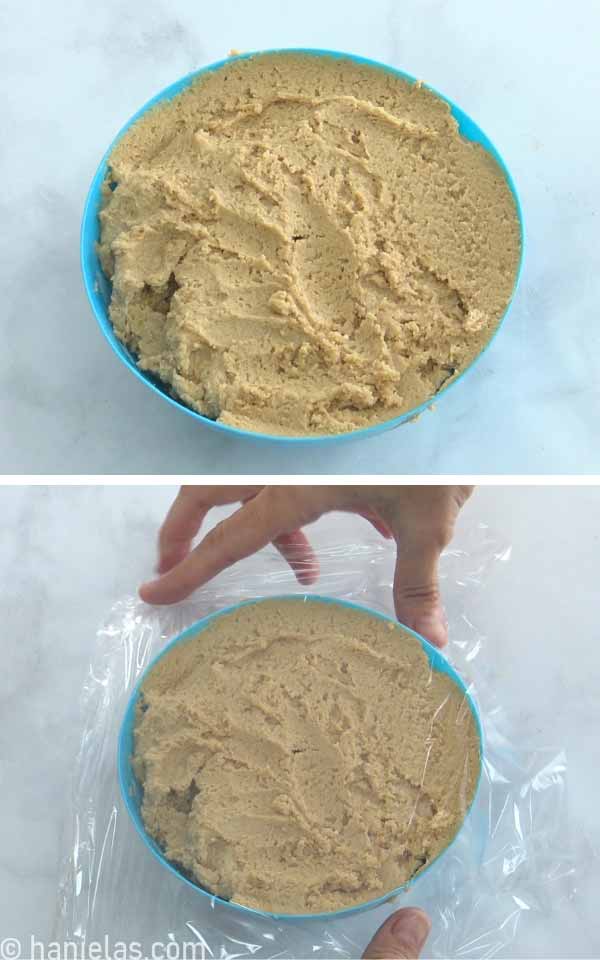
Cover the dough tightly to prevent it from drying out. Chill for at least 2 hours, or up to overnight.
Chilling and resting help firm the soft dough, making it significantly easier to shape and handle, and cookie bak up nicer.
SHAPE THE COOKIES
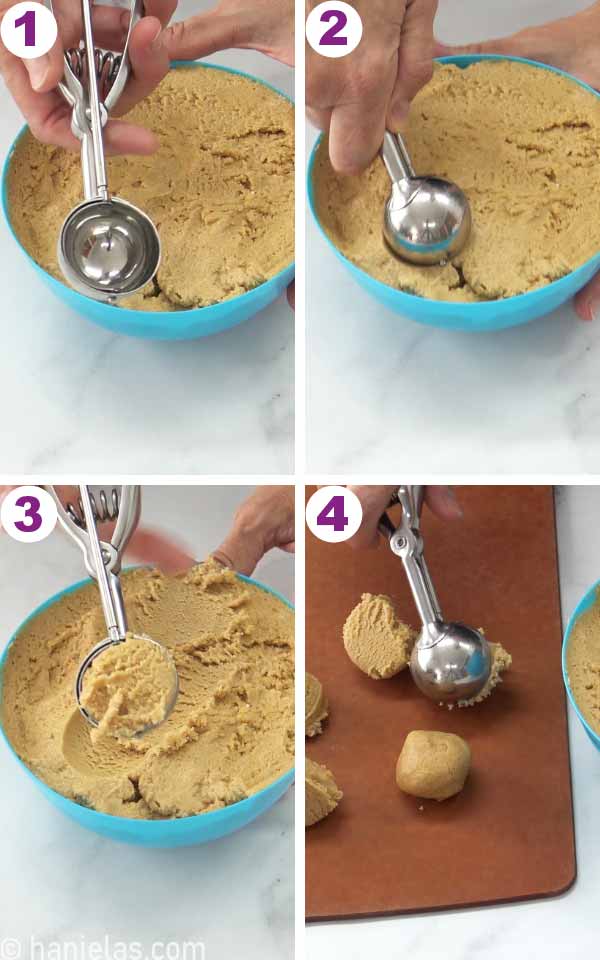
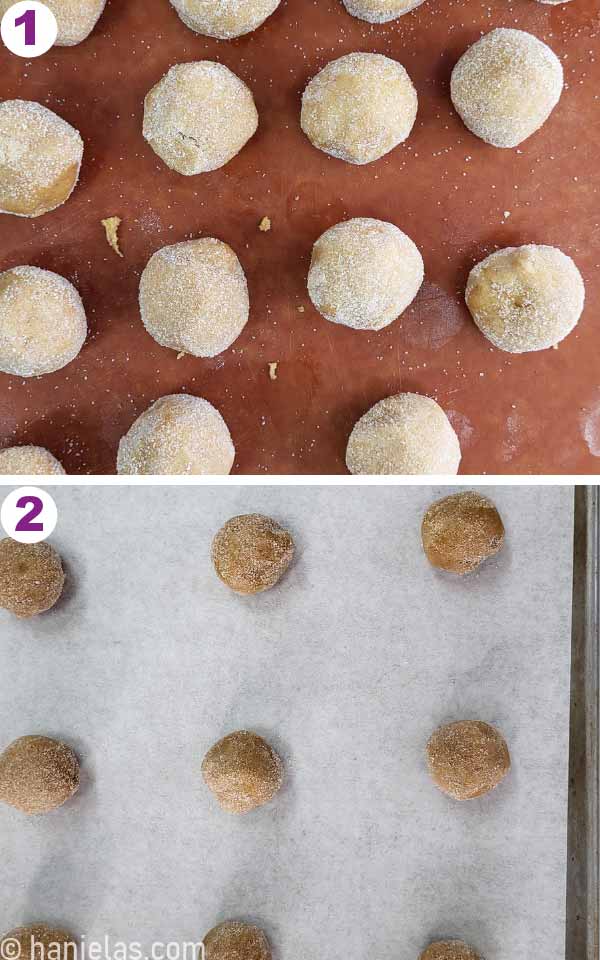
Divide the cookie into even portions, using a 1-inch cookie scoop. Finish all the dough. If the dough mounds get too soft to shape, cover them loosely with plastic wrap and chill for 10 minutes before shaping.
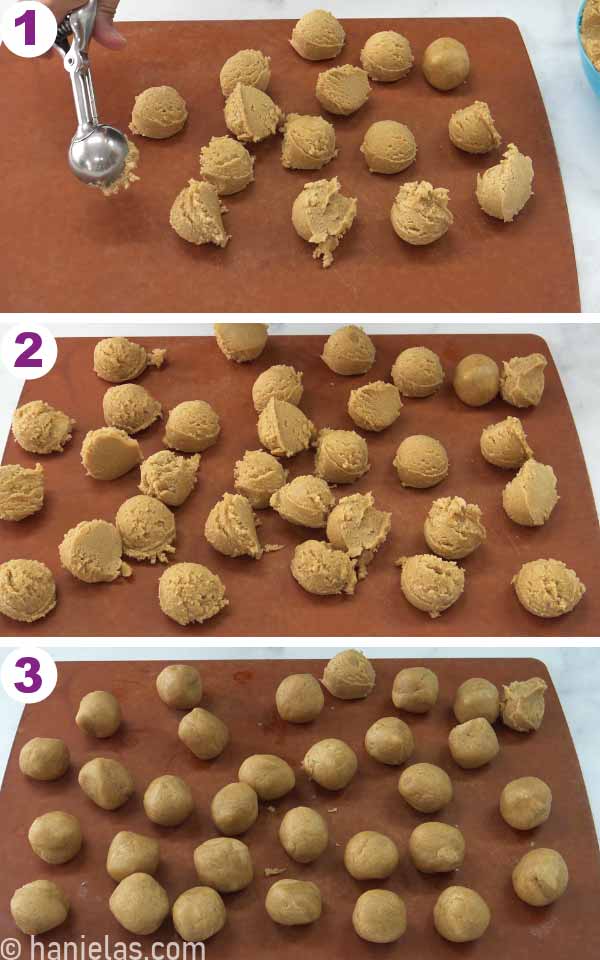
Shape the dough into smooth balls.
SUGAR COATING
I like to roll cookie balls in vanilla sugar before baking. If you don’t have Vanilla sugar use granulated sugar instead.
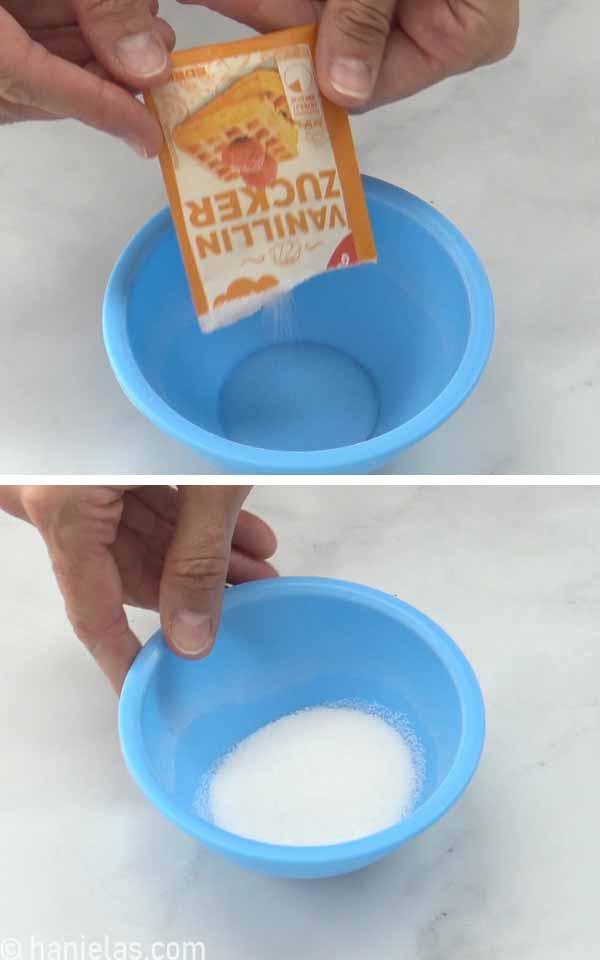
For extra flavor and texture, dip the cookie balls in Vanilla sugar or granulated sugar if you don’t have Vanilla.
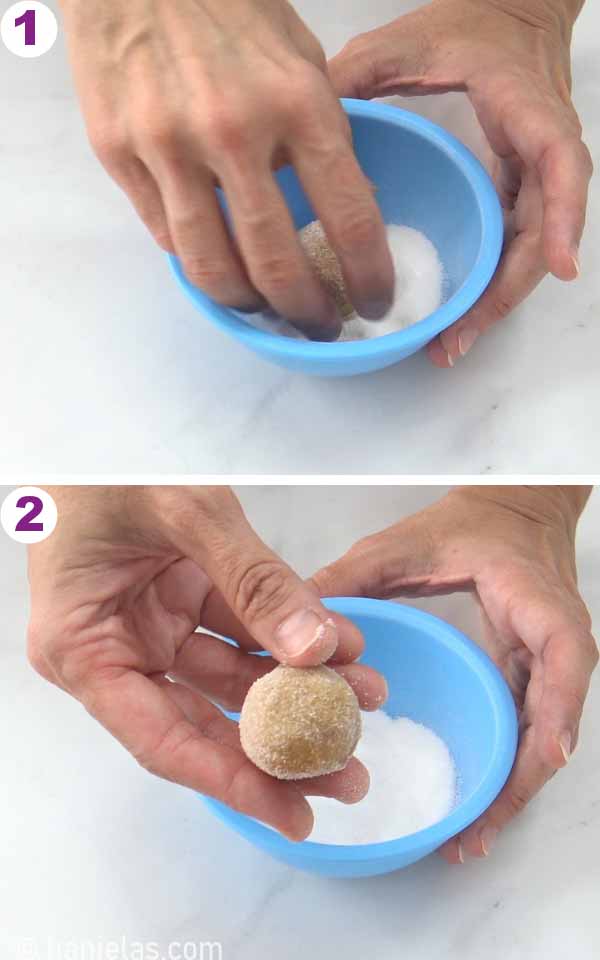
For extra crunch, try using coarse sanding sugar.
HOW TO MAKE THUMBPRINT COOKIES
Tip: If the dough feels very cold and starts cracking, let it soften for a couple of minutes before making the indentations.
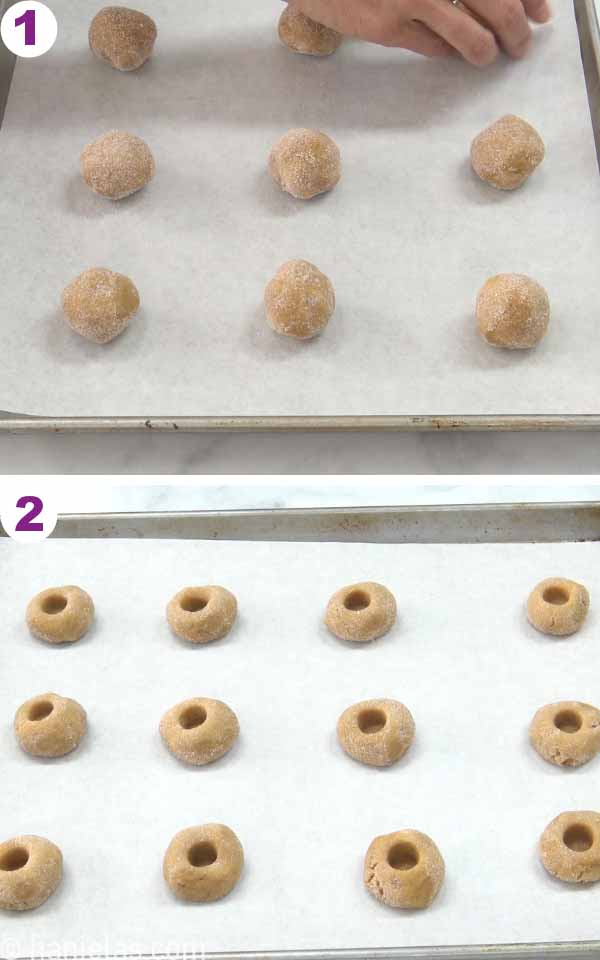
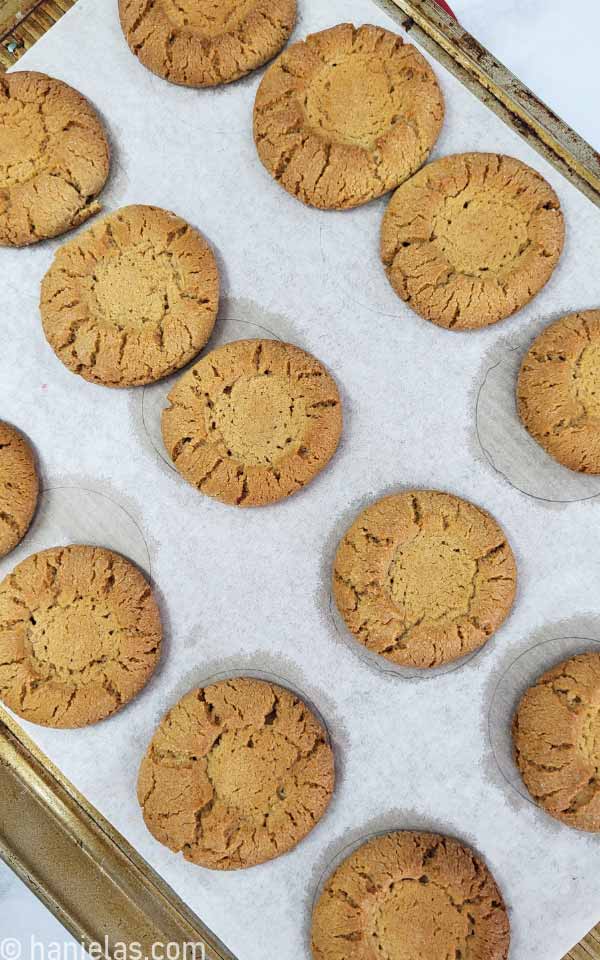
During baking, cookies spread and flatten a bit. So, place them about 2 inches (5cm) apart on a parchment-lined baking sheet.
For traditional thumbprint cookies, use your thumb and gently press the center of each ball to create a deep rounded cavity.
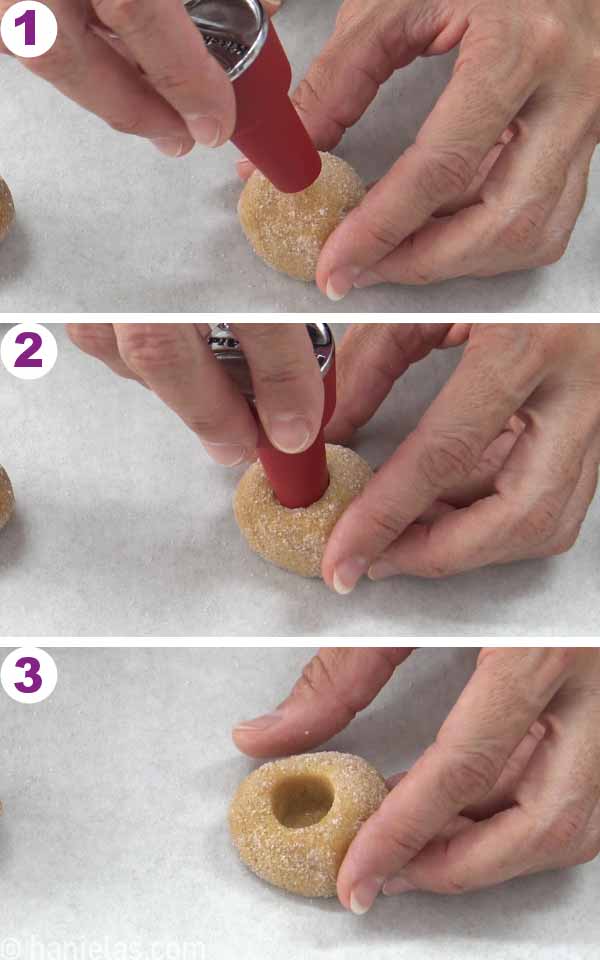
I used a wooden rod in the past to make the process easier, or you can use a wine cork wrapped in food wrap or a silicone wine stopper instead. It creates a wide, even cavity quickly, and the dough doesn’t stick.
BAKE AND COOL
Preheat the oven to 375°F(190°C). Bake the cookies until the edges are golden brown. Peanut butter cookies are easy to overbake, so don’t wait for the entire cookie to turn brown. Once the edges get darker, take them out of the oven. At first, they will be soft, so let them cool on the baking sheet for 5-8 minutes before transferring them to a cooling rack to cool completely.
FILL AND ADD CHOCOLATE
Tip: When using jam, you can use a piping bag to fill the cookies. It’s much faster, and you’ll get thru the batch of cookies quickly.
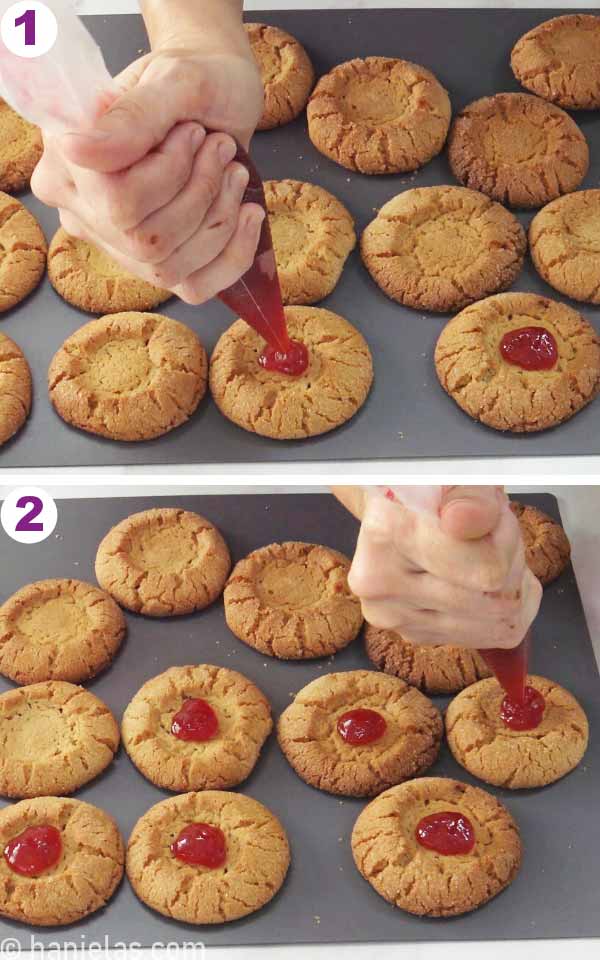
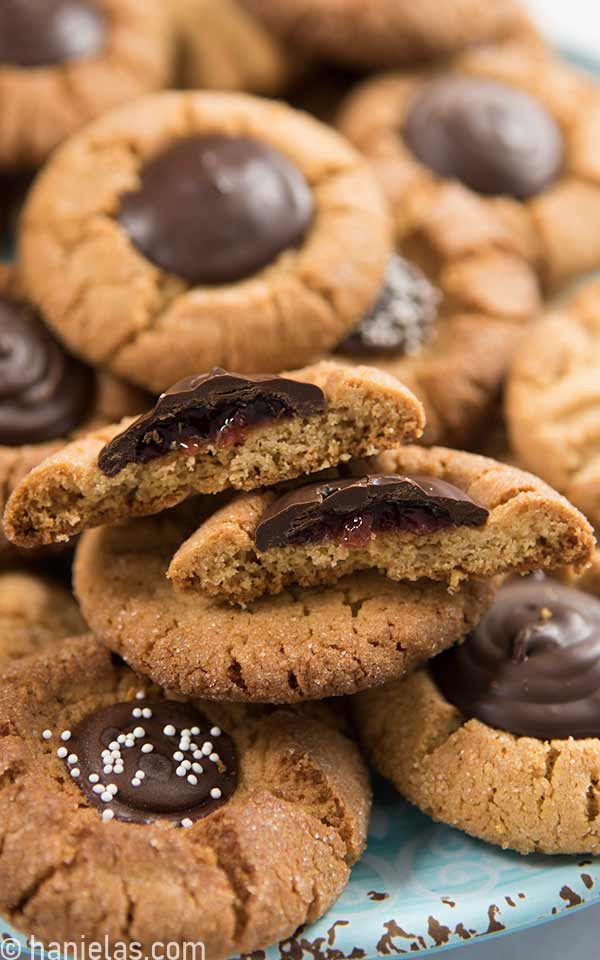
Once the cookies are cool, fill each cavity with 1/2 teaspoon of jam, fruit preserves (raspberry, cherry, apricot), or Nutella.
Cherry preserves is my favorite to use, and it’s especially delicious if you can find a kind with cherry pieces. Filling the cookies with those is unmatched. You’ll thank me later.
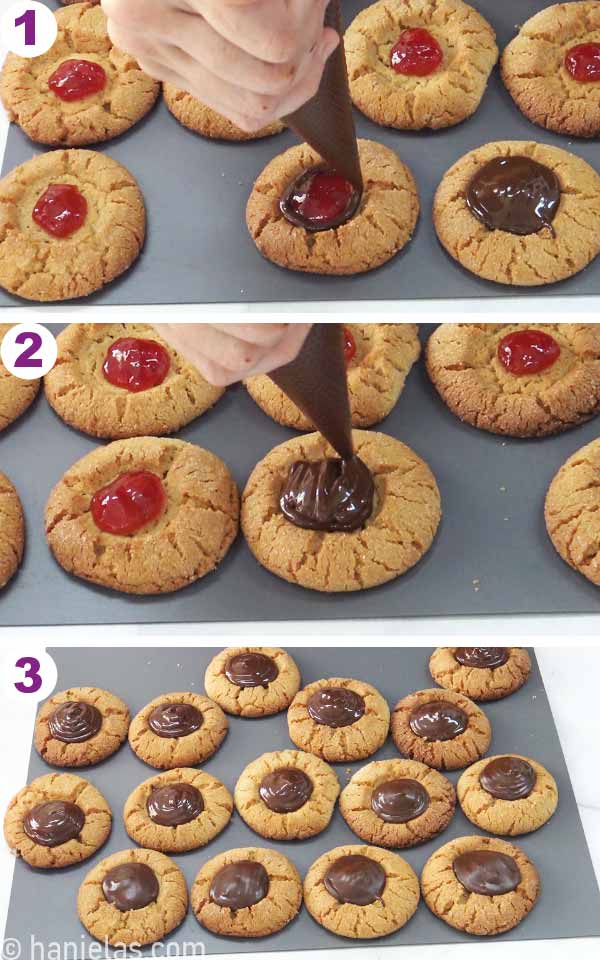
For the chocolate topping, you have several options:
- Chocolate wafers/candy melts (compound chocolate): These are the easiest to use and don’t require tempering. Just melt and use.
- Chocolate chips or a chocolate bar: You can melt these with a tiny amount of shortening.
- Couverture chocolate: This chocolate requires tempering for a shiny, firm finish.
Use a piping bag or a small sandwich bag to pipe the chocolate around the filling and over the center, completely sealing the jam inside. Or spoon the chocolate onto the cookie and gently spread it over the filling with the back of the spoon.
SUCCESS BAKING TIPS
Can peanut butter thumbprint cookies be frozen?
Yes. You can freeze cookies in an airtight, freezer-safe container for up to 3 months. Line a freezer-safe container with food wrap, and let some overlap. Stack cookies inside. Seal the opening with food wrap and close the container with a lid. Use my tips for freezing cookies.
Can I use this recipe to make peanut butter blossom cookies?
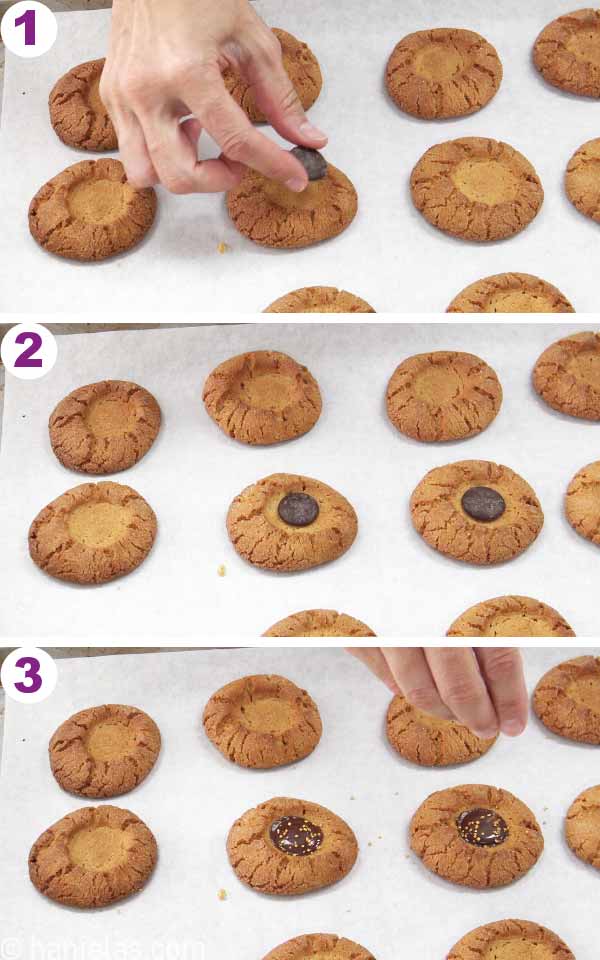
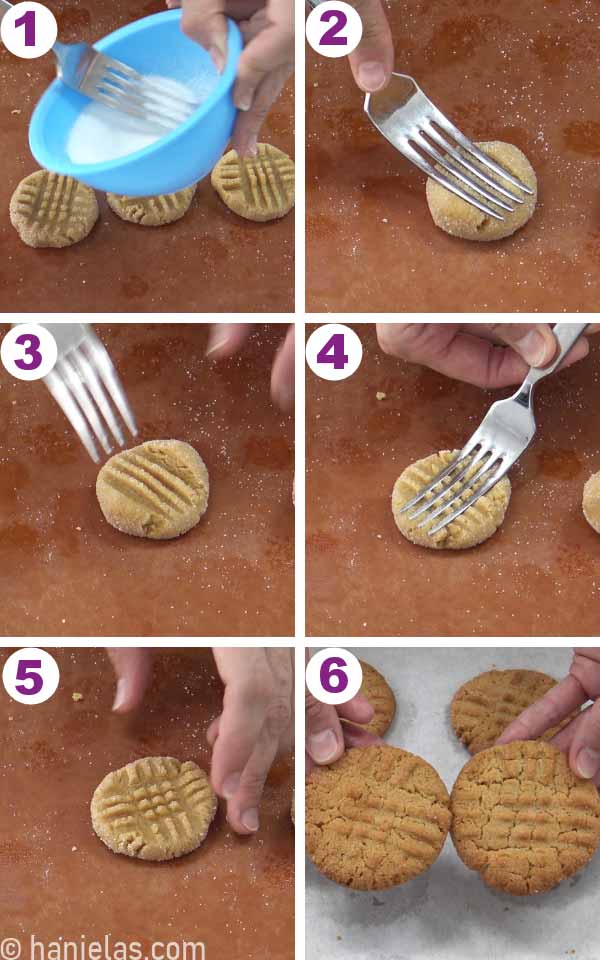
- Absolutely. If you plan to use this peanut butter cookie recipe to make peanut butter blossom cookies, don’t indent the cookies before baking. Instead, bake the sugar-rolled cookie balls. Once the cookies are baked, gently press the chocolate kiss into the middle of each cookie.
- For chocolate peanut butter thumbprints, press the chocolate pieces (chocolate chips or chocolate disks) into the cookie “well” right after you take the cookies out of the oven. Let the heat from the cookie melt the chocolate so it sticks.
How to make classic criss-cross cookies?
Simple criss-cross cookies are easy to make. Dip a fork in Vanilla or granulated sugar. Press the cookie ball with a fork, and then repeat in the opposite direction. Bake as usual, until lightly golden brown around the edges.
TASTY COOKIE RECIPES TO MAKE
- Fresh Cranberry White Chocolate Cookies
- Gingersnap Cookies
- Crunchy Egg White Walnut Cookies
- Cranberry Walnut Biscotti
- No-Bake Cookies via Cooking Classy

Peanut Butter Thumbprint Cookies
Ingredients
PEANUT BUTTER THUMBPRINT COOKIES
Cookie Dough
- 1 cup all-purpose flour (143grams)
- 1 tsp baking soda (5grams)
- 1/8 tsp salt
- 1/2 cup brown sugar, firmly packed (108grams)
- 1/3 cup granulated sugar (70 grams)
- 1/2 cup unsalted butter (1 stick, 113grams)
- 1 cup smooth peanut butter (255 grams)
- 1 large egg
- 1 tsp Vanilla Extract
Sugar Coating
- 3 tbsp vanilla sugar or granulated sugar
Fillings
- 12 oz Cherry Preserves (500grams), strained, use the cherry pieces for the filling
- Nutella, Strawberry, Raspberry Jam
Chocolate Topping
- 3 oz Dark Chocolate Chips or chopped chocolate (340grams)
- 3 oz Milk Chocolate Chips or chopped chocolate (340 grams)
- 2 tbsp Crisco
Instructions
PEANUT BUTTER THUMBPRINT COOKIES
Peanut Butter Cookie Dough
- In a medium bowl, sift together flour, salt, and baking soda, and combine using a whisk. Make sure baking soda is well distributed in the flour.
- In a bowl of your mixer, beat butter for 30 seconds, then add both sugars and beat until well combined, about 4 minutes, add all the peanut butter, and beat until smooth.
- Add the eggs, scrape the bowl in the beating process, and add vanilla extract.
- On low speed, add flour in 3 additions to your peanut butter mixture, and mix until incorporated.
- Scrape the dough into a plastic container or another smaller bowl, seal and refrigerate overnight or for at least 1 hour. If in a hurry, place the dough to chill in the freezer until firm and not sticky.
Bake Cookies
- Preheat oven to 375F (190C). Line baking sheet with parchment paper.
- Take your cookie dough out of the fridge or freezer.
- You want the cookie dough to be cold, it is easier to handle when it is cold, when it gets warm it will become sticky.
- With a 1-inch cookie scoop, measure the cookie dough. Place mounds of cookie dough onto a plate. Then roll each piece of cookie dough to shape a ball. Coat each ball in vanilla or granulated sugar.Transfer cookie dough balls onto a baking sheet, leaving about 2 inches between cookie balls. Calculate about 10-12 cookies per large baking sheet.
- Spray a wooden spoon handle with a nonstick spray or grease it with a little oil and make an indentation in the middle of each cookie ball. Alternatively, if you don't want to make thumbprint cookies, use a fork and make a criss-cross pattern with a fork.
- Bake cookies until edges are golden brown, for about 10 to 12 minutes, rotate pans at half time.
- Remove cookies from the oven, let them cool slightly on the baking sheet, transfer them onto a cooling rack and cool completely.
- At this time, you can either freeze the cookies for later use or you can fill them and enjoy them right away.
Fill Cookies
- Cherry or other Fruit Preserves – heat the cherry preserve until warm and fluid. Strain it thru a mesh sieve to separate the fruit from the juices. Place cherry pieces on the top of your baked cookies, where you see a little "pot hole" in the middle of the cookie.
Chocolate Topping
- Place chocolate and Crisco in a heat-safe bowl (tempered glass or stainless steel). Put the bowl on top of the pot with simmering water. Don't let the simmering water touch the bottom of the chocolate bowl. Stirring, melt the chocolate.
- Don't use damp utensils or bowls when working with chocolate any trace of water will ruin your chocolate.
- Once the chocolate is melted, let it cool a little till the chocolate is "lava" consistency, you don't want it to be too runny or too thick.
- Using one teaspoon, gently smooth out melted chocolate on top of the cherries you just placed on the baked peanut butter cookies. Let cool completely or place in the fridge for the chocolate to harden.
- Store in an airtight container in the cool room, layered between pieces of wax paper.
- Filled cookies will be good for about 3-4 weeks.
Video
Notes
- Can I freeze peanut butter cookies? – Yes, you can freeze cookies for up to 3 months.
This recipe was originally published on December 21st, 2010. On November 23rd, 2022, I updated this recipe with new step-by-step pictures, written instructions, and a video.

Hi, I’m Hani
Welcome!
Thank you for visiting Haniela’s. On my blog, you’ll find delicious sweet & savory recipes made with simple ingredients. Why not start a new adventure? Discover a world of cookie decorating with my step-by-step tutorials.

Hi, I’m Hani
Welcome!
Thank you for visiting Haniela’s. On my blog, you’ll find delicious sweet & savory recipes made with simple ingredients. Why not start a new adventure? Discover a world of cookie decorating with my step-by-step tutorials.



Hi, can I just leave them unfilled & do the criss cross pattern?
Hi Lisa,
yes, absolutely.
These are my kind of jewels! 🙂
Yummy. These look delicious!
Totally delicious and so yummy! I'm definitely bookmarking this! 😀