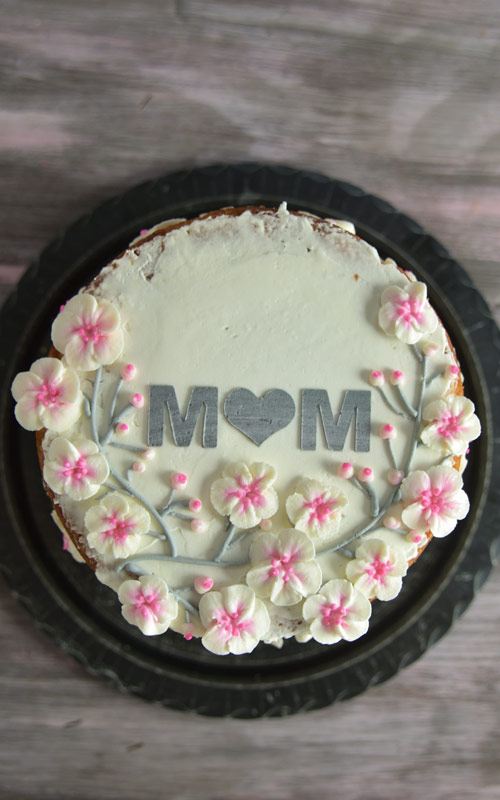
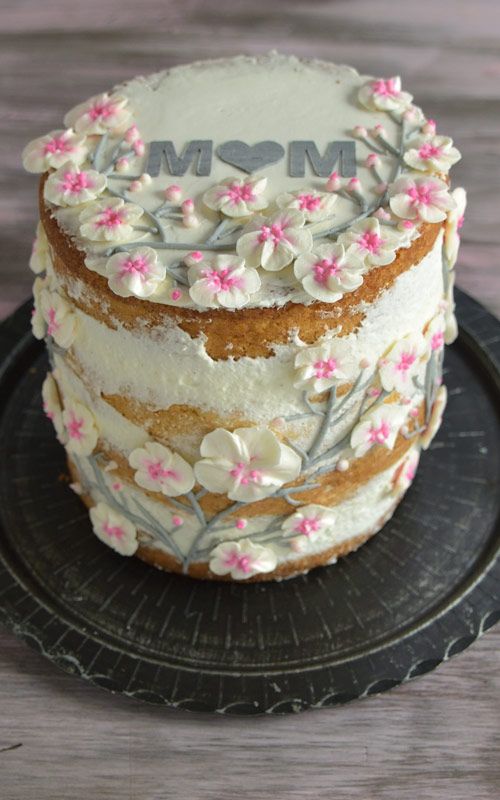
Mother’s Day Cherry Blossom Cake Tutorial |Video|
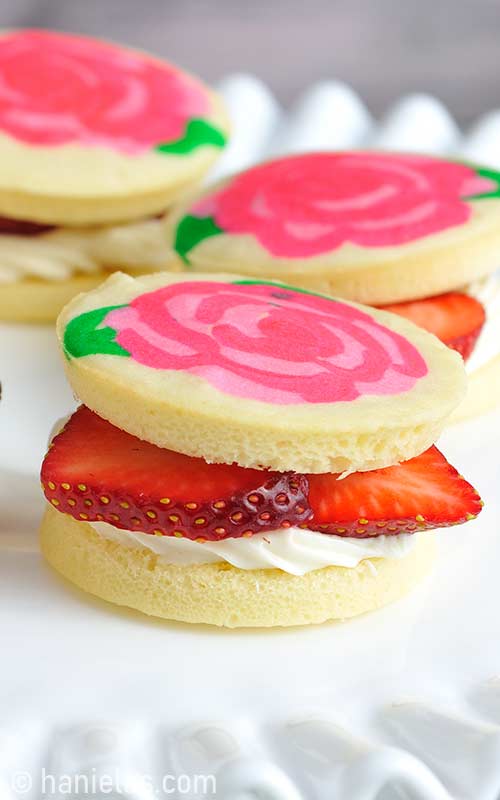
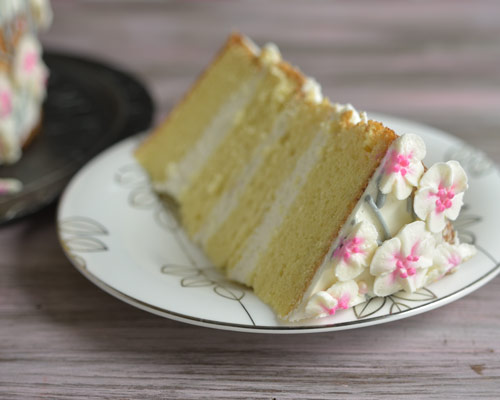
This cherry blossom cake is all about light texture, simple elegance, and beautiful details. Made with a soft sponge cake and lightly frosted with whipped cream, it has a delicate, airy feel that pairs perfectly with fresh fruit.
WHY I LOVE THIS CAKE
- Light and soft -This cake is soft and delicate, made with my easy sponge cake and filled and frosted with whipped cream, which pairs perfectly with its airy crumb.
- Minimalist naked cake design – A simple naked cake style keeps the look elegant and lets the cake’s natural beauty shine.
- Delicate cherry blossom decorations – I adore dainty buttercream cherry blossoms! They look incredibly appealing on cakes or cookies. Their soft, delicate petals and gentle pink hues add a perfect finishing touch to any celebration cake, from a birthday cake to a Spring or wedding cake, or for Mother’s Day.
- Easy to prepare – No need for advanced piping skills; if you decide to skip piped flowers, you can create a similar look by piping clusters of pink dots, similar to these simplified Pink Ribbon Cookies.
- Perfect with fresh fruit – One of my favorite ways to serve sponge cake is with fruit. Sponge cake and whipped cream complement fresh fruit beautifully. Berries are wonderful, but don’t shy away from more exotic fruits like kiwi or pineapple.
- Make ahead – When well covered, the cake keeps nicely in the fridge for 5–6 days.
RECIPES AND TOOLS YOU NEED
- Cake and Filling
- Easy Sponge Cake: bake 2 – 6-inch cakes
- Stabilized Whipped Cream
- Whip It Stabilizer: can be used as a quick alternative for gelatin when making Stabilized Whipped Cream
- Simple Syrup (optional): brush each layer with cooled flavored simple syrup
- Spatula: to spread filling and smooth the icing on the sides
- Piped Cherry Blossom Flowers
- Swiss Buttercream or American Buttercream to make piped flowers
- Food Colors
- Piping Bags – you need these to make flowers
- Couplers – these are great if you need to replace piping tips on a single piping bag
- Piping Tips: Petal Tips #103 #104 #102 , Small Round Tips #2 #1
- Parchment or Wax paper squares – attach it onto a flower nail
- Flower Nail – a tool that looks like an oversized nail, I used it to make piped flowers
- Mom Stencil – optional
This post contains Amazon affiliate links that earn me a small commission, at no cost to you. I only recommend products that I use and love. Learn more about my affiliate policy here.
TORTE AND FILL THE CAKE
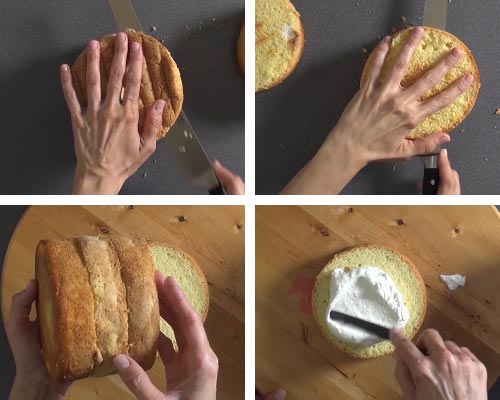
Once the cakes cooled, I filled them with vanilla-stabilized whipped cream. It’s simple to make, light, and always a favorite. You can also color it with food coloring if you’d like. To help it hold its shape, I add a bit of gelatin, which keeps it from becoming too soft or weeping. You can also use a ready-made stabilizer like Whip It. I’ve made cakes with stabilized whipped cream 3-4 days in advance with great results and no weeping.
If you’re not familiar with a naked cake design, it’s basically any cake with lightly frosted sides, where cake layers and filling are clearly visible. Once you’ve filled the cake and lightly frosted the sides, cover it and refrigerate for a few hours. Chilling helps the stabilized whipped cream set properly.

CHERRY BLOSSOM FLOWERS
To make buttercream cherry blossoms, I like to use American buttercream or Swiss meringue buttercream, with Swiss buttercream being my favorite for piping flowers.
Colors
To make flowers, I used white, light pink (flower petals), and deep pink (flower center- little clusters of dots in the middle of the flower)
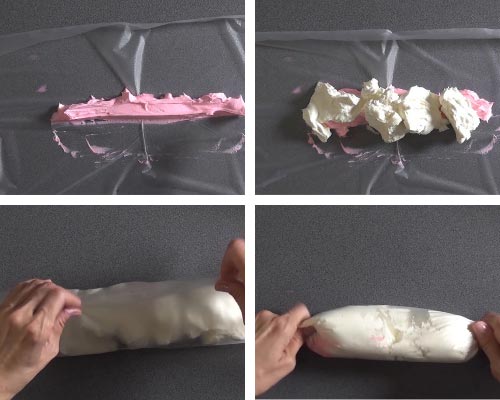
Layering
To achieve a variegated look, you can stripe the inside of the piping bag or use the layering method shown below.
- Layer pink and white buttercream onto a plastic wrap.
- Keep in mind we only need a little bit of pink buttercream and more white buttercream.
- Pink buttercream will come out through the wide part of the petal piping tip, and it will be in the center of the flowers.
- Form a pouch.
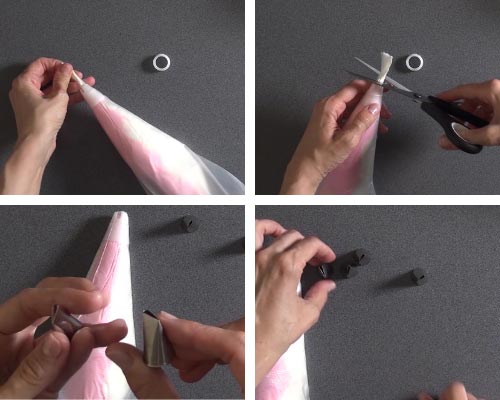
Piping Tips
Using flowers of different sizes to decorate a cake creates a dynamic that conveys a more realistic look.
- Use at least 2 Petal Piping Tip Sizes #103 #102 or #101
- Fit the piping bag with a coupler.
- Thread the end of the buttercream pouch through, trim the end.
- Screw on a Petal Piping Tip.
- Having the coupler in place allows you to easily replace piping tips as needed.
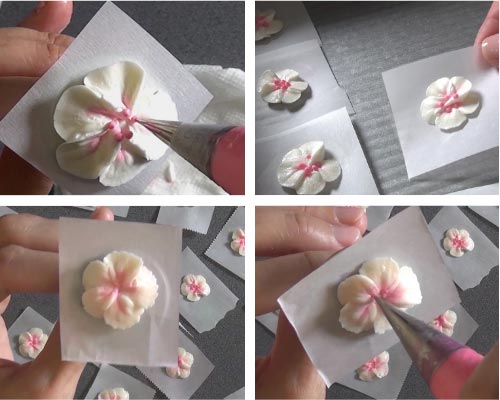
Pipe the Flower Petals
I love variagated cherry blossom flowers. A touch of color enhances the flowers, bringing them to life.
- We are making 5-petal flowers. The center of which will be light pink.
- To ensure the center is pink, pay close attention to the petal tip and the alignment of colored buttercream. Turn the piping tip so that the pink buttercream in the piping bag aligns with the wider part of the Petal Piping Tip.
- You also need darker pink buttercream to make the flower centers. Fit the piping bag with a Round Piping Tip # 1 or #2.

- Squeeze the piping bag and watch the buttercream come out. Stop when you see both colors coming out.
- Use a flower nail. Pipe a little bit of buttercream onto a flower nail. Attach a square of parchment or wax paper.
- Hold the bag at about a 45-degree angle, with the wide part of the petal tip facing the center.
- Pipe the first petal, move the piping bag clockwise, let the buttercream fan out as you simultaneously turn the flower nail counterclockwise. Move the piping tip (narrow end of petal tip is facing the edge of the flower nail) towards the edge of the flower nail. Then, change the direction, moving it inward toward the center, while slowly turning the flower nail. Repeat 5 times.
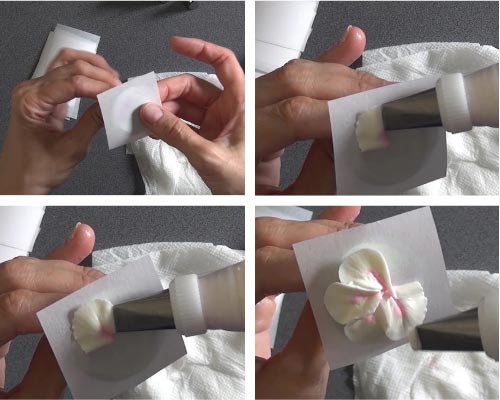
- With a darker pink, pipe the dots in the center of the flower.
- Then carefully lift the parchment square and place the flower onto a freezer-safe tray.
- Repeat. Place all buttercream flowers onto a flat tray.
- Freeze flowers for an hour, or till ready to use.
- If making piped flowers ahead of time. Freeze flowers till solid and then store them in an airtight freezer-safe container for up to a week.
STENCILING
- Color buttercream with a tiny bit of black gel food coloring.
- If using Swiss Buttercream, follow my easy tips on How To Color Swiss Buttercream.
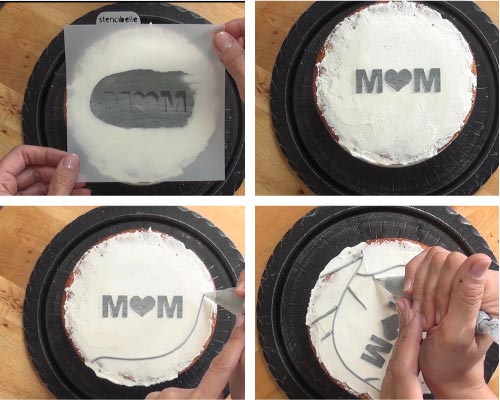
- Place the stencil on a chilled cake. Spread gray buttercream over the stencil.
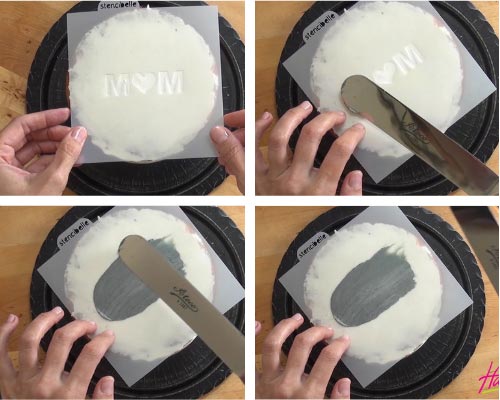
- Carefully lift the stencil.
- Using a piping bag filled with a gray buttercream and fitted with Piping Tip #2 and #1, pipe the branches.
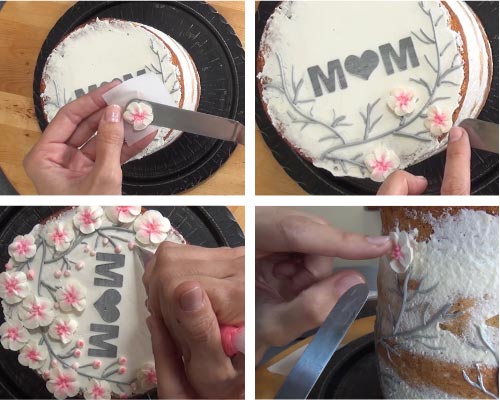
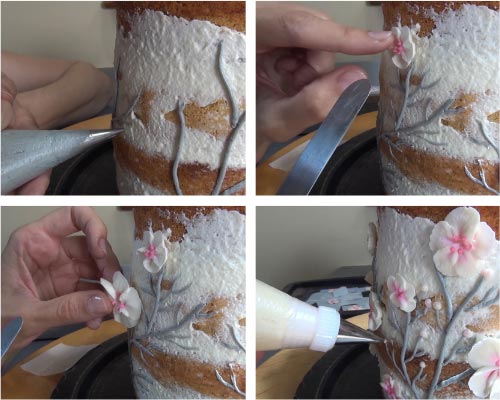
DECORATE WITH FLOWERS
To finish the cherry blossom cake design, we need to attach frozen buttercream flowers onto the cake. Carefully remove frozen buttercream cherry blossom flowers from the parchment and attach them to the cake. Use room temperature buttercream to glue the flowers onto the sides and top.
To make flower buds: pipe a small dot of white buttercream, and then use pink buttercream and pipe a dot in the middle of white.
Refrigerate until ready to serve. All to soften for 20-30 minutes, then serve.
PIN IT for later
WATCH VIDEO

Hi, I’m Hani
Welcome!
Thank you for visiting Haniela’s. On my blog, you’ll find delicious sweet & savory recipes made with simple ingredients. Why not start a new adventure? Discover a world of cookie decorating with my step-by-step tutorials.

Hi, I’m Hani
Welcome!
Thank you for visiting Haniela’s. On my blog, you’ll find delicious sweet & savory recipes made with simple ingredients. Why not start a new adventure? Discover a world of cookie decorating with my step-by-step tutorials.