Meringue Pretzel Sticks
It’s no secret I love all things meringue. Today I’ll share with you step by step how to make these pretty Rainbow Meringue Pretzel Sticks.
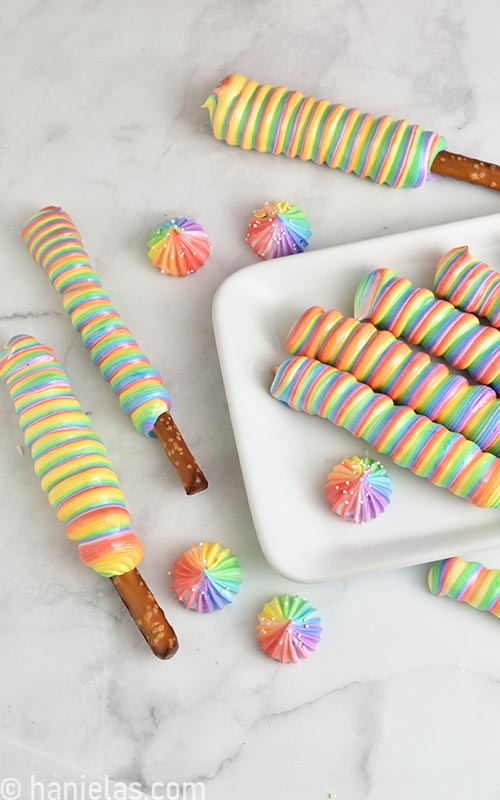
HOW TO MAKE RAINBOW MERINGUE PRETZEL STICKS
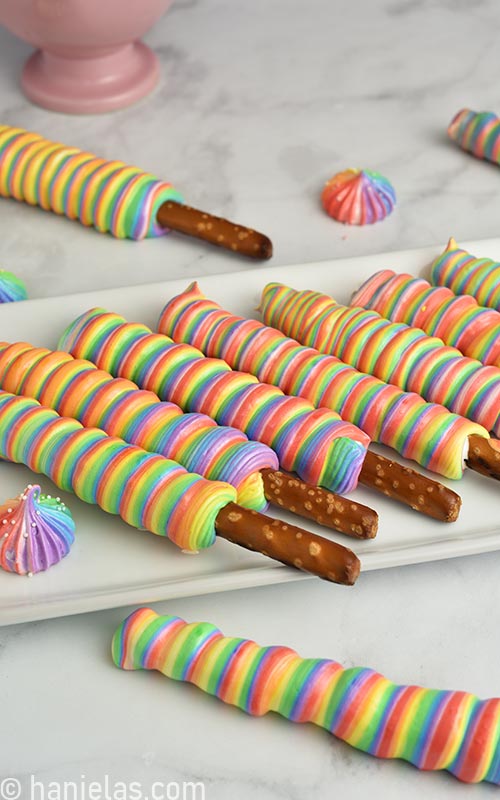
I saw variations of these cute meringue pops on instagram and wanted to try them for the longest time. They combine 2 of my favorite things : pretzels and meringues!
INGREDIENTS
- Stiff, glossy meringue made with egg whites, cream of tartar or lemon juice/vinegar, sugar, starch and extracts
- Pretzel Rods – I used thick rods, you can use thinner ones, too
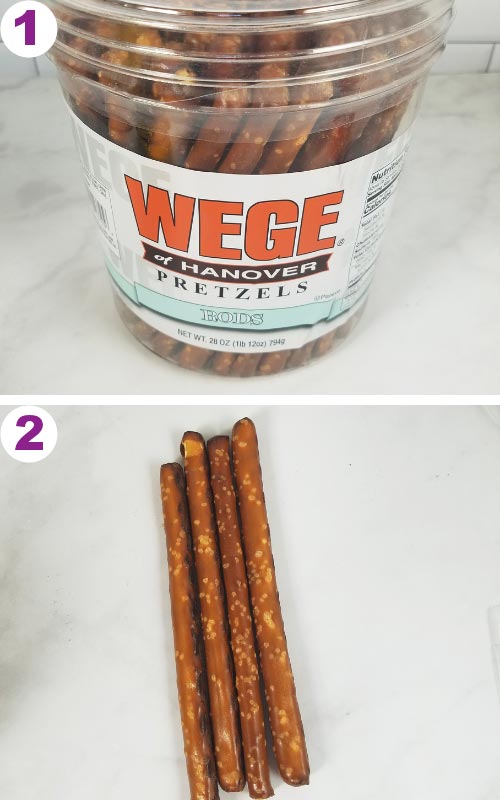
PRETZEL STICKS
You can use any pretzel sticks you’d like. I found out that it’s best when they are not too wonky, straight ones are the best. It’s probably also easier to pipe meringue on thinner pretzel sticks but then they can break so easily.
I used Hanover Pretzel Rods. They are also great for making chocolate dipped pretzel rods.
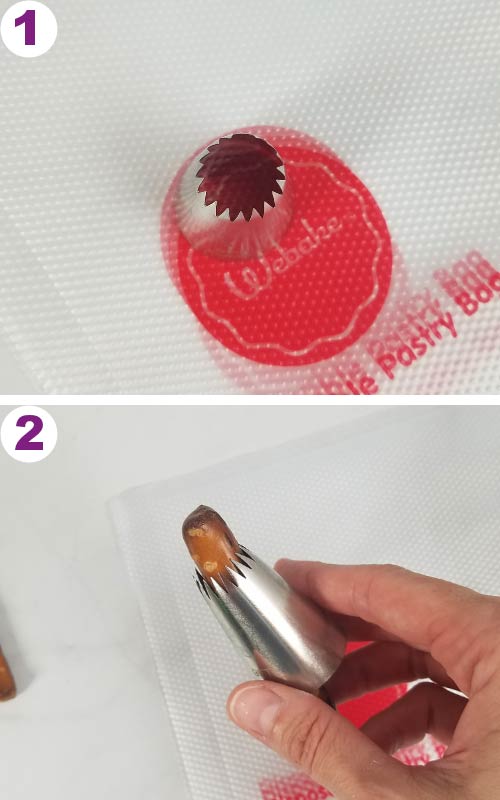
STAR PIPING TIP
To pipe meringue onto the pretzel sticks you’ll need a piping bag and a Star Piping Tip – I used Star Tip 8B. Cut a tip off the piping bag and fit the piping tip inside, (steps 1-2).
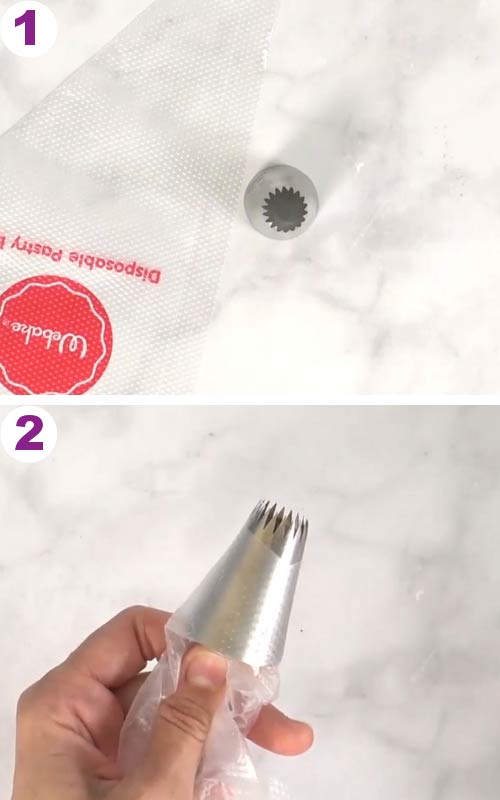
Opening on the piping tip needs to be large enough for the pretzel rod to go thru, (step 1-2).
DRILL
I’ve always wanted to use a drill for baking and this was the perfect project for it. I figured, I’d probably twist my arm trying to pipe the meringue and turn the pretzel rod at the same time. And that’s why I decided to use a drill, to help me turn the pretzel rod while piping the rainbow meringue.
TIP : Be sure to wipe the drip well with a clean damp cloth. And cover the drill’s chuck with a few layers of food wrap.

STEP 1 – PREPARE MERINGUE
To prepare meringue I always wipe the bowl and utensils with vinegar and dry paper towel. This removes any greasy residue that can affect meringue.

Into a clean, heat proof bowl add egg whites, sugar and cream of tartar or vinegar/strained lemon juice.
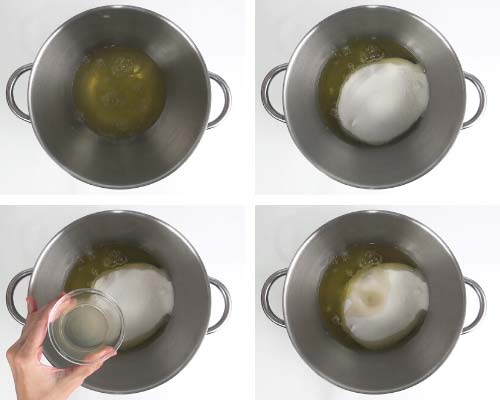
Fill a pot with 1 to 2 inches water, making sure bottom of the bowl with egg whites is not touching the water when it sits on the pot. Bring water to simmer and place bowl with egg whites on the pot. Stirring with a whisk constantly, heat the egg whites until all of the sugar is completely dissolved.
TIP : Rub the mixture between your fingers, when mixture is completely smooth and you don’t feel any sugar particles you can remove bowl from the heat and start beating the meringue. Mixture at this point will look soapy.
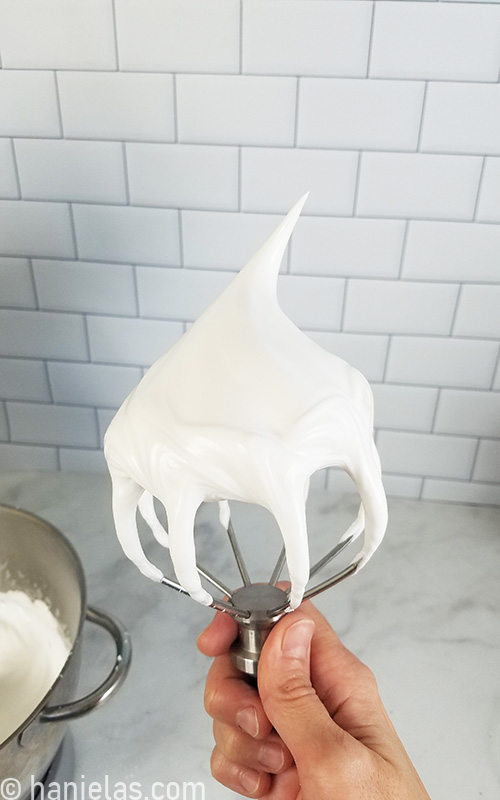
Start beating at the low speed and then increase it to medium high. Don’t beat meringue at very high speeds. Beat until medium peaks are formed. Then add alcohol or water based flavorings and after beat in starch. Continue beating until stiff peaks are formed.
TIP : Meringue should be glossy and smooth. If your meringue is grainy looking it is probably a result of over beating.

Glossy and stiff meringue should look something like this.
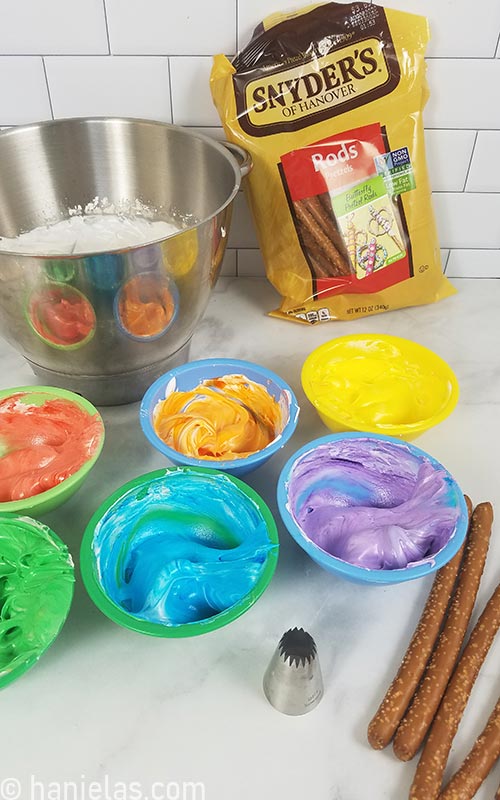
STEP 2 – COLOR MERINGUE
Instead of coloring all of the meringue I spooned about 2/3 cup of white meringue into 6 bowls. I left remaining meringue uncolored. Add few drops of concentrated gel color to each bowl and fold the color into the meringue with a spatula, (steps 1-3).
I can hear your question : ” Why don’t you just stripe the piping bag with food coloring? ” I rather not. The truth is I don’t like using straight from the bottle gel color to stripe the piping bag. I’ve tried it and I’m just not a fan. I feel like color has to be first mixed with other medium before it can be used to stripe the bag.
TIP : Make sure to fold the color in, try not to stir too much so meringue doesn’t deflate too much.

STEP 3 – MAKE MERINGUE FOOD WRAP POUCH
This looks complicated! It’s not. Really. Trust me.
Layer few pieces of food wrap on your work surface. Spread strips of colored meringue onto the food wrap. Please try to go in the order of rainbow or online rainbow police will get you! (steps 1-4)
Now spread remaining white meringue on top of the rainbow layer, (steps 5-8).

With both of your hands pick up one side of food wrap and fold it over to the other side, (steps 1-3). Twist the ends and tie one end, (steps 4-8).
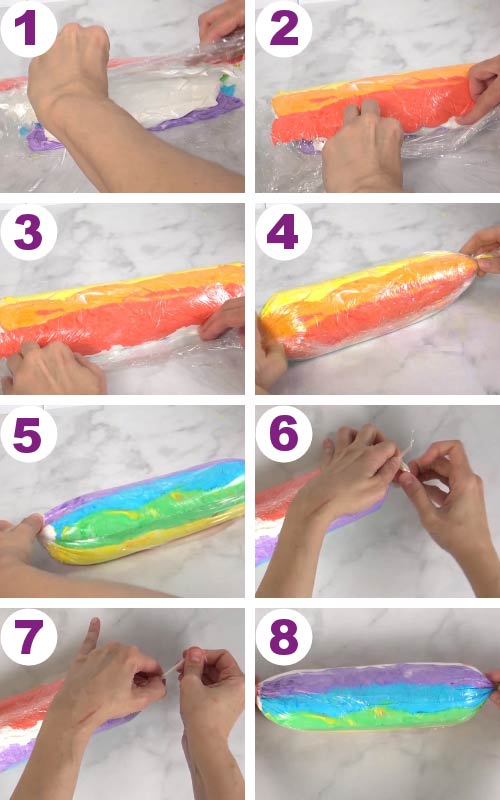
Gently push down the meringue on the open side of the pouch and trim the food wrap, (steps 1-4). With the cut side down place the meringue pouch into a piping bag (I used 16 inch piping bag). Increase pressure on the piping bag and start piping meringue.

STEP 4 – PIPE MERINGUE ONTO PRETZELS
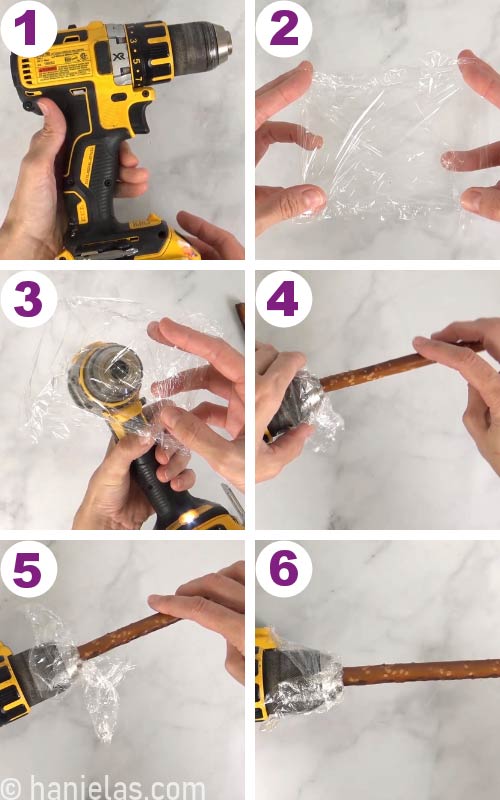
Prepare the drill. Wipe down the dril with a damp cloth. Then place couple of layers of food wrap over the chuck/nose of the drill, (steps 1-3). Carefully insert the pretzel rod and very gently tighten the opening to ensure pretzel rod stays in place. Don’t tighten it to much so you don’t crush the pretzel rod, (steps 4-6).
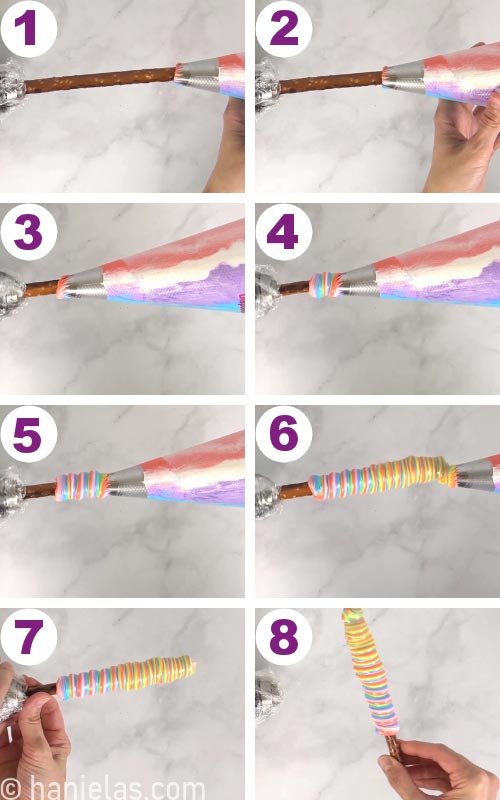
Here comes the fun part. Insert the pretzel rod into the piping bag. Keep it straight, (steps 1-2). Slowly start putting pressure onto the piping bag, (step 3). Start piping about 1 1/2 inches from the end of the rod to leave some space for the fingers to hold the stick, (step 4).
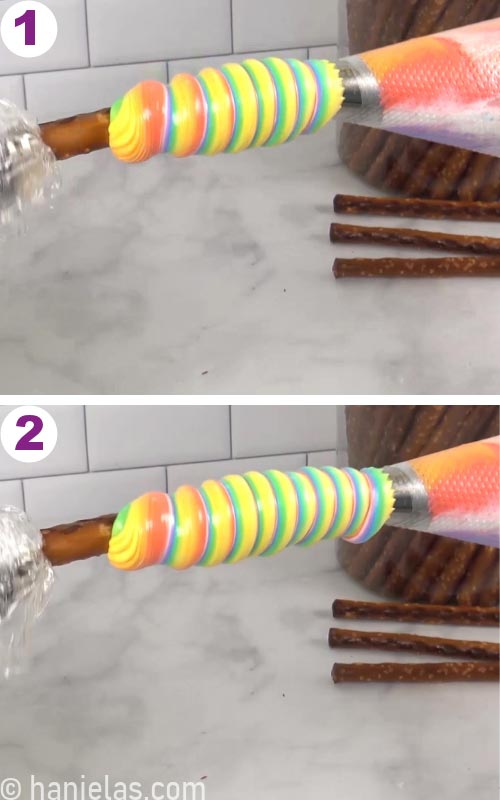
With your other hand gently press the trigger and watch the pretzel rod turn slowly. As you are piping meringue also move the piping bag away from the drill to cover the whole pretzel rod with a pretty rainbow meringue layer, (steps 5-8).
TIP : Keep pretzel straight, so it’s somewhere in the middle of the piping bag filled with meringue.
STEP 5 – BAKE MERINGUE PRETZEL STICKS
Place pretzel sticks with freshly piped meringue on a baking sheet lined with parchment. Bake rainbow meringue pretzel sticks 175F for 3-4 hours. After, turn off the oven and let the cookies cool completely in the oven.

Carefully remove meringue pops from the parchment and store immediately in an airtight container.

STEP 6 – HOW TO STORE MERINGUE PRETZELS STICKS
I like to store my meringues layered between pieces of parchment and along with a small bowl of raw rice or food grade silicate gel packets.

TIP : Food grade silica gel packets and raw rice help absorb excess moisture, keeping meringues crisp.

HOW LONG DO MERINGUE PRETZELS LAST?
Stored properly they will be good for 3-4 weeks.

WHAT KIND OF PRETZELS CAN I USE?
Any kind you like, really. But I’d say use straight sticks instead of wonky ones.

MORE DELICIOUS MERINGUE INSPIRATION
- Hydrangea Meringue Cookies
- Pink Meringue Roses
- Hazelnut and Meringue Chocolate Cake
- Raspberry Meringue Tarts
- Succulent Meringue Wreath Cake
This post contains Amazon affiliate links that earn me a small commission, at no cost to you. I only recommend products that I use and love. Learn more about my affiliate policy here.
TO MAKE RAINBOW MERINGUE PRETZEL STICK YOU NEED
- TOOLS
- Get all the tools in my Amazon Shop
- Stand or Hand Held Mixer to make the meringue
- Star Tip 8B
- Piping Bag
- Food Wrap
- Food Gel Colors – I used Americolor Brand
- Drill
- Parchment Paper
- Baking Sheets

Rainbow Meringue Pretzels
Ingredients
RAINBOW MERINGUE PRETZEL STICKS
- 6 egg whites
- 1 1/2 cup granulated sugar
- 1 tsp cream of tartar or 2 tsp strained lemon juice
- 2 tbsp cornstarch
- 1 tsp Vanilla Extract
- 1 tsp Almond Extract
Instructions
RAINBOW MERINGUE PRETZEL STICKS
Prepare Meringue
- Into a clean heat-resistant bowl, pour egg whites ( 6 egg whites), add cream of tartar (1 teaspoon) or lemon juice/vinegar (1 teaspoon), and whisk in granulated sugar (1 cup and 1/2 cup, 300 grams). Heat mixture over a pot with simmering water, stirring with a whisk constantly. Heat until all of the sugar is completely dissolved. The mixture will look white, soapy, and hot to the touch—about 5 minutes.Rub the mixture between your fingers to test if the sugar is dissolved. Once it's smooth, you can remove it from the heat.
- Transfer to a stand mixer or use a handheld mixer. Beat at medium speed and gradually increase to medium-high. Beat until stiff peaks are formed, then beat in Vanilla Extract (1 teaspoon) and cornstarch (2 tablespoons). Your meringue is now ready to be used.
Make Rainbow Meringue
- Spoon about 2/3 cup of the stiff white meringue into six bowls—color meringue with gel food colors.TIP: Use gentle folding to the color meringue; stirring will deflate the meringue considerably.
Prepare Rainbow Meringue Pouch
- Layer a few pieces of wood wrap on a work surface. Then spread colored rainbow meringue onto the food wrap. Follow the order of the rainbow from red to purple. Then spoon and spread the remaining white meringue onto the rainbow layer. Form a pouch. Lift the end of the food wrap away from you and fold them over, so you form a pouch. Twist the ends and tie one end.
Prepare Piping Bag
- Fit a large 16-inch piping bag with a star tip 8B. The tip needs to be large enough so the pretzel stick can go thru it. Trim the untied side of the meringue pouch and insert it into a piping bag. Gently push down the meringue in the piping to get
Pipe Meringue onto Pretzel Sticks
- Pipe rainbow meringue onto the pretzels. Insert the pretzel rod into the piping bag thru the piping tip. Keep the pretzel stick straight, so it doesn't touch the walls of the piping bag. Pipe meringue on the stick while slowly turning it with the other hand, or use a drill as suggested in the blog post.
Bake Rainbow Pretzel Sticks
- Bake meringue at 175F for 3 hours, then turn off the oven and leave it until it cools. Then store immediately in an airtight container. See recipe notes for more storage ideas.
Notes
- HOW TO STORE MERINGUES? – Store meringue immediately after cooling in an airtight container, layered between pieces of parchment. I like to store mine with a small bowl of raw rice or food-grade silica gel packets.
- CAN I USE OTHER FLAVORS? – Sure, you can use other flavorings, but be sure to use water- or alcohol-based flavorings.

Hi, I’m Hani
Welcome!
Thank you for visiting Haniela’s. On my blog, you’ll find delicious sweet & savory recipes made with simple ingredients. Why not start a new adventure? Discover a world of cookie decorating with my step-by-step tutorials.

Hi, I’m Hani
Welcome!
Thank you for visiting Haniela’s. On my blog, you’ll find delicious sweet & savory recipes made with simple ingredients. Why not start a new adventure? Discover a world of cookie decorating with my step-by-step tutorials.

How long will they last stored? Will the pretzels get soggy?
Hi Kay,
Pretzels didn’t get soggy. I kept them for a week in an airtight container with a small bowl of raw rice to absorb moisture, it helps to keep them crisp.
You are a freakin genius!! Lol I can not wait to try this meringue pretzels recipe! So pretty!! Thank you for the tutorial!
Thank you so much Ansa.
Wow! A new fangled way to cover pretzel sticks! I have a hand drill just like yours. I will be trying this one for sure! Thanks so much for your creative inspiration!
Hi Avis, glad you like them. Let me know how it goes when you try it. Happy New Year.