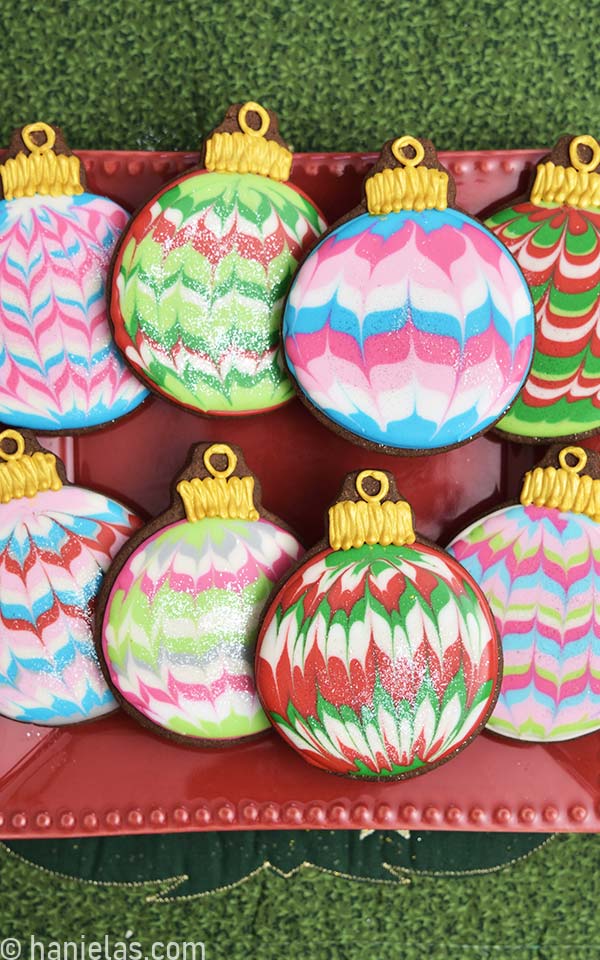
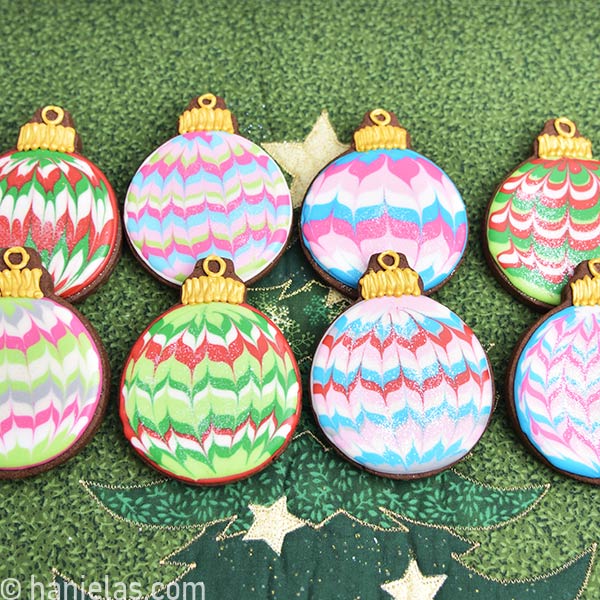
Marbled Christmas Ornament Cookies
Today I’m going to show you how to decorate festive Marbled Christmas Ornament Cookies for holidays in a pinch. With this easy royal icing decorating technique you’ll create cookies that will be the talk of the holiday party. Let me show how to make them.
updated post form 2018
HOW TO DECORATE MARBLED CHRISTMAS ORNAMENT COOKIES
Making beautiful cookies doesn’t have to take hours. Royal icing marbling is one of those easy and effective techniques you can use when you don’t have a whole day to create stunning cookies.
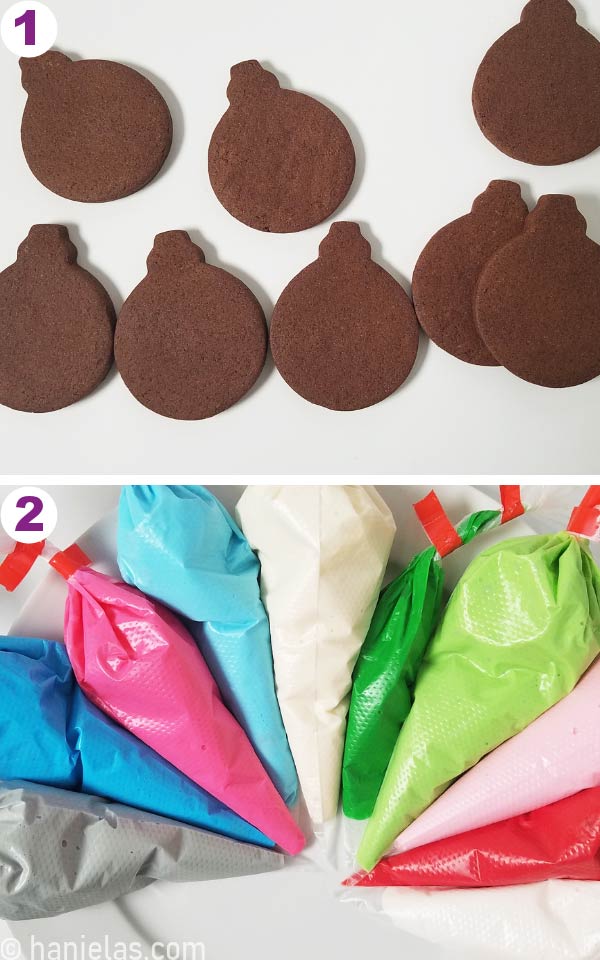
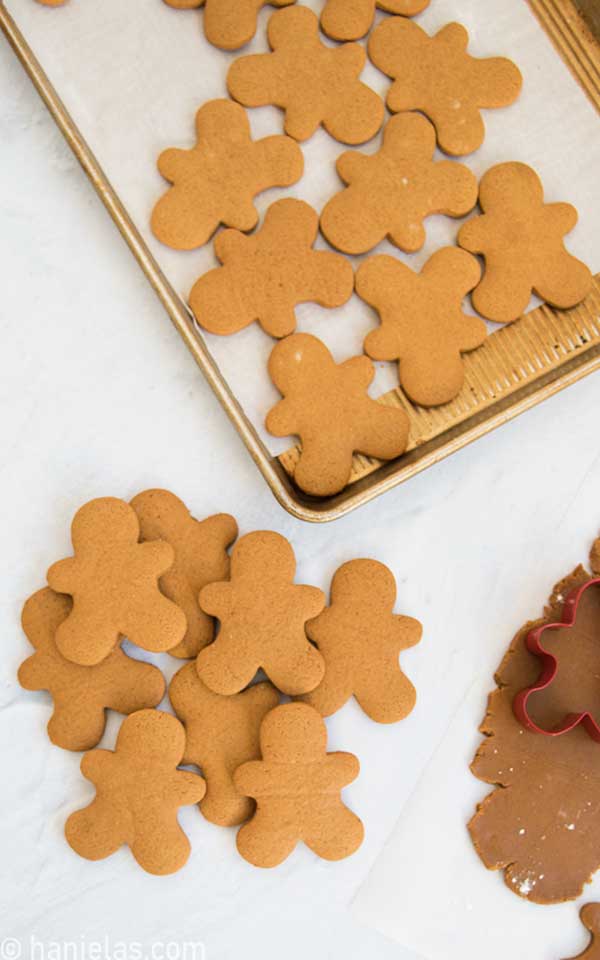
BAKE COOKIES
Prepare cookie dough using my Vanilla Sugar Cookie Recipe or Chocolate Sugar Cookie Recipe (or use both) and bake sugar cookies. Let the cookies cool completely before decorating. Store in an airtight container if not using right away.
PREPARE ROYAL ICING
Prepare icing using my recipe for Royal Icing. Beat till icing is thick. Be sure to cover icing with a food wrap or a damp paper towel to prevent it from crusting.
TIP: Don’t use oil based extracts to flavor royal icing.
How much icing do you need? Depending on the amount of cookies you are making you can either make a half batch or a full batch royal icing recipe. If you plan on making over 36 cookies using a lot of different colors I’d recommend using a full batch.
Reserve about 1/2 cup of stiff icing, rest you can thin to about 15 second consistency. Divide icing into small bowls and color icing with gel food colors. Pour icing into piping bags and tie a knot on each bag or use a handy bag tape sealer. (look in the tools section at the bottom of the post)
ROYAL ICING COLORS
To decorate Marbled Christmas Ornament Cookies I used variety of colors of 15 Second Consistency Royal Icing : Red, Light Green, Dark Green, Light Blue, White, Light Pink, Dark Pink, Gray. Get creative and use your own color combinations.
To make ornament cap I used a Medium Stiff Consistency Royal Icing : Color 1/2 cup of white stiff icing with light brown ( you can prepare light brown by mixing red and green together. Add a minuscule amount of red and green gel color into white icing and mix well.
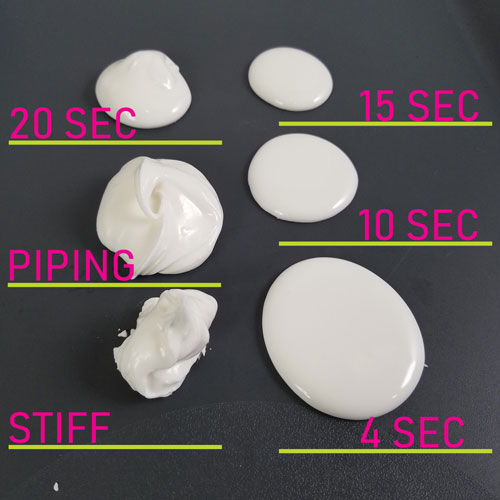
What is 15 second consistency?
To achieve flood consistency add few drops of water to stiff icing, stir and gradually add more water until you reach 15 consistency icing. To test if your icing is the correct consistency run a spatula thru icing. Watch and count how long it takes for the separation line to disappear. It should take about 15 seconds.
What is medium stiff consistency?
Icing when pulled up should have a peak that bends down slightly. Icing when piped should retain its shape.
HOW TO CUT A DISPOSABLE PIPING BAG
To cut a disposable piping bag flatten the seam in the middle. Cut a small tip straight across. It’s better to cut a small opening and then cut again to make it bigger.

DECORATE MARBLED CHRISTMAS ORNAMENT COOKIES
Have all the colored icing bagged in the piping bags, and cookies ready on a flat tray. Have a paper towel on hand to wipe down your hands and a scribe tool as needed.
TIP: Use a paper towel to clean the tip of the piping bag regularly.
Marbled Royal Icing Designs are created with the use of flood consistency icing of at least 2 constrasting colors; and a scribe tool or a toothpick.
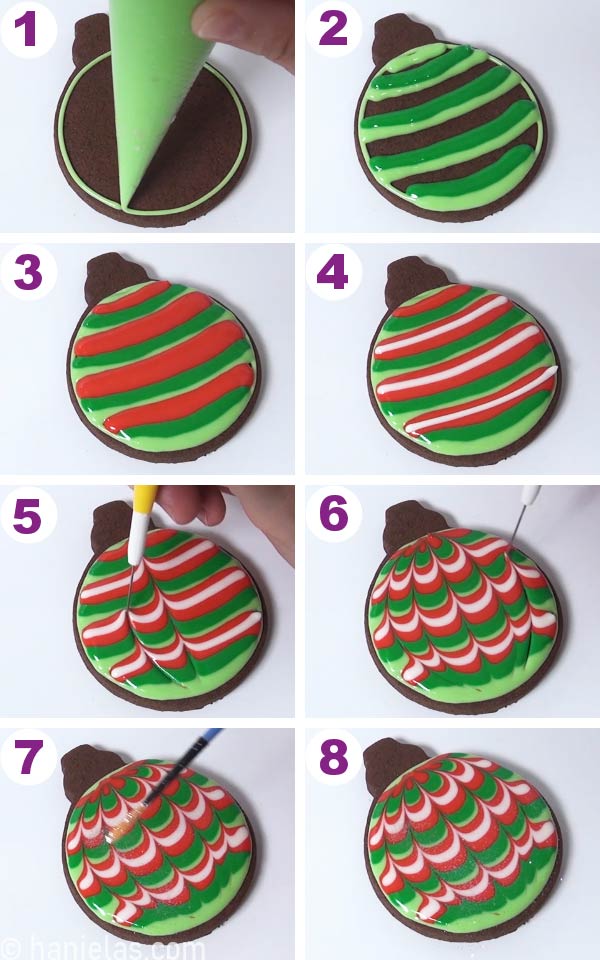
Basically, to create marbled patterns with icing you need to use flood icing. And while icing is wet you drag the tip of a scribe tool thru the icing creating beautiful marbled patterns. This technique is also called wet-on-wet marbling with icing, (1-3).

FLOOD COOKIES
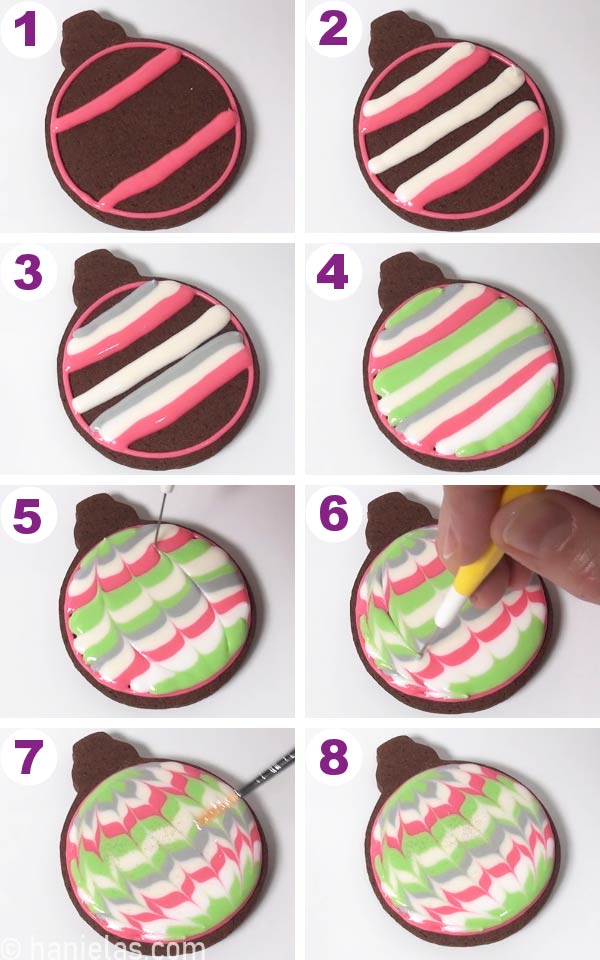
Start by outlining the cookie with red icing, (steps 1-2). Then pipe red lines across approximately 1/3 and 2/3rd up from the bottom of the cookie, (step 3). Now you can take white and pipe lines across next to the red, (step 4). After take dark green and light green and pipe the lines across, (steps 5-8).
Immediately follow with the next decorating step.

Run a tip of a scribe tool thru freshly piped lines of icing. If possible wipe the tip of the tool into a small piece of paper towel each time you run it thru the icing, (steps 1-2).
Notice as I’m pulling the scribe tool thru the icing I’m also shaping the marbled lines following the curvature of the cookie shape, meeting the marbled lines in the middle, at the very top, (steps 3-4).
Now, if desired you can repeat the same process but in opposite direction, from top to bottom, (steps 5-8). Allow icing to crust well, for about an hour before the next decorating step.

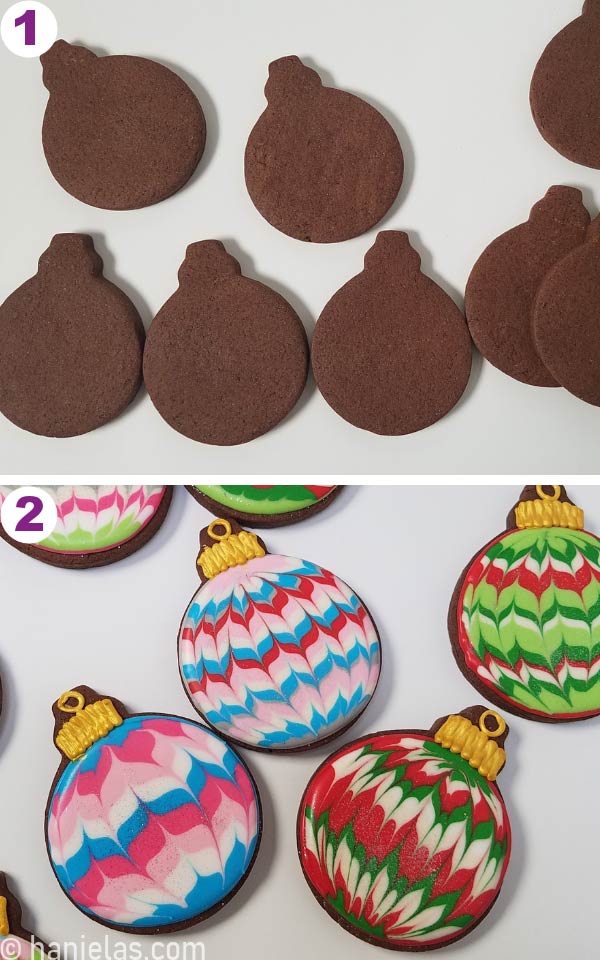
Repeat the same process with different colors. Have fun and get creative.

Use a lot of colors or use just 2 colors, possibilities are endless.

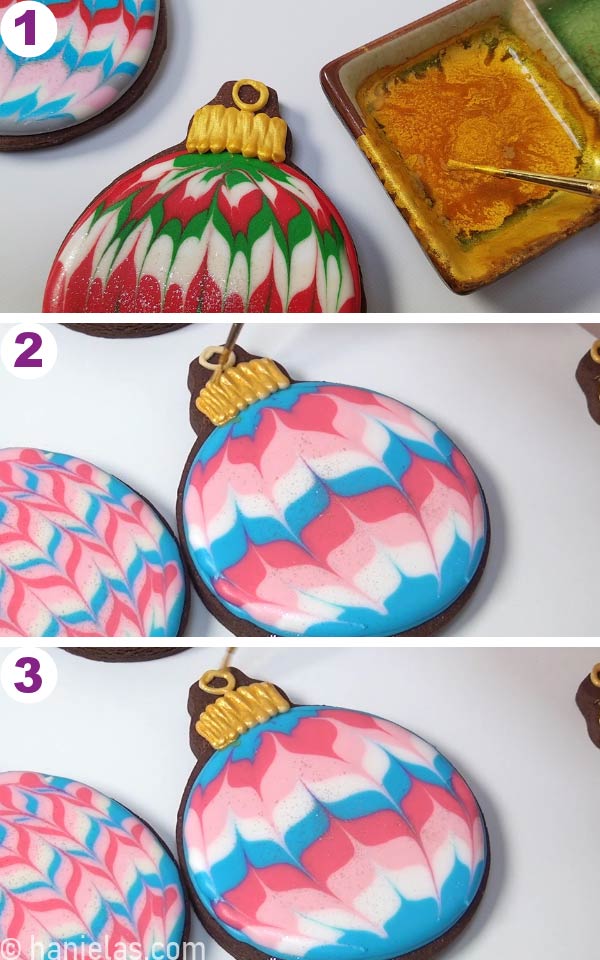
If you have Jewel Dust you can dust freshly marbled cookie with it. Dip the dry and food only paint brush into the jewel dust. Place brush above the wet icing and gently shake the brush to release jewel dust onto the icing, (steps 6-7).

CHRISTMAS ORNAMENT CAP
Use a medium stiff consistency light brown icing and decorate the Christmas ornament cap, (step 1). Use a zigzag, back and forth motion to pipe a line of light brown icing across, (steps 2-5). And then make a loop, (steps 6-8). Allow light brown icing to dry for 3-4 hours.

PAINT WITH LUSTER DUST
Decorate ornament cap with gold luster dust.
Mix dry gold luster dust with few drops of clear Vodka, White Rum, Lemon Extract, Vanilla Extract or Everclear Grain Alcohol.
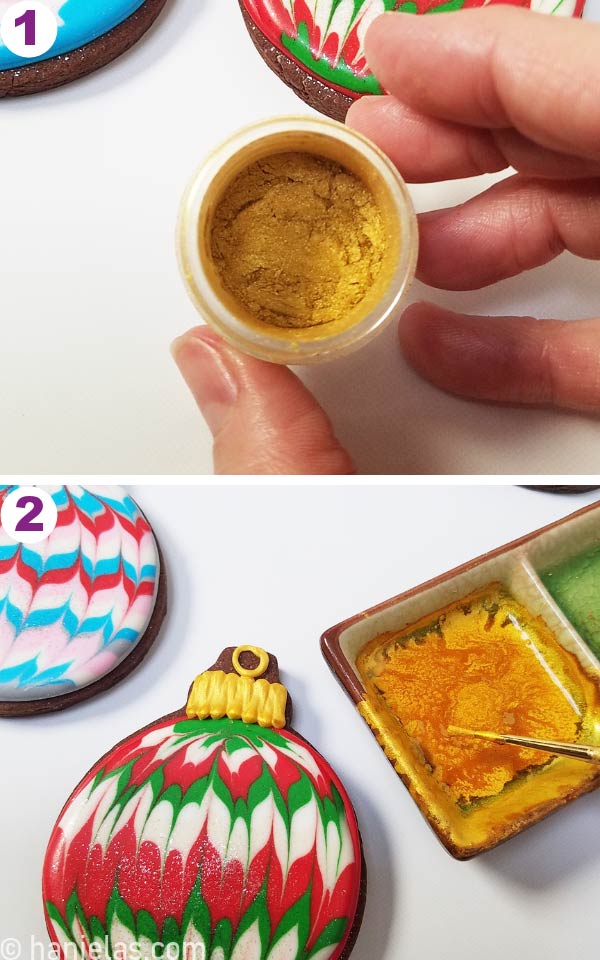
Use a small paint brush to mix dry luster dust with just a few drops of Vodka, Everclear or Lemon Extract and then paint the ornament caps. If luster dust becomes too thick you can add few more drops of alcohol to thin it slightly.
TIP: Don’t throw out unused luster dust. It can be used again for your next cookie decorating project.
As you can see I used chocolate sugar cookies but you can use other cut out cookie recipes if you’d like.
TO MAKE MARBLED CHRISTMAS ORNAMENT COOKIES YOU NEED
- RECIPES
- Classic Sugar Cookie Cut Out Recipe
- Vegan Sugar Cookies
- Gluten Free Sugar Cookies
- Haniela’s Royal Icing Recipe
- Vegan Royal Icing Recipe
- TOOLS
- Christmas Ornament Cookie Cutter
- Gel Food Colors : use variety of colors, I used : Sky Blue, Super Red, Pink, Leaf Green, Black, (Tip: red and green makes brown)
- Scribe Tool
- Dropper
- Disposable Piping Bags
- Bag Tape Sealer
- Edible Gold Luster Dust
- Food Only Paint Brush
- Everclear, clear Vodka or Lemon Extract
- Jewel Dust (optional)
This post contains Amazon affiliate links that earn me a small commission, at no cost to you. I only recommend products that I use and love. Learn more about my affiliate policy here.
Did you make these Decorated Cookies? Tag @hanielas on Instagram and hashtag it #hanielas
MORE CHRISTMAS DECORATED CHRISTMAS COOKIES
- Snowflake Gingerbread Wreath
- 3D Christmas Stocking Cookies
- Marbled Christmas Tree Cookies
- Buttercream Decorated Christmas Cookies
- Cute Snowman Cookies
This post was originally published on December 13th, 2018. On November 19th,2020. I updated this post with new step by step photos, text and a video.

Hi, I’m Hani
Welcome!
Thank you for visiting Haniela’s. On my blog, you’ll find delicious sweet & savory recipes made with simple ingredients. Why not start a new adventure? Discover a world of cookie decorating with my step-by-step tutorials.

Hi, I’m Hani
Welcome!
Thank you for visiting Haniela’s. On my blog, you’ll find delicious sweet & savory recipes made with simple ingredients. Why not start a new adventure? Discover a world of cookie decorating with my step-by-step tutorials.

Thanks for the tips! These are beautiful.
Thank you Sara.
I hav been watching you on u tube , your decorating skills are beautiful, I love watching your beautiful creations!!
Thank you. Happy Holidays.