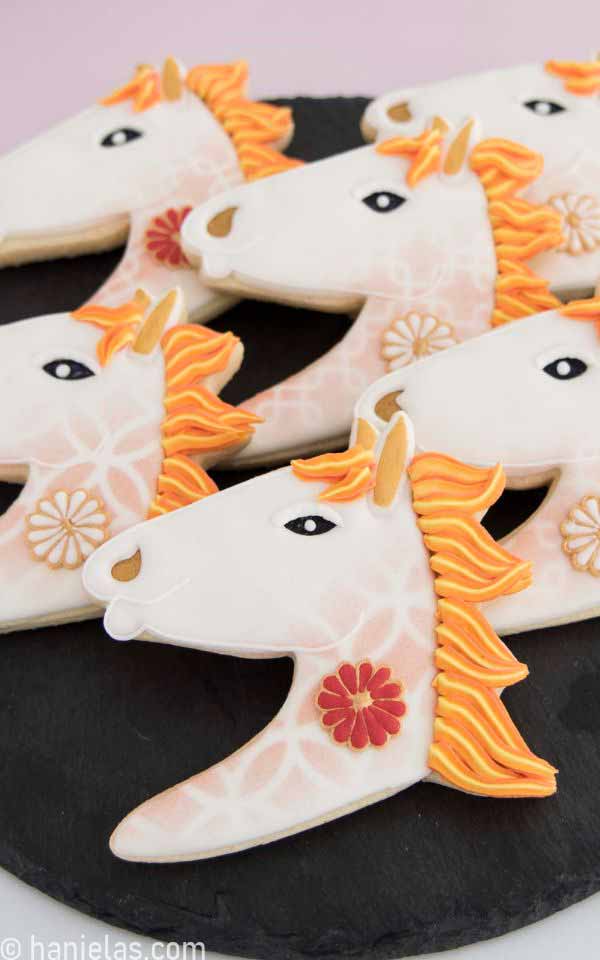
Fire Horse Cookies
2026 is the year of the Fire Horse. Did you know it’s a super rare moment, as a fire horse year occurs only once every 60 years? And to celebrate this special moment in the Chinese lunar calendar, I made Fire Horse Cookies.
FIRE HORSE COOKIES
In this tutorial, I’ll show you how I created fire horse cookies using two cutters from the Ann Clark Cookie Cutter Collection: the Unicorn and Horse Head cutters. They work beautifully together to create a striking silhouette of a horse with an untamed mane.
FACTS
- The last Fire Horse year was in 1966.
- It represents unstoppable energy, bold decisions, and ambition.
- A symbol of transformation, it signals the closing of old chapters and the beginning of fresh, inspiring opportunities for growth.
- Embrace new challenges, learn new things.
- Don’t let the fear of the unknown limit your endless potential.
THINGS YOU NEED
- Get all the tools and supplies in Haniela’s Amazon Shop
- Horse Cutter
- Unicorn Cutter
- Gel Food Coloring: ivory, red, yellow, orange
- Tipless Piping Bags
- Scribe Tool
- Edible marker: yellow and black
- Food-Only Paintbrush
- Airbrush
- Airbrush Color: red
- Stencils
- Stencil Holder
- Gold Edible Luster Dust Spray Pump and Dry Powder or Premixed Edible Metalic Paint
- Flower Transfer Sheets
- Star Tip #14, #16 or #18
- Horse Head Template
This post contains Amazon affiliate links that earn me a small commission, at no cost to you. I only recommend products that I use and love. Learn more about my affiliate policy here.
COOKIE CUTTER
To create this unique shape, I combine two cutters, both from the Clark cookie cutter collection.
Start by rolling out the dough to about 1/4 inch (6mm) thick, then cut out the horse head. Followed by cutting out the mane part of the unicorn. Use the head cutter to trim the unicorn’s mane to fit the back of the horse’s head. Attach a small piece of mane onto the flat end of the horse head, and bake it as instructed in a recipe.

ROYAL ICING COLORS AND CONSISTENCIES
I used royal icing to decorate cookies. You can use standard meringue-based royal icing made with egg whites, vegan icing (using aquafaba), or glaze icing.
- White Icing: 20-second consistency (ear, eye, nozzle outline, flower petals), 15-second consistency (head), piping consistency (final outlines, eye outline)
- Yellow, Orange, Red: thick consistency (horse fire mane)
- Ivory: soft piping consistency (flower outlines)
- Red: 20-second consistency (flower petals)

ROYAL ICING TRANSFERS
- To prepare royal icing transfers, start by printing the template. Insert the template into a smooth transparent protector sheet and secure it to a firm surface. I used a plexiglass.
- Pipe daisy-like shapes directly on the transparent sheet, following the outline using ivory soft piping consistency.
- Pipe each pedal, and immediately after, dust it generously with gold luster dust using a spray pump.
- Then, using red or white icing of 20-second consistency, fill each pedal, starting at the outer curved edge.
- Pipe a full dot, then slowly move the icing towards the tapered end. Decrease the pressure on the piping Bag as you come towards the tapered end.
- Try using piping as a ‘scribe’ dip the tip into the icing and use it to slowly drag the icing to the point.
- Let transfers dry for 8 to 12 hours before removing them from the acetate sheet
- Learn more about royal icing transfers, how to make them, and use them in my Ultimate Guide to Royal Icing Transfers.

TEMPLATE AND PIPING GUIDES
- Use a handy cardstock template or eyeball it – transfer eye outline onto a cookie using a black marker. If the eye opening appears too small, make it slightly bigger.
- Draw the eye with an edible marker (steps 1-3).
- Mix dry edible luster dust powder with Everclear or clear Vodka. Paint the nostril with edible gold luster dust paint (steps 4-5).
- Use a yellow edible marker to draw the ear guide (step 5).g

FLOOD WITH ICING
- Outline the ears, eye, and the nostril with 20-second consistency icing, let the icing crust.
- And then fill the ear with about 15 to 20 seconds of consistency icing, let the ear crust (step 2), then pipe the adjacent ear, and let both ears crust again (step 3) before flooding the whole cookie with 15-second consistency icing (step 4).
- Allow icing to dry for 8 hours.

AIRBRUSHING
- Secure your stencil in a stencil holder, then lightly airbrush the white icing to transfer a beautiful pattern onto the cookie.
- Go light on the trigger on your airbrush gun.
- Immediately, while the surface is lightly damp from the airbrush food coloring, spray it with gold luster dust using a spray pump.


PAINT EARS
- Using gold edible luster dust paint and a fine liner paintbrush, paint the inside of the ears.

ROYAL ICING FIRE FLAMES
- To make fiery horse mane pipe yellow, orange, and red icing onto the food wrap.
- Pipe the yellow in the middle, orange on the sides, and red on one side of the orange.
- Close the pouch/icing bullet. Tie one end. Trim the opposite end and insert it into a piping bag fitted with a star tip #14 or #16.


- Pipe short lines of curved icing on the mane area.
- When starting the flame line, squeeze the piping bag to let the icing come out, and move the piping bag slightly forward to tuck the line under, and continue towards the outer edge of the cookie (steps 1-3).

PIPED DETAILS
- Now we’re going to add piped details with piping consistency white icing.
- Using light pressure piping, pipe a line above the eye to accentuate the eye, and also make a small dot in the middle of the eye cavity (steps 1-2).
- Then outline the cookie, starting at the top by the ears, moving around to the nostrils, and ending in the middle, separating the head from the neck (steps 3-4).

EMBELLISH WITH TRANSFERS
- For a softer finishing touch, you can use delicate daisy-style royal icing transfers we made earlier.
- Use tweezers to handle the transfer.
- Pipe a small dot of icing onto the cookie to attach the flower.


FIRE HORSE COOKIES VIDEO TUTORIAL
MORE ANIMAL COOKIES
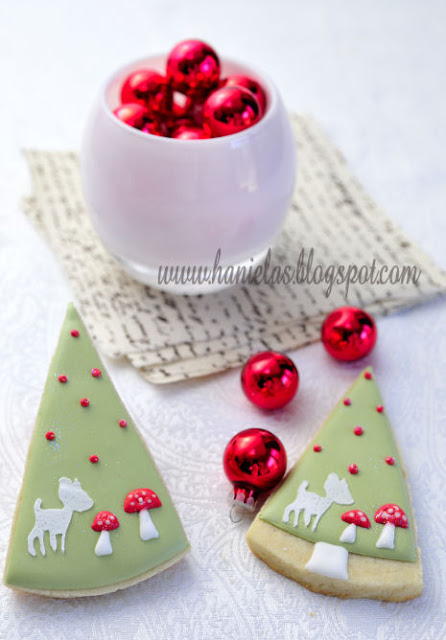
- Panda Cookies
- Watercolor Elephant Cookies
- Hen Cookies
- 30 Cookie Design Ideas with a Single Cookie Cutter
COOKIE DECORATING TOOLBOX
- Beginner’s Guide To Cookie Decorating
- Ultimate Guide to Cut-Out Cookies (tips, tricks, troubleshooting)
- Royal Icing Recipe
- Small Batch Royal Icing Recipe
- Cookie Icing Recipes (includes vegan royal icing, glaze, fondant)
- Guide To Royal Icing Consistencies with Visual Help(what is stiff, flood icing, etc.)
- How To Freeze Royal Icing
- How To Make Royal Icing Transfers
- Royal Icing FAQ ( for example: how to make black icing, color bleeding, storage, and more)
- How To Make a Cookie Cutter Template
- Ultimate Guide To Cookie Decorating Tools

Hi, I’m Hani
Welcome!
Thank you for visiting Haniela’s. On my blog, you’ll find delicious sweet & savory recipes made with simple ingredients. Why not start a new adventure? Discover a world of cookie decorating with my step-by-step tutorials.

Hi, I’m Hani
Welcome!
Thank you for visiting Haniela’s. On my blog, you’ll find delicious sweet & savory recipes made with simple ingredients. Why not start a new adventure? Discover a world of cookie decorating with my step-by-step tutorials.