How to Decorate Chalkboard Cookies with Royal Icing
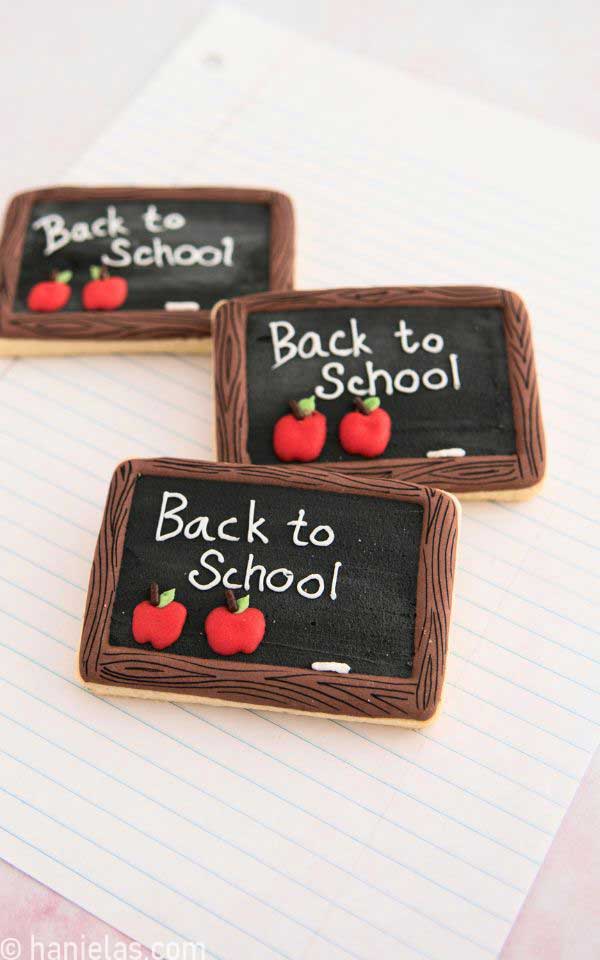
If you’re looking for a fun and classic back-to-school cookie project, these rectangular chalkboard cookies are the perfect mix of charming and delicious!
BACK TO SCHOOL CHALKBOARD COOKIES STEP-BY-STEP
In this step-by-step tutorial, I’ll show you how to decorate chalkboard cookies with royal icing – complete with a woodgrain-style frame and adorable, tiny red apples for that classic classroom touch.

THINGS YOU NEED
- Get all the tools and supplies in Haniela’s Amazon Shop
- Rectangular Cookie Cutter, alternatively, you can use other shapes
- Back To School Cutter Set
- Gel Food Coloring: black, brown, red, green
- Tipless Piping Bags
- Scribe Tool
- Edible marker – brown, black(optional)
This post contains Amazon affiliate links that earn me a small commission, at no cost to you. I only recommend products that I use and love. Learn more about my affiliate policy here.
COOKIE CUTTER
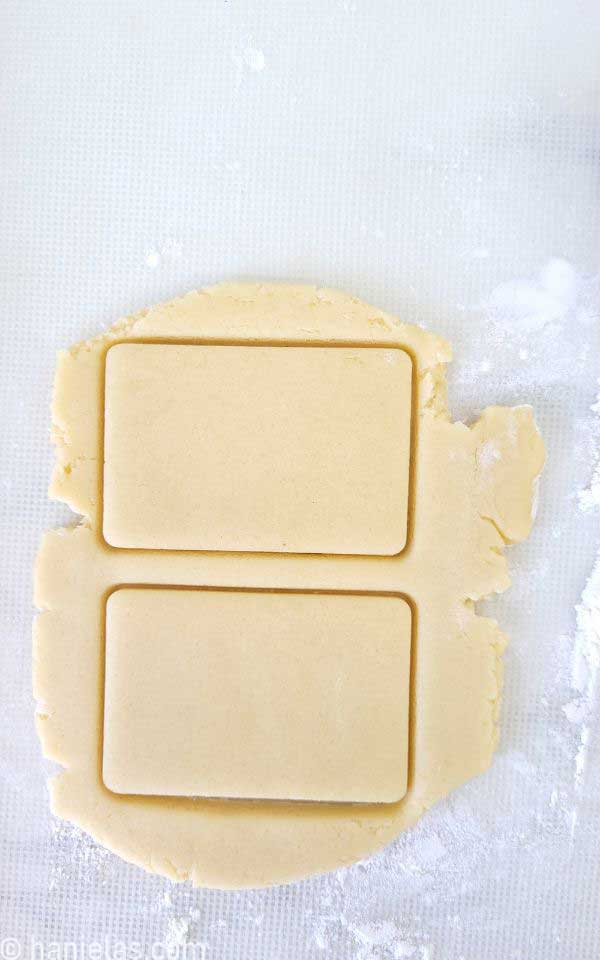
To make the cookies, I used a rectangular cutter with rounded corners, and I used my Fresh Lemon Royal Icing.
ROYAL ICING COLORS AND CONSISTENCIES
I used royal icing to decorate cookies. You can use standard meringue-based royal icing made with egg whites, vegan icing (using aquafaba), or glaze icing.
- Black Icing: piping to a thick consistency (chalkboard layer)
- White Icing: piping consistency (writing, chalk, chalkboard layer)
- Red Icing: 20-second consistency (apples)
- Green Icing: piping consistency (leaves)
- Brown Icing: 20-second consistency
CHALKBOARD LAYER
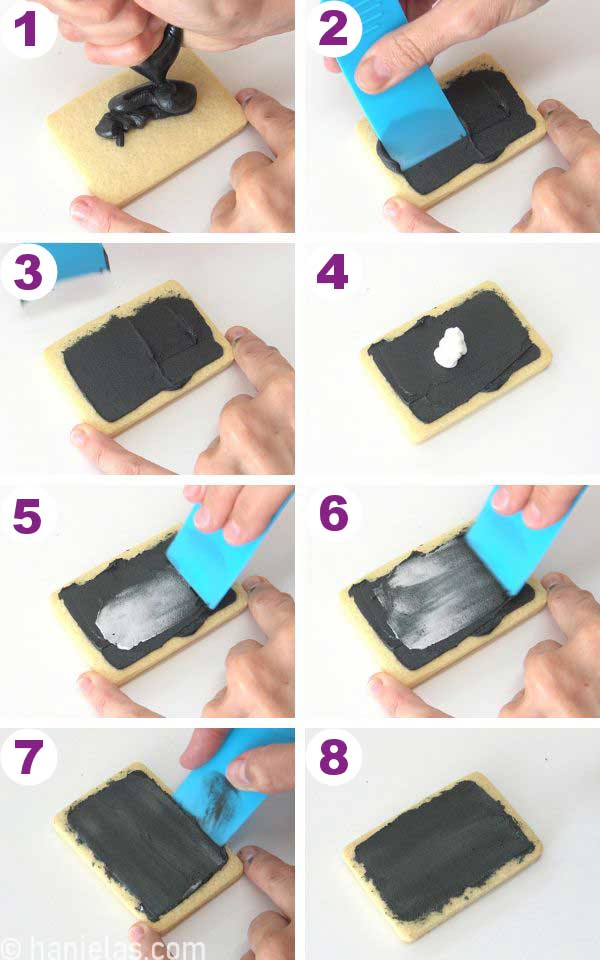
- Let’s start with the chalkboard layer.
- Spread a thin layer of thick consistency black icing across the cookie, leaving the edges empty (steps 1-3).
- Then, to create that signature washed-out look, spread a small amount of white icing over the black icing (steps 4-7).
- Let the icing crust for about 5-10 minutes (step 8).
FRAME
- To make the frame around the chalkboard, use 20-second consistency icing.
- Pipe the inside frame first (steps 1-2).
- Then outline the whole cookie (steps 3-4).
- Fill in the gap between the two frames with brown icing (steps 5-7). If you are experiencing heavy cratering in your icing, you can pipe a zigzag line in the middle of the frame, let it crust, and then pipe the icing over it.
- Let the icing fully dry for about 6 to 8 hours (step 8).

WOODGRAIN
- To create the woodgrain pattern, use an edible marker and draw the woodgrain lines onto the dry brown icing (steps 1-3).

APPLES
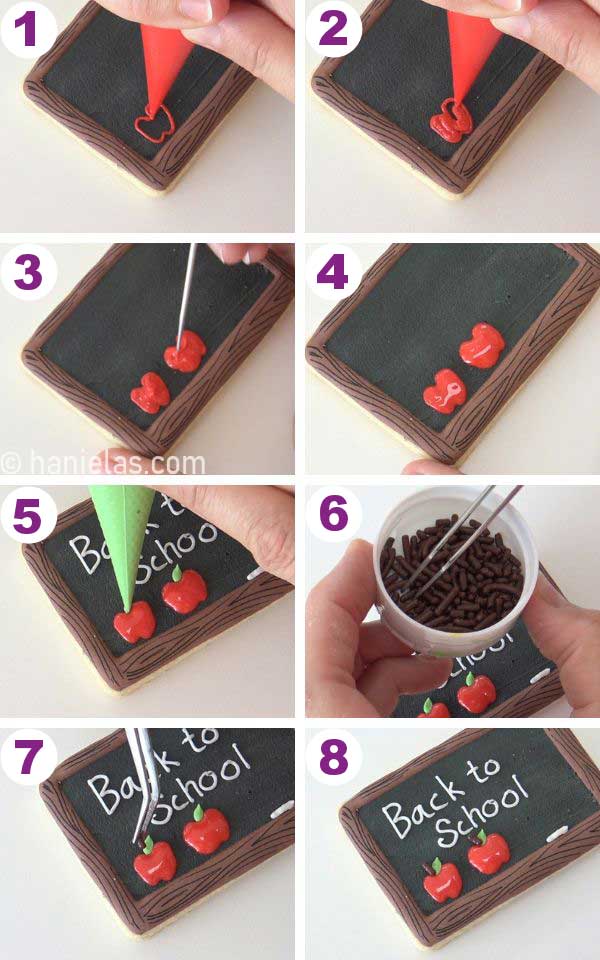
- To make the apples, use a 20-second consistency red icing pipe.
- Pipe an outline and then fill the shape. Use a scribe tool to smooth the icing. (steps 1-4).
- Let the red apples crust for 5 minutes before adding a small green leaf. To pipe the leaves, use piping consistency green icing. Basically, you want to pipe a teardrop shape. Squeeze the piping bag to let the icing come out to make the dot, and then slowly pull away to create the teardrop shape to make the leaf (step 5).
- To make the stem, instead of using brown icing, you can use brown Jimmie Sprinkles. How fun! For an easier application, use tweezers to pick up a small cylindrical sprinkles and insert it into the red icing, at the very top, by the green leaf (steps 6-7).
PIPE ‘BACK TO SCHOOL’
- Lastly, you can add a message of your choice and pipe it onto the chalkboard with piping consistency white icing.
- This message can read ‘Back to school’, or you can also personalize it by including a teacher’s or your classmate’s name. It’s up to you (steps 1-2).
- Don’t forget to pipe a tiny chalk on the top edge of the wooden frame (step 3).
- Let the icing dry for 2-3 hours before packaging cookies (step 4).

If you prefer, you can easily personalize each cookie by writing a student’s or a teacher’s name right on the chalkboard surface instead of ‘Back to School’. And for an extra special gift, pair them with pencil-shaped cookies or package them in a bakery box for a thoughtful treat.

CHALKBOARD COOKIES VIDEO TUTORIAL
Do you want to stay updated about free cookie decorating tutorials, live events, classes, and products? Sign up for Hani’s Cookie Decorating Newsletter.
MORE SCHOOL-INSPIRED IDEAS
- Yellow Pencil Cookies – a fun treat without icing
- Graduation Cap Star Cookies
- Teacher Cookies
- Peanut-Butter Dip with Apples – tasty snack
COOKIE DECORATING TOOLBOX
- Beginner’s Guide To Cookie Decorating
- Ultimate Guide to Cut-Out Cookies (tips, tricks, troubleshooting)
- Royal Icing Recipe
- Small Batch Royal Icing Recipe
- Cookie Icing Recipes (includes vegan royal icing, glaze, fondant)
- Guide To Royal Icing Consistencies with Visual Help(what is stiff, flood icing, etc.)
- How To Freeze Royal Icing
- How To Make Royal Icing Transfers
- Royal Icing FAQ ( for example: how to make black icing, color bleeding, storage, and more)
- How To Make a Cookie Cutter Template
- Ultimate Guide To Cookie Decorating Tools

Hi, I’m Hani
Welcome!
Thank you for visiting Haniela’s. On my blog, you’ll find delicious sweet & savory recipes made with simple ingredients. Why not start a new adventure? Discover a world of cookie decorating with my step-by-step tutorials.

Hi, I’m Hani
Welcome!
Thank you for visiting Haniela’s. On my blog, you’ll find delicious sweet & savory recipes made with simple ingredients. Why not start a new adventure? Discover a world of cookie decorating with my step-by-step tutorials.