How to Decorate Graduation Cap Star Cookies
Celebrate your graduate with these show-stopping graduation cap star cookies! They are perfect for any graduation party!

HOW TO DECORATE GRADUATION CAP STAR COOKIES
In this tutorial, I’ll walk you through how to decorate star-shaped cookies using a wet-on-wet technique and graduation cap transfers.
THINGS YOU NEED
- Star Cookie Cutter, baked and cooled cookies
- Graduation Cap Transfer Sheet
- Acetate Sheets – smooth, transparent protector sheet, or use wax paper, parchment
- Gel Food Coloring: yellow, ivory, navy blue (royal blue and black)
- Food Only Paintbrushes
- Tipless Piping Bags
- Scribe Tool
- Gold Luster Dust or Gold Luster Dust in a Spray Pump
- Everclear or Clear Vodka
This post contains Amazon affiliate links that earn me a small commission, at no cost to you. I only recommend products that I use and love. Learn more about my affiliate policy here.

BAKE COOKIES
Use your favorite cut-out cookie recipes to prepare the cookies. Or you can use one of these tested cut-out cookie recipes.

ROYAL ICING COLORS AND CONSISTENCIES
- Navy Blue Icing: 20-25 second consistency (graduation cap royal icing transfers)
- White Icing: 15-second consistency (white dot/stars)
- Golden Yellow: 15-second consistency (base icing layer)
- Ivory Yellow: 15-second consistency (wet-on-wet stars)
- Yellow Icing: 25-second consistency, piping consistency (tassel)

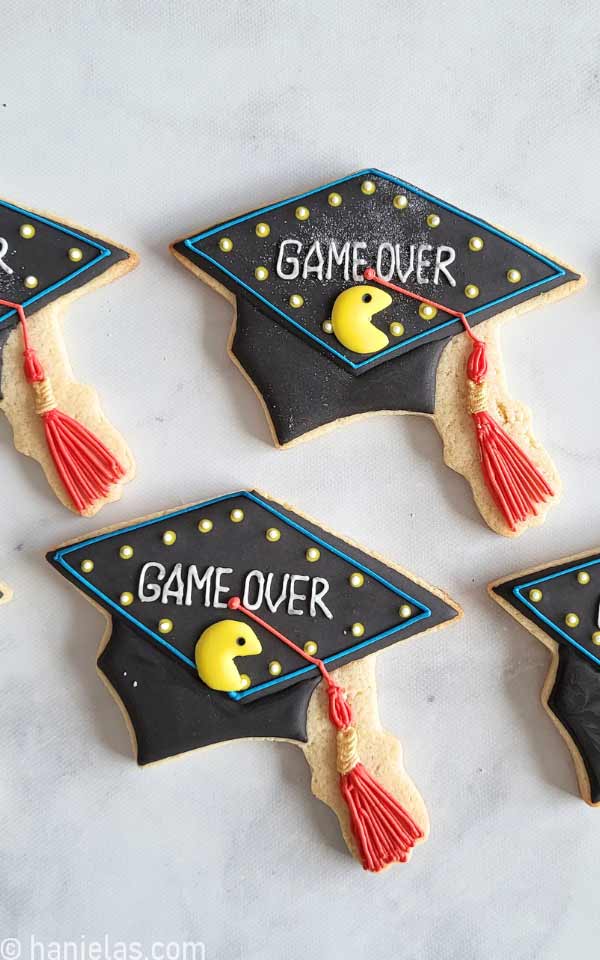
GRADUATION CAP ROYAL ICING TRANSFERS
- Print out a graduation cap transfer sheet (via template shop) or draw graduation cap outlines on a piece of paper. Place the graduation cap transfer sheet into a transparent, smooth protector sheet or place it under a piece of parchment or wax paper.
- Secure the sheet to a flat surface, like a plexiglass or a flat baking sheet.
- Pipe the mortarboard (square) outline and fill it with icing of 20-second consistency. Smooth it with a scribe tool and let it crust for 20 minutes (steps 1-4).

- Now that the square is crusted, outline and fill the section below it (steps 1-4). Let the icing crust for 30 minutes.

- Pipe a yellow tassel with piping consistency golden yellow icing. Start in the middle of the square and pipe the line towards the edge. Then, pipe a vertical line towards the bottom edge. (steps 1-3).
- To make the tassel end, pipe a tight zic-zac pattern (steps 4-6). Allow to crust for 10 minutes.

- Finish the graduation transfers. Pipe a small dot over the end of the yellow line (steps 1-2).
- Allow royal icing transfers to dry for 8-12 hours.

- Carefully remove dry transfers from the acetate sheet (steps 1-4).

FLOOD THE COOKIES
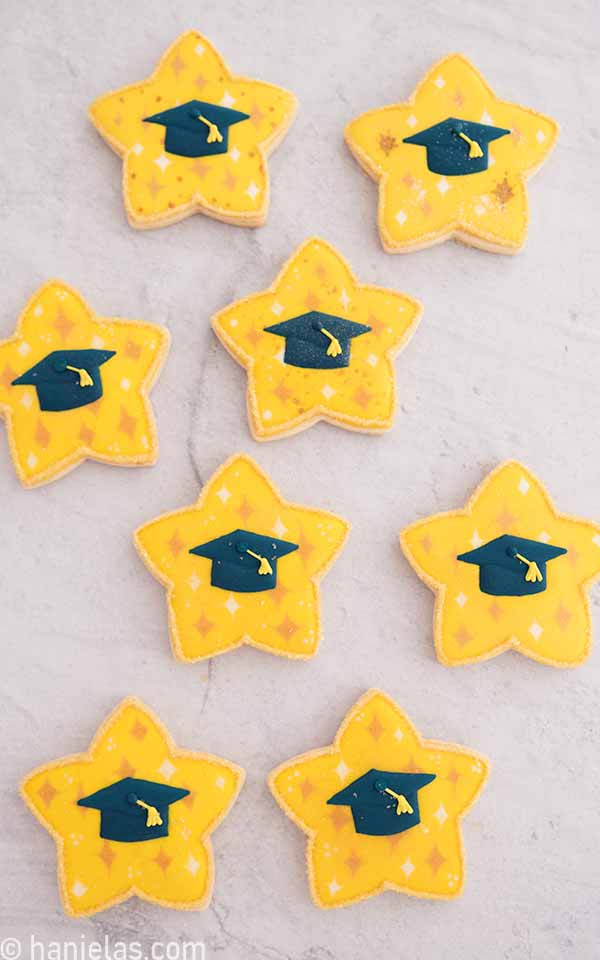
Start by outlining the star-shaped cookie with 15-second consistency icing (steps 1-2). Flood the inside, use a scribe tool to evenly distribute the icing across the cookie surface (steps 3-8). Do not allow the icing to crust; continue with the next step.

CREATE WET-ON-WET STARS
While the golden yellow icing is still wet, pipe ivory dots with 15-second icing into the base icing. Avoid piping the dots in the immediate middle -graduation cap transfer will occupy that area (steps 1-2).
Use a scribe tool or toothpick and slowly pull the ivory icing from the middle of the dot vertically up, shaping it into a point. Clean the tip of the scribe tool. Drag the icing vertically down and repeat the same shaping process horizontally. Ensure that you clean the tip of the scribe tool frequently to prevent color contamination. Do so patiently and without too harsh, vigorous movements (steps 3-8).


ADD LUSTER DUST
Use the same technique to make white stars. Pipe white dots with 15-second icing and shape the dots with a scribe tool while icing is wet (steps 1-4).
- Gold Luster Dust Spray Pump – To add a gold shine to the icing, use a gold luster dust spray pump. Use it immediately after icing the cookie and finishing the wet-on-wet star shaping. Spray the edible gold luster dust mist directly onto the wet icing (steps 5-6).

- Gold Luster Dust Splatter – Alternatively, create a unique gold luster dust paint splatter pattern. Mix dry gold luster dust with a little bit of Everclear or Clear Vodka (steps 1-4). Dip the bristles into the edible gold paint, and gently press them against the palette tray to remove excess paint (steps 1-5).

- Position the paintbrush above the cookie, freshly iced with icing. Run a tip of a scribe tool or a toothpick through the bristles. This movement propels the edible gold paint, creating a splatter on the icing. Repeat until you are satisfied with the result (steps 1-3).

ATTACH GRADUATION CAP TRANSFERS
- Dry-on-Dry Application – Wait for the yellow icing on the star cookies to dry, and then apply the transfers to the dry icing. Pipe some wet icing on the back of the transfer and glue it onto the cookie.
- Dry-on-Wet Application – Immediately, while the yellow icing is still wet, carefully place the dry transfer on top of the wet yellow icing. Allow yellow icing to dry completely.


MAKE SUGAR BORDER
Pipe the border with a piping consistency icing and immediately dip the border in gold sanding sugar (steps 1-8). If the sugar sticks to the surface slightly, use a decorating bottle or a rubber dust blower to remove it from the surface gently.
If the base layer icing is not fully dry, sugar will stick to it. Ensure the icing dries thoroughly before adding sprinkles or sanding sugar border.

VIDEO TUTORIAL
MORE SCHOOL-INSPIRED COOKIES
- Colored Pencil Cookies
- Teacher Love Cookies
- Cupcake Back To School Cake (via Haniela’s on YouTube)
- Back To School Cookies
- Decorated Diploma Cookies (via Lila Loa)
- Ruler Cookies
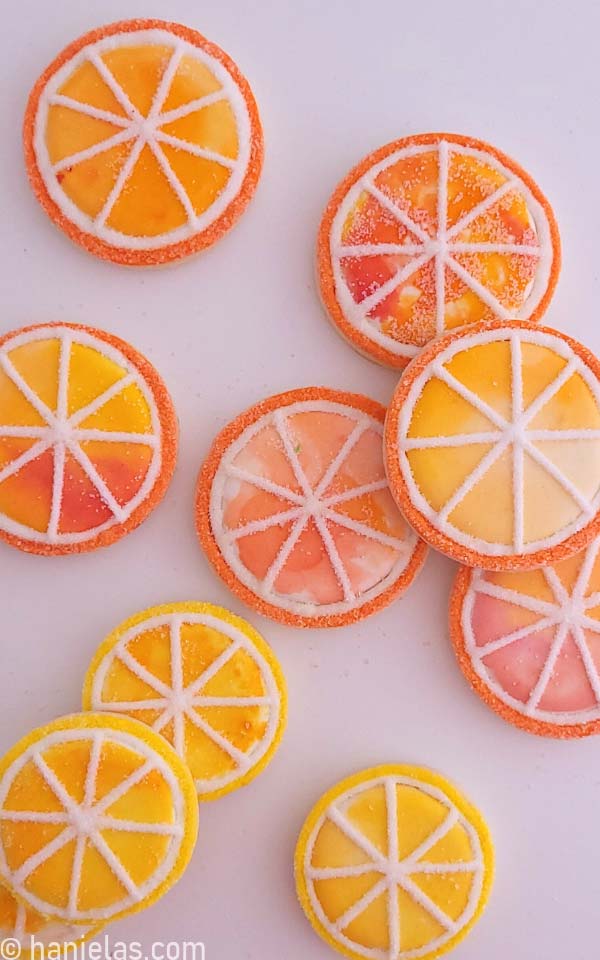
GRADUATION CAP COOKIES FROM THE PAST


Hi, I’m Hani
Welcome!
Thank you for visiting Haniela’s. On my blog, you’ll find delicious sweet & savory recipes made with simple ingredients. Why not start a new adventure? Discover a world of cookie decorating with my step-by-step tutorials.

Hi, I’m Hani
Welcome!
Thank you for visiting Haniela’s. On my blog, you’ll find delicious sweet & savory recipes made with simple ingredients. Why not start a new adventure? Discover a world of cookie decorating with my step-by-step tutorials.