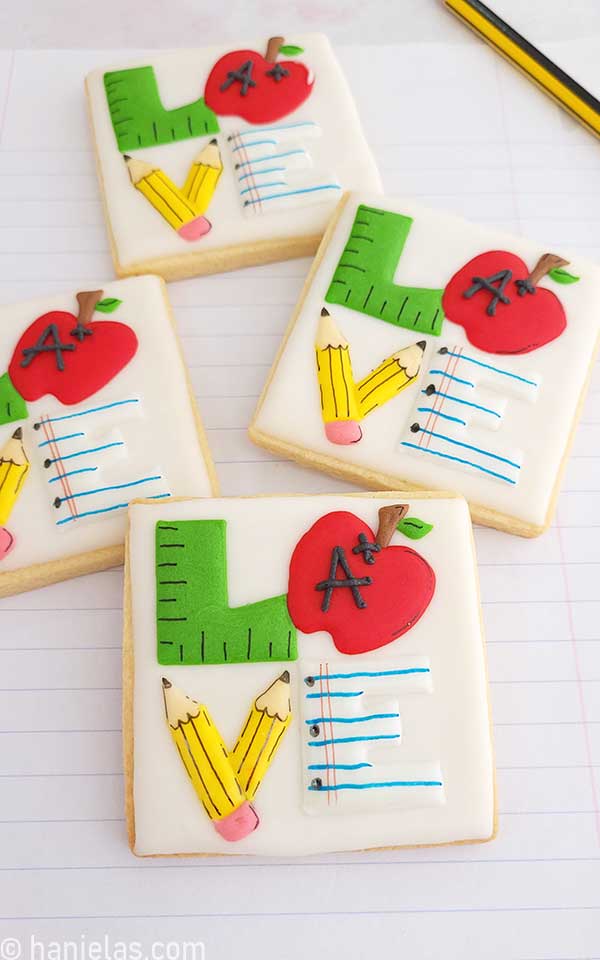
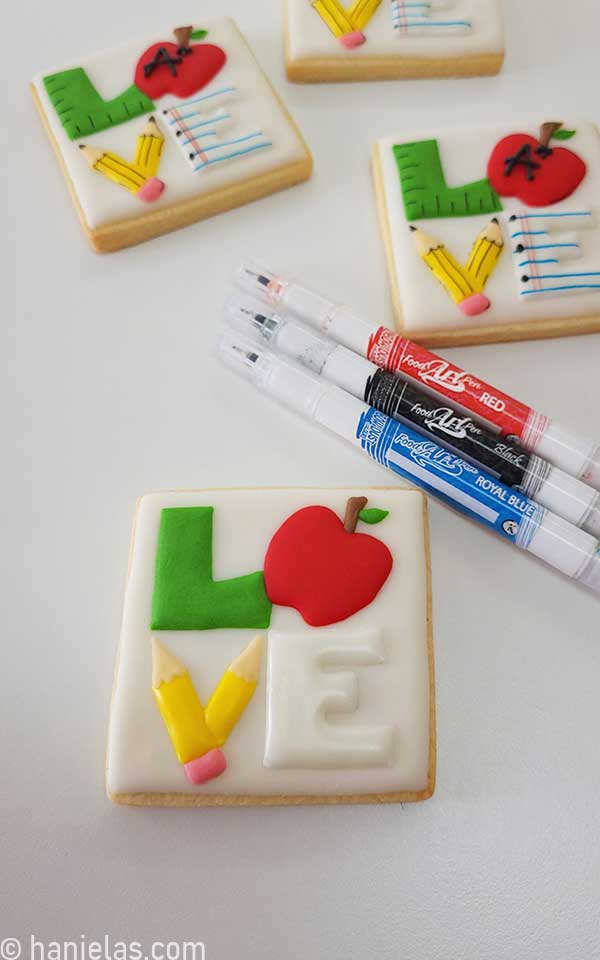
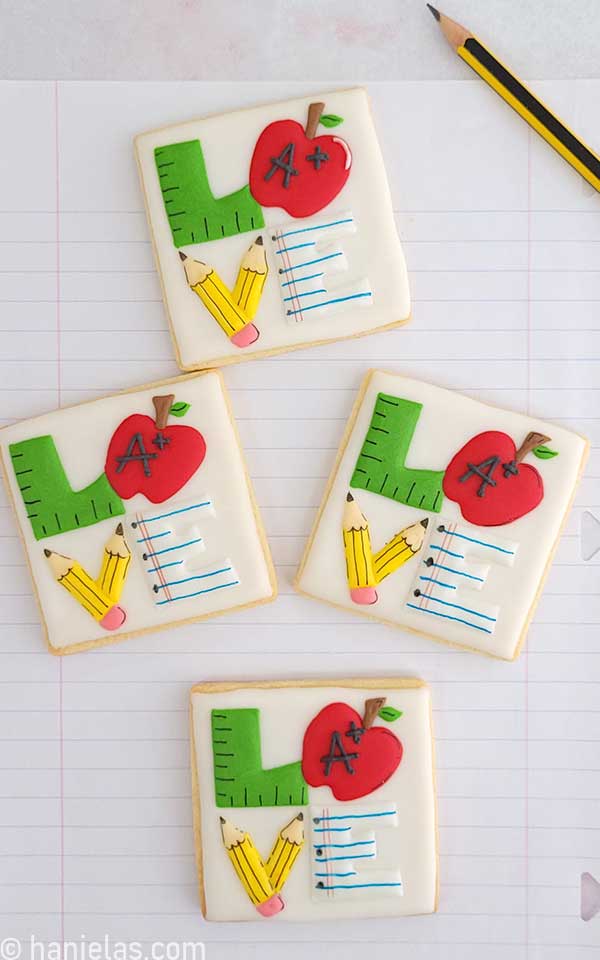
Teacher Love Cookies
Show gratitude and appreciation for your teacher with these cute teacher-love cookies. They are perfect for teacher appreciation week.
HOW TO DECORATE TEACHER LOVE COOKIES
Inspired by Robert Indiana’s Love Statue, I created Love Statue Cookies. I decided to use the same idea, with a creative play on letters, to make these teacher appreciation cookies.
- Beginner’s Guide To Cookie Decorating
- Ultimate Guide to Cut-Out Cookies (tips, tricks, troubleshooting)
- Royal Icing Recipe
- Small Batch Royal Icing Recipe
- Cookie Icing Recipes (includes vegan royal icing, glaze, fondant)
- Guide To Royal Icing Consistencies with Visual Help(what is stiff, flood icing, etc.)
- How To Freeze Royal Icing
- How To Make Royal Icing Transfers
- Royal Icing FAQ ( for example: how to make black icing, color bleeding, storage, and more)
- How To Make a Cookie Cutter Template
- Ultimate Guide To Cookie Decorating Tools
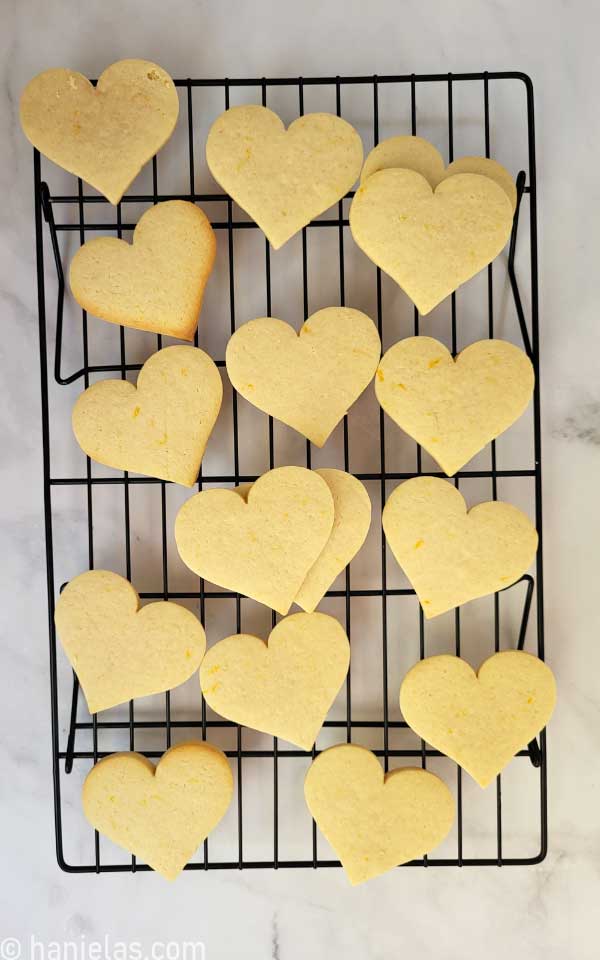
SUGAR COOKIES AND ROYAL ICING
I used my favorite classic sugar cookie recipe to make the cookies. And to decorate I used my favorite Fresh Lemon Royal Icing.
Do you want to perfectly square cookies? Try using a perforated mat for baking cookies.

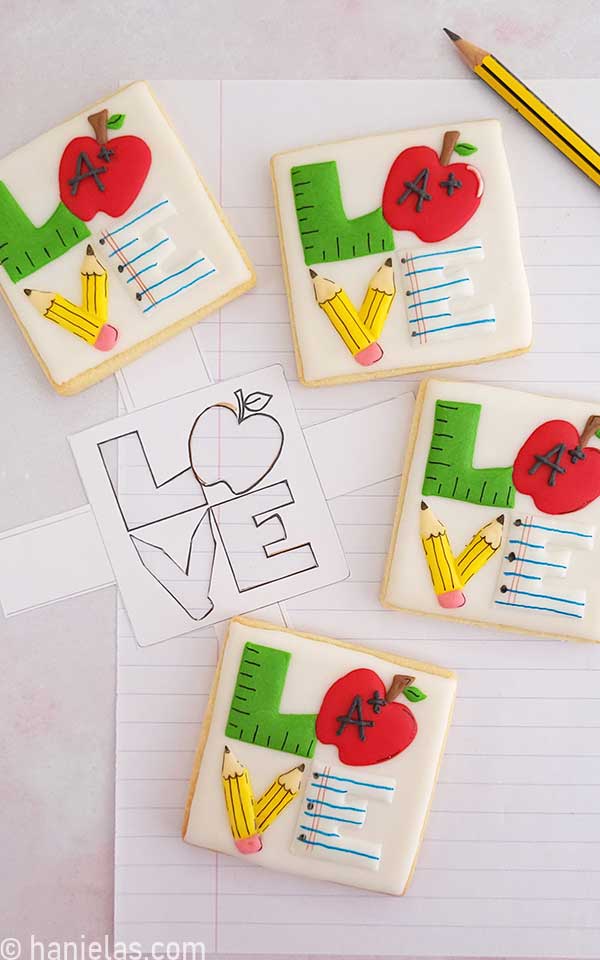
TEACHER LOVE COOKIES DECORATING TEMPLATE
I used a simple cardstock template to get the outlines of the LOVE design onto a cookie. Check out the tools sections for details.
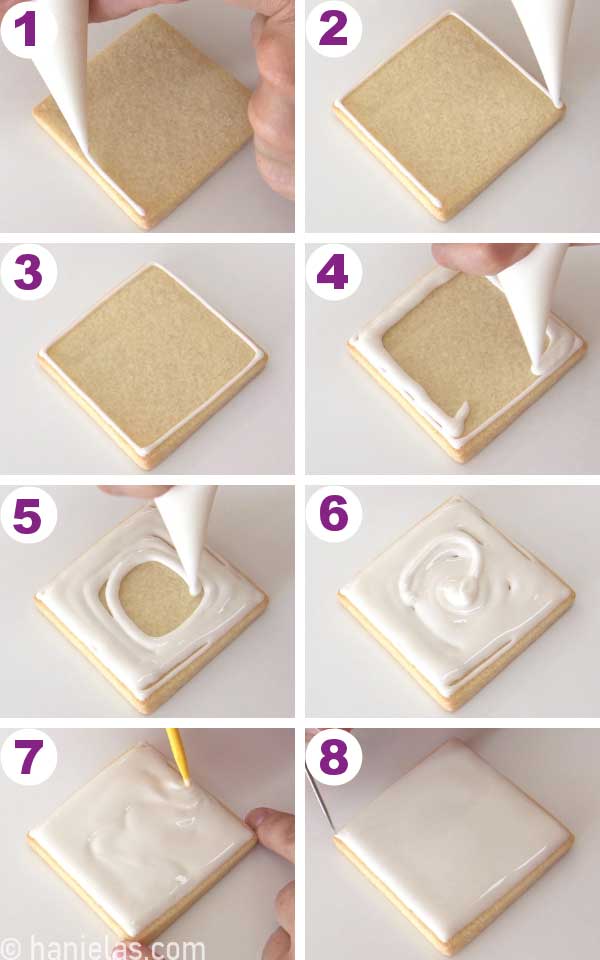
FLOOD SQUARE COOKIES WITH ICING
Start by outlining and flooding a square cookie with 15-second consistency white icing (steps 1-6). Distribute and smooth the icing with a toothpick or a scribe. Accentuate corners and let the icing dry overnight (steps 7-8).
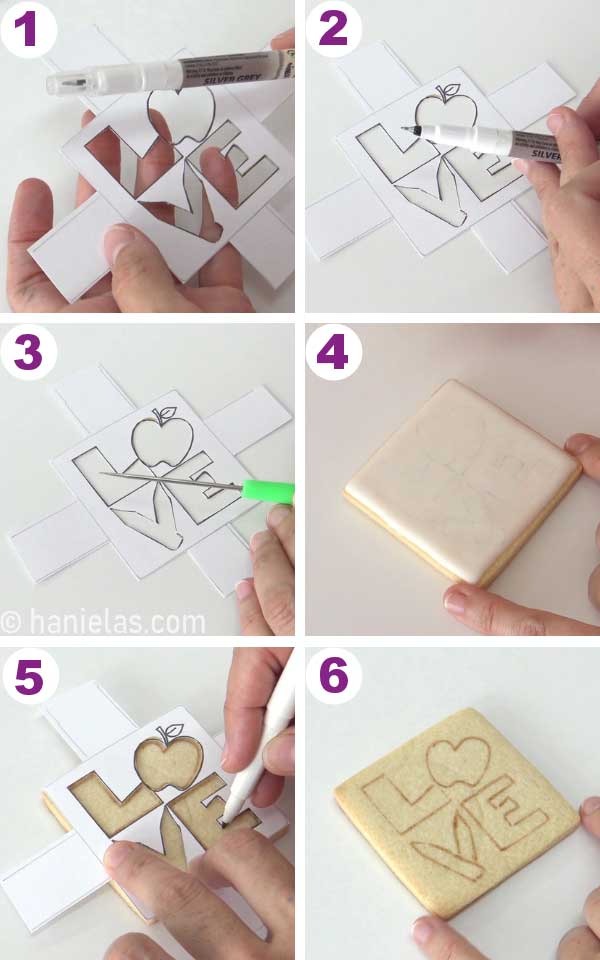
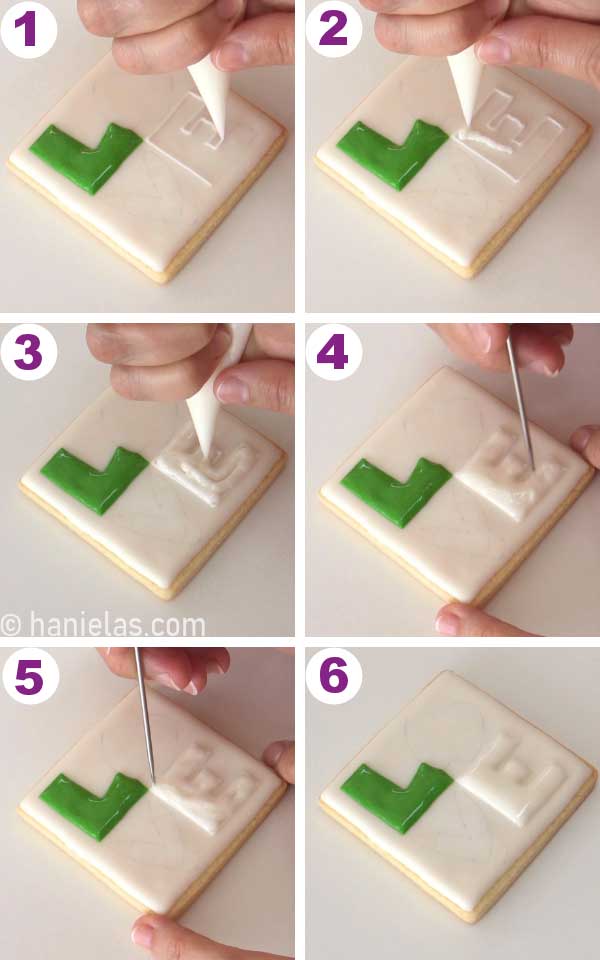
HOW TO USE A DECORATING TEMPLATE
Print the template onto cardstock (see the tools section at the bottom of the post for tools). Cut it out with an exacto knife. Trace the outlines onto icing with a edible marker or a metal scribe. I used a gray marker (steps 2-4). Or you can trace the design directly onto the cookie (steps 5-6).
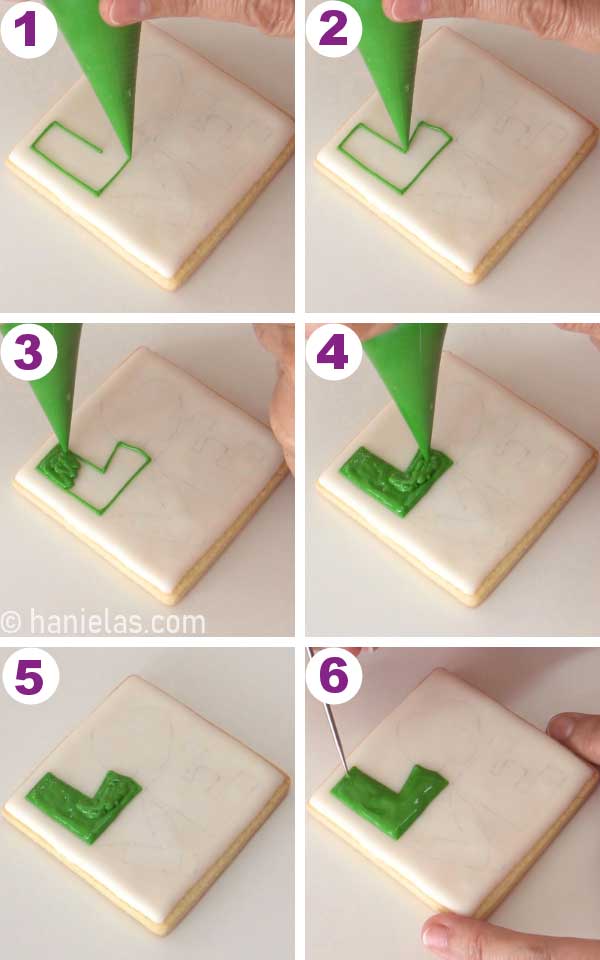
DECORATE LETTERS
With 20-second consistency, green icing outline and flood the L letter. Use a a scribe to smooth the icing (steps 1-6).
Outline and flood the E letter with 20-second consistency white icing (steps 1-6).
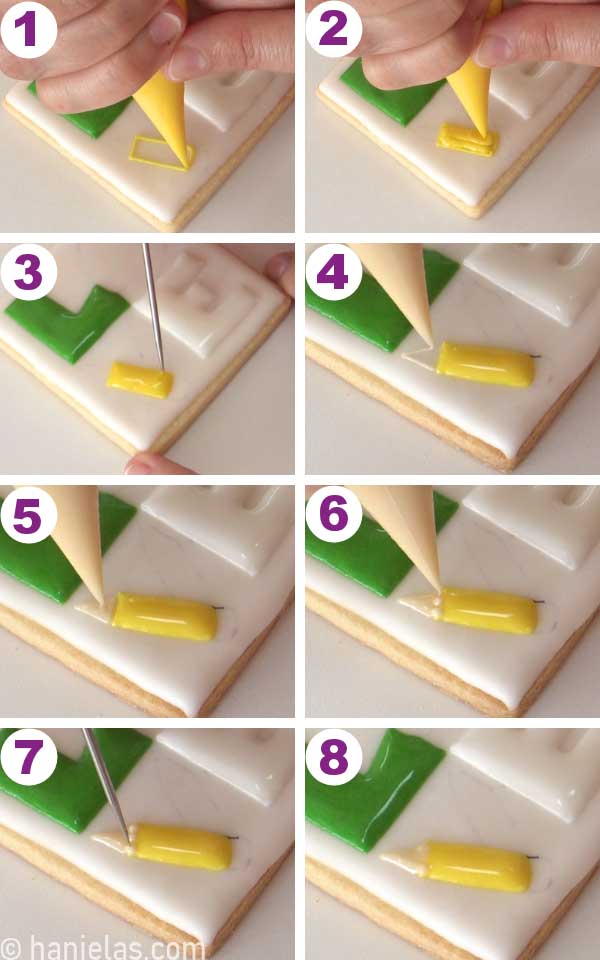
HOW TO PIPE YELLOW PENCILS
Outline and flood the body of the pencil with yellow 20-second icing (steps 1-3). Immediately pipe the collar with 20-second ivory icing. To make the collar top pipe three dots on the ivory-yellow border. Use a scribe and up and down motion to level dots into the icing (steps 4-8).
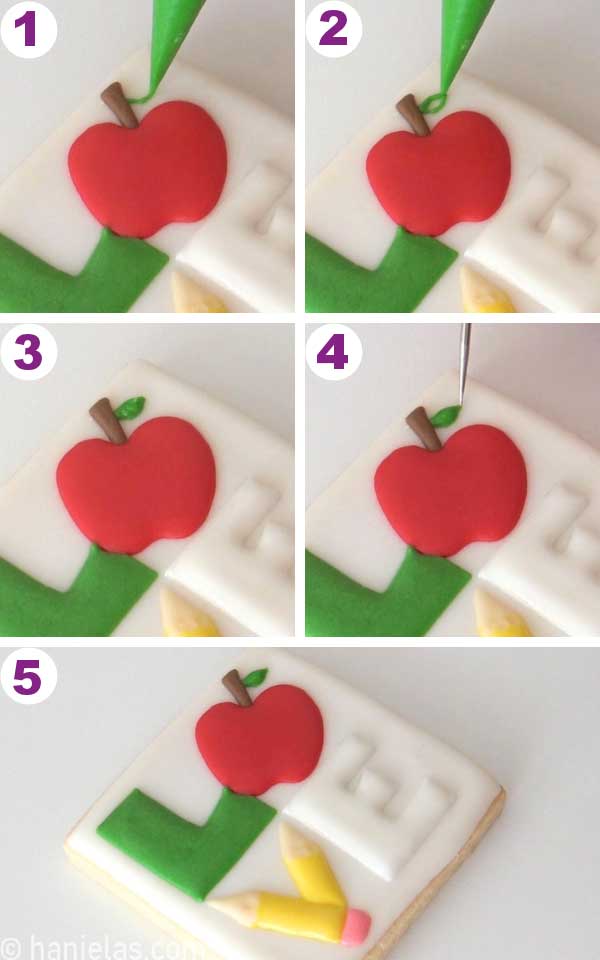
Once the first pencil crusts you can pipe the second pencil next to it (steps 1-4). Finish pencil design with a pink eraser. Pipe 20-second pink icing on the bottom of first pencil (steps 5-8).

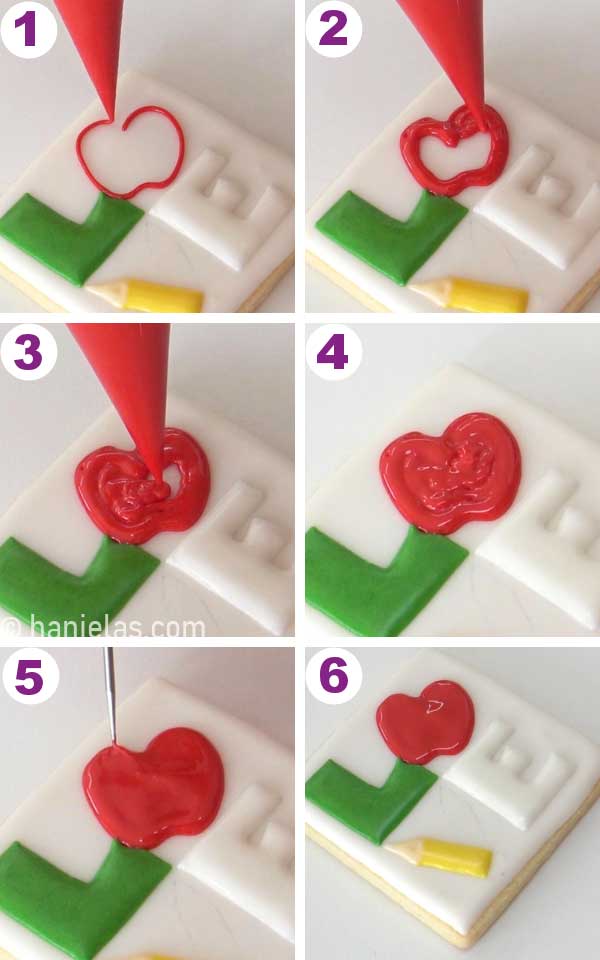
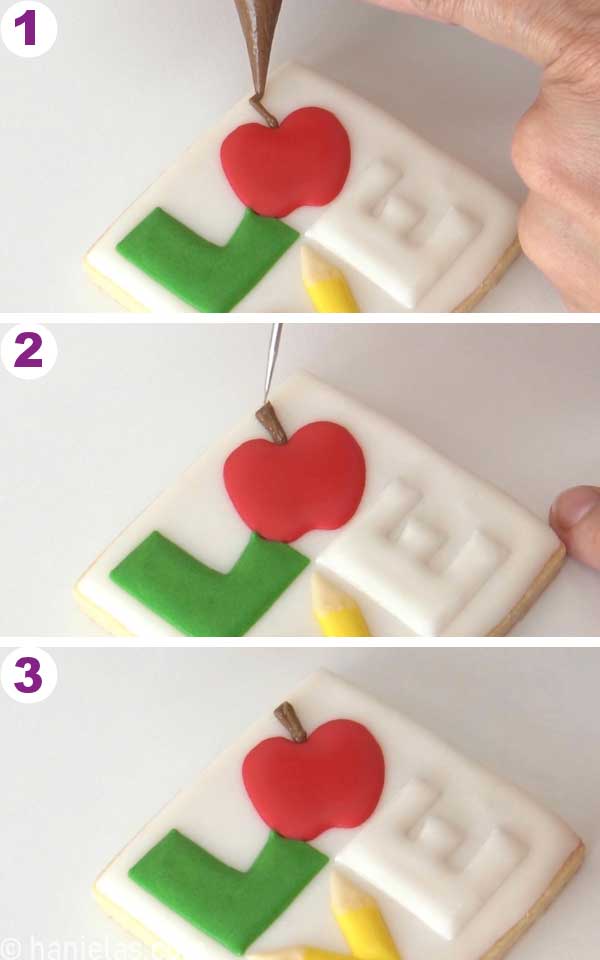
MAKE AN APPLE: FRUIT OF KNOWLEDGE
Follow the apple outline with 20-second red royal icing and immediately fill the middle. Use as scribe tool to smooth the icing and let the apple crust for 20 minutes before adding the stem (steps 1-6).
Be sure to wait for an apple to crust before adding the brown stem with 20-second consistency brown icing (steps 1-3).
Pipe a small leaf with 20-second consistency green icing on the side of the brown stem (steps 1-5).
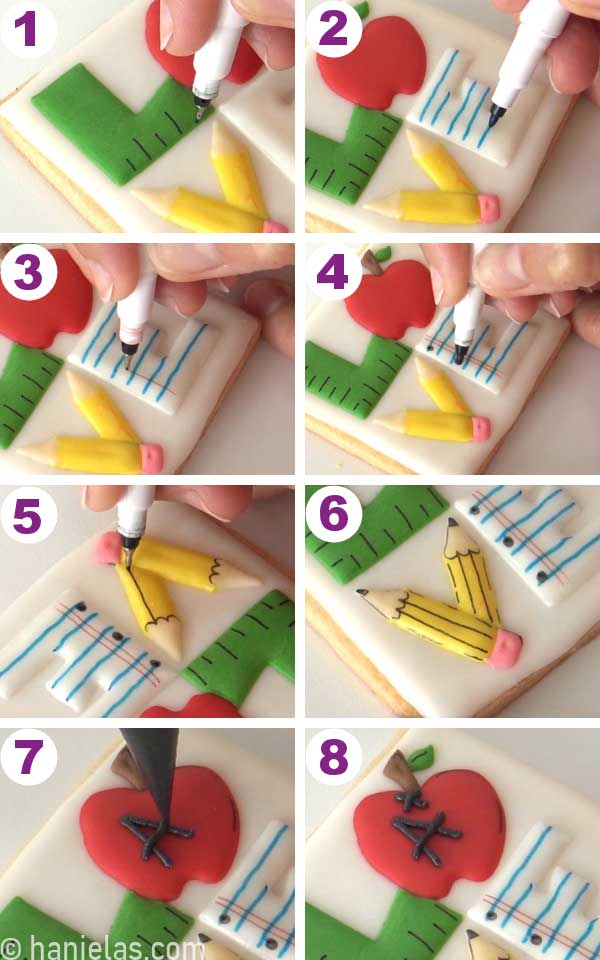
ADD DETAILS: DECORATE WITH EDIBLE MARKERS
Before you can draw on cookies with edible markers, let the icing dry. If the icing is dry, the marker tip will break the icing crust.
Use edible markers to draw details on dry icing.
MORE TEACHER APPRECIATION WEEK IDEAS
- Colored Pencil Cookies
- Thanks a Latte Printable Tags via Just Add Confetti
- Easy Ruler Cookies
TO MAKE TEACHER APPRECIATION LOVE COOKIES YOU NEED
- Cut-Out Cookies
- Royal Icing
- Square Cookie Cutter
- Decorating Template via Template Shop
- Gel Food Colors: green, yellow, pink, brown, black
- Edible Markers: black, blue, red , gray (by Rainbow Dust)
- Scribe Tool or 2-in-1 Decorating Tool (boo-boo stick)
- Tipless Piping Bags
- Cardstock
- Exacto Knife
This post contains Amazon affiliate links that earn me a small commission, at no cost to you. I only recommend products that I use and love. Learn more about my affiliate policy here.

Hi, I’m Hani
Welcome!
Thank you for visiting Haniela’s. On my blog, you’ll find delicious sweet & savory recipes made with simple ingredients. Why not start a new adventure? Discover a world of cookie decorating with my step-by-step tutorials.

Hi, I’m Hani
Welcome!
Thank you for visiting Haniela’s. On my blog, you’ll find delicious sweet & savory recipes made with simple ingredients. Why not start a new adventure? Discover a world of cookie decorating with my step-by-step tutorials.

Your ideas and artwork are amazing! Thank you for sharing.
Thank you so much, Sissy.