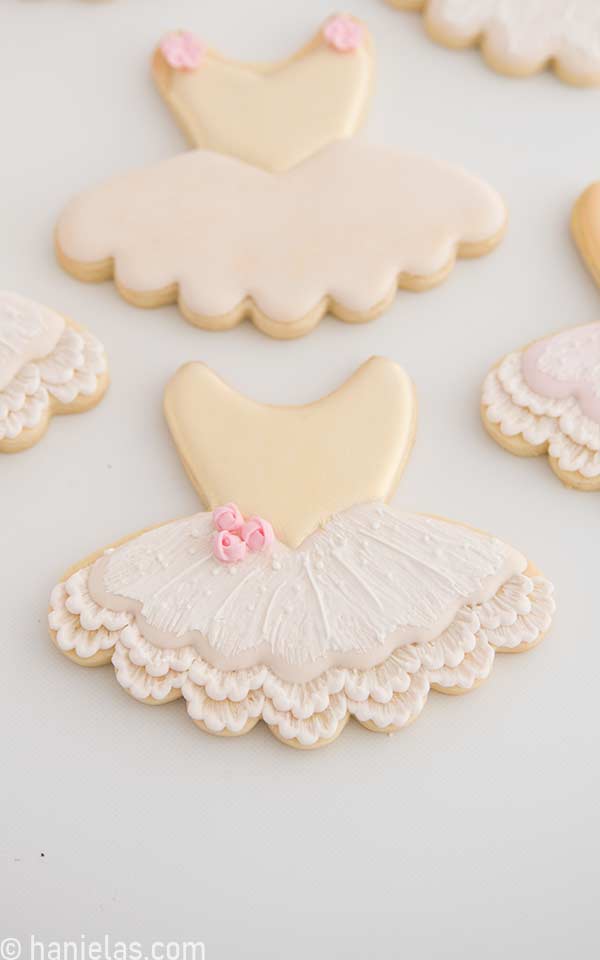
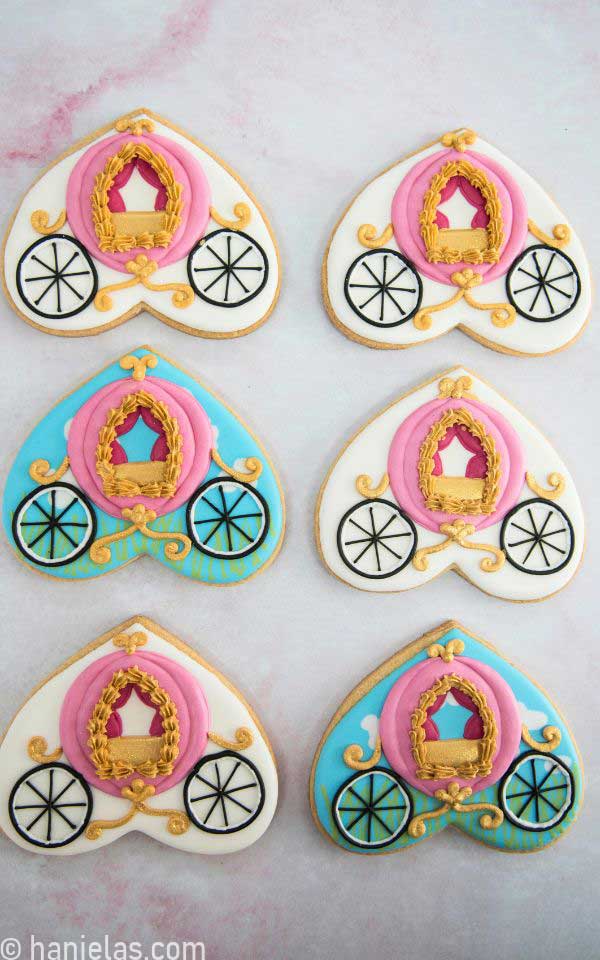
Heart Princess Carriage Cookies Tutorial
In this step-by-step picture tutorial, using royal icing, I show you how to turn heart-shaped cookies into princess carriage cookies — perfect for princess-themed parties, birthdays, or any fairytale celebration.
updated from 2013
DECORATED PRINCESS CARRIAGE COOKIES STEP-BY-STEP
I used a heart shape as I don’t have a carriage cutter. All you have to do is turn the cookie upside down, and you are ready to make charming carriage cookies. Follow step-by-step picture instructions or watch a video at the end of the picture tutorial.
THINGS YOU NEED
- Get all the tools and supplies in Haniela’s Amazon Shop
- Heart Cookie Cutter, I used a 3.5 to 4-inch cutter
- Gel Food Coloring: sky blue, green, pink, black, ivory
- Food Only Paintbrushes
- Tipless Piping Bags
- Scribe Tool
- Star Tip #14 or #16
- PME 1.5 Piping Tip
- Fine-tip edible marker
- Cardstock Template
- Edible Metallic Paint Tools: Gold Luster Dust (alternatively, you can get pre-made edible metallic paint), Vodka or Eveclear (alternatively, you can use Luster Dust Activator), Paint Palette Tray, Dropper
This post contains Amazon affiliate links that earn me a small commission, at no cost to you. I only recommend products that I use and love. Learn more about my affiliate policy here.

PREPARE COOKIES AND ROYAL ICING
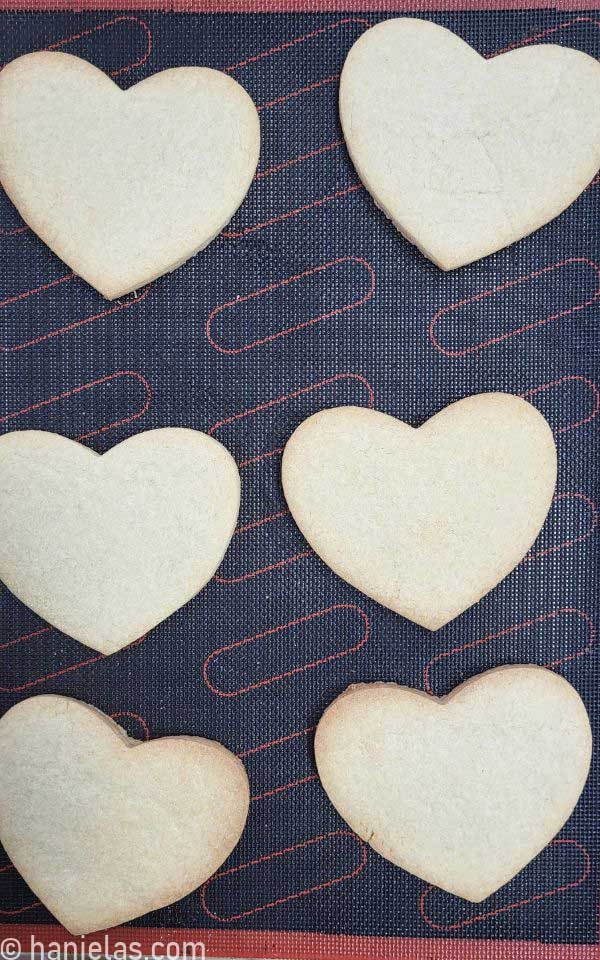
For this project, I baked large heart cookies (3.5 to 4 inches) using my classic cut-out sugar cookie recipe; however, you can use any cut-out cookie recipe of your choice. I paired it with citrusy royal icing – Fresh Lemon Royal Icing.
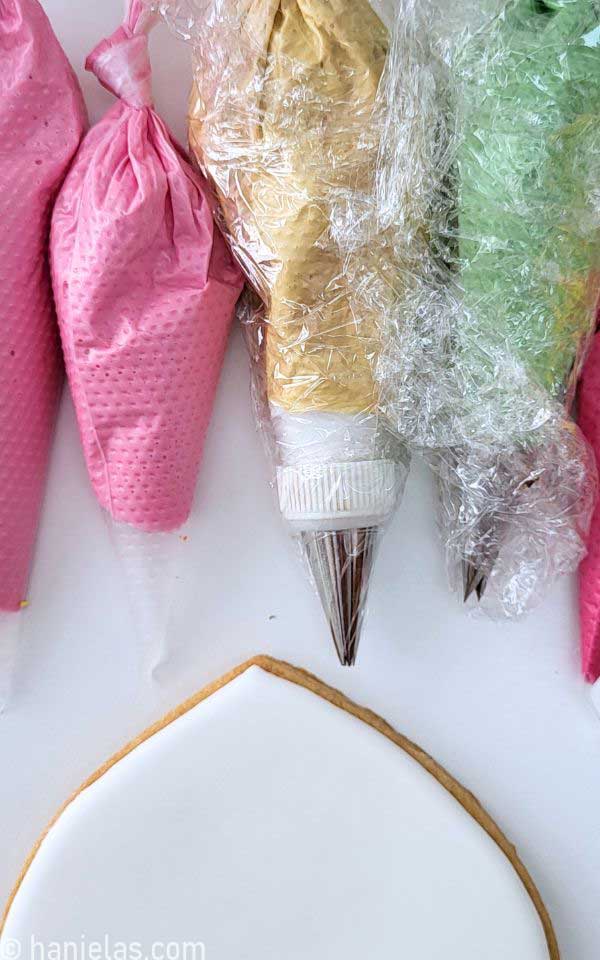
ROYAL ICING COLORS AND CONSISTENCIES
- Blue Icing: 15-second consistency (base)
- White Icing: 15-second consistency (base), piping consistency-optional (wheels)
- Green (two shades): 15-second consistency (base)
- Light Pink Icing: 20-second consistency (carriage)
- Deep Pink Icing: 20-second consistency (drapes)
- Ivory Icing: stiff (decorated window border, piped swirls), 20-second consistency (window panel)
- Black Icing: piping consistency (wheels)
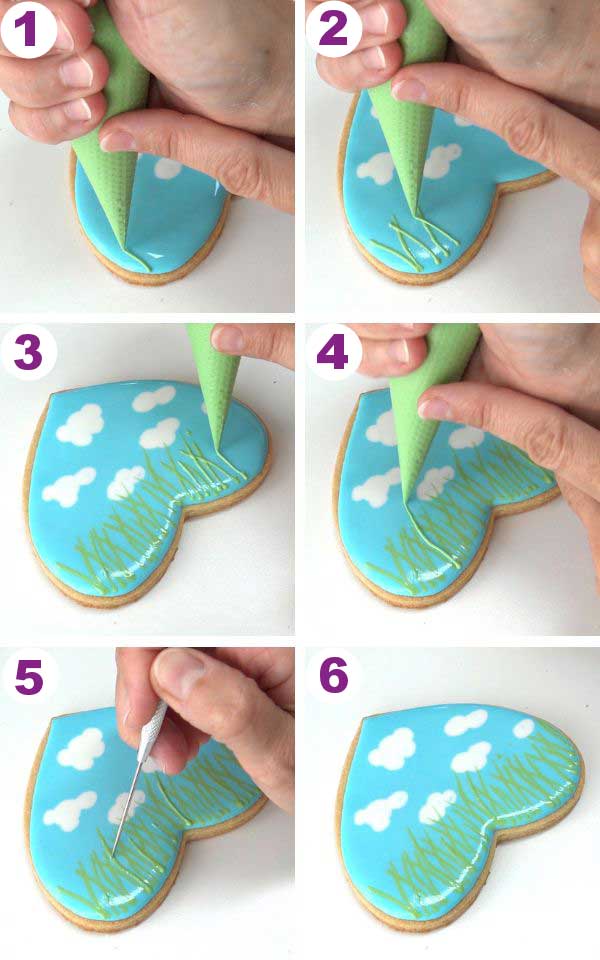
FLOOD HEART COOKIES
- Outline and flood the cookie with blue and use a scribe tool to distribute the icing evenly across the surface of the cookie (steps 1-3).
- Immediately after this step, use white icing to pipe small clouds onto the blue base. To pipe the cloud, start with a small round and then build the cloud using the rounds.
- It’s essential that the icing is flood consistency so that it sinks into the blue layer, creating an even, seamless layer (steps 4-8).

- Make the grass pattern using green royal icing. You can use two shades of green or one shade of green. Using two shades creates a more dynamic design.
- Start at the bottom of the cookie and pipe straight or slightly curved lines, as shown in the picture. Use a scribe tool to accentuate the points of the lines as needed (steps 1-6).
- Allow the icing to dry for 8 to 12 hours.
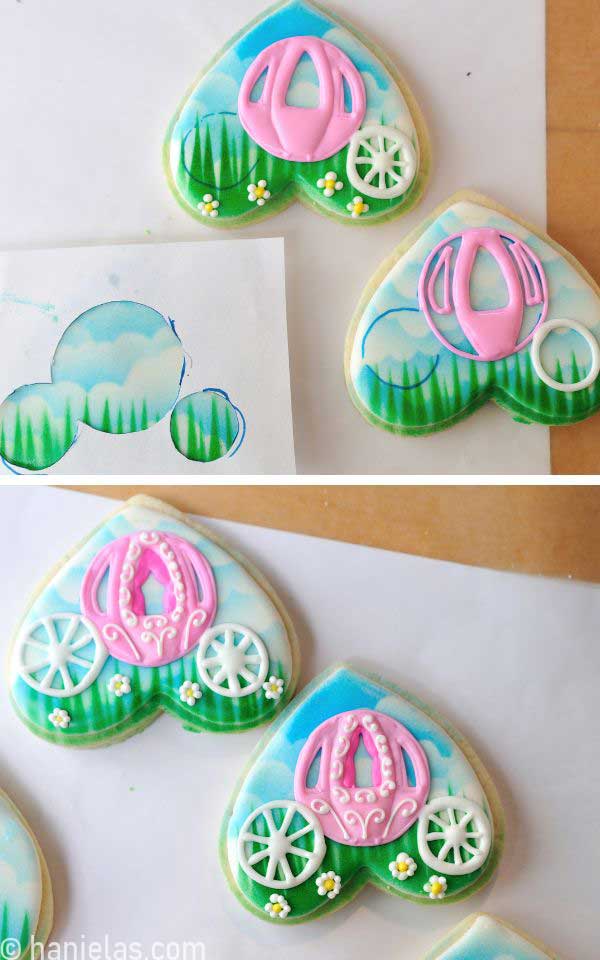
MAKE PIPING GUIDE-CARDSOCK TEMPLATE
- In the next step, we will use a cardstock template to create the piping guides (step 1).
- Cut the template out of the cardstock draw the pattern onto the cookie and then cut out short slits with an exacto knife.
- Use an edible marker to trace the outlines onto the cookie. I used a fine-tip gray edible marker (steps 2-6).
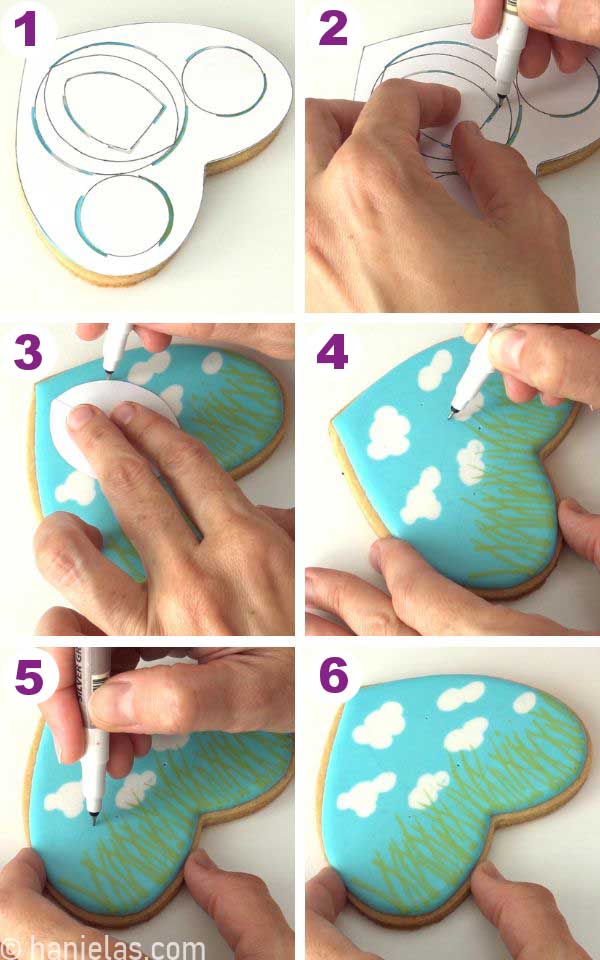
You can see piping guides clearly on the white background.

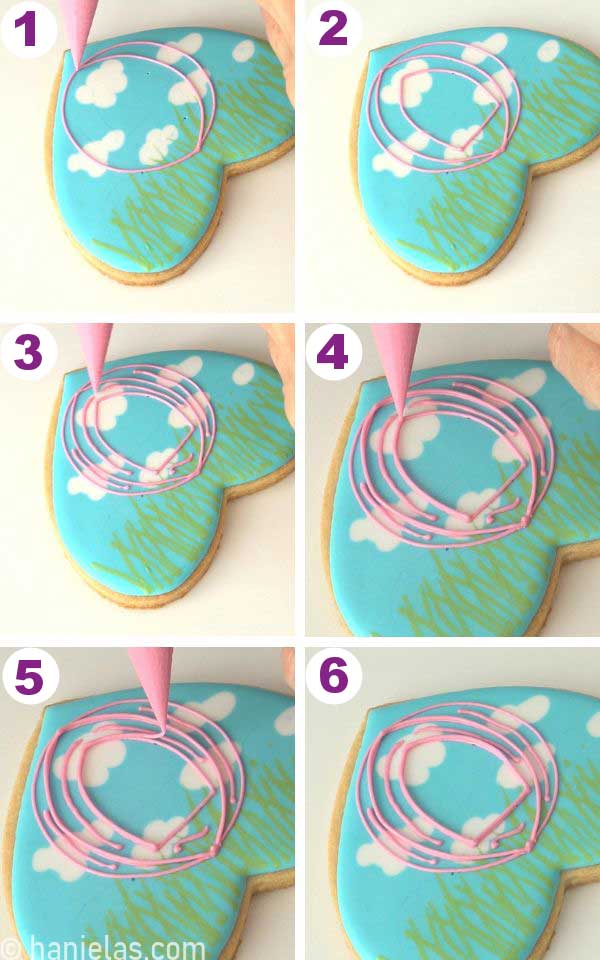
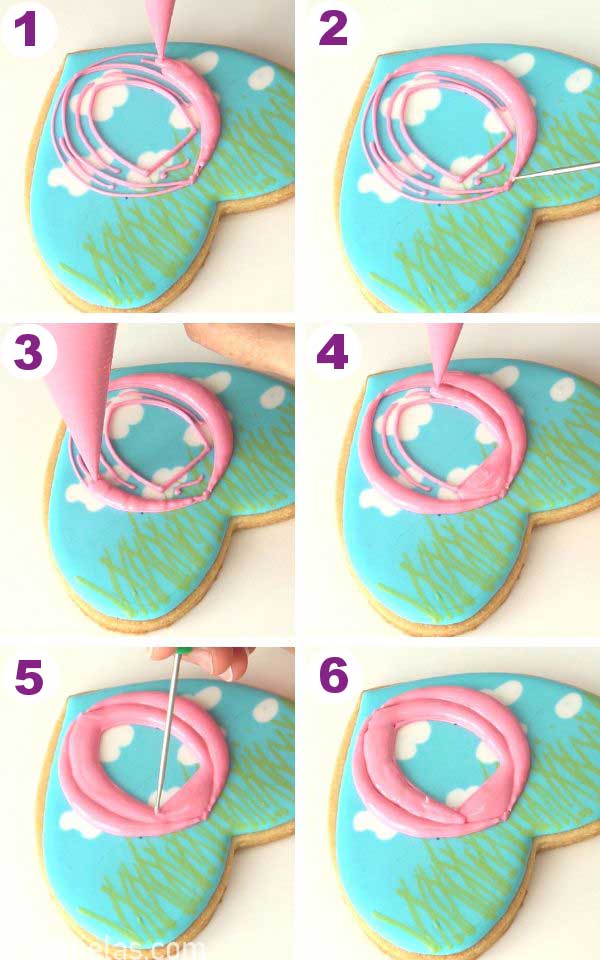
PINK PRINCESS CARRIAGE
- Now we are ready to make the carriage. Use pink royal icing of 20 consistency and pipe the outlines. Then pipe zic-zac lines across the narrow areas to help mitigate cratering (steps 1-3).
- Accentuate the window outline and the separation line by adding another line on top of it, making it higher, and we can add more icing to these areas, creating a puffier look (steps 4-6).
- Allow icing to crust for 5 minutes.
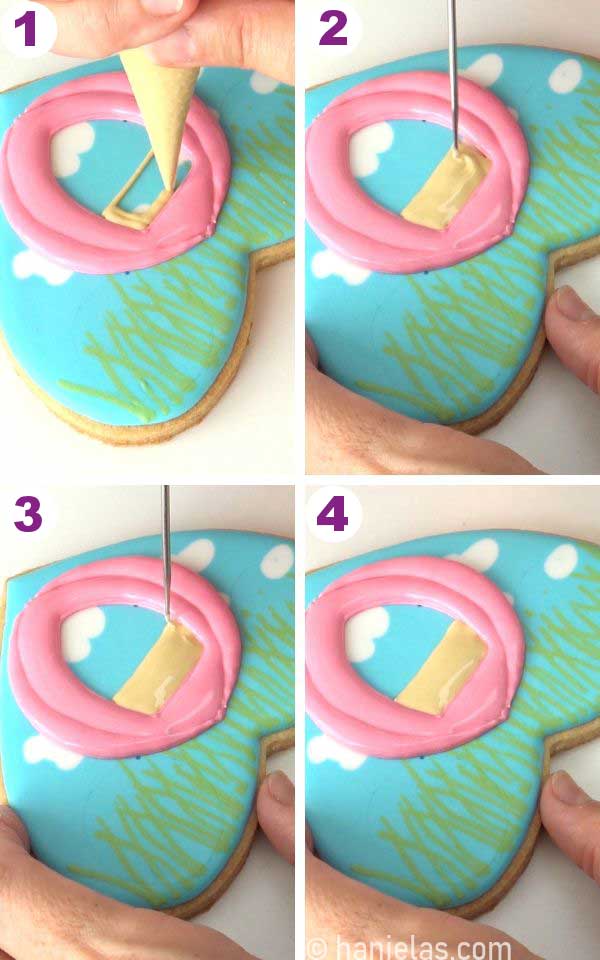
- Once the icing crusts, start filling each area with 20-second consistency icing. Use your scribe tool and smooth the icing and accentuate the points.
- Let the icing crust before piping adjacent areas to achieve dimension. Fill the areas around the window. Allow to crust for 10 minutes.
- Pipe a window panel with ivory-colored icing (20-second consistency), use a scribe tool to smooth the icing across. Let it crust for about 10 minutes (steps 1-4).
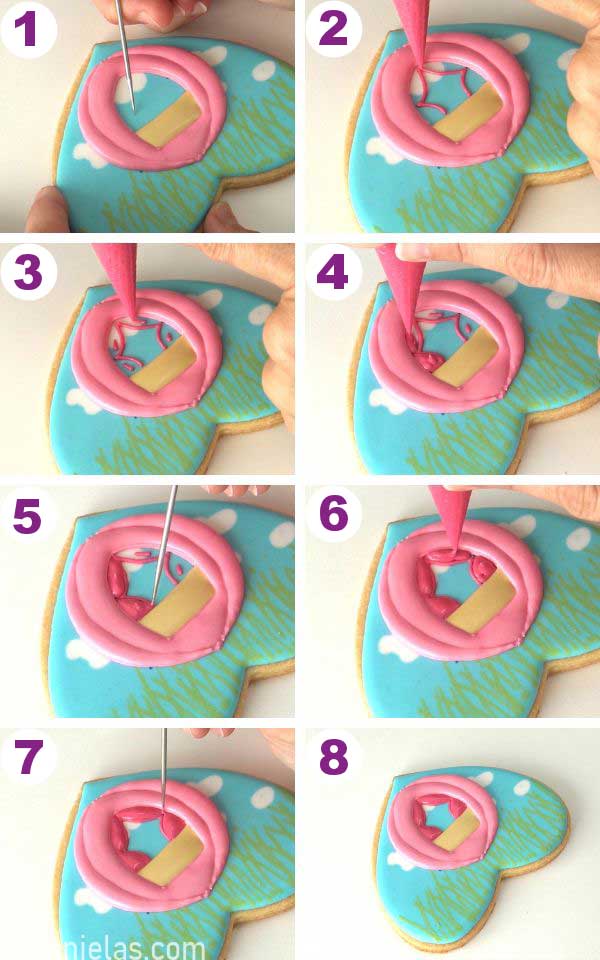
CARRIAGE WINDOW DRAPES
- To create the window drapes, I used a scribe tool to lightly scratch the surface, creating a piping guide (step 1).
- Use deep pink 20-second icing and pipe the drape outline. Then, pipe small lines into each section to help prevent cratering (steps 2-3).
- Then fill in the drape design, let the first section crust, and then fill the opposite side. Use your scribe tool to distribute the icing evenly (steps 4-8).
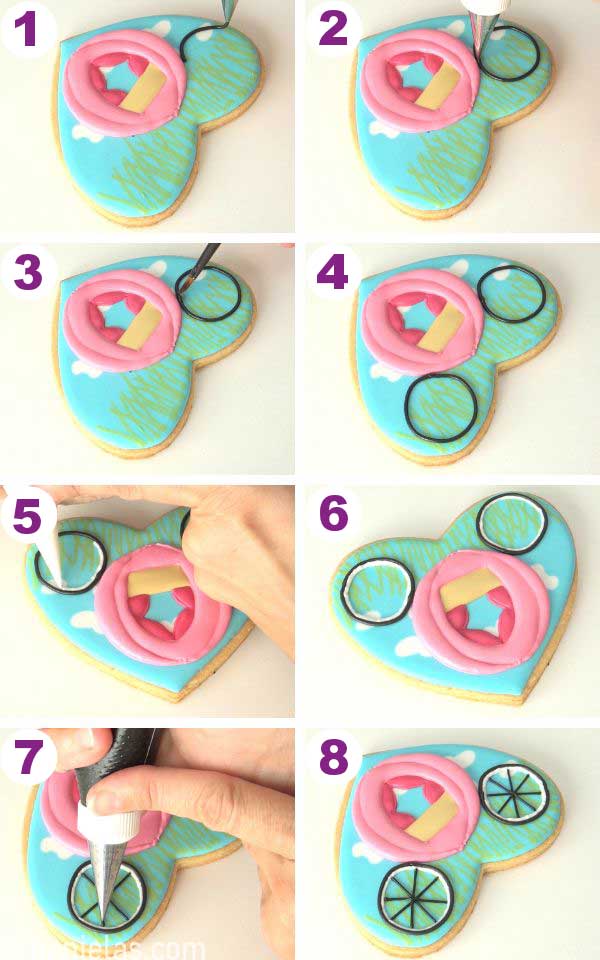
WHEELS
- Now it’s time to make the wheels. Use black piping consistency icing and a piping tip #2 to pipe the wheel. To smooth out any points and spikes in your lines, use a paintbrush and gently press down on the icing to make it even and smooth (steps 1-4).
- In this next step, we’re going to do something optional: the white inner wheel circle. Use white icing that is piping consistency (steps 5-6).
- And lastly, we can pipe the spindles. I used a PME 1.5 piping tip using black piping consistency icing (steps 7-8)
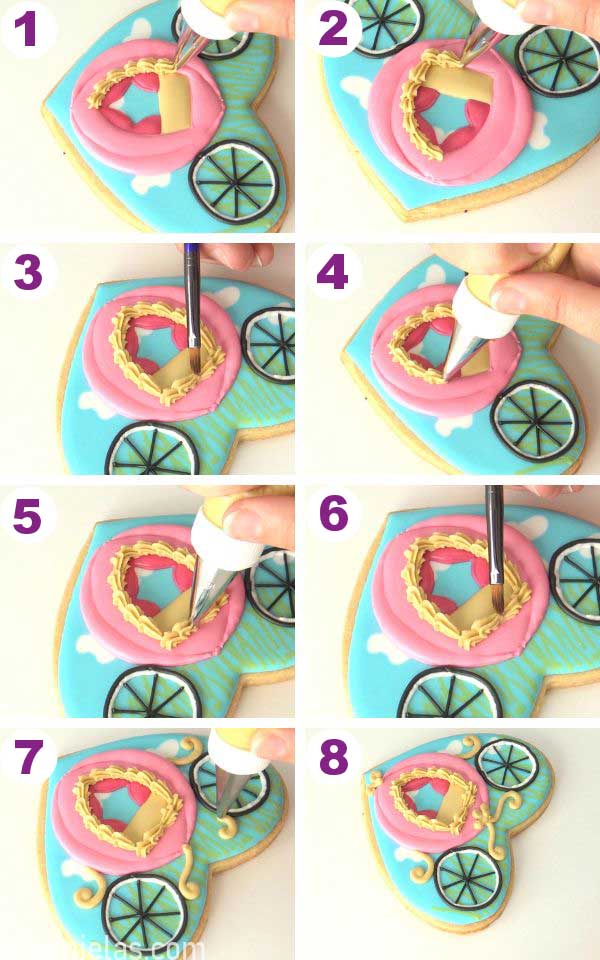
DECORATIVE BORDER
- We’re going to make a pretty decorative border using a star tip #14 and stiff consistency ivory icing.
- Pipe the shell border around the window. Use a paintbrush to smooth the spikes (steps 1-6).
- Then switch the piping tip to a #3 piping tip.
- Create piped swirls above the wheels, under the carriage, and on top of the carriage (steps 7-8).
- Let the icing dry completely.
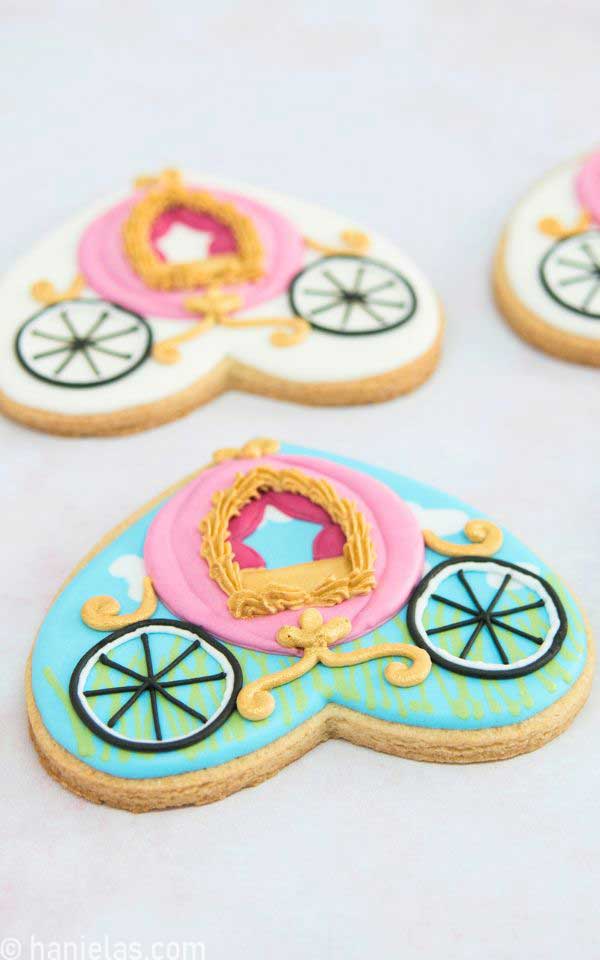
PAINT DETAILS WITH LUSTER DUST
- Into a paint palette, add gold luster dust powder and a few drops of grain alcohol, such as Everclear, or clear Vodka (steps 1-3).
- Mix it well with a food-only paintbrush (steps 4-5).
- Paint ivory details with gold edible paint (steps 6-8).

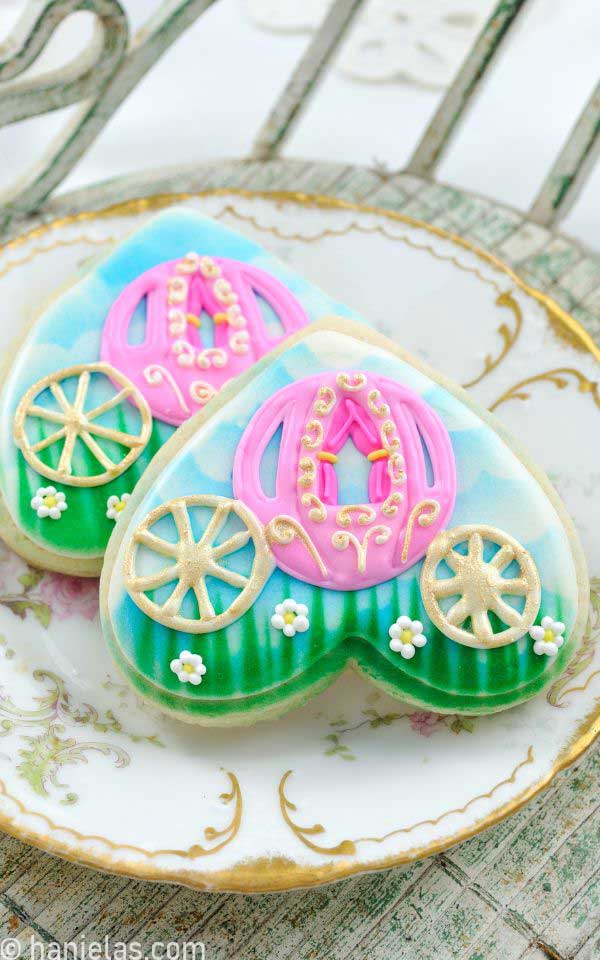
I hope these heart-shaped princess carriages add a touch of magic to your celebration. If you’re looking for a fun way to package these, consider using a simple top tag packing technique, as I did for my Berry Best Mom Cookies.
PRINCESS CARRIAGE COOKIES VIDEO TUTORIAL

COOKIES DESIGNS FROM THE PAST
I created a heart-shaped princess carriage cookies using an airbrushing technique in 2013. This version of the project is available to view on my YouTube Channel Haniela’s.
Do you want to stay updated about free cookie decorating tutorials, live events, classes, and products? Sign up for Hani’s Cookie Decorating Newsletter.
MORE PRINCESS-INSPIRED RECIPES
- Princess Crown Cookies
- 3-D Princess Cookie Rings
- Castle Cake Tutorial via Veena Azmanov
- Princess Wand Cookie Pops
COOKIE DECORATING TOOLBOX
- Beginner’s Guide To Cookie Decorating
- Ultimate Guide to Cut-Out Cookies (tips, tricks, troubleshooting)
- Royal Icing Recipe
- Small Batch Royal Icing Recipe
- Cookie Icing Recipes (includes vegan royal icing, glaze, fondant)
- Guide To Royal Icing Consistencies with Visual Help(what is stiff, flood icing, etc.)
- How To Freeze Royal Icing
- How To Make Royal Icing Transfers
- Royal Icing FAQ ( for example: how to make black icing, color bleeding, storage, and more)
- How To Make a Cookie Cutter Template
- Ultimate Guide To Cookie Decorating Tools
This post was first published on June 27, 2013. On July 8, 2025, I updated this post with step-by-step process pictures and a video tutorial. Along with written instructions, a list of tools and recipes used in the project.

Hi, I’m Hani
Welcome!
Thank you for visiting Haniela’s. On my blog, you’ll find delicious sweet & savory recipes made with simple ingredients. Why not start a new adventure? Discover a world of cookie decorating with my step-by-step tutorials.

Hi, I’m Hani
Welcome!
Thank you for visiting Haniela’s. On my blog, you’ll find delicious sweet & savory recipes made with simple ingredients. Why not start a new adventure? Discover a world of cookie decorating with my step-by-step tutorials.