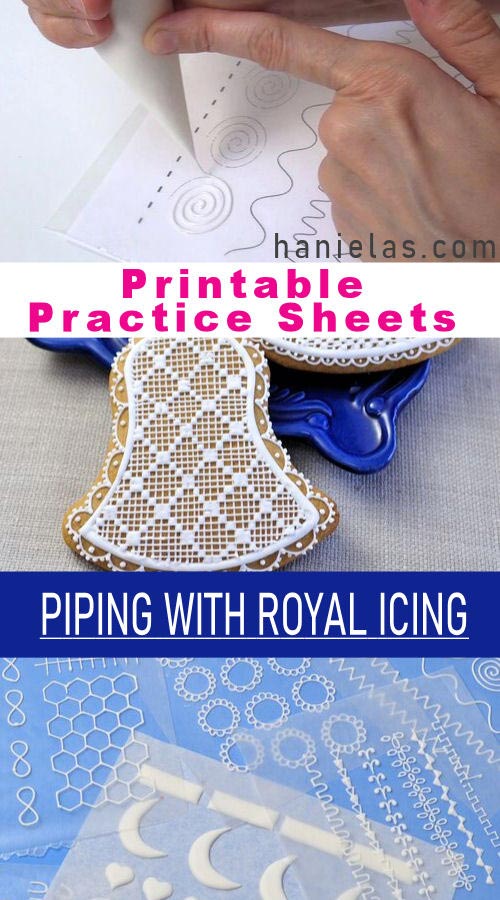
Practicing Piping with Royal Icing
For a cookie decorator it’s important to keep Practicing Piping with Royal Icing. Whenever I need to refresh my cookie decorating skills I use royal icing practice sheets.

JUMP TO TEMPLATES | PIN IT for later
- TABLE OF CONTENTS
- Things you need to practice piping with royal icing.
- What royal icing consistency should I use for practicing?
- How to fill the piping bag?
- Sealing a piping bag?
- How to cut a tipless disposable piping bag?
- Prepare for piping with royal icing?
- How to hold a piping bag?
- How to pipe a straight line with royal icing?
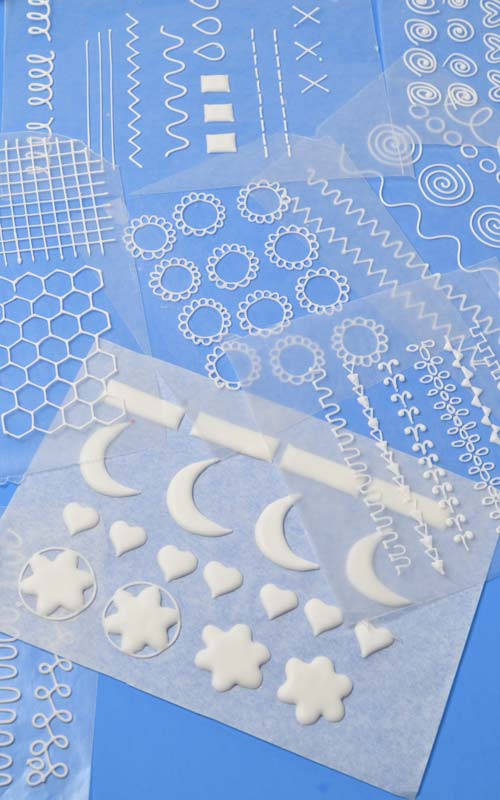
- Royal icing practice sheets.
PRACTICE PIPING WITH ROYAL ICING
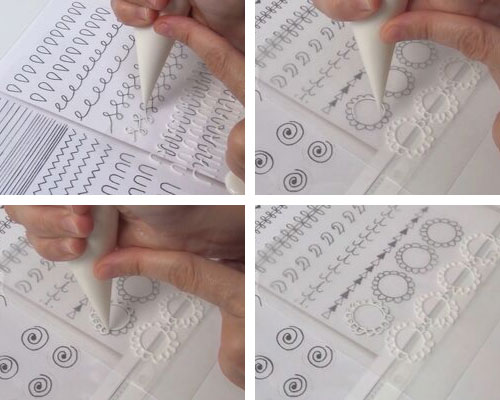
Piping intricate designs with royal icing takes patience and practice. And believe me it’s super easily to loose the magic touch. When that happens I print cookie decorating practice sheets and practice piping with royal icing on wax paper. And I also find it therapeutic.
I wanted to make these Henna Cookies but felt I needed to practice some piping as I haven’t piped intricate designs in a while. I designed few practice sheets and got to work.

THINGS YOU NEED TO PRACTICE PIPING WITH ROYAL ICING
- Wax Paper /Parchment – I use wax paper, it’s cheap
- Royal Icing Practice Sheets – you can find my pdf templates at the bottom of this post, in the tools section
- Royal Icing – use my Small Batch Recipe
- Piping Tips – if using, today I’m not using any tips – for fine, delicate piping use small round tips #00, #0, #1,# 1.5, #2. Tips 00, 0, 1.5 are PME tips, they are a bit more expensive but are really worth it.
- Masking Tape – optional
- Scissors – to cut the tip of the piping bag
WAX PAPER
Prepare wax paper or parchment sheets by cutting them into more manageable sizes.
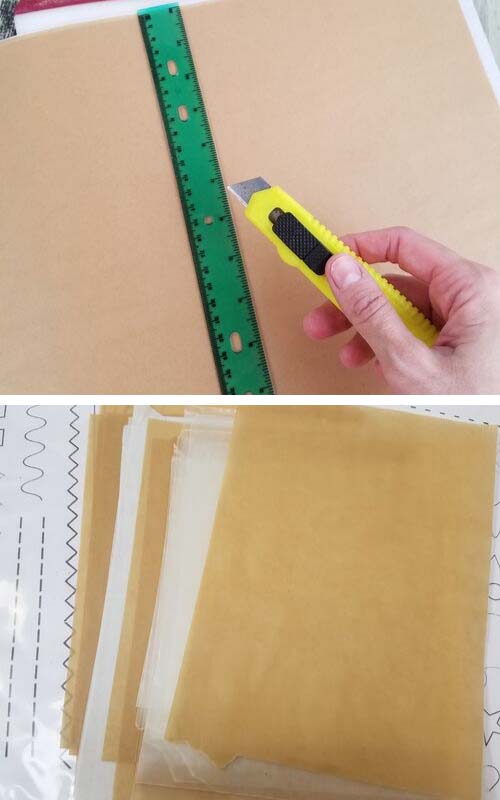
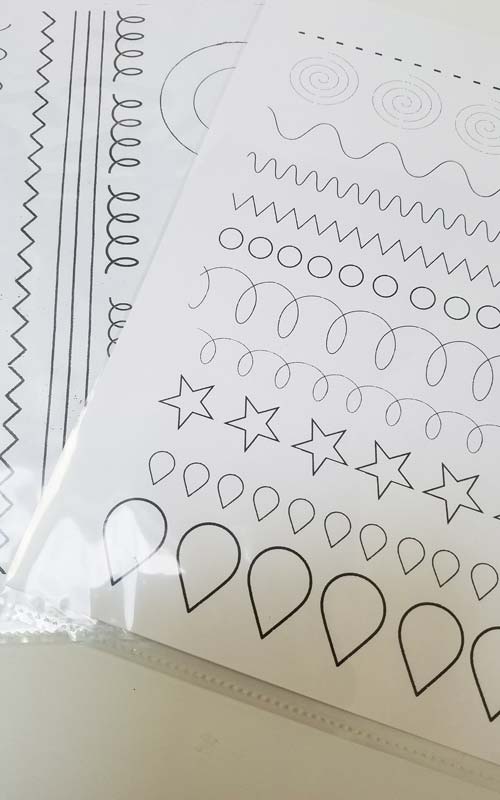
ROYAL ICING PRACTICE SHEETS
My printable pdf practice sheets can be located at the bottom of this post in the recipe and tools section.
Place your printed practice sheets into sheet protectors.
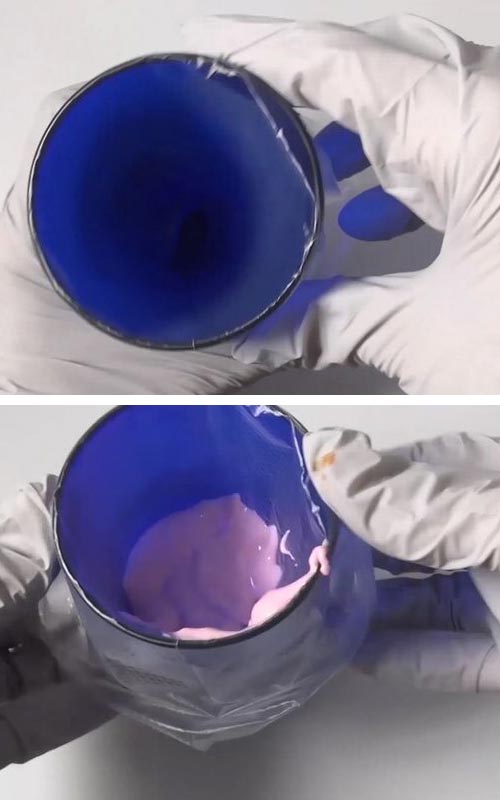
ROYAL ICING
Prepare Royal Icing. For royal icing practice purposes I use unflavored and uncolored royal icing. To practice piping you don’t need a lot of icing so I’d recommend using Small Batch Royal Icing. It makes about 1 ½ royal icing.
Next, you will need to thin royal icing to a softer, more fluid consistency. Use a spray bottle and room temperature to thin royal icing. Follow my Guide to Royal Icing Consistency.
WHAT CONSISTENCY SHOULD I USE TO PRACTICE PIPING?
- 15 SECOND CONSISTENCY – it really depends on what you need to practice? If you are new to cookie decorating and need to practice flooding of shapes then it is best to use 15 second consistency royal icing. And if you have no idea what 15 second consistency is then I highly recommend you check out my detailed tutorial Ultimate Guide to Royal Icing Consistency.
- 25 to 30 SECOND CONSISTENCY – for piping loops, ziz-zac lines, loop, scalloped edges use icing that is slightly thicker but not too thick. If it’s too thick it will put too much strain on your wrist and hand. You can adjust consistency when you are decorating an actual cookie. But for practicing it will be fine.
- THICK CONSISTENCY – if you plan to practice using specialty tips, such as leaf tip, star tip, petal tip be sure to use stiff royal icing.
FILL THE PIPING BAG
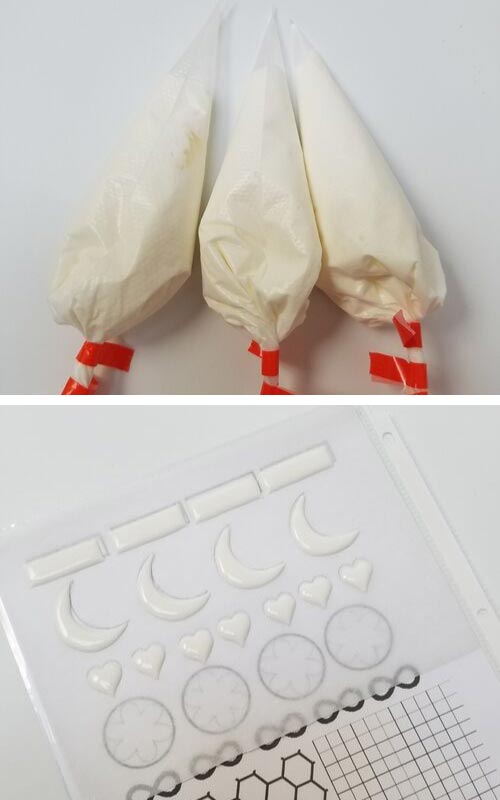
Spoon royal icing into a piping bag. I used disposable piping bags.
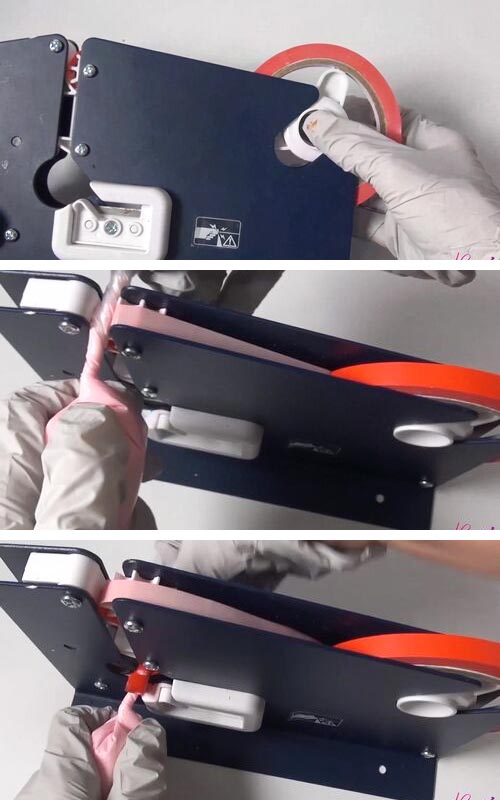
HOW TO SEAL A PIPING BAG
I like to seal my bags with a tape sealer or alternatively you can use a rubber band. If you should decide to get a tape sealer yourself. Be sure to get a tape and tape sealer, they are sold separately.
I use a tape sealer to seal piping bags filled with icing. I like to differentiate my piping bags based on a consistency of royal icing. For example for 15 second consistency I’ll use 3 stripes and for thick icing 1 use stripe and so on.
HOW TO CUT A DISPOSABLE PIPING BAG?
I use disposable piping bags to decorate. To make an opening on the piping bag first locate the seam and press it in the middle. Then with sharp scissors cut straight across. Cut should be perpendicular to the seam. Don’t cut on an angle. If this is your first time cutting a piping bag, cut only a tiny piece. You can always cut it bigger if you need to.

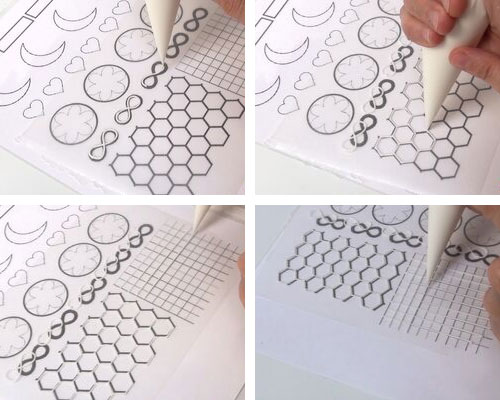
PREPARE FOR PIPING WITH ROYAL ICING
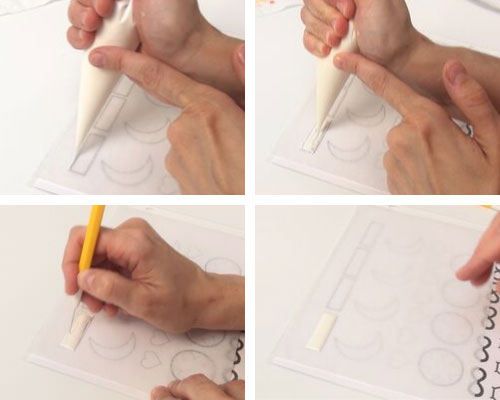
Preparation for practice piping with royal icing is essentially same as with Royal Icing Transfers. You need a practice/template sheet, wax paper and royal icing.
Place a piece of wax paper over the template. For practicing purposes it’s not necessary to secure wax paper or templates. But if you feel that you need to secure them onto the work surface by all means do so. Use a masking tape to secure a template and wax paper onto your work surface.
To flood shapes use 15 second consistency royal icing. First, outline the shape and then fill it with the icing. Then using a needle tool distribute the icing evenly within the outlines. And accentuate the corners if there are any.
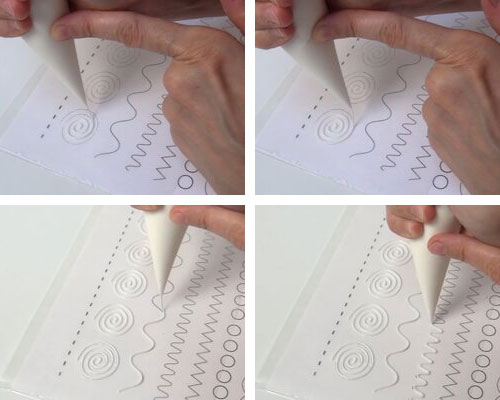
HOW TO HOLD A PIPING BAG?
I’m right-handed so I hold the piping bag with my right hand. Place the bag into a palm of you hand. Notice I’m also using my left index finger to guide the piping bag. It also provides additional stability when piping. If your hand shakes you can use your other hand to support your piping hand.
I make lots of mistakes. When that happens I scrape off the icing and start over.
HOW TO PIPE A STRAIGHT LINE
Here are few tips that will make it easier to pipe straight lines with royal icing :
- Don’t overfill your piping bags. Working with smaller amounts of icing when piping small details is more effective, easier and it puts less strain on your hands and wrists.
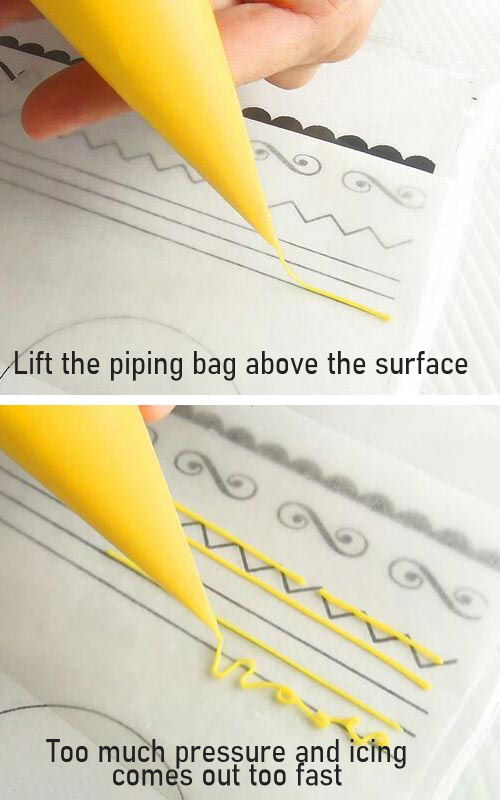
- When piping don’t put too much pressure onto the piping bag. If you put too much pressure on a piping bag more icing comes up of the bag faster. Faster the icing comes out harder it is to control it.
- To pipe even straight lines put even pressure on the piping bag.
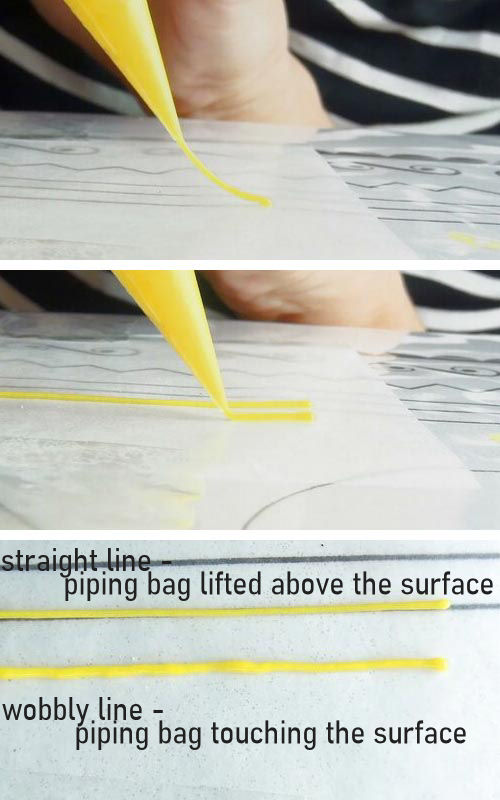
- Try to lift up the tip of the piping bag slightly above the surface so the icing slowly falls on the surface. Don’t pipe dragging the piping bag with icing touching the surface. It results in wobbly lines.
- Try not to rush. Rushing usually leads to putting to much pressure on the piping bag. More pressure you put on the piping bag more icing comes out. Fasted icing comes out of the piping bag harder it is to control.
- Slower and steady.
- Support the tip of the piping with an index finger of your other hand. For example if you are holding piping bag in your right hand use left index finger to support the piping bag. If your hands are shaky alternatively support your piping hand wrist slightly with your other hand.
- Piping dash lines – come to a full stop, stop piping before you make a full stop.
- Zig-zag lines – come a partial stop on each point.
Notice a wobbly line when piping with a piping bag touching the surface
TO PRACTICE PIPING WITH ROYAL ICING YOU NEED
- RECIPES
- Small Batch Royal Icing
- TOOLS
- Royal Icing Practice Sheets : template1, template2, template3, template4, template5
- Tape Sealer, Tape (sold separately)
- PME piping tips for delicate piping #00, #0 #1.5(popular)
- Piping Bags
- Needle Tool
- Wax Paper
- Masking Tape – optional
RELATED ROYAL ICING TUTORIALS :
PIN IT for later
This post was originally published on September 3rd, 2013. I updated this post with new photos, written directions, tips and tricks and a video.
This post contains Amazon affiliate links that earn me a small commission, at no cost to you. I only recommend products that I use and love. Learn more about my affiliate policy here.

Hi, I’m Hani
Welcome!
Thank you for visiting Haniela’s. On my blog, you’ll find delicious sweet & savory recipes made with simple ingredients. Why not start a new adventure? Discover a world of cookie decorating with my step-by-step tutorials.

Hi, I’m Hani
Welcome!
Thank you for visiting Haniela’s. On my blog, you’ll find delicious sweet & savory recipes made with simple ingredients. Why not start a new adventure? Discover a world of cookie decorating with my step-by-step tutorials.


Hi Hani-
I am going to make your tennis ball cookies for my team’s christmas luncheon. Did you make the template for the white lines on the tennis ball yourself? What type of paper did you use or do you use when making templates? Thanks so much for all your effort on my behalf!
Gwyn
Hi Gwyn,
yes I made them myself. You can use cardstock, however if you plan on stenciling onto a cookie with royal icing then I’d suggest
acetate or stencil blanks (mylar sheets, clear).
how can I get your template pdf.
Hi Elga,
tepmplate are listed at the bottom of the post, they are pdfs files, you need to click on the text that says template and a new page will open with the template, they you can print it. Hope it helps.
Hello Hani,
Thank you so much for the templates and the detailed explanation on how to learn to pipe!! This Will help so much!!
Love Susanne
Hi Susanne,
you are very welcome. Hani.
These are great templates! Thank you!
Is there a way to get these in full sized?
I’ve adjusted everything on my computer to enlarge and be able to use these templates with no luck.
I’ll looking into it. Thank you.