Woody Toy Story Cookies
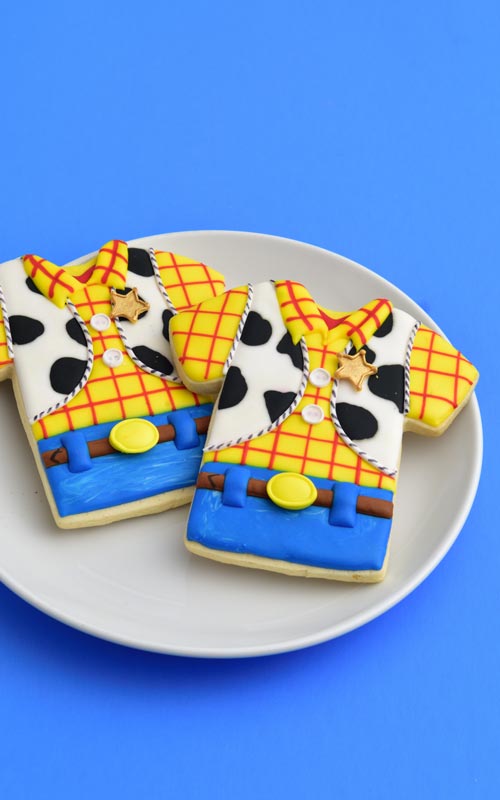
Today I’m going to show you how to decorate cute Disney’s Woody Toy Story Cookies. I don’t have a Sheriff Woody character cookie cutter so I used a shirt cookie cutter instead. And it worked perfectly.
In the past I’ve made 2 Toy Story inspired cookies. Few years back I decorated Buzz Lightyear Disney Emoji Cookies and I also made super simple Sheriff Star Cookies. And my friend Amber of SweetAmbs also created her favorite Toy Story character Aliens Cookies.
WOODY TOY STORY COOKIES
1st Toy Story movie came out in 1995. 2nd and 3rd movies followed in 1999 and 2010. And now with a brand new Toy Story 4 movie coming out in a few days I wanted to make another cookie inspired by this popular animated series. Having been a big fan of Tom Hanks, who voiced Woody; Woody Cookie was an obvious choice.
COOKIE CUTTER
This cookie design focuses on Woody’s costume alone. You’re welcome.
Instead of a specialty Woody Character Cookie Cutter (that I don’t own) I used a T-shirt cutter. You can also use a rectangular, round or even a heart cutter would work.
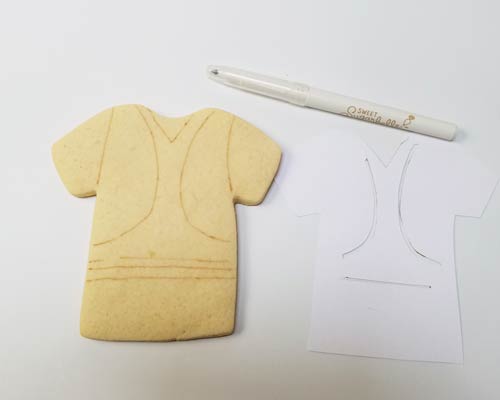
TEMPLATE
I use templates in cookie decorating because I need them. They make decorating easier. But that doesn’t mean you have to.
Generally I just trace the cutter shape onto a white card stock paper. Then I draw the outlines and then I cut it out with scissors. Smaller sections I cut out with an exacto knife.
TUTORIALS WHERE I USED TEMPLATES :
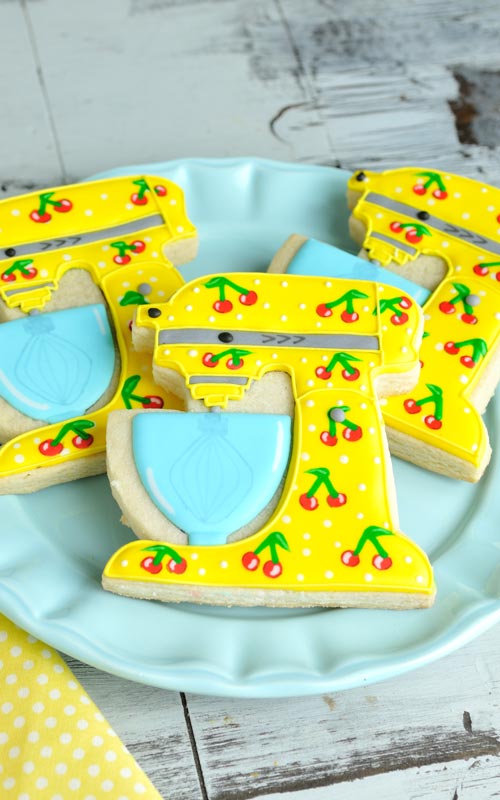
- Stand Mixer Cookies
- Soccer Ball Cookies
- LOL Surprise Doll Cookies
- Handyman Tools Cookies
- Star Wars Gingerbread House
ROYAL ICING TRANSFERS
Being a huge fan of Royal Icing Transfers and I also used them to decorate Woody Cookies. In this cookie tutorial I made 3 royal icing transfers. 2 of which were made with stencils. When using stencils be sure to use thick royal icing.
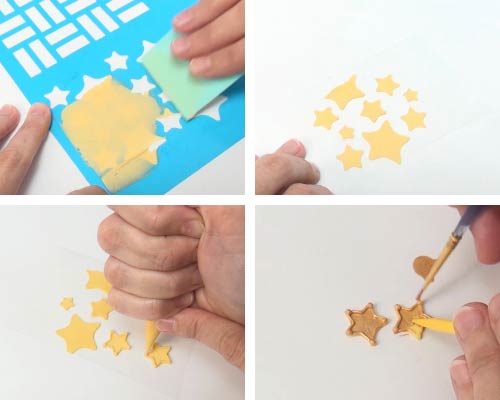
- Sheriff Star – One of my decorating pet peeves is freehand piping of stars with royal icing. Star shape haunts me! Having a star stencil handy made Sheriff Star design an easy task. I also used this same stencil to make Patriotic Cookies.
- Buttons – I used the similar polka dot stencil to make gold coins for my Saint Patrick’s Day Pot of Gold Cookies
- Buckle – To make a buckle I piped yellow royal icing onto a wax paper. Once dry you can peel off wax paper and use the decoration as desired. I employed same piping technique to make piped Royal Icing Butterflies or these adorable Mini Ladybugs.
TO MAKE WOODY TOY STORY COOKIES YOU NEED
- RECIPES
- Sugar Cookies, Vegan Sugar Cookies, Gluten Free Sugar Cookies
- Fresh Lemon Royal Icing, Vegan Royal Icing or if using fresh egg whites use this Royal Icing Recipe
- TOOLS
- Favorite Decorating Tools
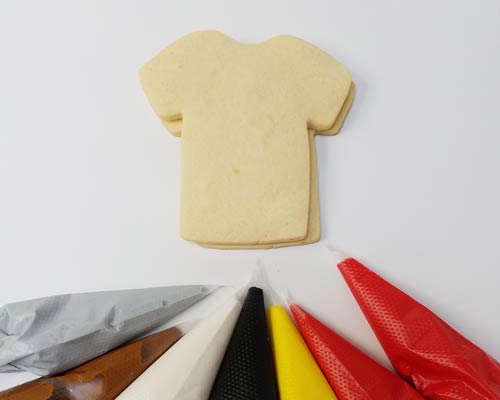
- Cookie Cutter
- Food Colors – yellow, blue, black, red, brown
- Needle Tool
- Piping Bags
- Edible Marker
- Stencils : Star Stencil, Polka Dot Stencil
- USEFUL TUTORIALS
- Guide to Royal Icing Consistency
- Royal Icing FAQ
- Freezing Royal Icing
- Woody Toy Story Tutorial with narration
Woody Toy Story Cookies
Make Toy Story inspired Woody Cookies. Decorate with royal icing.
Materials
- Sugar Cookies
- Royal Icing
- Food Gel Colors : yellow, red brown, blue, black
- Edible Marker
- Wax Paper
Tools
- Cookie Cutter
- Needle Tool
- Template
- Edible Gold Luster or Edible Gold Paint
- Food Paint Brush
Instructions
- Trace design outline using a paper template and an edible marker.
- Flood the sleeves and middle section with yello 15 second consistency royal icing. Then pipe the grid with red 15 second consistency royal icing. Use a grid template underneath the cookies if needed.
- Grid template helps with piping lines evenly spaced out. Let crust.

- Flood the bottom section, just below yellow with sky blue an marble it with white royal icing, both 15 second consistency.
- Continue with flooding the vest with white 15 and second consistency. Immediately pipe black spots to make cow pattern.
- Pipe the belt with brown 20 second consistency royal icing, let crust.
- Add belt loops and let dry.
- Prepare royal transfers.
- Place star stencil over a wax paper. Use ivory stiff royal icing and spread it over a star stencil. Slowly lift up the stencil. Let the stars dry for several hours.
- Then with an ivory piping consistency pipe the outline and dots in each point. Let dry.
- Paint sheriff star with an Edible Gold Pain or gold luster dust mixed with lemon extract. Let dry 10 minutes. Peel off the wax paper and use to decorate the cookies.
- To make the shirt buttons place a small circle stencil over a wax paper. Spread a thin layer of white stiff royal icing over a stencil. Lift it up and let the rounds dry.
- With a gray marker draw 2 dots in center of the white rounds.
- Use yellow royal icng about 20 second consistency to make an oval shape buckle. Let it dry and then pipe a outline. Let dry.
- Outline the vest with white piping consistency royal icing. Let dry.
- Attach white button onto the shirt. Then outline buttons with white piping consistenc royal icing.
- Glue on the buckle.
- Draw short black lines on a white vest outline to finish the lem.
- With yellow and red make make the collar. Make sure you let the right side crust before adding the left side.
- Lastly glue on the sheriff star with a little bit of royal icing.


Notes
RECIPES
- Sugar Cookies (makes about 10 T-shirt Cookies, 1/4 inch thick)
- Fresh Lemon Royal Icing
- Vegan Royal Icing
PIN IT for later

This post contains Amazon affiliate links that earn me a small commission, at no cost to you. I only recommend products that I use and love. Learn more about my affiliate policy here.

Hi, I’m Hani
Welcome!
Thank you for visiting Haniela’s. On my blog, you’ll find delicious sweet & savory recipes made with simple ingredients. Why not start a new adventure? Discover a world of cookie decorating with my step-by-step tutorials.

Hi, I’m Hani
Welcome!
Thank you for visiting Haniela’s. On my blog, you’ll find delicious sweet & savory recipes made with simple ingredients. Why not start a new adventure? Discover a world of cookie decorating with my step-by-step tutorials.

Youre tutorial is the most detailed and fun to watch.
I learned exactly what i needed from it to make my icing decorations.
Thank you!
Thank you Miri, I’m glad it was helpful.
I love your cookies, I know you must hear that a lot. But, you make me want to bake all day, and decorate all night.
Thank you so much for sharing your talents with me as I appreciate learning so much from you.
Thank you so much Maria. ♥