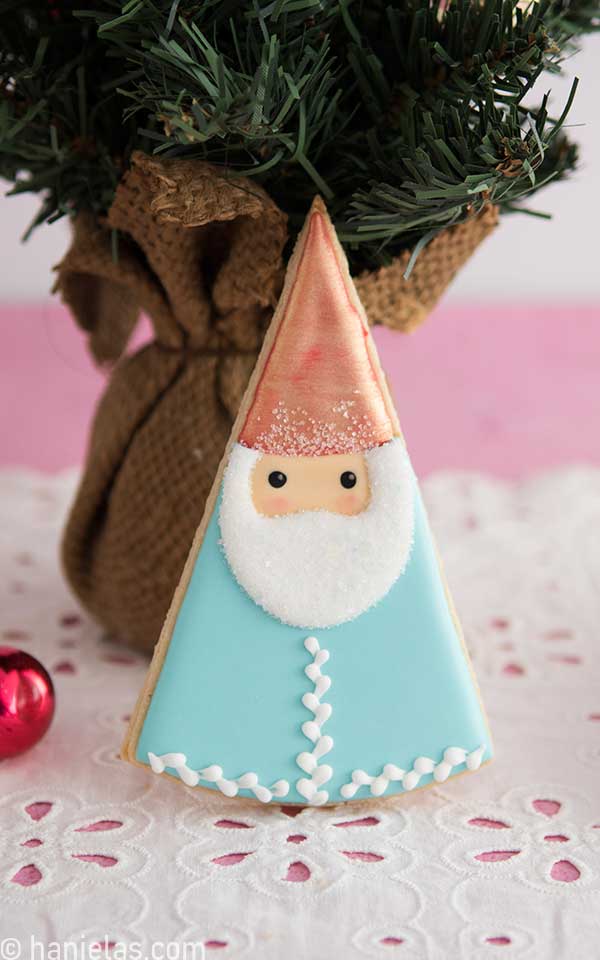
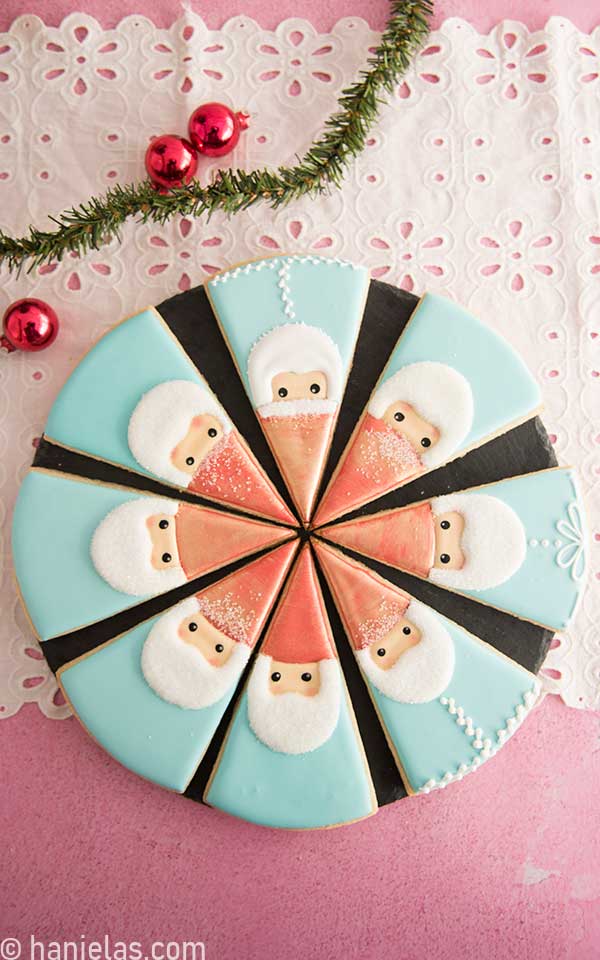
Triangle Santa Cookies
Browsing online, I found irresistible felt Santa Ornaments, and immediately I knew I had to turn them into Triangle Santa Cookies.
updated post from 2010
HOW TO DECORATE TRIANGLE SANTA COOKIES
Triangle-shaped cookies are super easy to make. Use a round plastic container or a plate to cut out a large round cookie. Then with a knife or a bench scraper, cut the round into even wedges. Or use a triangle cookie cutter instead.

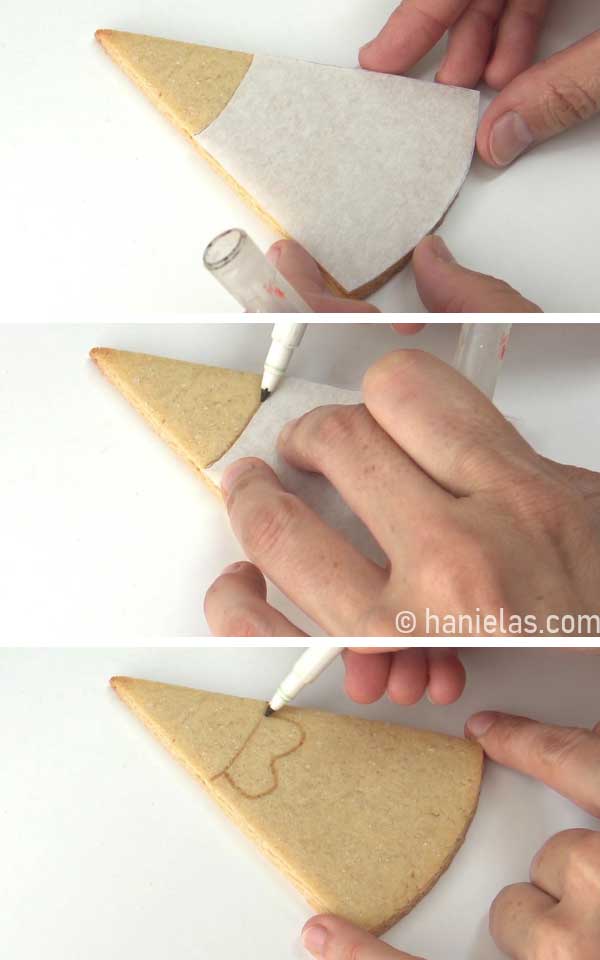
DECORATE SANTA FACE
Start by tracing the outline guides onto the cookie with an edible marker.
TIP: I used a piece of parchment to make the template. To make a sturdier template you can also use a cardstock
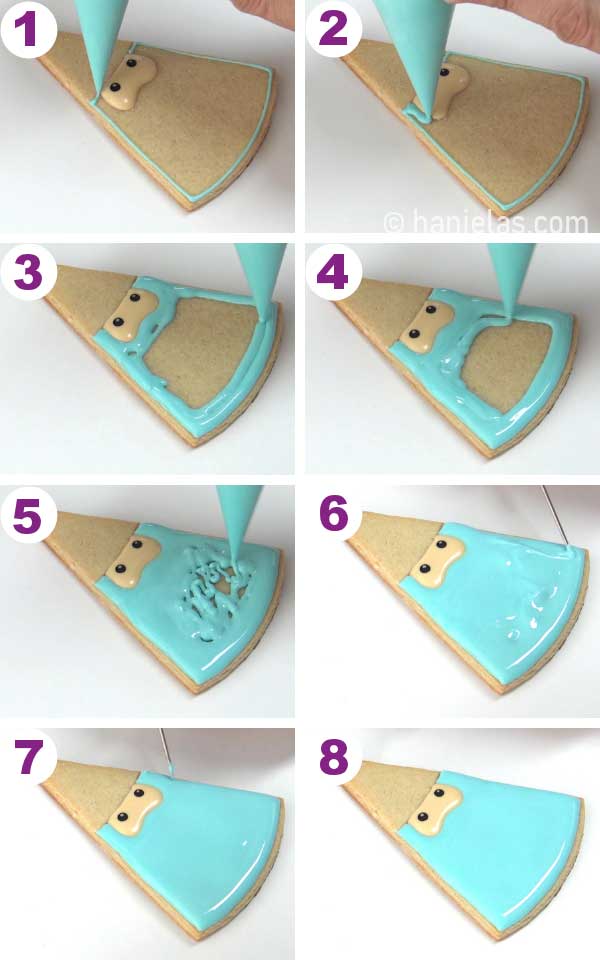
With 15 to 20-second consistency icing pipe the face (steps 1-2). Immediately pipe the eyes using wet on wet technique, with black 15-second consistency icing (steps 3-4). To add reflection, pick up a dot of ivory or white icing with a scribe tool and place it onto the black eyes (steps 5-6). Let the icing crust for 30 minutes.
TIP: To make skin tone icing I used ivory gel food coloring to color icing, and I added a minuscule amount of pink food coloring.

BODY AND SANTA HAT
Use a sky blue 15-second consistency icing to outline and flood the bottom part of the cookies. Use a scribe to distribute the icing evenly (steps 1-8). Let the icing crust for 20 minutes.
With 15-second consistency red royal icing outline and flood the hat (steps 1-5). Let the icing dry.

DECORATE CHEEKS WITH PETAL DUST
Add blush to the cheeks using dry FDA-approved petal dust. Dip a dry food-only paintbrush into pink petal dust, gently shake off the excess. Then apply dust onto the cheeks using a circular motion.
Use a small decorating bottle and blow the air onto the cheeks to remove residue petal dust.
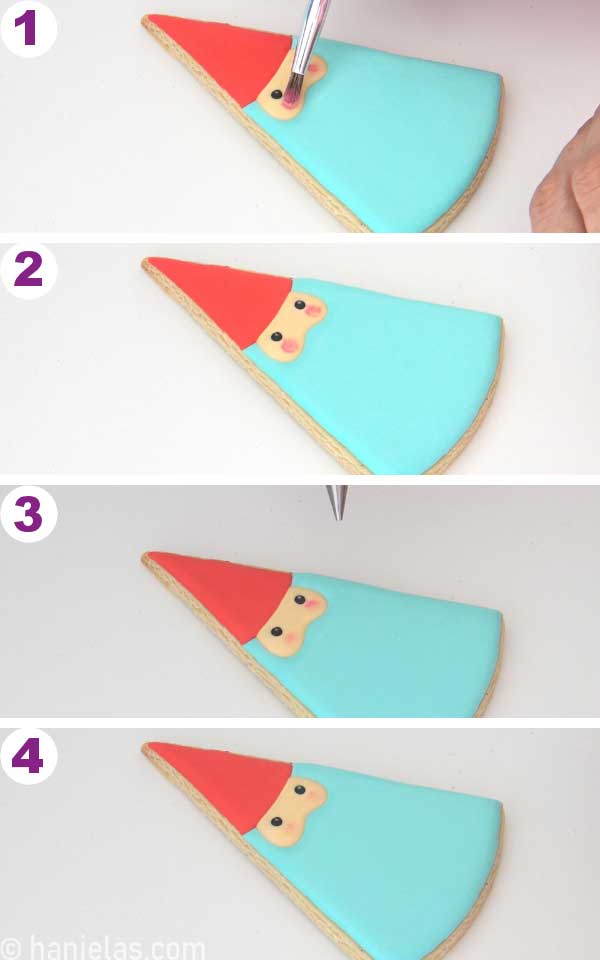
PAINT WITH EDIBLE GOLD PAINT
I decided to paint the hat gold. I used a Glamorous Gold Edible Art Decorative Paint by Sweet Sticks (step 1).
Pour a few drops of gold paint into a palette or on a piece of wax paper. Dip the flat food-only paintbrush into the gold paint (step 2). Paint the red icing (steps 3-4).

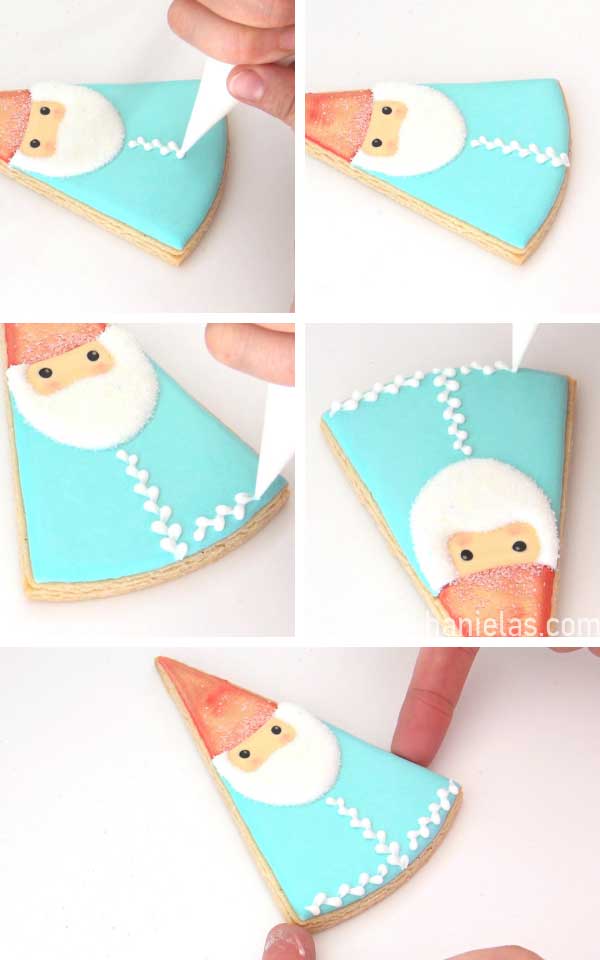
SANTA BEARD
Lastly, make the beard with white 15 to 20-second consistency white royal icing. Pipe the outline and then fill the section with icing. Use a scribe to distribute the icing evenly (steps 1-5).
Then place a cookie onto a small funnel tray and dust the beard with white sanding sugar.
TIP: If you don’t have a funnel tray, use a clean, dry coffee filter instead.

DECORATIVE BORDER
And lastly, pipe a decorative pattern on the bottom. Use piping consistency royal icing to create a beaded border.
TIP: Learn more about the different consistencies of royal icing. And how to use them in cookie decorating.
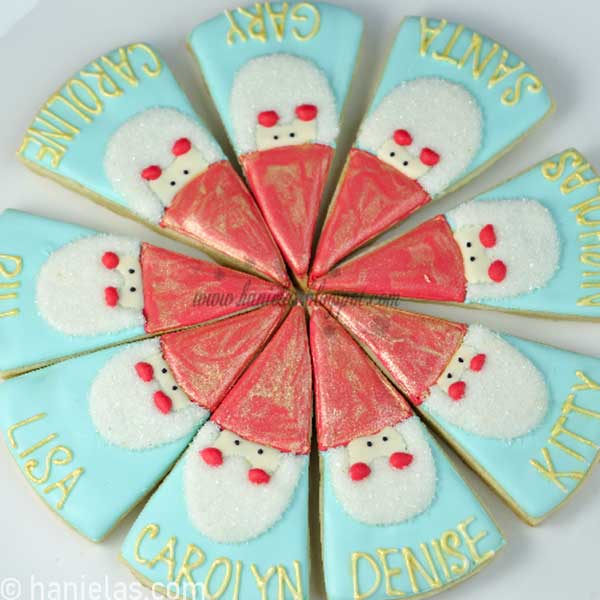
TABLESETTING COOKIE IDEA
I made these cookies for a friend in 2010. She requested that I pipe a name on each cookie. What do you think? Aren’t these adorable? As you can see, triangle cookies are also great for platters and table-setting cookies. Writing the names on the cookies can be as easy as writing them onto the dry icing with an edible marker. Or you can pipe the names with royal icing. I used the same idea to make New Year’s Eve Party Cookies.
MORE CHRISTMAS COOKIE DECORATING IDEAS
- Christmas Gingerbread House
- Pretty Bow Sugar Cookies for Christmas
- Christmas Angel Cookies
- Easy Poinsettia Cookie Platter / via Sweet Sugarbelle
- Snowflake Gingerbread Wreath
- Eiffel Tower Cookie Centerpiece
Did you make these Decorated Cookies? Tag @hanielas on Instagram and hashtag it #hanielas
TO MAKE TRIANGLE SANTA COOKIES YOU NEED
- RECIPES
- Cut-Out Sugar Cookies
- Royal Icing
- TOOLS
- Tipless Piping Bags
- White Sanding Sugar
- Food Gel Colors by Americolor Brand: Super Red, Sky Blue, Ivory,
- FDA Pink Petal Dust – for the cheeks
- Food-Only Paintbrush
- Scribe
This post was originally published on December 7th, 2010. On December 7th, 2021 I updated this tutorial with step-by-step picture instructions and written text.

Hi, I’m Hani
Welcome!
Thank you for visiting Haniela’s. On my blog, you’ll find delicious sweet & savory recipes made with simple ingredients. Why not start a new adventure? Discover a world of cookie decorating with my step-by-step tutorials.
Hi, I’m Hani
Welcome!
Thank you for visiting Haniela’s. On my blog, you’ll find delicious sweet & savory recipes made with simple ingredients. Why not start a new adventure? Discover a world of cookie decorating with my step-by-step tutorials.


Thank you so much everyone for your wonderful comments.I love them.
Anonymous, sure I don't see why it wouldn't work, just make sure you cut them in approximately same sizes. Good Luck. I'd love to see them, once you have them finished, feel free to post them on my FB Page Haniela's
I love your cookies! I want to make these Santas. Do you think it would work to roll out a circle and use a pizza cutter to cut it into the triangle wedges? Thank you for all the beautiful creations. You are a true artist!
beautiful, beautiful cookies!! and i love the photography as well! so great. i am not going to be baking a single thing this year! but i sure to miss it..wish i had you hear so i could get some goodies…i need some christmas baking love!
You are right, these Santa cookies are PERFECT! Very adorable, and sweet! Thanks for sharing your sweet talents with us! 🙂
These are b far the prettiest Santo cookies I have seen all season! Hani, I am raving again!!!
Those little guys are just perfect! So sweet!
Merry Christmas!!
Haniela, These Santa-gnomes are ADORABLE! I am going to make some for sure! I'm so happy that I found you blog(did I already say that)! 🙂
These are just cute beyond belief! And I love how they look all arranged in a circle. Those are definitely perfect Santas!!!
The triangle santa cookies are so amazing and lovely, like all your other creations…
So cute and perfect, Haniela! Love it!