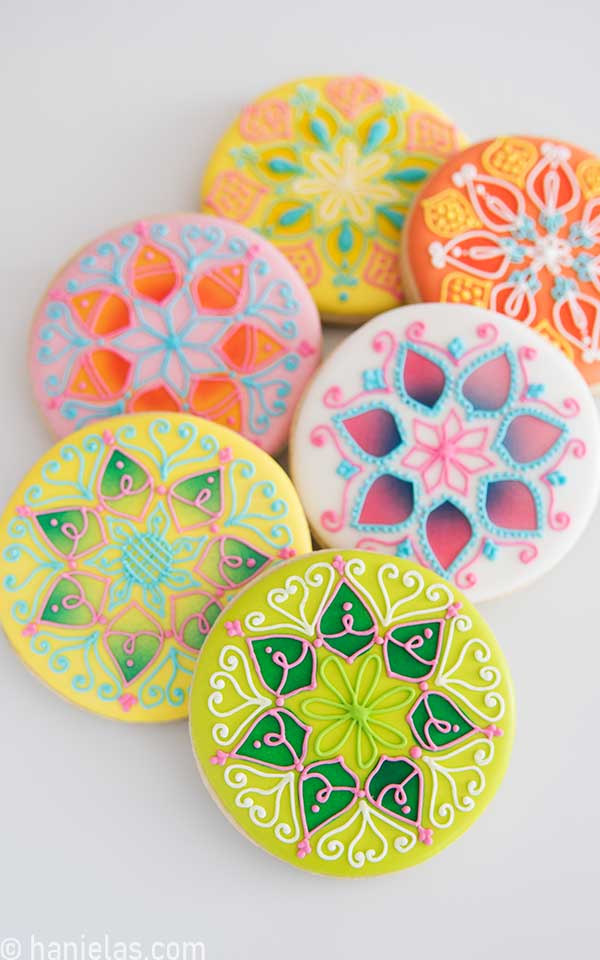
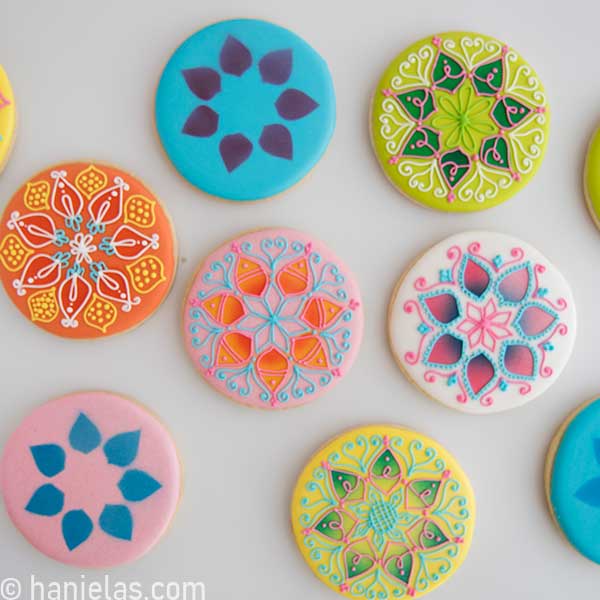
Mandala Cookies
Today I’ll show you how to decorate colorful Mandala Cookies with royal icing.
HOW TO DECORATE MANDALA COOKIES
- TABLE OF CONTENTS
- Bake Perfect Round Sugar Cookies
- How to Cut a Piping Bag
- Flood Cookies with Royal Icing
- How to make Cardstock Mandala Stencil
- Airbrush Cookies
- Tips on Piping Mandala Designs
- Pipe Mandala Designs onto Cookies
- Tools and Recipes
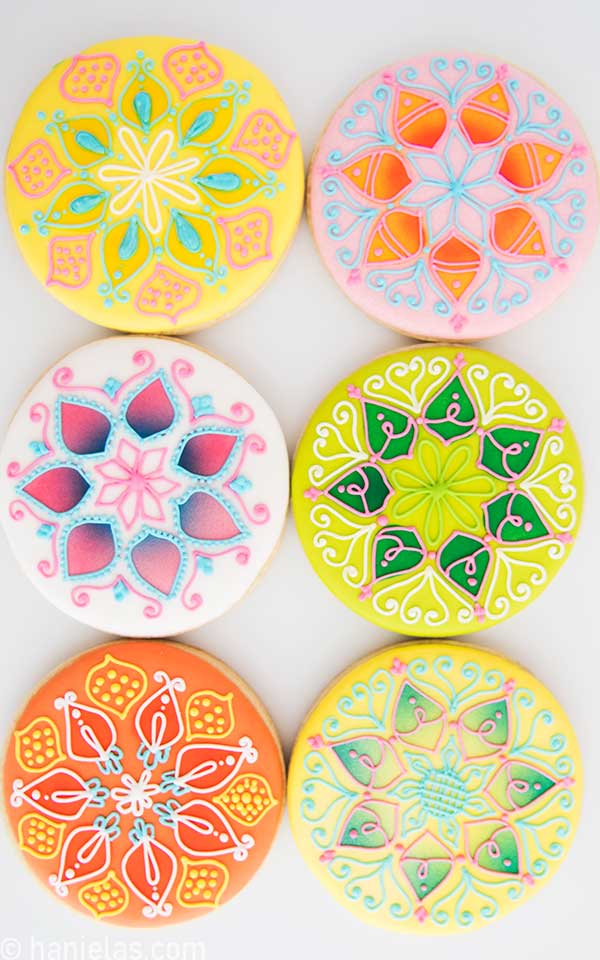
Mandala designs are popular in so many art forms: from henna paintings on hands, canvas drawings, tattoos, house décor, jewelry to cakes and cookies, to name a few.
The Mandala is a circle with a geometric configuration of symbols arranged into sections around a single center point. What does it mean for our decorated mandala cookie designs? To decorate cookies with a mandala-inspired design, you can either eyeball it, use a projector or try using my handy Mandala Cookie Stencil.
BAKE SUGAR COOKIES
My friend Marlyn told my last year to try and bake cookies on a perforated mat. I finally did and the results are fantastic! My round cookies baked evenly, with no spreading or mishaping. Look how perfect they are!

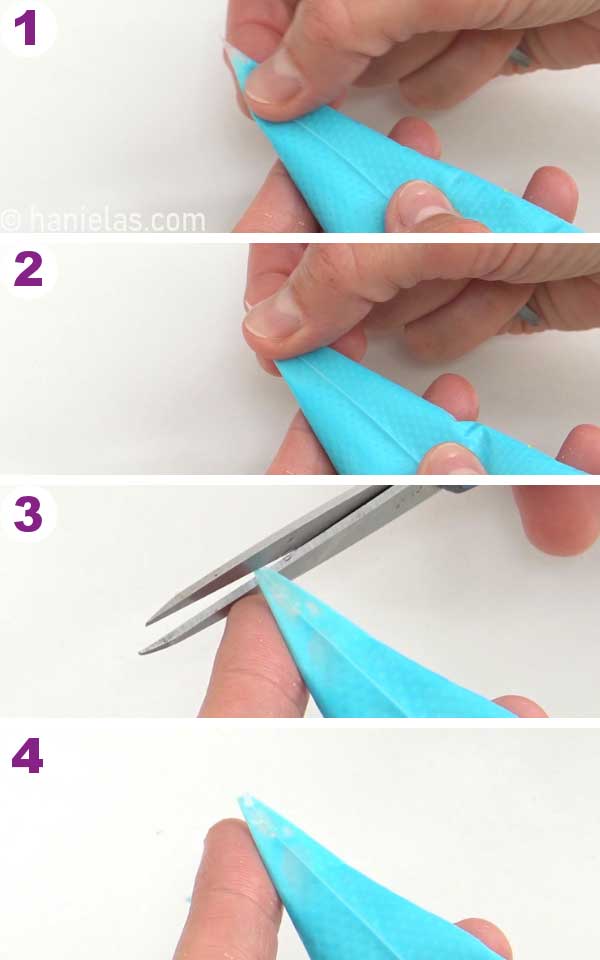
HOW TO CUT THE PIPING BAG
Today I’m using tipless piping bags to decorate. To cut a tipless piping bag, find a seam on a piping bag, press it in the middle, flatten the tip, and cut the tip off with sharp scissors. It’s best to cut a small tip and then cut it bigger if needed, (steps 1-4).
FLOOD SUGAR COOKIES
To ice the cookies, I used 15-second consistency royal icing. If you are new to cookie decorating, you can find a detailed tutorial where I explain 15-second consistency and other consistencies used in cookie decorating – Ultimate Guide to Royal Icing Consistencies for decorating.
- Outline the cookie, (steps 1-2).
- Flood the cookie, (stepS 3-5).
- Use a scribe tool to distribute the icing, (step 6).
- Give the cookie a little shake to smooth out the icing, (steps 7-8).
- Allow to dry overnight.

MANDALA COOKIE STENCIL
I created a basic mandala stencil years ago, and only just recently I’ve decided to update it. My cardstock stencil/template is excellent for airbrushing or tracing with an edible marker. You can find my Mandala Template in the Tools and Recipe section.
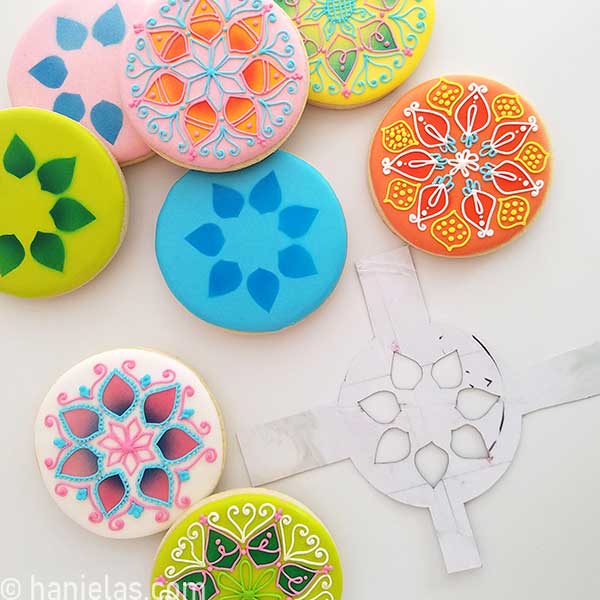
TIP: Instead of using a stencil on the whole cookie, you can use my template partly on a portion of a cookie, creating a dramatic detail.
TO MAKE CARDSTOCK/MYLAR STENCIL YOU NEED
- Cardstock or Mylar Plastic Sheet (4 to 6MIL)
- Exacto Knife
- Printed Template
- Cutting Board to protect your table
- Scissors

AIRBRUSHING
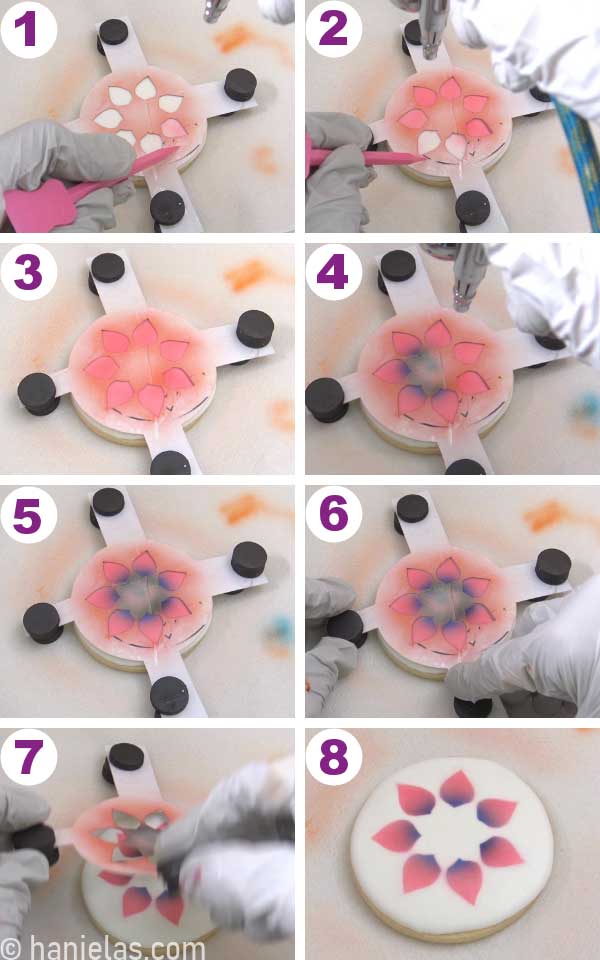
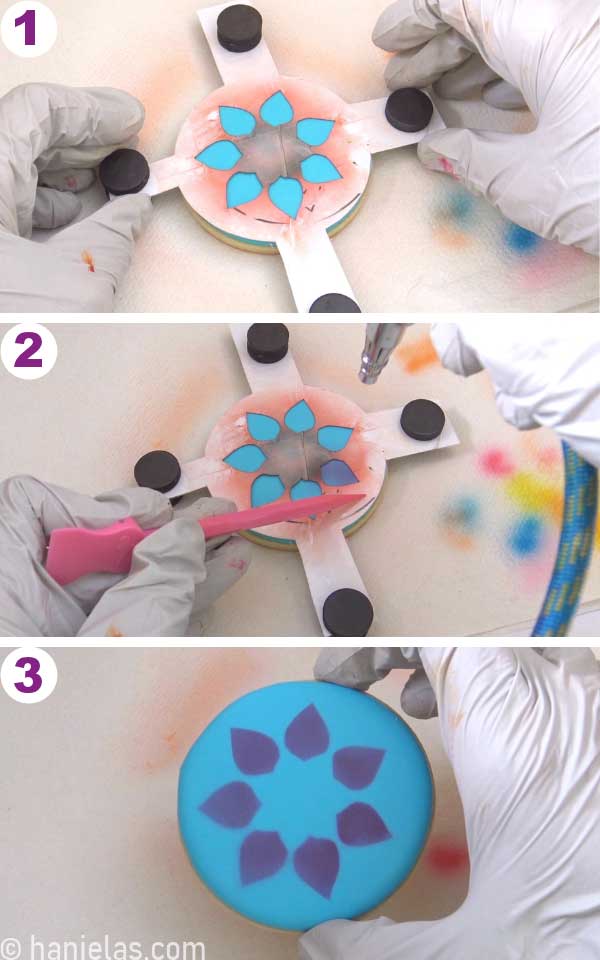
It helps to anchor stencil for the best airbrushing results, so it’s not moving around while you are airbrushing. To make sure it lays snugly on an iced cookie, I use magnets or stencil holders. The stencil holder was too big for my stencil; instead, I used magnets.
For the close-fitting, I use 2 magnets, 2-4mm thick magnets, about 5/16inch thick which is about the thickness of a cookie with a layer of icing on the top.

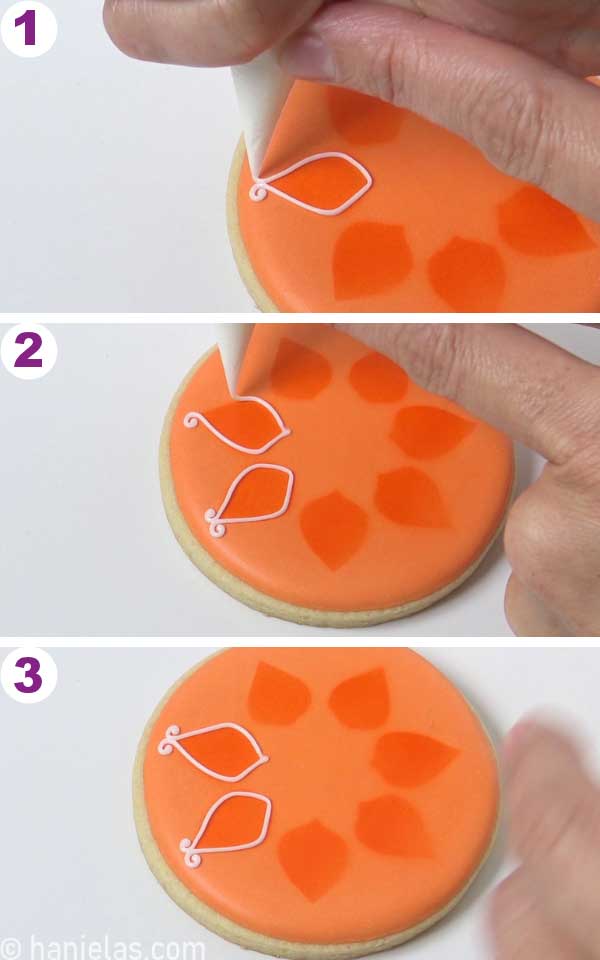
I stenciled a pink cookie with yellow airbrush color, and then I airbrushed the inner edge with orange.

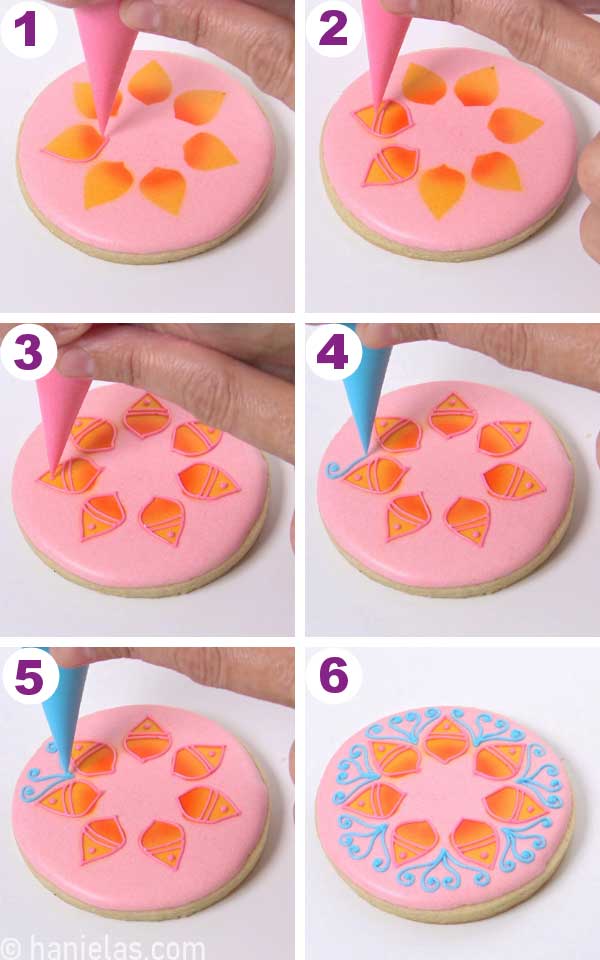
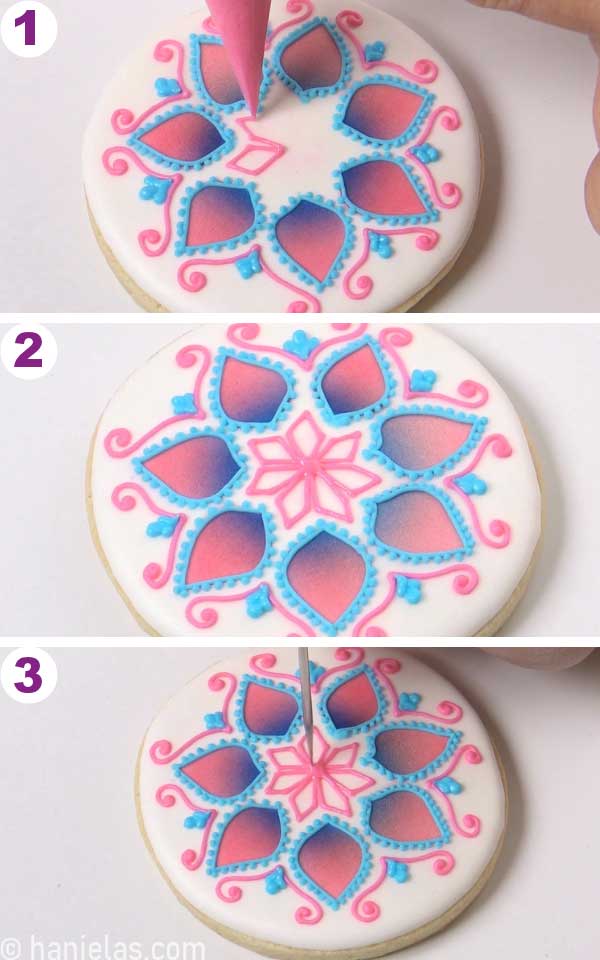
In case your base layer is white, you can use any airbrush color you wish. I decided to use pink for the petals, (steps 1-3). Then I airbrushed the inner edge with sky blue airbrush color, making purple, (steps 4-8).
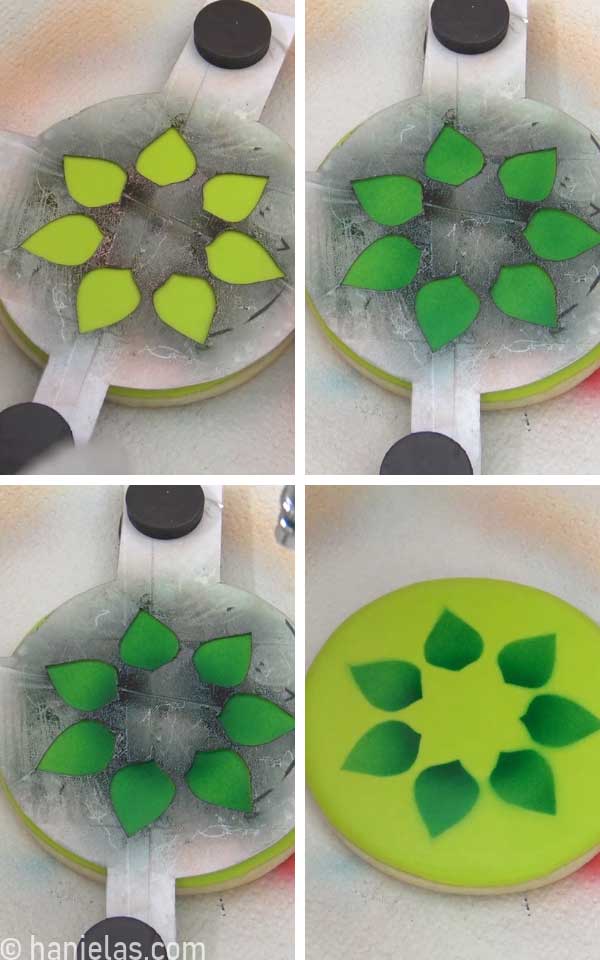
I used a leaf green airbrush color to airbrush the petals, and then I used the same color to airbrush the inner edge.
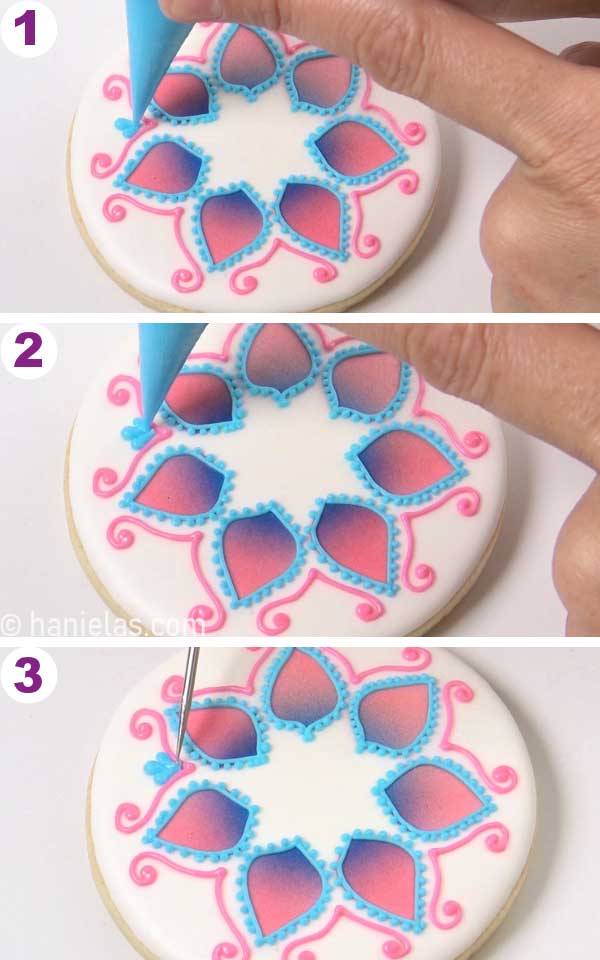
And lastly, I used pink to airbrush blue icing, achieving a purple airbrushed mandala design, (steps 1-3).
PIPING MANDALA DESIGNS
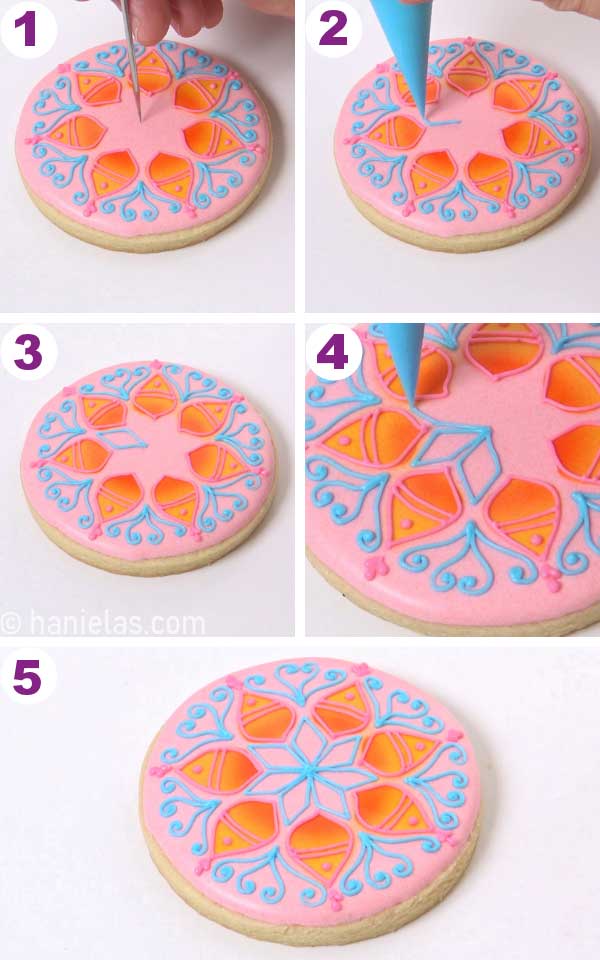
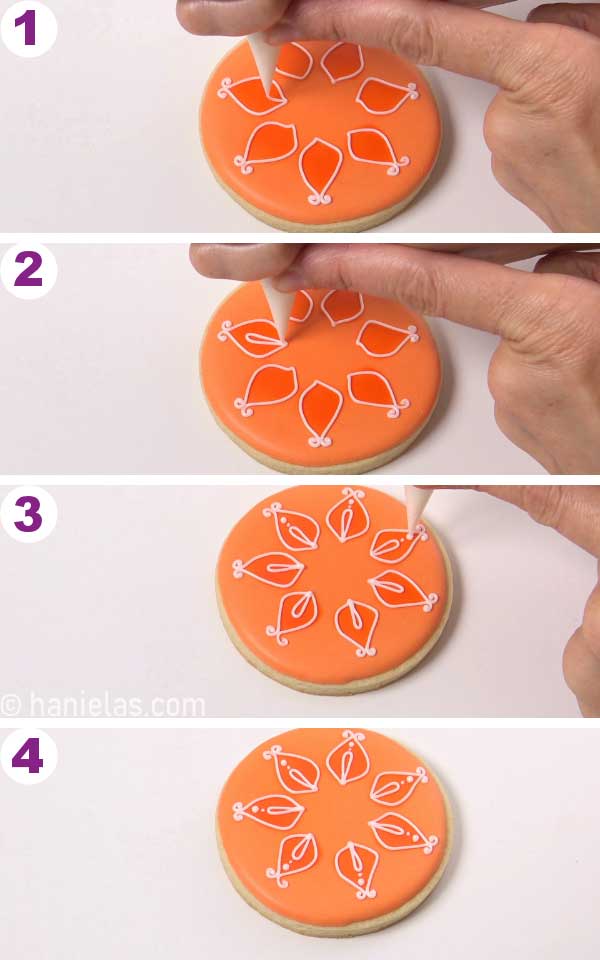
Now you can start decorating with royal icing. The idea is to utilize airbrushed design as a guide when piping fine lines, swirls and dots.
What Consistency Should I use to pipe Mandala Cookies?
I’d recommend that you use a piping consistency and even slightly thinner than that. When pulled up with a spatula, the icing should bend down softly, but it shouldn’t become blended with the rest of the icing.
Below you’ll find 3 Mandala Cookies designs to get you inspired.

TIPS FOR PIPING FINE LINES AND DETAILS
- Use a small amount of icing (1/4 cup); having a large amount of icing in a piping bag makes it harder pipe; with a smaller piping bag you’ll more control.
- Take your time, don’t rush the piping.
- Learn to control pressure and how to anchor icing. Practice on a piece of wax paper. You can use piping practice sheets.
- Use the index finger of your non-piping hand to gently support the piping bag as you pipe the details, (step2).
- If you are struggling with tipless piping bags, use a piping tip: I’d recommend PME tips: 1 to 1.5
- Is your piping tip clogging up? Try to press icing thru new and clean nylon tights.


In this 3nd design I used white and yellow icing.
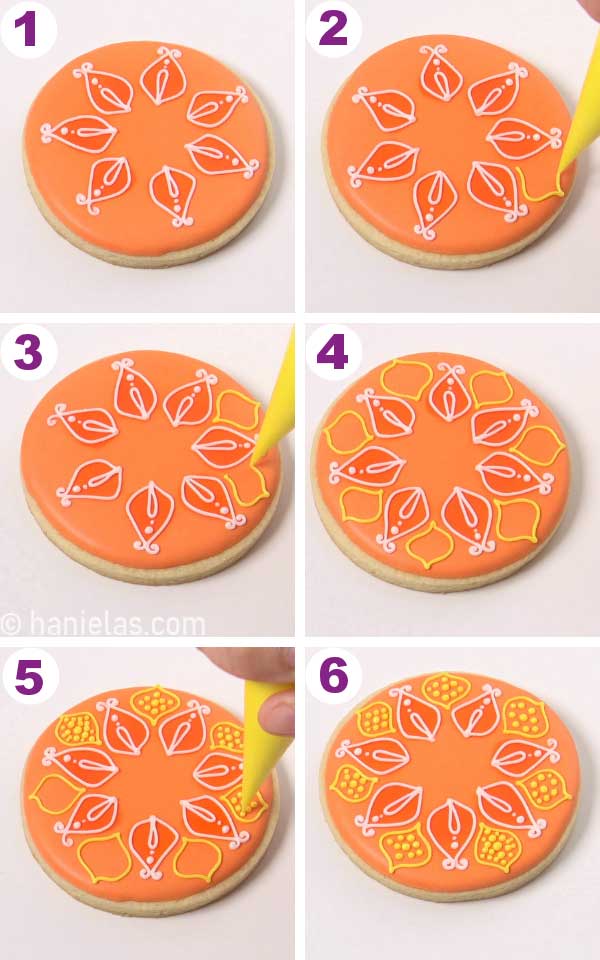
These Mandala Cookies are easier to make than you’d think. The best part is that you can make them as simple or as complicated as you wish. Possibilities are endless.
MORE DECORATED COOKIES
This post contains Amazon affiliate links that earn me a small commission, at no cost to you. I only recommend products that I use and love. Learn more about my affiliate policy here.
TO MAKE MANDALA COOKIES YOU NEED
- RECIPES
- Sugar Cookie Recipe
- Vegan Cookie Recipe
- Royal Icing
- Vegan Royal Icing
- TOOLS
- Find all the supplies in my AMAZON SHOP
- Shop Mandala Template
- Tipless Piping Bag
- Magnets
- Icing Spreader
- Icing Scrapper – Boo Boo Stick
- Airbrush
- Food Gel Colors

Hi, I’m Hani
Welcome!
Thank you for visiting Haniela’s. On my blog, you’ll find delicious sweet & savory recipes made with simple ingredients. Why not start a new adventure? Discover a world of cookie decorating with my step-by-step tutorials.

Hi, I’m Hani
Welcome!
Thank you for visiting Haniela’s. On my blog, you’ll find delicious sweet & savory recipes made with simple ingredients. Why not start a new adventure? Discover a world of cookie decorating with my step-by-step tutorials.