Hot Chocolate Bombs
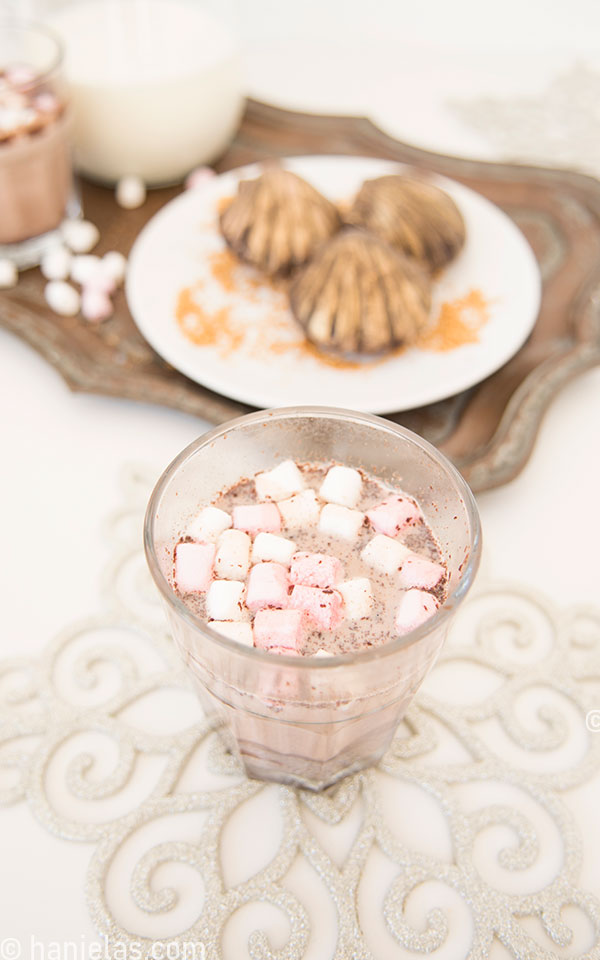
Inspired by the newest candy trend, I’ve decided to make my Hot Chocolate Bombs. What are hot chocolate bombs? They are chocolates filled with marshmallows and cocoa mix. You pour steaming hot milk over them, and chocolate melts away, producing a fun explosion-like effect and releasing soft fluffy marshmallows. It’s fun, and it’s delicious.

HOW TO MAKE HOT CHOCOLATE BOMBS
We’ve recently moved to a coastal town. Being surrounded by beautiful beaches gave me a fun idea for beach-inspired seashell hot chocolate bombs. Aren’t they adorable! They would be fantastic for a Winter Wedding, bridal showers, birthdays and of course Holidays. They make for the cutest gifts and I can’t wait to make some more soon.
Ingredients And Tools You Need
- Chocolate
- Heat Proof Bowl
- Chocolate Thermometer
- Silicone or Plastic/Acrylic Mold
- Food Only Paint Brush
- Bench Scrapper
- Marshmallows
- Hot Cocoa Mix
- Sprinkles, Edible Metallic Paint etc. (optional)
What Kind Of Chocolate Should I use?
To make hot chocolate bombs, you can use real chocolate or not-so-real compound chocolate known as candy melts. However, candy melts lack the natural chocolate flavor, and they will not melt as nicely in steaming hot milk. If using candy melts, be sure to use a silicone mold. And if you’d like to try this with chocolate chips, I’ll save you a headache; it won’t work the same.
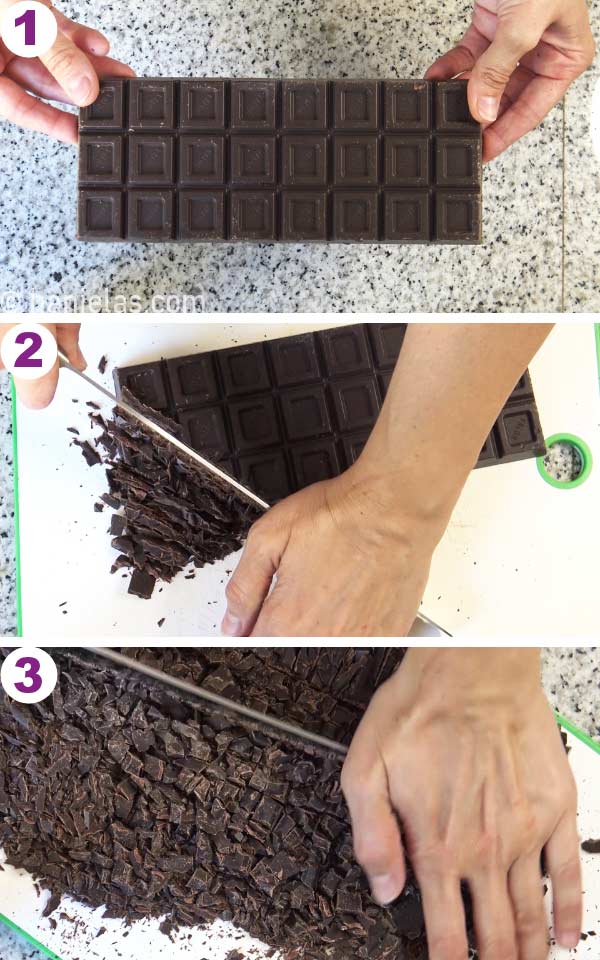
Today I’m going to work with 72% Dark Chocolate. I couldn’t get my hands on couverture chocolate and so I picked up a good quality chocolate bar at my local grocery store and it worked wonderfully, (step 1). Chocolate bars you get at the grocery store are tempered chocolate.
TIP : Check the ingredients on the packaging, it should list cocoa butter, with at least 60%, 65% cocoa or more.
Chop the chocolate. I like to use serrated knife for this, (steps 2-3).
How To Temper Chocolate in The Microwave using Seeding Method
Tempering method I’m using today is called seeding method, or the seed.
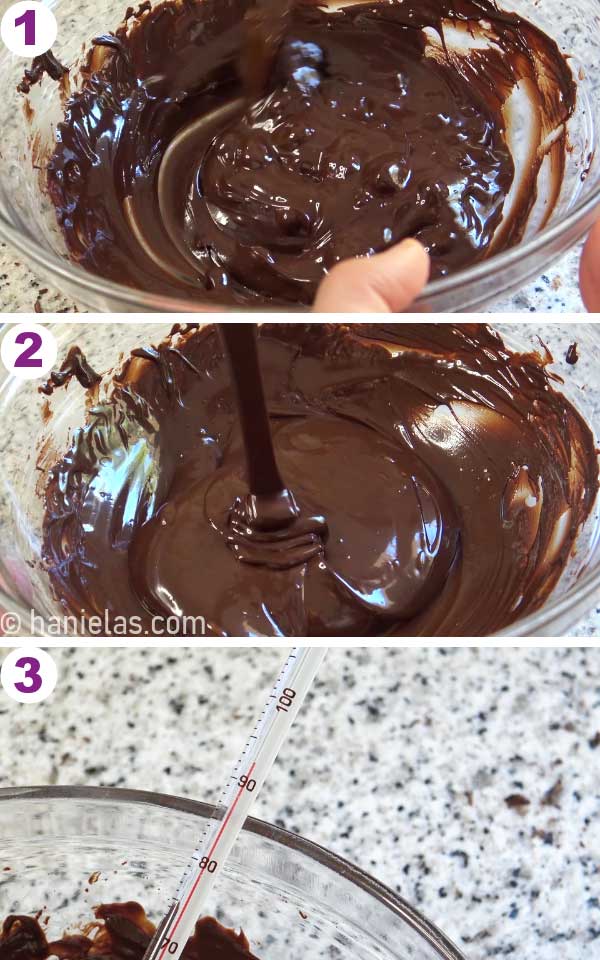
Pour about 2/3 of chopped dark chocolate into a heat proof, microwave safe bowl. Reserve 1/3 of chopped chocolate and set it aside, (steps 1-2). Microwave chocolate on high in 2-3 intervals for 20-30 seconds. Stirring well after each interval to avoid hot spots so chocolate doesn’t burn, (step 3-5).
Then you need to decrease the microwaving time to 5 seconds each and agitate chocolate well after each time. You’ll notice chocolate is quickly melting on the sides and the bottom. Be sure to stir chocolate well, (steps 6-8).

Continue stirring and microwaving in 5 second intervals (step 1). Keep checking the temperature of chocolate, you don’t want go over 120F. Temperature will be well over 90F and possibly close to 115F. Just don’t heat it over 120F (steps 1-3).
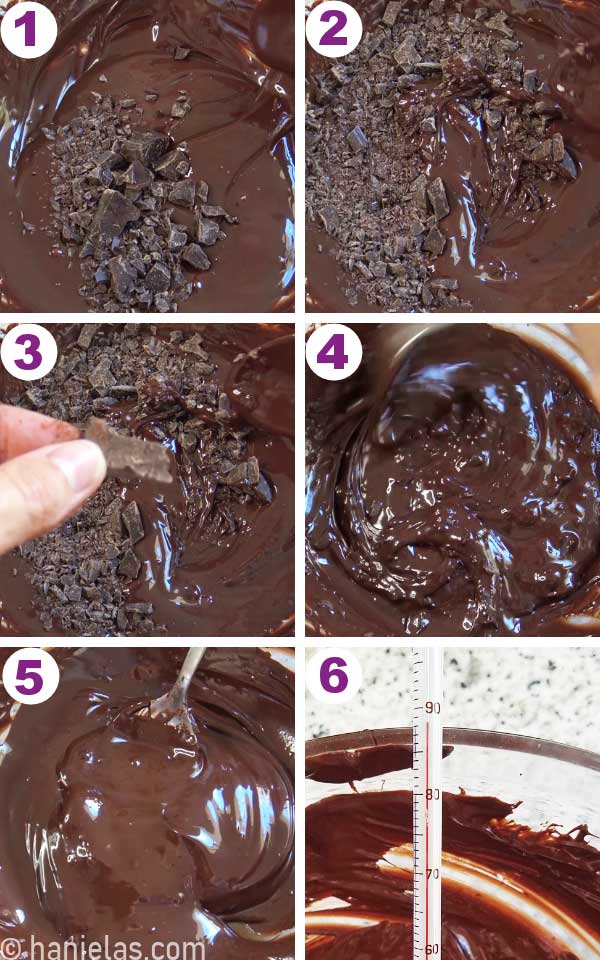
Now you can add remaining 1/3 of the chopped (tempered, remember chocolate bar you buy at the grocery store is tempered chocolate) into the melted chocolate. Allow the residual heat to melt the added chocolate slowly, while you stir it, (steps 2-5). Allow chocolate to cool to 80F-84F. Once the chocolate cools, you need to gently reheat it to 88F-90F. Your chocolate is now tempered. Don’t go over 91F or you’ll need to start the seeding process again.
TIP: This is the seed method. This means that tempered chocolate that you add to melted untempered will emission/seed the proper crystalline structure to the whole batch of melted chocolate, bringing all of it to temper.
Dark Chocolate, when at 88-90F, is tempered and can be used to create candies and, molded chocolates, cute cupcake chocolate decorations (step 6).
Make Molded Chocoalate
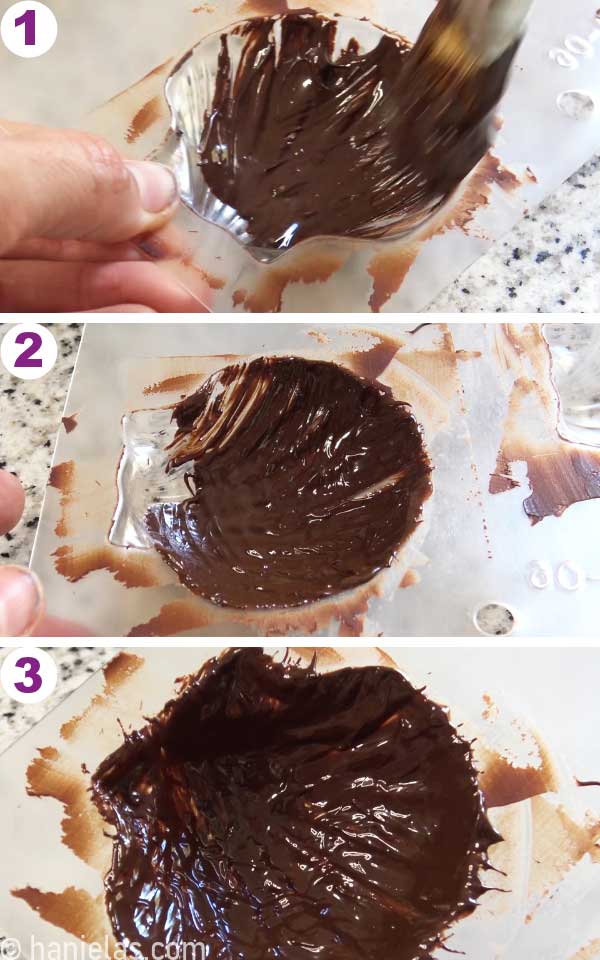
I used plastic candy molds to make seashells. Brush a thin layer of chocolate into each cavity with a pastry brush. Refrigerate for 5 minutes (steps 1-3).
TIP : Be sure that the pastry brush is dry, any kind of moisture, water droplets will cause chocolate to seize.
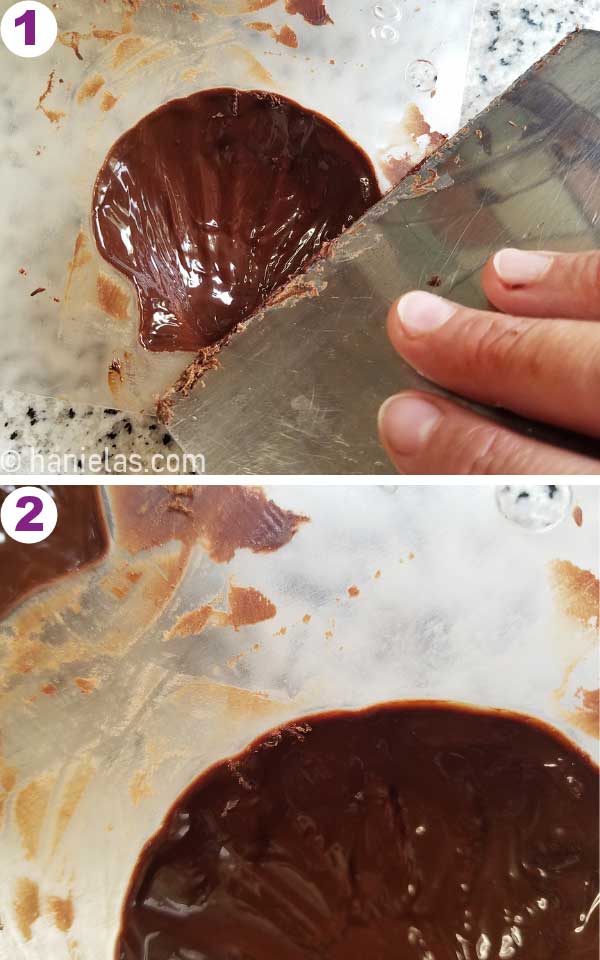
Clean Up The Edges
It is super important, especially when you work with this kind of mold (plastic or acrylic) that you clean up the edges really well. It’s not so important when using silicone mold, though I do it anyway.
Use a bench scrapper to clean the edges (steps 1-2).


Apply Second Coat
Once the 1st coat of chocolate is set you can brush on the second coat. Be sure to brush chocolate all the way to the rim (steps 1-4). Again, clean up the edges with a bench scrapper, and refrigerate for 5-10 minutes (6-8).
TIP: Have a pot with hot water close by. To keep chocolate in temper, stir it frequently and occasionally place it on the pot with hot water for 20-30 seconds at a time, stirring well.

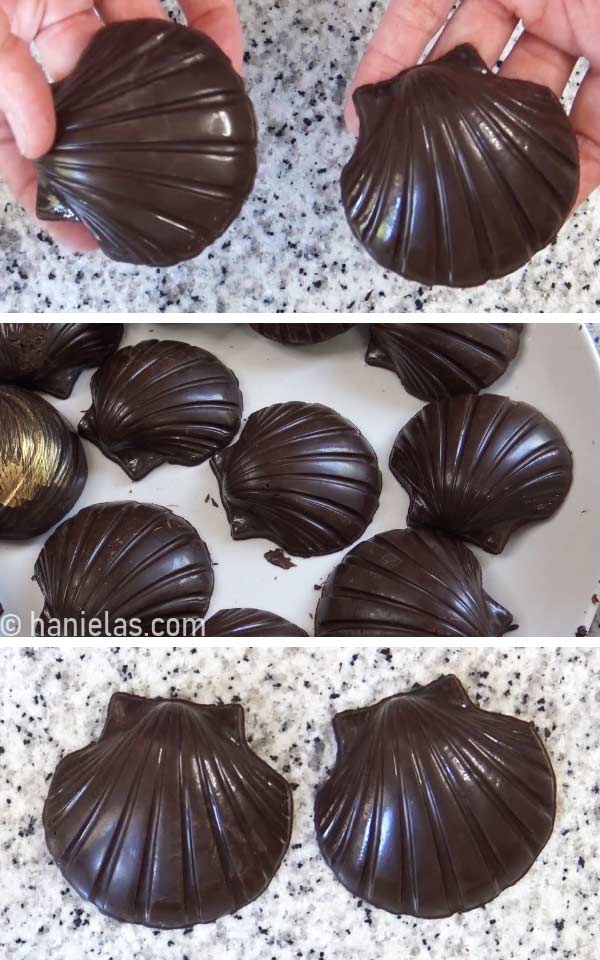
Unmold The Chocolate
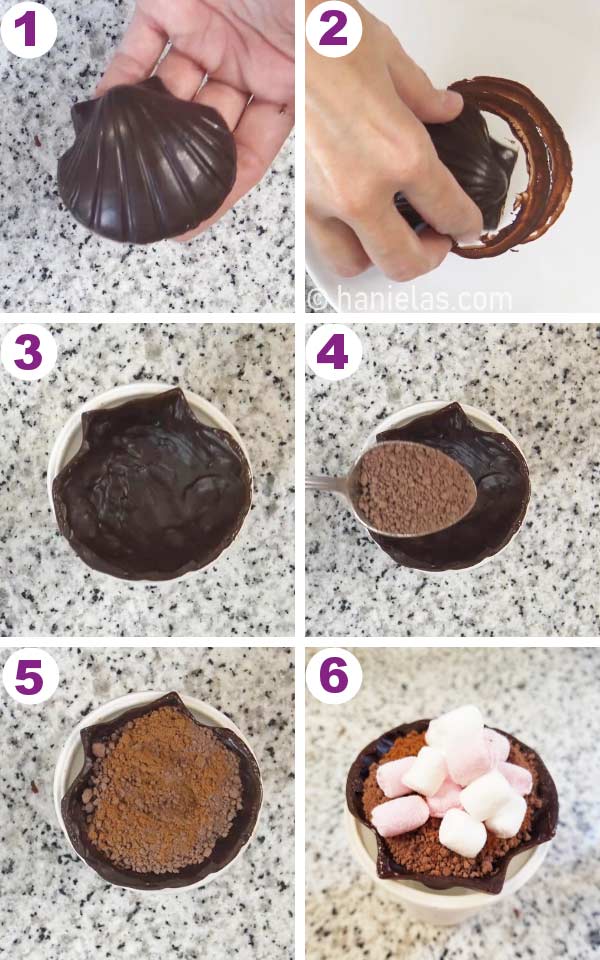
Once chocolate is set, molded chocolate pieces should come out of the mold easily (steps 1-3)
TIP: If you have to force it with no luck it’s either that chocolate wasn’t properly tempered or it needs little more time to set. Let’s hope it is the latter.

Chocolate Hasn’t Set Properly
Here is an excellent example of me trying to get the chocolate seashell from the mold way too soon, hence the hole (step 1). You can see the bottom wasn’t set correctly and it needed more time to harden completely (steps 2-3).

Moulded Seashell Chocolates
These chocolates can now be filled with dry hot cocoa mix, marshmallows and other fillings.
Hot Chocolate Bombs Fillings
- Hot Chocolate Mix (store bought or Make Your Own Hot Chocolate Mix)
- Marshmallows – micro or minis, flavored, plain, rainbow, shaped, have fun with it. You can if you really want to make these super special make your own homemade marshmallows .
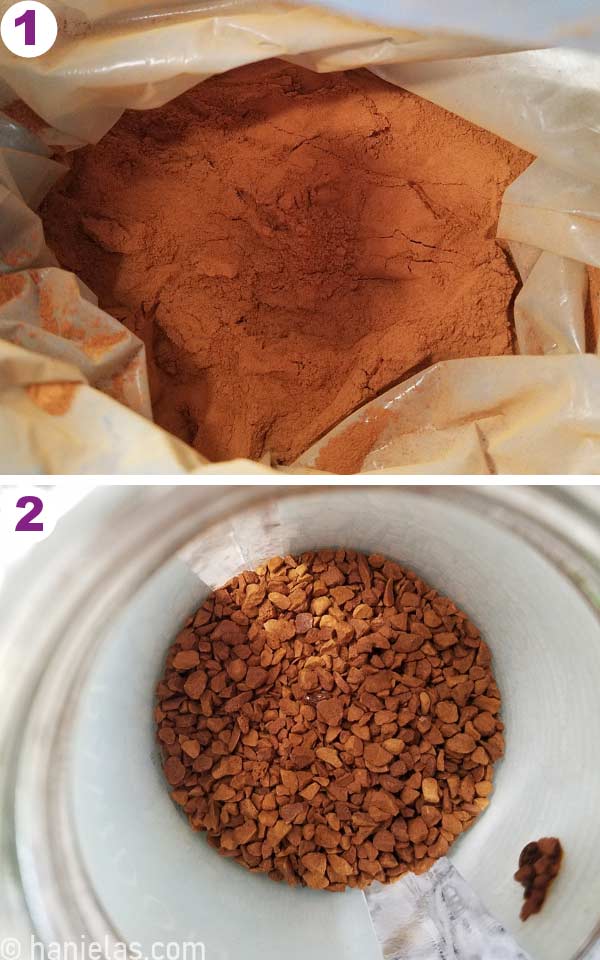
- Cinnamon
- Instant Coffee
- Peppermint Candies
- Chili Flakes for a little heat
- Crushed Oreos
- Sprinkles

Cinnamon is my favorite baking spice and it’s really nice in hot chocolate too. Try it.
How To Assemble Hot Chocolate Bombs
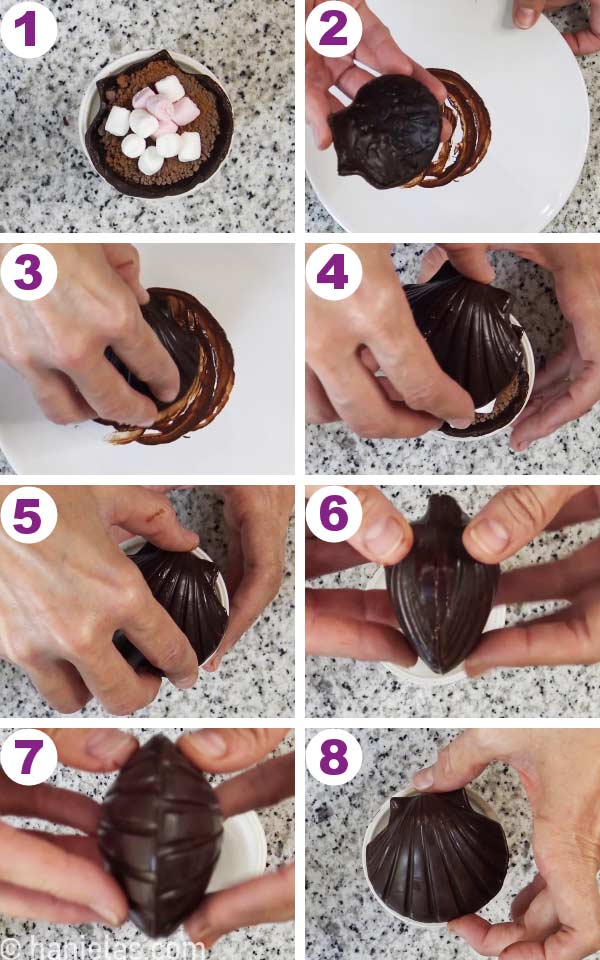
Assembly is quite simple. Heat a plate in a microwave. Take the 1st chocolate shell, turn it down, and ever so gently, using a circular motion, smooth the edges and melt some of the chocolate just on the edge (steps 1-2). Place it upside down onto a small glass (step 3). Fill it with hot cocoa mix, marshmallows, cinnamon, etc.
Now take the 2nd chocolate shell, gently smooth the edges, and melt some chocolate on edge. This melted chocolate will be the glue (steps 1-3). Carefully align the top and bottom edges, and press gently to seal chocolate into one shell/sphere. Run your finger on the seam to wipe away any chocolate that oozed out (steps 4-8). Allow setting.
Paint With Edible Gold Paints
You can decorate seashell hot chocolate bombs with sprinkles if you wish. Use some melted chocolate as drizzle or dip seashells in chocolate and then decorate with sprinkles. Or you can use edible gold paint to paint the chocolates.
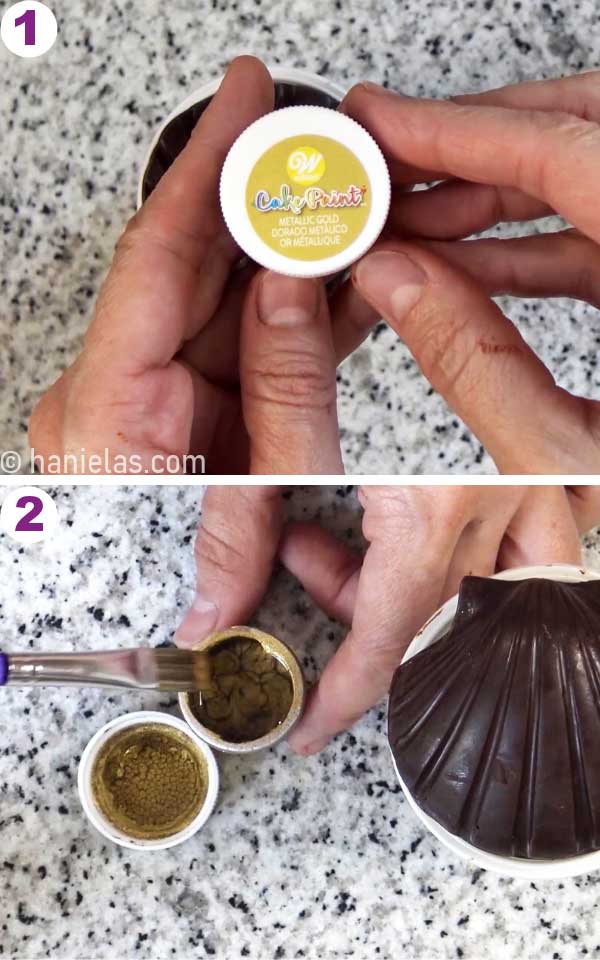
Isn’t it beautiful?! I used Wilton Cake Paint and a food only paint brush. It worked great. This edible paint is rather thick and a little goes a long way.

How To Serve Hot Chocolate Bombs
- Heat milk to almost boil. You really don’t want the milk to boil over, (trust me on this).
- Place your hot chocolate seashell into a glass.
- Slowly pour steaming hot milk over it.
- Watch the chocolate melt away and marshmallows pop out of the shell.
- It’s fun and delicious.

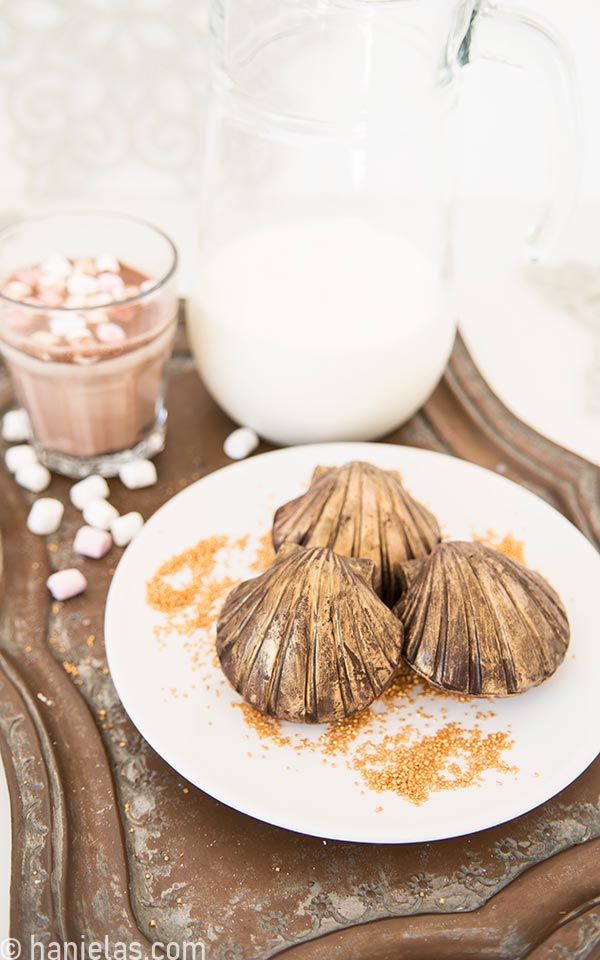
This fancy hot chocolate drink is perfect for special occasions. It makes for a beautiful and delicious gift and looks so pretty; look at that lustrous chocolate shell.


How To Enjoy Hot Chocolate Bombs Outside
Who says you can’t enjoy hot chocolate at the beach? You just need a good thermos. I used YETI. Bring milk to almost boil, pour into the thermos and head out to your favorite spot outside and enjoy the hot chocolate.

- MORE CHOCOLATE TREATS
- Chocolate Pudding Buns
- Easy Chocolate Cake
- Easy Chocolate Fudge via Baker by Nature
- Chocolate German Buttercream

To Make Seashell Hot Chocolate Bombs You Need
This post contains Amazon affiliate links that earn me a small commission, at no cost to you. I only recommend products that I use and love. Learn more about my affiliate policy here.
- RECIPES
- Homemade Hot Chocolate Mix
- Marshmallows Recipe
- TOOLS
- Get all the tools in my Amazon Shop – in the Hot Chocolate Bombs Section
- Seashell Candy Mold
- Half Sphere Mold (silicone or acrylic)
- Brush to brush chocolate into the mold.
- Chocolate Thermometer
- Bench Scrapper
- Gold Edible Paint
- Paint Brush (food only) to paint with edible gold paint
- Use Acrylic Molds only with real, good quality chocolate, otherwise for candy melts use silicone molds instead.
- INGREDIENTS
- Dark Chocolate ( store bought dark chocolate bar 60%,65% or more, couverture chocolate, candy melts (these won’t melt as nicely and they lack real chocolate flavor)
- Marshmallows
- Hot Chocolate Mix

Hot Chocolate Bombs
Equipment
- Chocolate Thermometer
- Silicone, Candy or Acrylic Mold (sphere or seashell)
Ingredients
HOT CHOCOLATE BOMBS
- 22 oz (600grams) 60% to 72% dark chocolate, chopped
- 6 tbsp Hot Chocolate mix
- 1 cup mini or micro marshmallows
- 1 tsp cinnamon, divided (optional)
Instructions
HOW TO MAKE HOT CHOCOLATE BOMBS
Prepare Tempered Chocolate
- Into a heat proof bowl add 2/3 of chopped chocolate. Microwave on high for 20-30 seconds, in 2-3 interval, stirring well after each time. Check the temperature of chocolate, it should never go above 120F. Ideally it should be around 115F.
- Pour in the remaining 1/3 of finely chopped chocolate. Stir well, let it sit for 20 seconds and allow residual heat from the bowl and melted chocolate soften freshly added chocolate. Keep stirring vigorously until all of the chocolate is melted, and check the temperature of chocolate with a chocolate thermometer. Keep stirring and cool chocolate to 80-84F. Once it cools you need to gently reheat it to 88-90F. Don't go over 91F. Chocolate is now tempered and you can use to make decorations.
Chocolate Shells
- Brush a thin layer of tempered chocolate into the each cavity of your mold. Clean up the edges with bench scrapper. Refrigerate for 5 minutes. Then brush another layer of chocolate into the cavities. Clean up the edges and refrigerate again for 5-10 minutes.TIP : Keep your tempered chocolate in temper by stirring it frequently and placing the bowl over the pot with hot water for 10 seconds, to prevent chocolate from cooling down to much. Stir well.
Unmold Chocolate Shells
- Once tempered chocolate set it easy to remove from the mold. It should just pop out. You may need to push slightly to release the chocolate shells but it shouldn't be too hard to release them.
Fill Chocolate Shell
- Heat a small plate in a microwave for one minute. Carefully remove it from the microwave, be careful it will be hot.
- Take one chocolate shell and place it carefully onto the place, edges down, very gently and just for a few seconds allow chocolate edges to melt a little to smooth them out perfectly for an easy assembly.
- Nest the chocolate shell upside down onto a glass to keep it steady. Then pour in 1 tablespoon hot chocolate mix, marshmallows and if desired about 1/8 teaspoon of Saigon Cinnamon or other fillings as desired.
- Take the second shell and smooth and melt the edges slightly on a warm place. Immediately seal the chocolate shells together. Align the edges and gently press them together. Use your finger along the seam to smooth any melted chocolate that oozed out. Repeat with remaining chocolate shells.TIP : It's best to wear gloves to prevent finger prints on the chocolate.
Serve Hot Chocolate Bombs
- Heat milk to almost boil, it should be hot. Place hot chocolate bomb into a mug or a glass and pour hot milk over it.
Serve them outside
- To take these on the road you'll need a good thermos to keep the milk hot and enjoy fresh hot chocolate anywhere.
Notes
- What Chocolate Can I use? – you can use specialty couverture chocolate but if can’t source it out you can get quality dark chocolate at the grocery store, ingredients on the packaging should list cocoa butter, 60%-72% is good. You will have melt and temper this chocolate.
- Can I use Candy Melts? – yes you can, though you are going to miss on the real chocolate flavor and chocolate is not going melt as nicely as real chocolate does. I’d recommend using Ghirardelli or Merckens. It’s best to use silicone molds when using candy melts.
- Can I use Chocolate Chips ? – I wouldn’t recommend using chocolate chips for this project.
- How long do Hot Chocolate Bombs keep?– in my house a day or two, but in general I’d say with good quality chocolate, stores away from direct sunlight, at least a month.
Did you make this recipe? Tag @hanielas on Instagram and hashtag it #hanielas

Hi, I’m Hani
Welcome!
Thank you for visiting Haniela’s. On my blog, you’ll find delicious sweet & savory recipes made with simple ingredients. Why not start a new adventure? Discover a world of cookie decorating with my step-by-step tutorials.

Hi, I’m Hani
Welcome!
Thank you for visiting Haniela’s. On my blog, you’ll find delicious sweet & savory recipes made with simple ingredients. Why not start a new adventure? Discover a world of cookie decorating with my step-by-step tutorials.