Easy One Bowl Buttermilk Chocolate Cake Recipe
This one-bowl buttermilk chocolate cake is one of my all-time favorites. It’s incredibly easy to make as everything comes together in just one bowl. The cake is moist, tender, and it bakes beautifully with ample softness. It stays fresh for days and also freezes well, making it perfect for planning ahead.

WHY I MAKE THIS CAKE OVER AND OVER
- Super moist, never heavy – The cake itself is deeply chocolatey, incredibly moist, and soft without feeling heavy.
- Versatile & crowd pleaser – I use it to make layered cakes, or it quickly turns into a sheet cake for a crowd. Simply pour one-bowl batter into a parchment-lined pan, and by the time the cake is lukewarm, the glaze is ready to pour. Finished with chocolate, berry glaze, or buttercream, it’s always a guaranteed crowd-pleaser.
- Endless topping pairings – It pairs beautifully with all kinds of finishes, from chocolate glaze and berry icing to German buttercream, citrus marmalade, or whipped frosting. I often make it topped with homemade lemon or orange marmalade and a drizzle of chocolate glaze-our neighbors absolutely love it.
- Natural or Dutch Cocoa – You can make it successfully with either Dutch-process or natural cocoa powder.
- Freezes well – Freezing actually improves the flavor and texture of the cake. As it rests, the flavors have time to meld together while the crumb stays moist and tender. It also makes layered cakes much easier to assemble, since the chilled cake firms up and is easier to stack, fill, and frost.
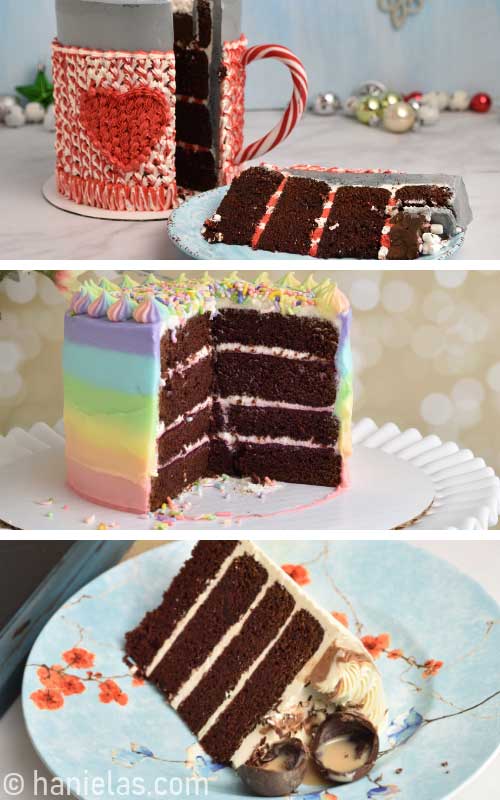
- Layered cakes – I used this chocolate cake to make a festive Giant Hot Cocoa Mug Cake, Pastel Rainbow Chocolate Raspberry Cake with Cream Cheese Frosting, and boozy Baileys Cake.
HOW THE INGREDIENTS WORK
All-purpose flour – It provides structure and texture. I don’t need any special flour to make this soft cake.
Sugar – There is more to sugar than it meets the taste. It also helps tenderize the crumb, and with its hygroscopic properties, keeps the cake moist. In addition, sugar helps stabilize the oil-and-buttermilk emulsion, creating a smooth, cohesive batter.
Oil and Buttermilk – Both keep the cake incredibly moist and tender. Oil coats the flour, reducing friction between particles and limiting gluten development, resulting in a more tender cake. Buttermilk is naturally acidic, which helps break down long gluten strands in the batter. This results in a softer, more delicate crumb instead of a dense or tough cake.
Buttermilk and Baking Soda – Acidity in buttermilk also plays an important role in leavening. When buttermilk reacts with baking soda, it creates carbon dioxide bubbles. As the cake bakes, these bubbles expand, helping the cake rise.
Baking Soda and Natural Unsweetened Cocoa Powder – Alkaline baking soda also helps balance the acidity of natural cocoa powder. If you choose to use natural cocoa powder in this recipe, you can!
Baking Powder and Dutch Cocoa – To ensure a reliable rise, the recipe uses both baking soda and baking powder. Unlike baking soda, baking powder doesn’t need acid to activate (it needs moisture and heat). Baking powder gives the cake a consistent second rise. In addition, the presence of baking powder makes it easier to use Dutch-process cocoa, which is neutral and needs baking powder to work properly.
Eggs – play an important structural role. As the cake bakes, the proteins in the eggs set, forming a framework that helps the cake hold together.
Hot Liquid (Water, Coffee) – Adding hot liquid to the cocoa-based cake batter ‘blooms’ the cocoa powder, enhancing and deepening the chocolate flavor, giving the cake a richer, more intense taste. Coffee doesn’t really make the cake taste like coffee; it enhances the cocoa flavor.
Vanilla, Almond Extracts – They add flavor and richness. If you find yourself out of Vanilla, you can use Dark Rum or Bourbon in its place.
Salt – Don’t skip it, it balances sweetness and enhances the flavor.

PREPARE BAKING PAN
Grease baking pans and line them with parchment.
| 1 batch One-Bowl Buttermilk Chocolate Cake |
| Four 6-inch pans |
| Three 8-inch pans |
| Two 9-inch pans, use a parchment ring on the inside and a flower nail |
| Two 10-inch pans, use a flower nail |
| Two 9-inch pans, use a parchment ring on the inside, and a flower nail |
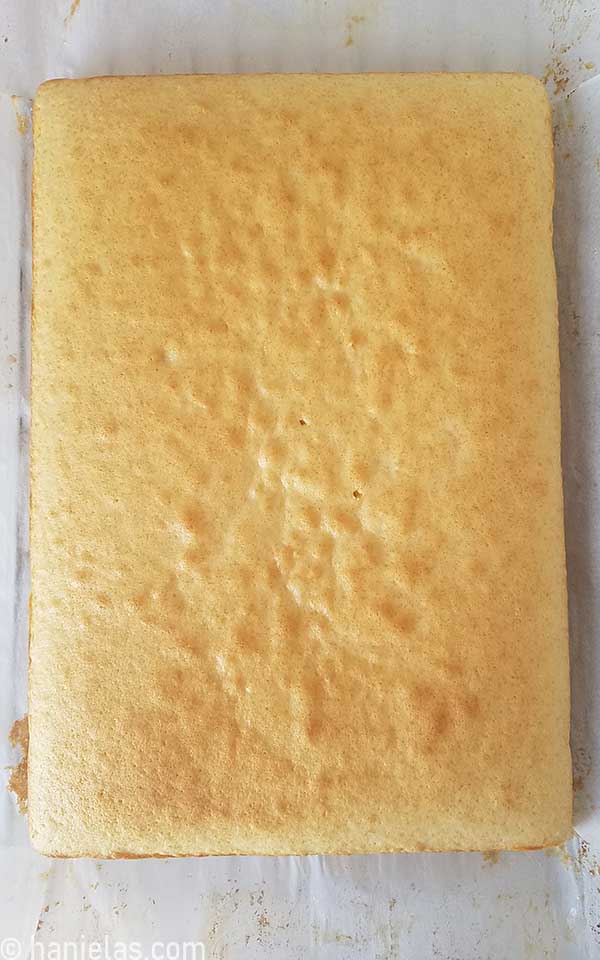
| One 17×12-inch half sheet pan |

DRY INGREDIENTS
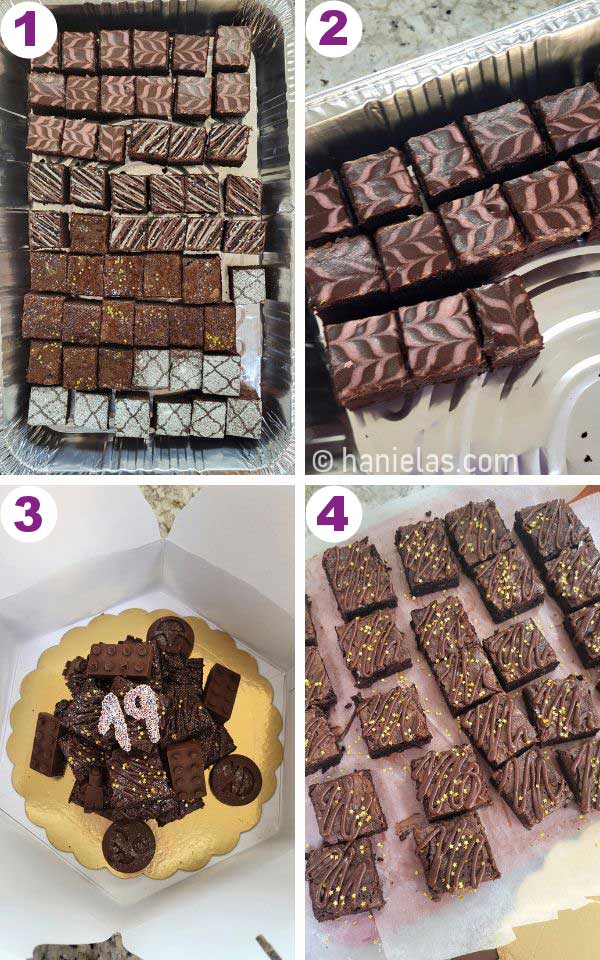
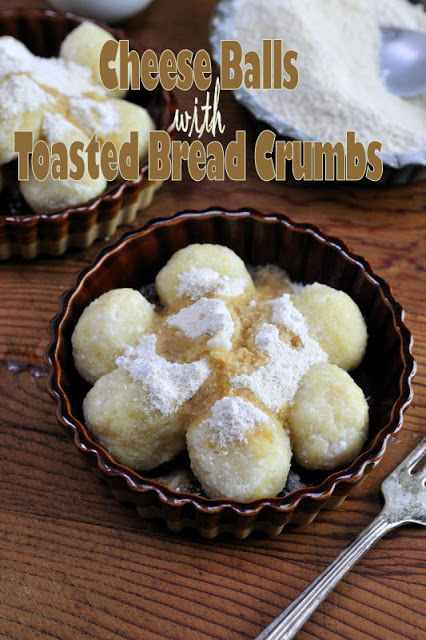
I love how straightforward this recipe is. Gather dry ingredients and sift the all-purpose flour, granulated sugar, baking powder, baking soda, and cocoa powder into a bowl, then whisk or mix with a handheld mixer until well combined. I will let you in on a little secret: I once forgot to add sugar, only to realize it once I filled the pans. In case you’re wondering, I poured cake batter from cake pans into a bowl, mixed sugar into a portion of the batter, stirred the sweetened portion into the unsweetened, and, after the cake baked, turned it into cake balls. It was such a relief that I was able to turn a nearly insurmountable problem successfully around.

WET INGREDIENTS
One of the reasons this cake is so good is the buttermilk. If you’re like me, you probably don’t have a bottle of buttermilk in the fridge. But maybe you’ll surprise me, and you do, make sure to bring it to room temperature, or you can easily make a quick substitute at home. To make homemade buttermilk, combine 1½ cups of room-temperature milk with 1½ tablespoons of vinegar or lemon juice. Stir and let it sit for 5–10 minutes, then use as directed in the recipe instructions: in a bowl, whisk together the buttermilk, oil, room-temperature eggs, vanilla, and almond extracts until well combined (steps 1-8).

CAKE BATTER
Pour the wet ingredients into the dry ingredients and beat at low speed until combined, then increase the speed to medium-high and continue mixing for several minutes, building a thick, chocolatey batter.

HOT WATER OR COFFEE
Whether you use hot water or coffee is completely up to you. Coffee won’t make the cake taste like coffee, but it beautifully enhances the chocolate flavor. If using coffee, dissolve instant coffee or espresso powder in boiling water (steps 1-2). Gradually pour the hot liquid into the batter while mixing on low speed, stopping to scrape down the sides and bottom of the bowl to ensure everything is fully incorporated. The batter will be quite thin, and that’s exactly how it should be (steps 3-8).
If you prefer not to use coffee, simply use hot water instead. You can also substitute freshly brewed coffee for instant espresso.

FILL CAKE PANS
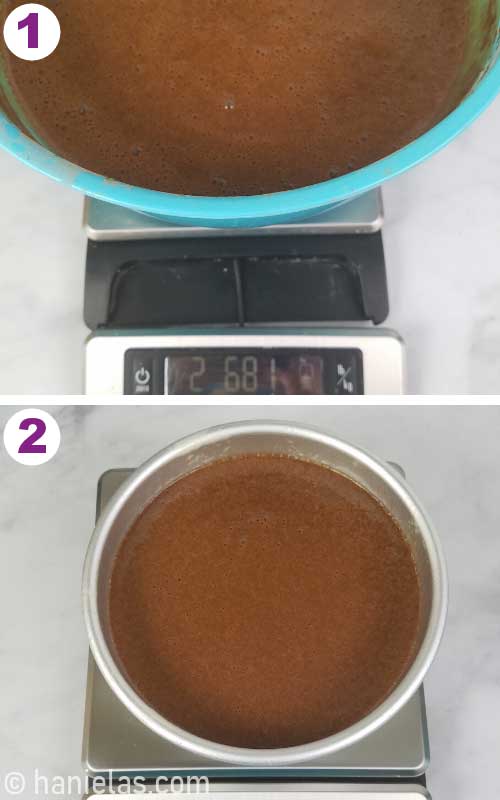
I like to divide the cake batter evenly by weight for consistent layers. First, weigh the empty bowl and note its weight. Then weigh the bowl with the batter and subtract the bowl weight to get the net batter weight. Divide that number by the number of pans you’re using, and portion the batter into each prepared pan, weighing as you go to ensure even layers.
BAKE
Bake the cakes at 350°F. If using four 6-inch pans, place two on the upper rack (about 2/3 of the way up) and two on the lower rack (about 1/3 of the way down). At the 30-minute mark, quickly rotate the pans, then continue baking for another 20-25 minutes, for a total of 50–55 minutes, or until a toothpick inserted in the center comes out clean.
If your cakes are browning a little too much on top, form a dome with aluminum foil and loosely cover the cakes. You can do this once the cakes have risen, not when they’re still in the cake batter stage.

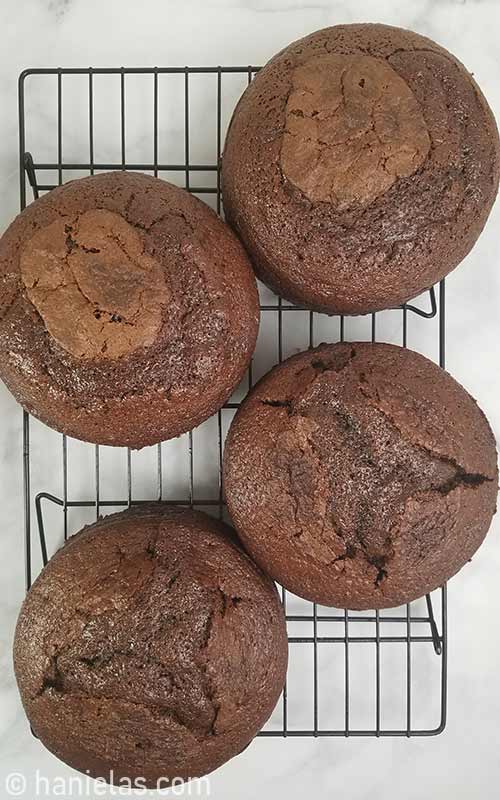
COOL AND STORE
Let the cakes cool for 20-30 minutes after removing them from the oven. Carefully take the cakes out of the pans and peel off any parchment that’s sticking. While still slightly warm, cover with a kitchen towel or foil, and as soon as they cool, wrap the cakes in plastic wrap or food-safe bags. Wrapping them helps seal the moisture, keeping them tender.

SUCCESS TIPS & FAQ
- can I freeze chocolate cake?
- cake domes slightly
- prevent over-browning
- dairy-free option
- keep cakes moist
- what kind of oil can I use?
- how to use this cake
- recommended fillings and frostings
Can I freeze chocolate cake?
Absolutely. Wrap the cakes well in a food wrap and place them into Ziploc bags. Freeze cakes for up to 3 months. Allow to defrost overnight before filling and frosting the cake.
Cake domes slightly
This easy homemade chocolate cake naturally bakes with a slight dome, so trim the tops before assembling layered cakes.
Prevent over-browning
If the cakes are browning too quickly, loosely cover them with a dome of aluminum foil after they’ve risen. Do not cover while still in batter form.
Dairy-free option
If you have a dairy allergy, substitute no-dairy milk (soy milk) for regular milk.
Keep cakes moist
Brush layers with flavored simple syrup to enhance flavor and maintain moisture.
What kind of oil can I use?
I’ve successfully made this cake recipe with vegetable oil, sunflower oil, canola oil, mild olive oil, coconut oil (which may add a subtle coconut aroma to the baked cake), or grapeseed oil.
How to use this cake
This cake is perfect for layered cakes (see examples below), but it is not ideal for fondant-covered cakes.
Recommended fillings and frostings
Swiss buttercream, whipped cream, cream cheese frosting, ganache, fruit fillings, chestnut filling, raspberry curd, or German buttercream all pair beautifully with this cake.


Once Bowl Buttermilk Chocolate Cake
Equipment
- Cake Pans
- Hand-held, or stand mixer
- Parchment
- mixing bowl
- spatula
- Whisk
Ingredients
Dry Ingredients
- 2 3/4 cup all-purpose flour 395 grams
- 3 cups granulated sugar 600 grams
- 1 cup unsweetened cocoa powder 100 grams
- 2 tsp baking soda
- 2 1/4 tsp baking powder
- 1 tsp salt
Wet Ingredients
- 4 eggs, at room temperature
- 1 1/2 cup buttermilk, at room temperature 360ml
- 2/3 cup oil 160ml/145grams
- 1 tbsp Vanilla Extract
- 1/2 tsp Almond Extract
- 1 to 2 tbsp Espresso Powder
- 1 1/2 cup boiling water 360ml/grams
Instructions
Prepare Baking Pans
- Preheat oven to 350F. Spray four 6-inch cake pans with a nonstick spray. Line the bottom with a parchment round. Spray again with a nonstick spray and dust with flour. Or butter and dust pans with flour. Shake out excess flour and set aside.
Cake Batter
- In a large bowl sift flour (2 cups and 3/4cup), granulated sugar (3 cups), unsweetened cocoa powder (1 cup), baking soda (2 tsp), baking powder (2 and 1/4 tsp), and table salt (1 tsp). Set aside.
- In another bowl, whisk together eggs (4 large eggs at room temperature), buttermilk ( 1 cup and 1/2 cup), oil (2/3 cup), Vanilla Extract (1 tbsp), and almond extract (1/2 tsp).TIP: Make your own buttermilk: measure 1 1/2 cups of milk into a bowl, remove 1 tbsp and 1/2 tbsp milk, and replace it with lemon juice or white distilled vinegar. Let it sit for 5-10 minutes.
- Bring water (1 cup and 1/2 cup) to boil, whisk in espresso powder (1 to 2 tbsp).
- Pour wet ingredients (egg mixture, not boiling water) into dry ingredients and beat with a hand held mixer for about 3 minutes, until well combined. Then gradually using medium speed beat in boiling hot water mixed with espresso powder. Mixture will be fluid and it will appear runnier than other cake batters. This is normal.
- Divide cake batter into prepared cake pans.
Bake Chocolate Cakes
- Bake at 350F. Bake 2 pans on the top oven rack (about 2/3) and 2 cake pans on the bottom rack (1/3). Bake for 30 minutes, then rotate pans. Move the bottom ones to the top rack and the top ones to the bottom rack, then continue baking for an additional 20-25 minutes or until a toothpick inserted in the center comes out clean.
- Remove baked cake from the oven and let cool for 20-25 minutes. Then run a dull knife along the edges and carefully invert cakes onto a cooling rack. Cover with a kitchen towel to cool completely. Wrap in food wrap to prevent drying out before using.
This post contains Amazon affiliate links that earn me a small commission, at no cost to you. I only recommend products that I use and love. Learn more about my affiliate policy here.

Hi, I’m Hani
Welcome!
Thank you for visiting Haniela’s. On my blog, you’ll find delicious sweet & savory recipes made with simple ingredients. Why not start a new adventure? Discover a world of cookie decorating with my step-by-step tutorials.

Hi, I’m Hani
Welcome!
Thank you for visiting Haniela’s. On my blog, you’ll find delicious sweet & savory recipes made with simple ingredients. Why not start a new adventure? Discover a world of cookie decorating with my step-by-step tutorials.


Once again, this flour cup to grams is off.
Hello,
It’s actually not off. It’s correct.
When I fill 1 cup (236ml to 240ml) measure it weighs 140-143 grams.
America’s Test Kitchen also uses 1cup=142grams.
I understand that this is not the mainstream cup to grams flour conversion, but this
is the measurement I’ve been successfully using for many years. I follow my scale reading.
I want to use 10 inch square cake tins how many would I need for this recipe
Hi John,
I’d use 1 1/2 batter to make 10-inch square cake, if possible
use a heating core for even heat distribution. I use a flour nail greased and dusted with flour.
Hi! Can I use this recipe for tall cakes and 2 and 3 tier cakes?
Hello,
I’ve used this recipe to make tall cakes – 8 inch tall, filled and frosted with swiss buttercream, but I haven’t tried to make 2 or 3 tiered cakes.
Hani
Hello, I’ve just made this cake, I halved the recipe and used 2x 8 inch tins. It smells divine but sponges haven’t really risen apart from the dome? I checked it with the toothpick and it was definitely baked but feels a bit heavy/claggy. What could have gone wrong?
Hello Alicja,
have you tried cutting the cake to see the texture inside? I’m curious if leavening agents were fresh.
Please keep me posted. Hani
If skipping the espresso mixture, do you still add water to the cake mix? Or extra buttermilk?
Hi Abby,
if you’d like to skip the espresso, you can omit it but use all the other ingredients without any adjustments.
Hani
Excellent recipe! If weights were added, it would be even better! Thank you!
Thank you. I’ll try to add them ASAP.
Thanks a lot ❤️ U
You are welcome.