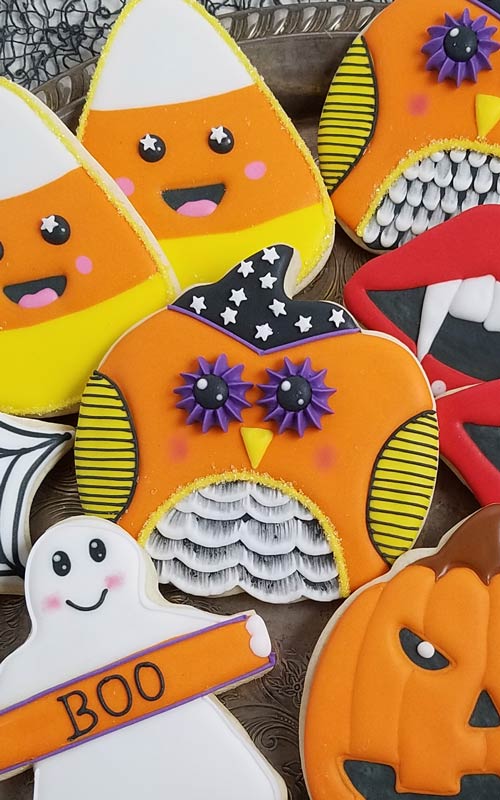
Halloween Kawaii Owl Cookies
I can hardly believe Halloween is just around the corner. Let’s get into the Halloween spirit with these cute Halloween Kawaii Owl Cookies. They are perfect for Halloween festivities.
JUMP TO VIDEO|JUMP TO RECIPES AND TOOLS | PIN IT for later
Updated post from 2014.
HOW TO DECORATE HALLOWEEN KAWAII OWL COOKIES
COOKIE CUTTER AND TEMPLATE
To make these adorable Halloween Kawaii Owl Cookies I used a pumpkin cookie cutter. My favorite Cut-Out Sugar Cookie recipe. And Fresh Lemon Royal icing to decorate.
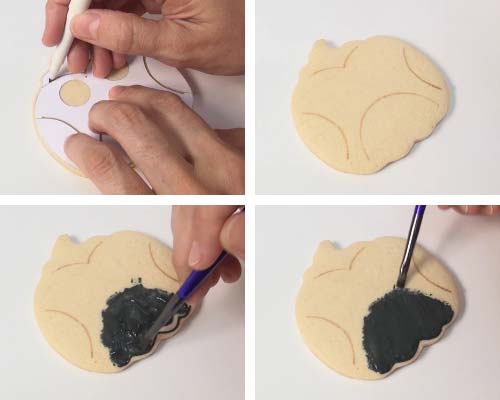
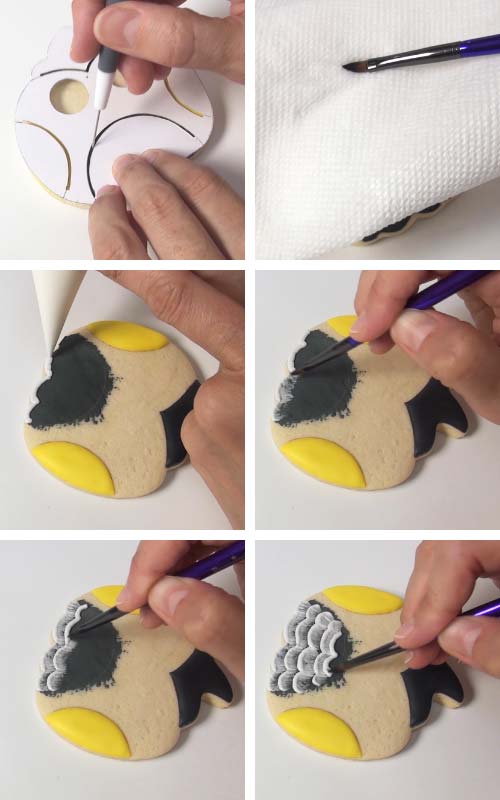
I made a simple card stock paper template and traced outlines onto a cookie with brown edible marker. You can find printable template in tool section, at the bottom of this post.
ROYAL ICING COLORS AND CONSISTENCIES :
- Yellow – 20 second consistency
- Black – 10 second consistency
DECORATING STEPS :
Brush a thin layer of black icing onto a cookie, owl belly section.
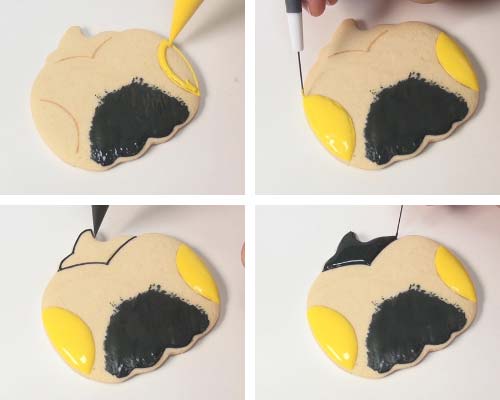
Then with yellow icing (15sec) outline and flood the wings. Let yellow crust and black should be dry – thing layer of black will take about an hour to dry.
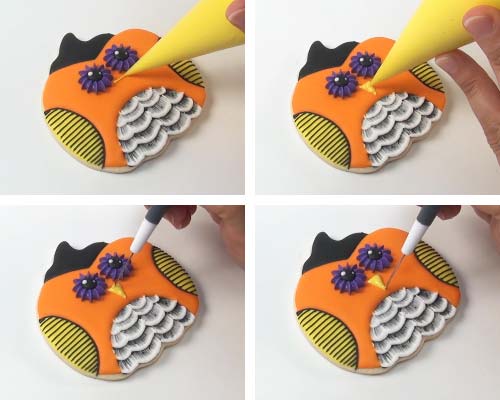
BRUSHED EMBROIDERY
ROYAL ICING COLORS AND CONSISTENCY :
- White – stiff consistency – brushed embroidery
- Orange – 15 second consistency – flood
- Black – piping consistency – piped lines on the wings
DECORATING STEPS :
If needed use a template and a trace the curved outline onto a black section. Use a needle tool or a push pin to gently scratch the surface of the icing.
Have a food only paint brush ready. Dampen bristles with some water. Paint brush should be damp, not wet. Have a piece of damp paper towel on hand to wipe the brush, to remove residue icing.
Pipe a thick scalloped line starting at the bottom of the cookie. Then with a brush use short strokes to brush some of the icing towards the center of the cookie. Repeat until you come up to the marked curved lined. Let crust, about 10 minutes.
Once crusted outline and flood the cookie with orange icing (15sec). Use a needle tool to distribute the icing evenly.
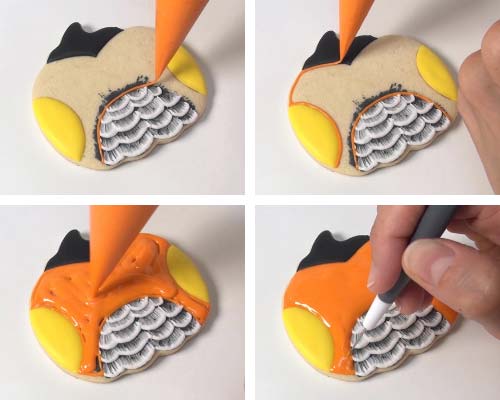
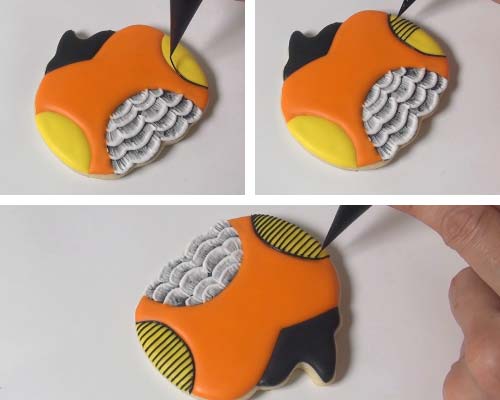
Next step is to finish wings with black royal icing (piping consistency). Outline inside curve on the wings and then pipe straight lines across.
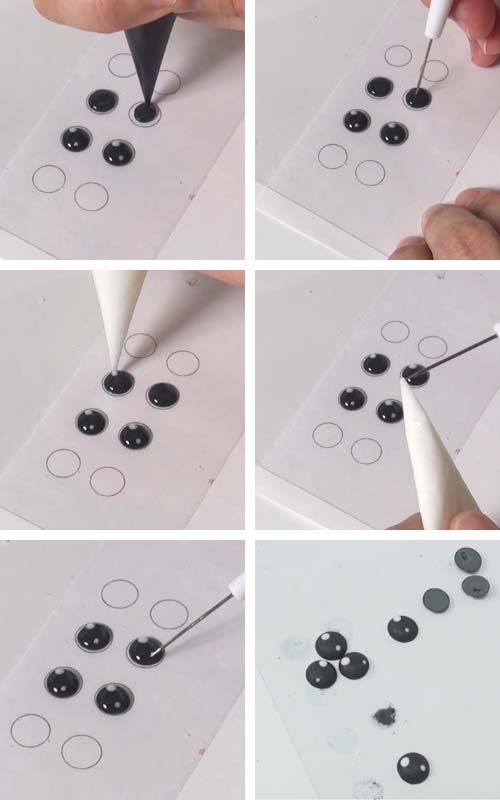
KAWAII EYES
I made kawaii eyes are royal icing transfers. Transfers can be made ahead of time (days, weeks, months ahead). Store them in an airtight container. Away from moisture and direct sunlight. Learn more about Royal Icing Transfers in my detailed tutorial.
ROYAL ICING COLORS AND CONSISTENCY :
Black, White – 20 second consistency
DECORATING STEPS :
Place a piece of food grade acetate sheet or wax paper over a template. Pipe a dot with black icing (20sec) shape it with a needle tool if needed. Immediately into the wet black icing pipe a large dot with white icing (20sec) in the right corner. Then apply 2 small white dots for the reflection in the opposite corner. Use a needle to to apply tiny white dots onto the black icing. Let dry overnight. Then remove from the acetate or wax paper. Store in an airtight container until ready to use.
PIPE EYES AND BEAK
ROYAL ICING COLORS AND CONSISTENCY :
- Purple – stiff consistency, to color icing I use sky blue and electric pink gel food coloring
- Yellow – 20 second consistency – to pipe a beak
DECORATING STEPS :
To make eye use stiff purple icing. Fit a piping bag with a star tip (Star Tip#32) and fill it with purple icing (stiff). Then pipe 2 large star shaped rounds onto the orange icing.
Immediately take dry black kawaii eyes we made earlier and place them in the center of the purple stars. Gently press them into the purple icing with a needle tool.

After, I piped a beak with yellow icing (20sec). Use a needle to accentuate the tip of the beak. Let crust well.
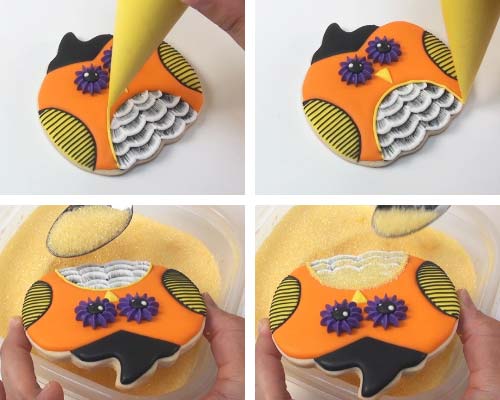
SANDING SUGAR
Outline belly edge with yellow icing (piping consistency) and immediately dust icing with yellow sanding sugar.
Decorate black area with white star sprinkles. Or pipe white dots if you don’t have star sprinkles.
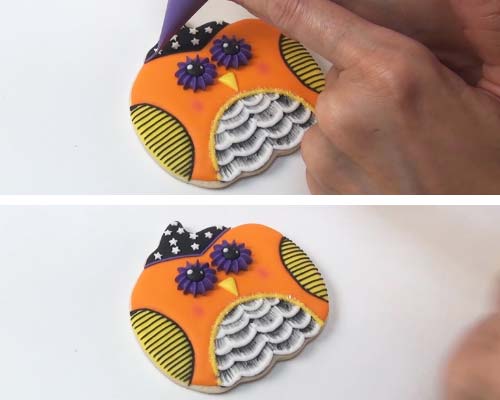
Using pink petal dust and a clean Q-tip add some blush to the cheeks.
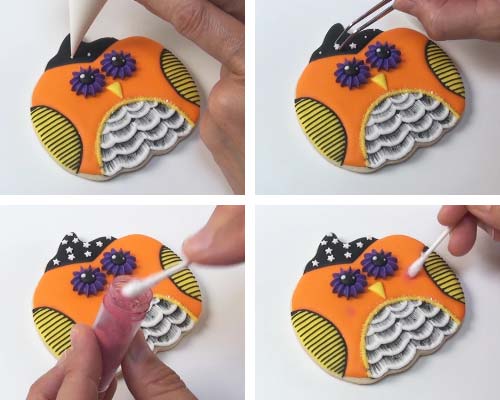
And lastly, pipe purple line (piping consistency) on the seam of black and orange icing.

TO MAKE CUTE HALLOWEEN KAWAII OWL COOKIE YOU NEED
- RECIPES
- Cut-Out Cookies : Cut-Out Sugar Cookies, Vegan Sugar Cookies, Gluten Free Sugar Cookies, more cut-out cookie recipes
- Fresh Lemon Royal Icing, Vegan Royal Icing
- TOOLS
- Favorite Decorating Tools
- Pumpkin Cookie Cutter
- Templates : Owl Template, Eye Template
- Food Gel Colors : orange, yellow, black, purple (I use electric pink and sky blue to make purple)
- Piping Bags
- Needle Tool
- Brown Edible Marker regular tip
- Yellow Sanding Sugar
- Paint Brush
- Star Sprinkles(rainbow), Red, White, Blue Star Sprinkles
- Star Piping Tip
- Red Petal Dust
- RELATED TUTORIALS
- Ultimate Guide to Royal Icing Consistency
- How to Freezer and reuse frozen royal icing
- Royal Icing FAQ
MORE OWL INSPIRED TREATS :
PIN IT for later

This post was originally published on October 29th, 2014. I updated this post on August 31th, 2019 with new step by step photos, written text and a video.
This post contains Amazon affiliate links that earn me a small commission, at no cost to you. I only recommend products that I use and love. Learn more about my affiliate policy here.

Hi, I’m Hani
Welcome!
Thank you for visiting Haniela’s. On my blog, you’ll find delicious sweet & savory recipes made with simple ingredients. Why not start a new adventure? Discover a world of cookie decorating with my step-by-step tutorials.

Hi, I’m Hani
Welcome!
Thank you for visiting Haniela’s. On my blog, you’ll find delicious sweet & savory recipes made with simple ingredients. Why not start a new adventure? Discover a world of cookie decorating with my step-by-step tutorials.