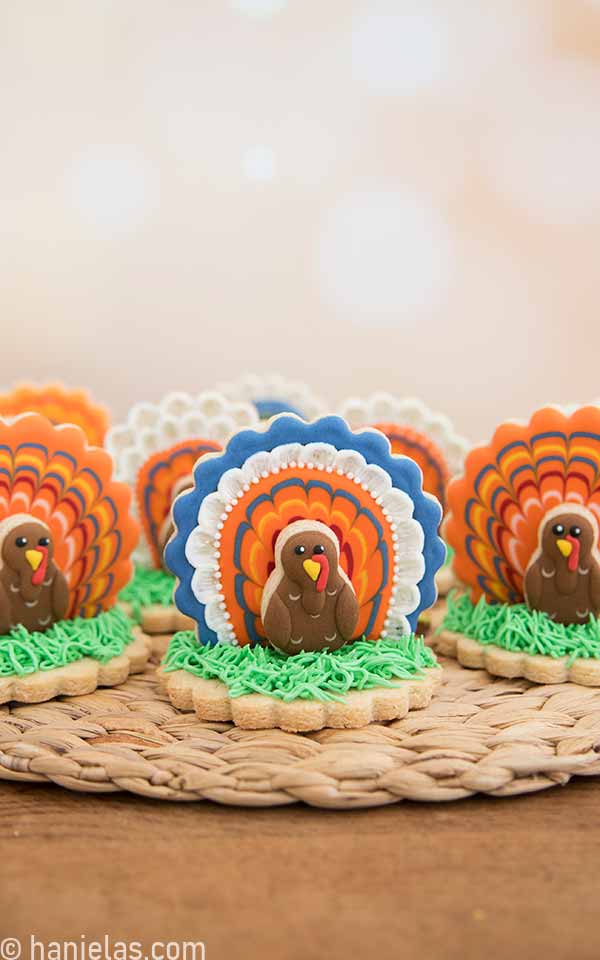
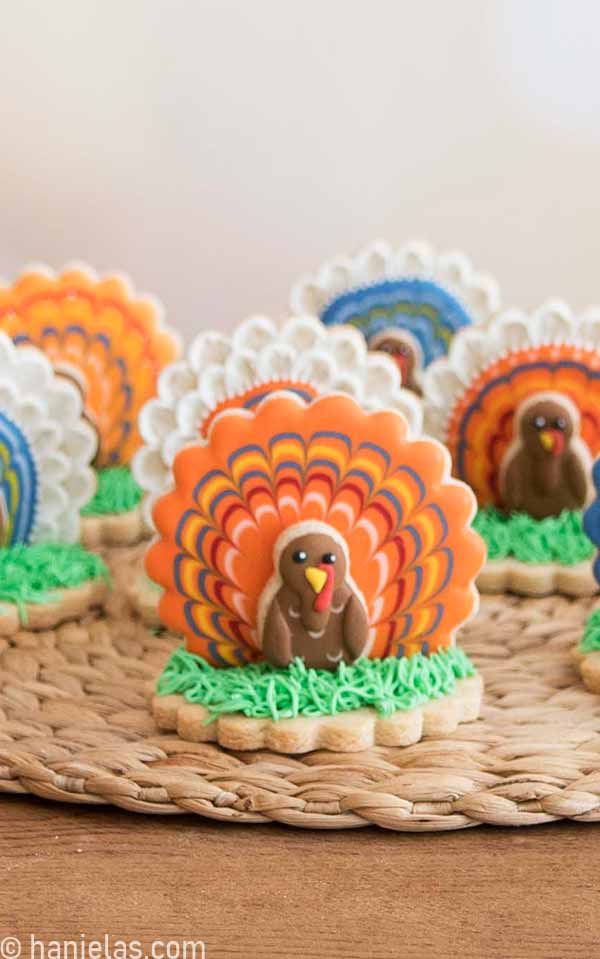
3D Turkey Cookies
Why not serve two turkeys on Thanksgiving? Make it savory and sweet. My easy-to-make decorated 3D Turkey Cookies will look great on your Thanksgiving table.
HOW TO DECORATE 3D TURKEY COOKIES FOR THANKSGIVING
In this cookie decorating tutorial, I’ll share several design ideas on how to decorate the turkey tail. You can make it super easy using my favorite wet-on-wet royal icing technique. If you wish to complicate things, you can beautify turkey tail cookies using brushed embroidery designs.
COOKIES
To make 3D turkey cookies you need 3 cookies.
- Base cookie – I used a scalloped edge round cookie cutter
- Tail cookie -is the same shape as the base, but the bottom is trimmed flat, so it can be propped upright.
- Turkey Body Cookie– this can be a mini snowman with the bottom trimmed, you can also use a small oval shape.
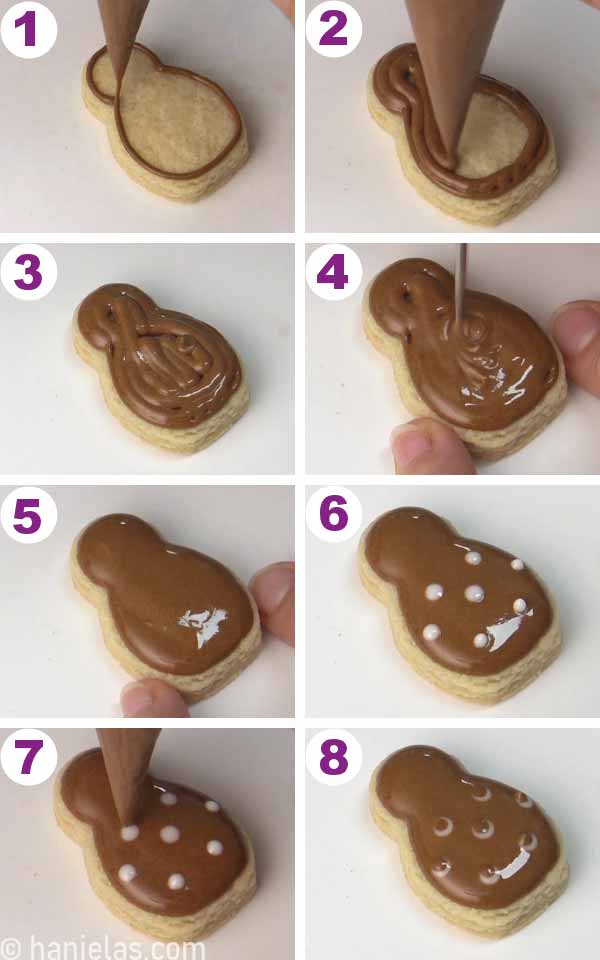
DECORATE TURKEY BODY
To decorate the body, you can use a super simple technique to create a different feathers style.
Outline and flood the cookie with about 20-second consistency icing (steps 1-5). Immediately, into the brown icing pipe small dots with white icing of the same consistency (step 6). Then with the brown icing pipe a dot on the top edge of each white dot (step 7). This will result in perfect little white crescent shapes that represent feathers (step 8). Let the icing crust for 20 minutes before the next step.
In this next step, you can pipe the head and the wings and let them crust. Use 20-second consistency brown icing (steps 1-3). Once crusted, pipe a small yellow beak using 20-second consistency, and shape the icing with a scribe tool (steps 4-5). To make the eyes, first, pipe black dots, and then immediately, with the tip of a scribe pick up a small amount of white icing and place it onto the black icing to create the reflection (steps 6-8). Let icing crust.
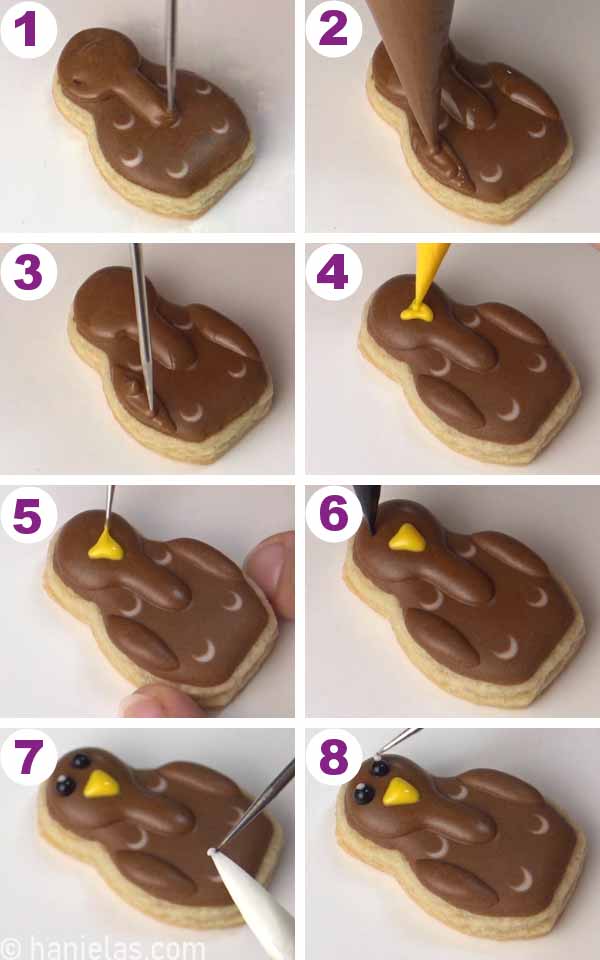
Turkey without a wattle is not a turkey, don’t you agree?! Use 20-second consistency red icing and pipe the wattle, start just above the beak and let the icing fall below the beak (steps 1-3). Let the turkey body dry.

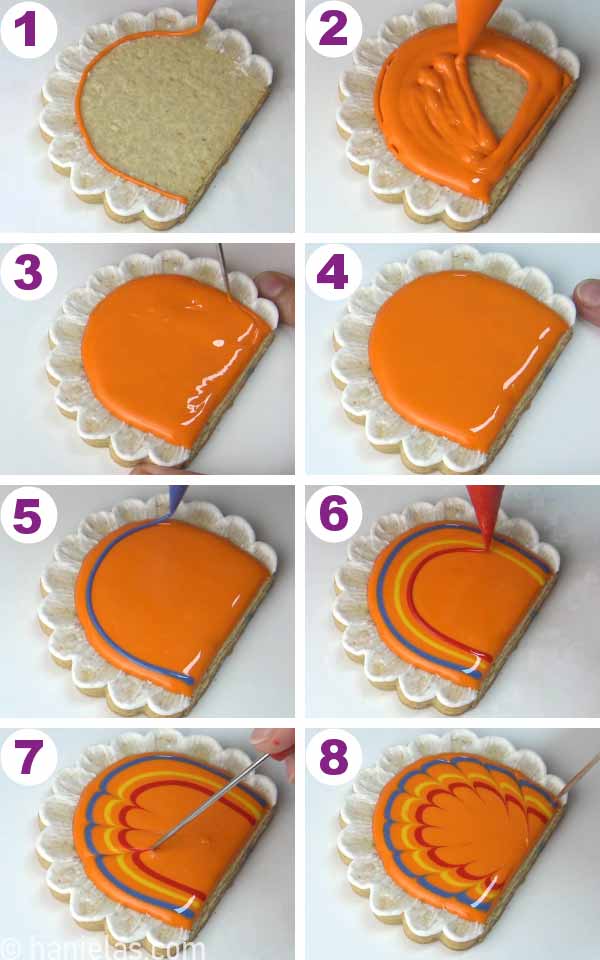
SIMPLE TURKEY TAIL COOKIES
This is the simplest of all the turkey tail designs in this Thanksgiving cookie decorating tutorial.
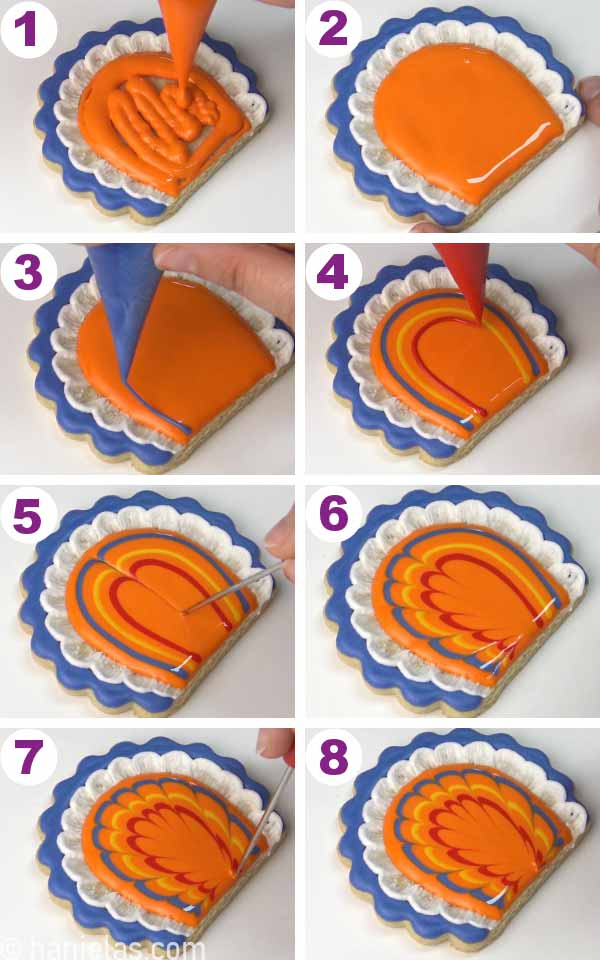
Marbling or often called feathering is a popular wet-on-wet decorating technique. It’s easy, fast, effective, and produces eye-catching designs in seconds.
Outline and flood the tail cookies with 15-second consistency orange icing. Use a scribe to distribute the icing. Try to work quickly so orange icing doesn’t start to crust (steps 1-4). Immediately pipe lines with blue, yellow, white, and red icing (steps 5-6). Run a tip of a scribe thru the icing, start at the outer edge and move toward the center bottom edge (steps 6-8). Let icing dry.

EASY BRUSHED EMBROIDERY TURKEY TAIL COOKIES
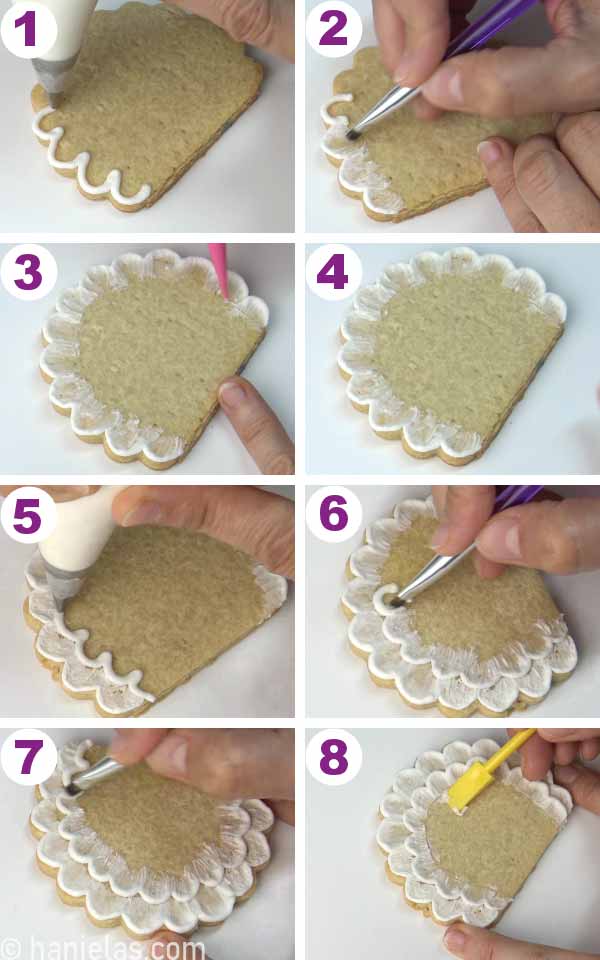
Follow the scalloped edge outline, use piping tip number #3, and pipe a short line of white thick icing on edge. With a damp paintbrush, brush some of the icing inwards (step 2). Have a damp paper towel on hand and wipe the paintbrush as needed. Continue with the brush embroidery design (steps 5-6). With a 2-in-1 tool, clean up the inside edge of the embroidery design (steps 7-8).

With 15-second consistency orange icing outline and flood the cookie (steps 1-4). Immediately pipe curved lines with colored icing (steps 5-6). Then, feather icing, run a metal scribe or a toothpick thru the icing. Wipe the tip of the tool between so you don’t transfer colors (steps 7-8).
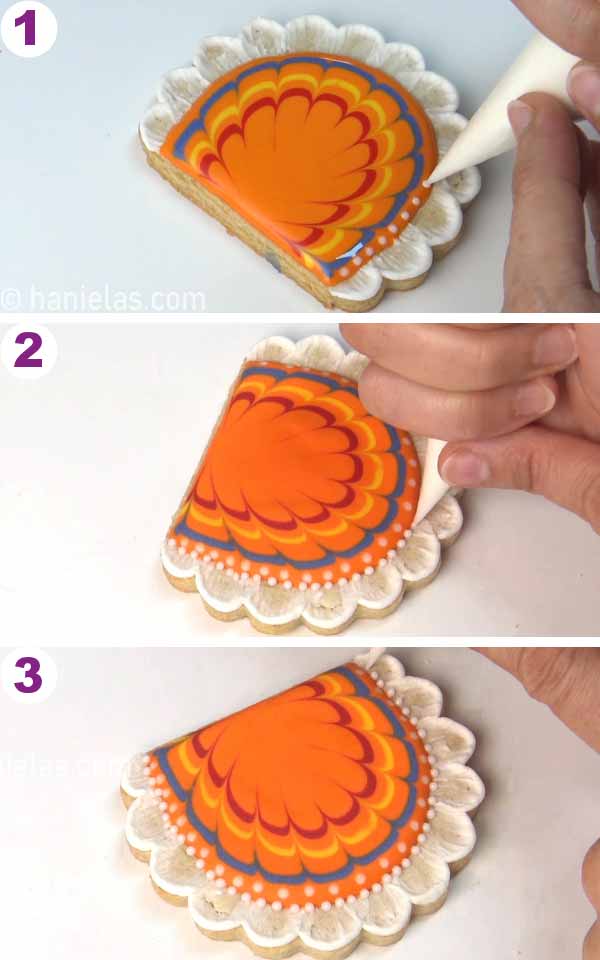
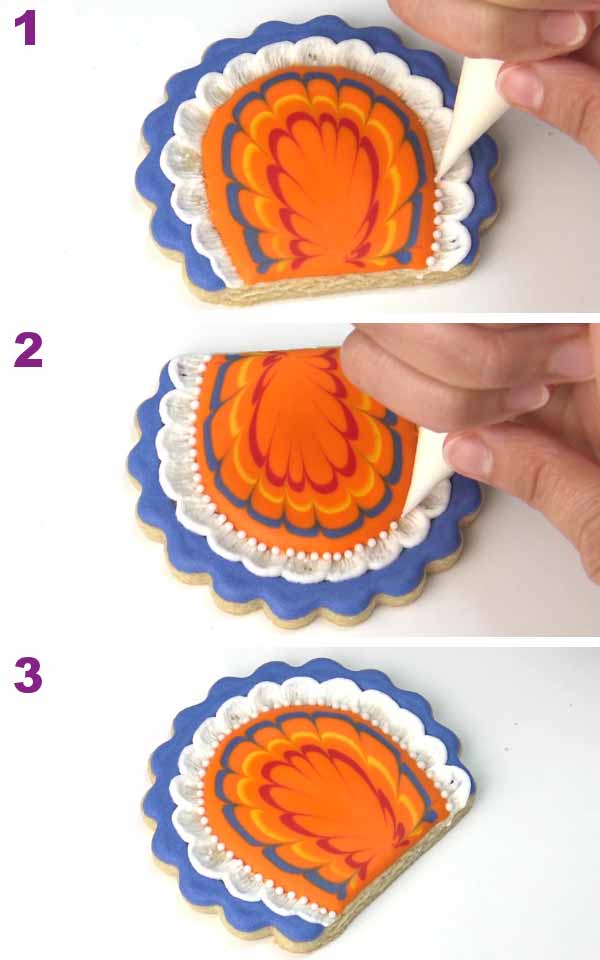
Immediately, take white icing, 15-second consistency, and pipe small dots into the orange icing, around the edge (steps 1). Let icing crust, and then pipe more white dots using 25-second consistency icing, just on the edge of orange and brushed embroidery design (steps 2-3).
DOUBLE BRUSHED EMBROIDERY TURKEY TAIL COOKIE
Did you know you can layer brushed embroidery?
In this next design, start by creating the outer layer (steps 1-4), then repeat the process and create the second layer of the brushed embroidery design, clean up the inner edge with a scribe tool or a boo-boo stick/2-in-1 tool (steps 5-8).
Fill the inside with royal blue 15-second consistency icing (steps 1-4). Immediately pipe yellow and white lines into the blue icing (step 5). Use a scribe to feather the icing while it’s wet (steps 6-8). Let the icing crust for 30-40 minutes.

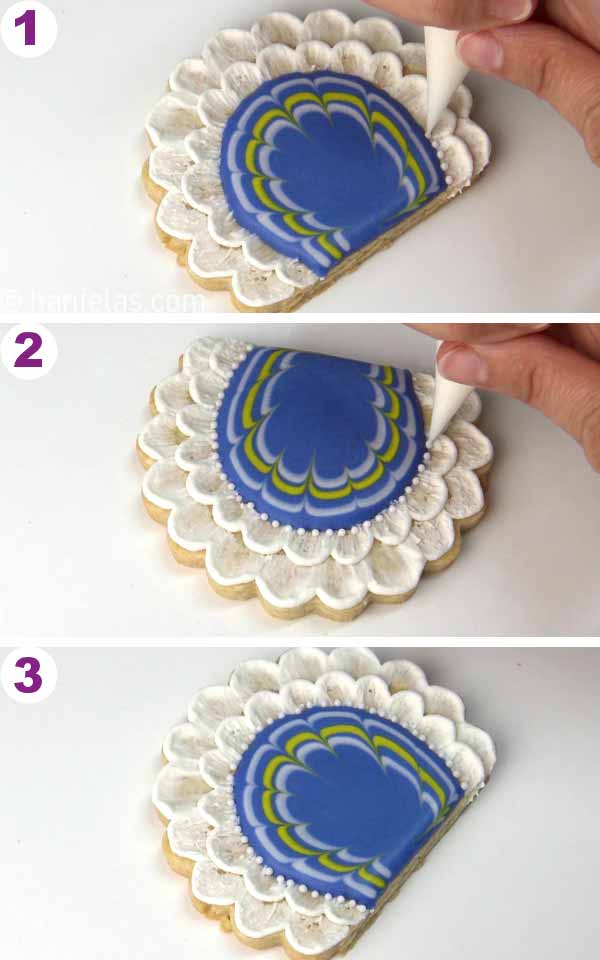
Pipe small dots with white icing, 25-second consistency, just on the edge of blue (steps 1-3).
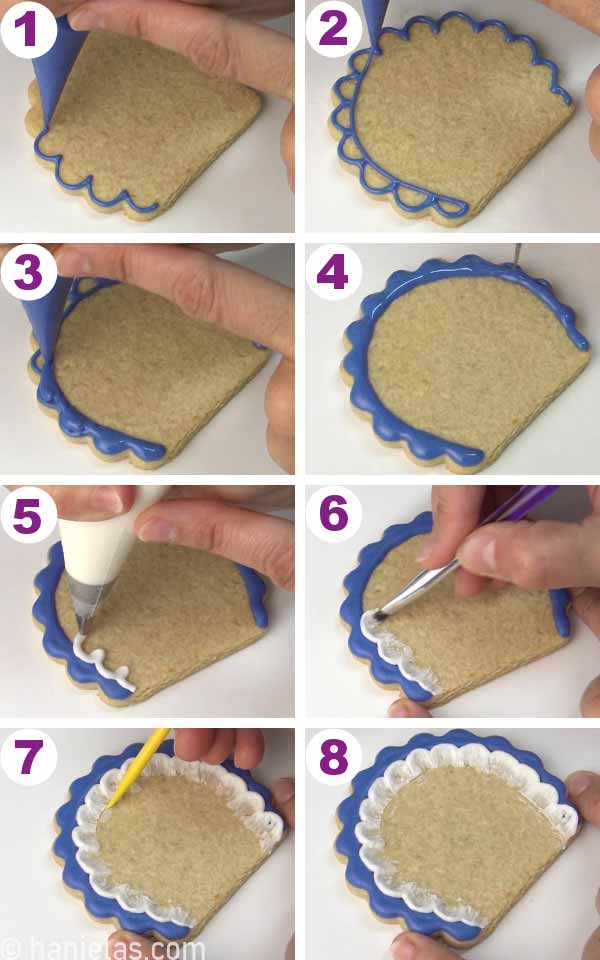
It’s fun to switch up the design. In this following turkey tail cookie, I first decorated the outer edge with blue icing, 15 to 20-second consistency (steps 1-4). Let it dry for 2 hours. Then use the brushed embroidery technique to decorate; use stiff white royal icing on a food-only, damp paintbrush (steps 5-8).
Follow with the flooding and creating feather design, like in the previous steps.
Pipe a decorative dotted border with white icing on the edge of blue and brushed embroidery (steps 1-3).
ATTACH TURKEY ONTO THE TAIL COOKIE
The icing on the tail and turkey head cookies should be dry, allow icing to dry overnight, for 6-8 hours.
Pipe a small amount of icing on the cookie where you want to attach turkey head cookie. Then gently attach the head to the tail cookie using a shifting motion.

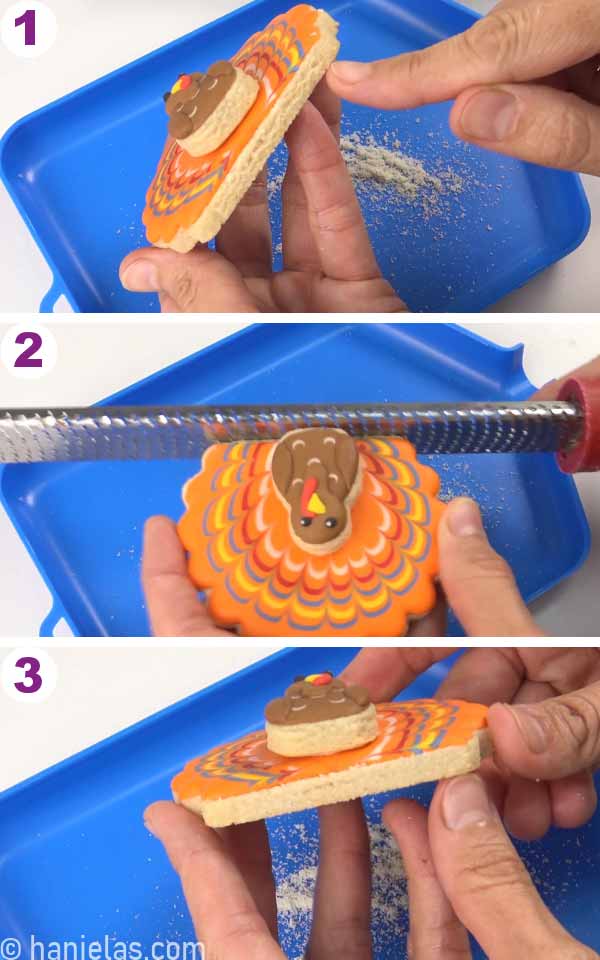
MICROPLANE ZESTER
I noticed the bottom edge of the cookies was uneven. To amend this problem, use a Microplane zester and shave some of the cookies to make a perfect edge (steps 1-3).
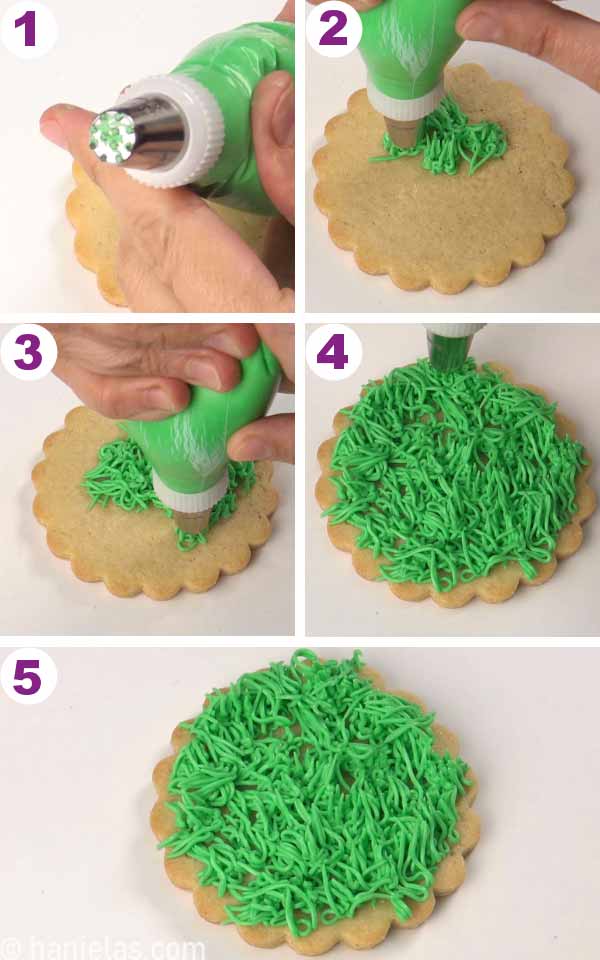
PIPE GRASS
With stiff royal icing pipe green grass icing onto a 3-inch round base cookie (steps 1-5). Don’t let the icing crust or dry. Immediately follow with the next step.
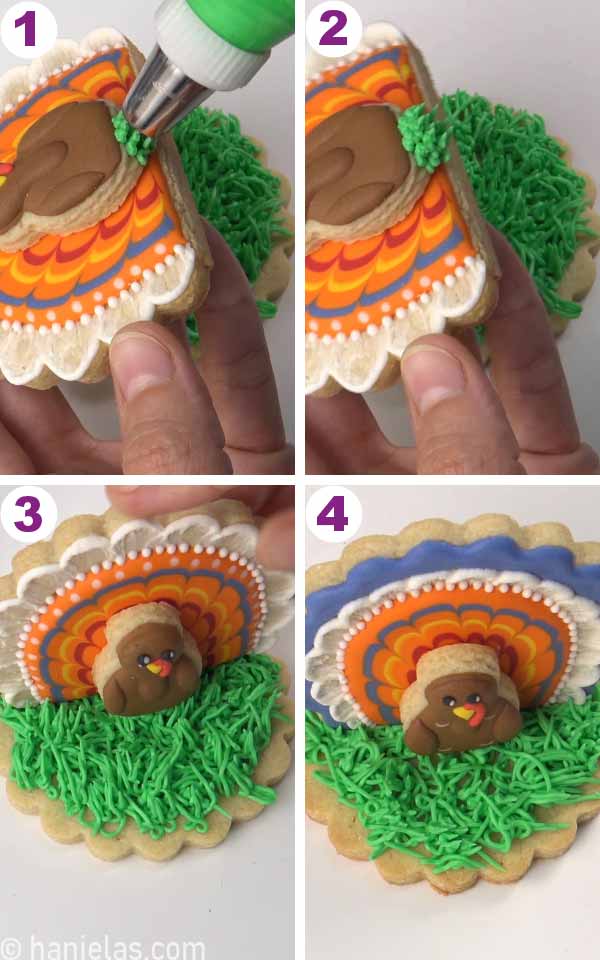
3D TURKEY COOKIE ASSEMBLY
Pipe some grass onto the edge of the turkey cookie (steps 1-2). Push the turkey with the tail cookie attached to the freshly piped green grass. Allow icing dry for a couple of hours. Package for gifting or store in an airtight container until ready to use.
These cute 3D Turkey Cookies will look great on your Thanksgiving table. Use them as table-setting decorations, and your guest will gobble them up before you find a wishbone.

TO MAKE 3D TURKEY COOKIES YOU NEED
- Cut-Out Sugar Cookies (favorite)
- Vegan Sugar Cookies
- Gluten Free Cookies
- Royal Icing
- Vegan Royal Icing
- TOOLS
- Find All The Tools in my Amazon Shop
- Cookie Cutter – 3 inch round or scalloped edge
- Gel Food Colors (I use Americolor Brand): orange, royal blue, yellow, red, brown
- Metal Scribe or a toothpick
- Food-only paintbrush, flat 1/4 inch
- Piping Tips : Grass Piping Tip, Round Piping Tip #3
TRY THESE FALL RECIPES AND DECORATED COOKIES
- Mini Pumpkin Cheesecakes
- Homemade Pumpkin Puree
- Easy Fall Bouquet of Decorated Cookies via LilaLoa
- Buttercream Fall Wreath Cake
- Decorated Marbled Pumpkin Cookies
This post contains Amazon affiliate links that earn me a small commission, at no cost to you. I only recommend products that I use and love. Learn more about my affiliate policy here.

Hi, I’m Hani
Welcome!
Thank you for visiting Haniela’s. On my blog, you’ll find delicious sweet & savory recipes made with simple ingredients. Why not start a new adventure? Discover a world of cookie decorating with my step-by-step tutorials.

Hi, I’m Hani
Welcome!
Thank you for visiting Haniela’s. On my blog, you’ll find delicious sweet & savory recipes made with simple ingredients. Why not start a new adventure? Discover a world of cookie decorating with my step-by-step tutorials.