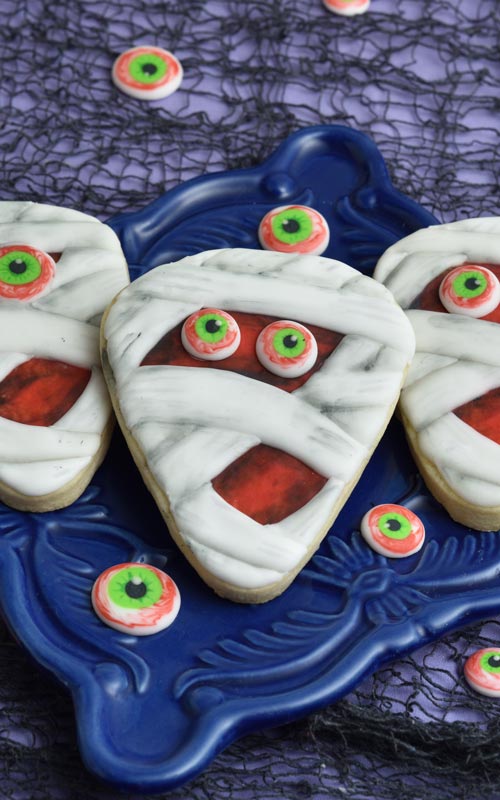
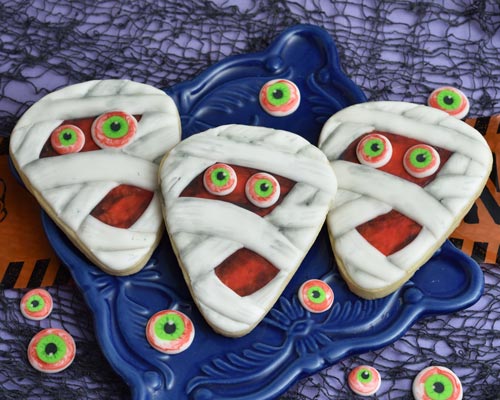
Spooky Mummy Cookies
Give candy corn cookie cutter makeover with these Spooky Mummy Sugar Cookies. I’ll show you how to make monster eyes and mummy bandages with royal icing.
HOW TO MAKE SPOOKY HALLOWEEN MUMMY COOKIES
COOKIE CUTTER
For today’s spooky Halloween cookie project I used a Candy Corn cookie cutter turned upside down. But if you rather make not so scary candy corn cookies you’ll definitely love these Cute Halloween Cookies.
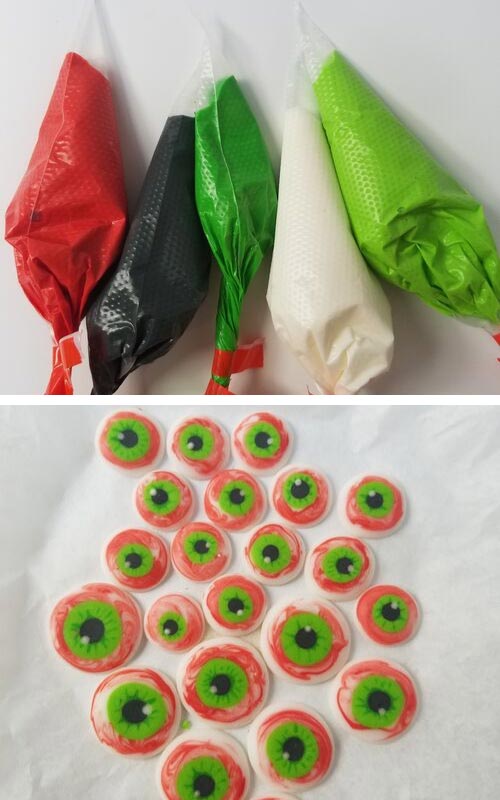
SCARY MONSTER ROYAL ICING EYES
Monster eyes are made as Royal Icing Transfers. I prepared them couple of days before. And you can also make them months in advance.
ROYAL ICING COLORS AND CONSISTENCY :
- White, Red, Electric Green, Dark Green, Black – 25 second consistency
DECORATING STEPS :
Prepare royal icing and color it with gel food colors. To make electric green you can either use readily available electric green gel color or use yellow food color and a touch of leaf green.
Place a piece of wax paper on top of the template. Secure it with a masking tape. Then pipe sclera with white royal icing (25sec). Then onto the white pipe a red circle (25sec). Immediately marble icing using a needle tool.
Then pipe iris round with electric green (25sec) and then pipe a dark green dot (25sec) in the center of electric green.
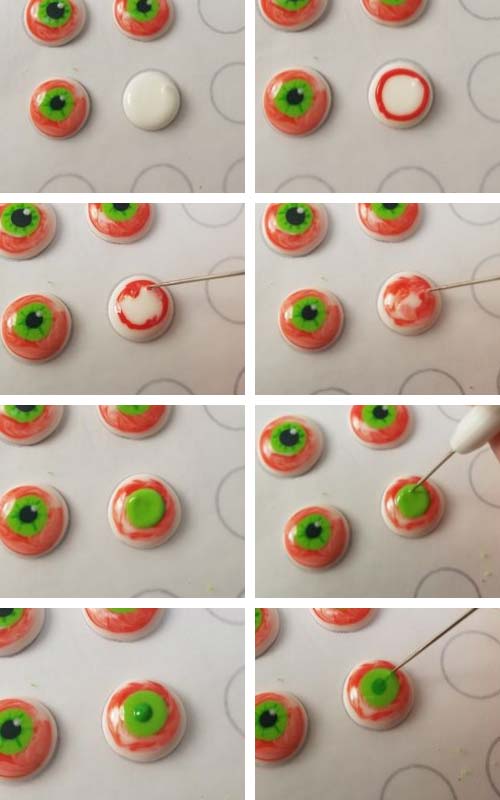
After use a needle tool to shape and pull dark green icing into the electric green. Finish by piping a large black pupil (25sec) into the center of dark green.
Flatten the black icing with a needle tool using up and down sewing needle motion. Then attach a white dot of icing onto the edge of black to make the reflection.

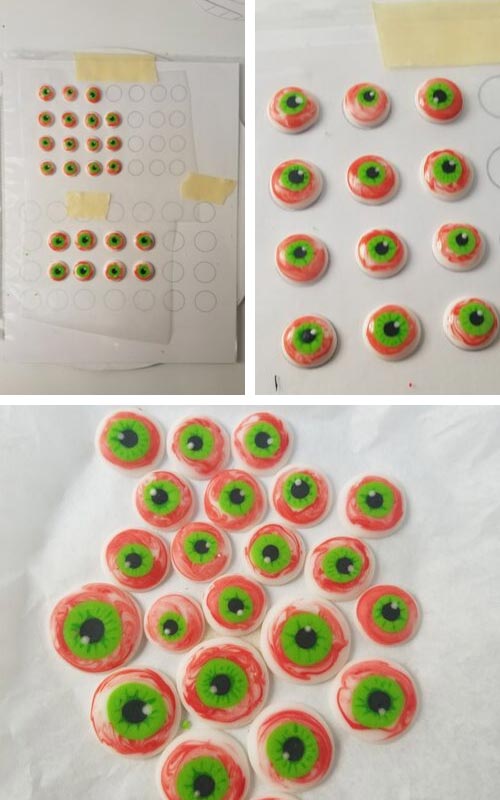
Let the eyes dry overnight. Then peel off the baking wax paper. Store royal icing eyes in an airtight container until ready to use. Keep them away from direct sunlight and moisture. Royal icing transfers keep for months.
MUMMY COOKIES
ROYAL ICING COLORS AND CONSISTENCY:
- Red, Black – 10 second consistency
- White – 20 second consistency
DECORATING STEPS :
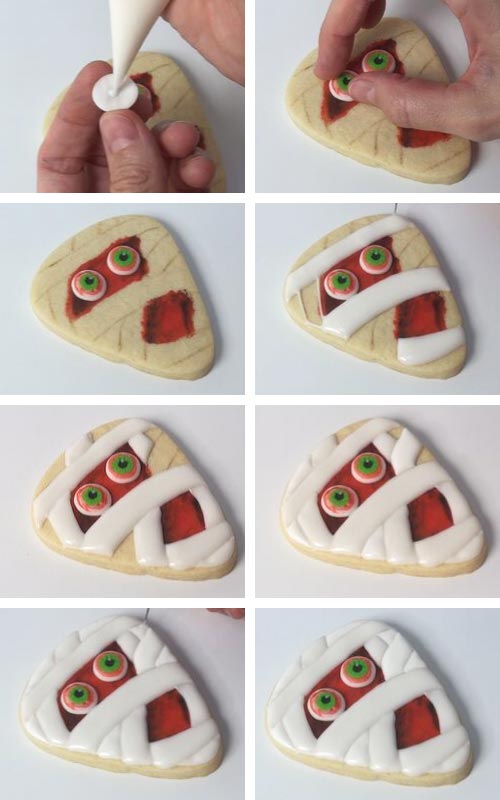
Trace the outlines on a cookie with a card stock template and an edible marker. Then spread a thin layer of red royal icing (10sec) onto the eye and mouth opening. Dampen the food only paint brush and smooth the icing.
Then immediately pipe 2 dots with black icing (10sec) onto the red and into the corners. Blend the black into the red to shade the edges. Wipe the brush into a paper towel as you keep blending the icing. Let the icing dry.

Now attach the eyes onto the eye section. Use just a dot of white icing to adhere eyes onto the cookie. Secure eyes onto the cookie using a gentle back and forth motion.
Then start piping mummy bandages with white icing (20sec). Flood bandages in sections. Don’t flood neighboring sections at the same time or icing will blend together. Allow sections to crust for 20 minutes. Then continue flooding rest of the bandages. Let the icing dry before continuing with the next step.
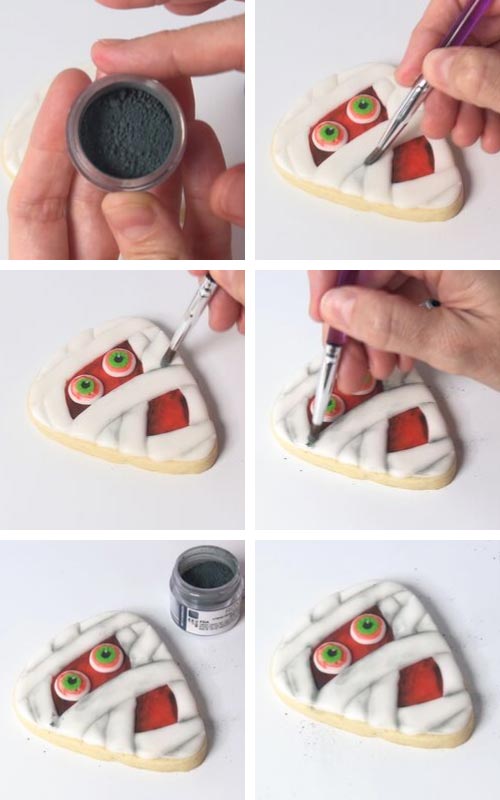
APPLY DRY PETAL DUST
To give spooky mummy cookies more dramatic final look I used dry gray petal dust. With dry food only paint brush apply small amounts of dry petal dust onto the bandage seams. Spread the dust along the seams with a paint brush.
PIN IT for later
TO MAKE SPOOKY MUMMY COOKIES YOU NEED
- RECIPES
- Sugar Cookie Recipe
- Royal Icing Recipe
- TOOLS
- Template
- Cookie Cutter
- Food Colors
- Piping Bags
- Needle Tool
- Edible Marker
- Roxy & Rich Dove Gray Edible Petal Dust
- Paint Brush
- Wax Paper
- RELATED TUTORIALS
- How to Thin Royal Icing
- All you need to know about Royal Icing Transfers
- Can I freeze Royal Icing?
MORE FUN HALLOWEEN TREATS :
- Skull Cake Roll
- Cute Halloween Cookies (set of Candy Corn, Jack-o-Lantern and Ghost Cookies)
- Vampire Teeth Cookies
- Kawaii Owl Cookies
- Slice and Bake Halloween Cookies
- Halloween Ghost Gingerbread House
This post contains Amazon affiliate links that earn me a small commission, at no cost to you. I only recommend products that I use and love. Learn more about my affiliate policy here.

Hi, I’m Hani
Welcome!
Thank you for visiting Haniela’s. On my blog, you’ll find delicious sweet & savory recipes made with simple ingredients. Why not start a new adventure? Discover a world of cookie decorating with my step-by-step tutorials.

Hi, I’m Hani
Welcome!
Thank you for visiting Haniela’s. On my blog, you’ll find delicious sweet & savory recipes made with simple ingredients. Why not start a new adventure? Discover a world of cookie decorating with my step-by-step tutorials.