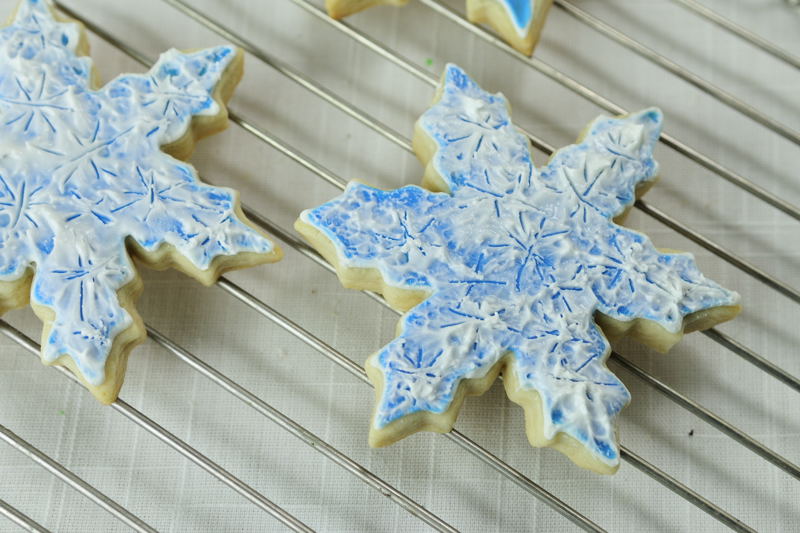
Baked cookies(Collection of cut out cookie recipes), you can use any shapes you like, rounds,trees and less complex shapes are really great to use when having kids decorate cookies with this technique.
Using a thin royal icing(about 5 second icing) apply a very thin layer of icing, distributing icing with a brush onto the cookie surface. Let dry completely.
Reason I used a very thin icing for the 1st coat is because I wanted to avoid having 2 thick layers of icing on the cookies.
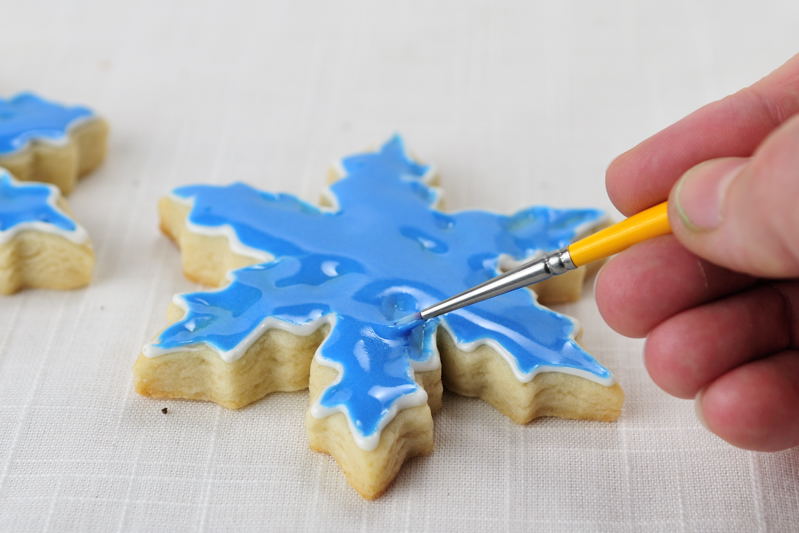
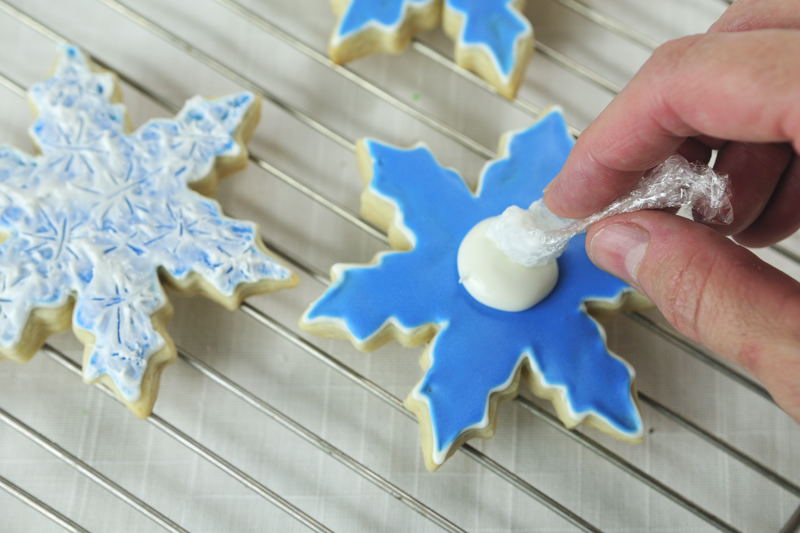
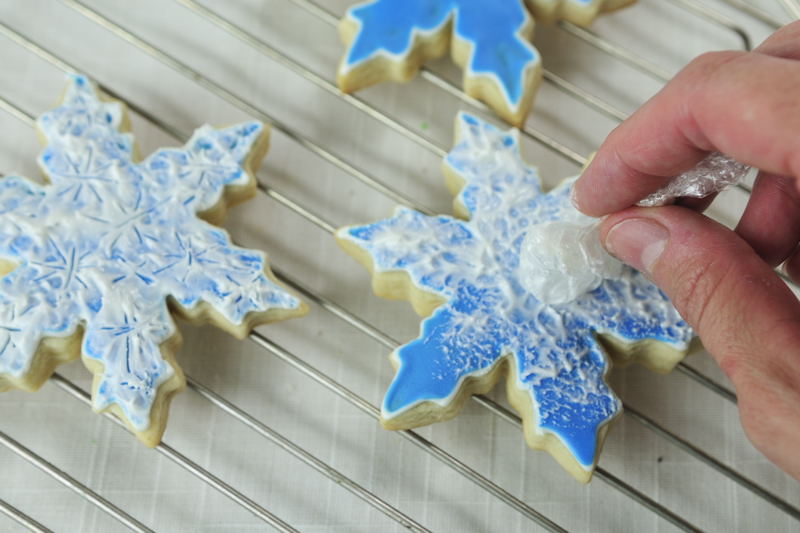
Using a flood(10 to 15 second icing) icing and a crumbled piece of plastic wrap, apply white icing directly onto the blue layer. Dabbing away, almost as if you were faux painting the wall.
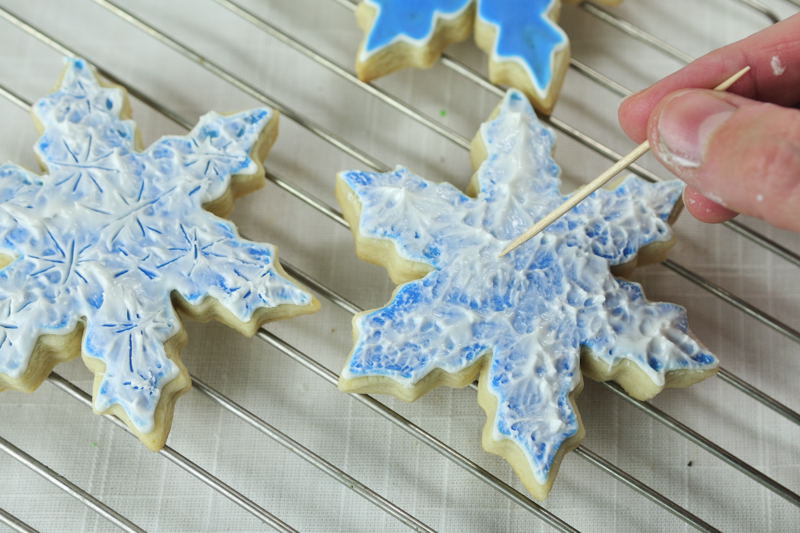
Once you covered the whole cookies, take a toothpick and draw snowflake like lines, stars or such. You will need to wipe the toothpick few times while drawing. Once you made enough stars to cover the whole cookies, you can let the icing dry completely.
Once icing has dried, spray the cookies with pearl spray for added shimmer.
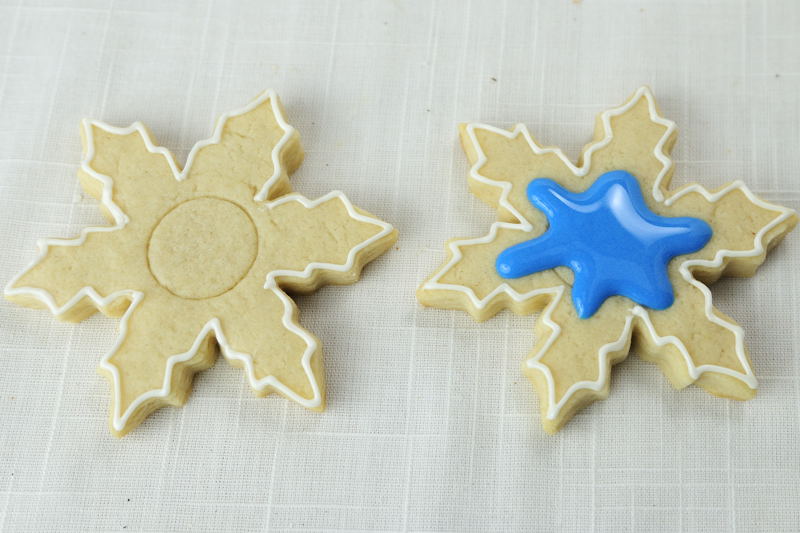
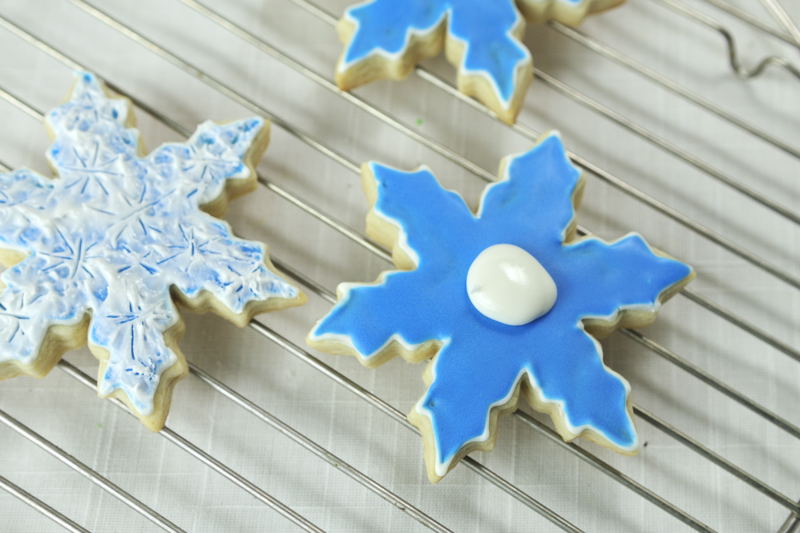
Using outline royal icing consistency, outline with white and flood the cookie with a thin blue icing
Spread and push the icing into the hard to reach areas with a small brush
Pipe little bit of flood consistency icing onto the cookie
Using crumbled piece of plastic wrap apply “Faux finish” onto the cookie, dabbing all over the blue layer
Using a toothpick draw stars, snowflakes into the wet white icing
Wipe the toothpick as needed
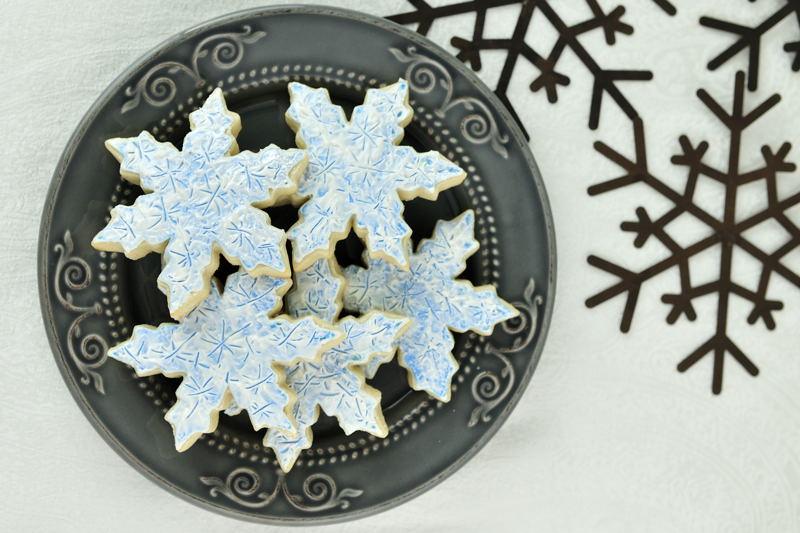
Icy Snowflake cookie. Once icing is dry spray the cookies with Pearl Spray to add shimmer
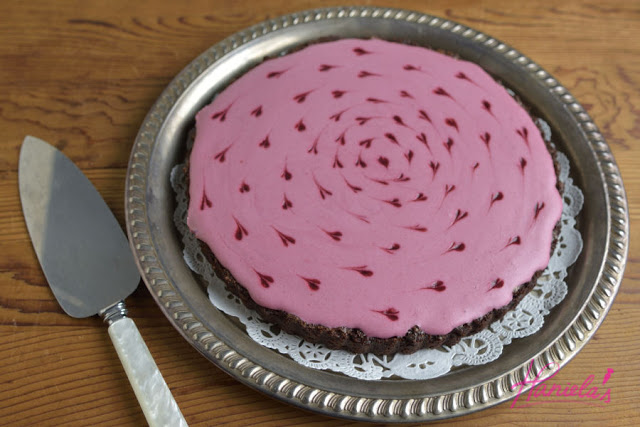
I like a lot of desserts chilled and this brownie raspberry mousse tart is no exception. If you prefer desserts at room temperature let the tart sit our for about 20-30 minutes before serving. I used a lighter recipe for the brownie base to cut some calories and a creamy raspberry mousse for the…
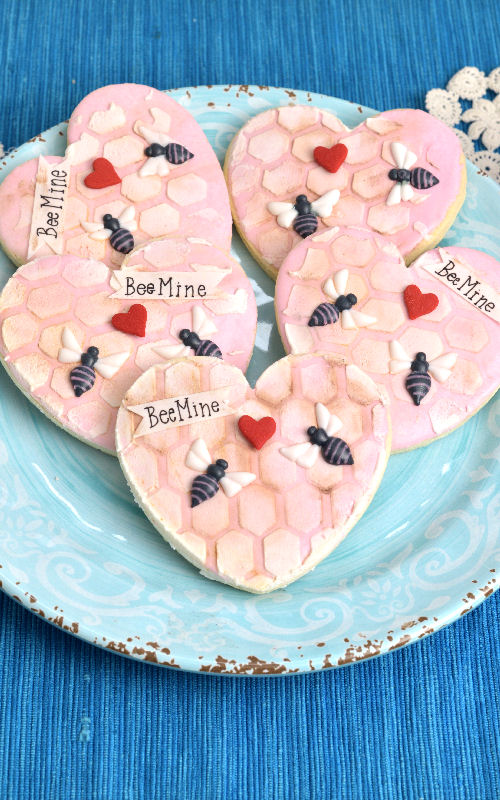
Few weeks ago I shared with you a recipe for Vegan Royal Icing. I used vegan royal icing to make these pretty Bee Mine Honeycomb Cookies. Before I jump into a tutorial let me tell you little bit about my favorite gadget of 2018! The best tool I got last year was a Bag…
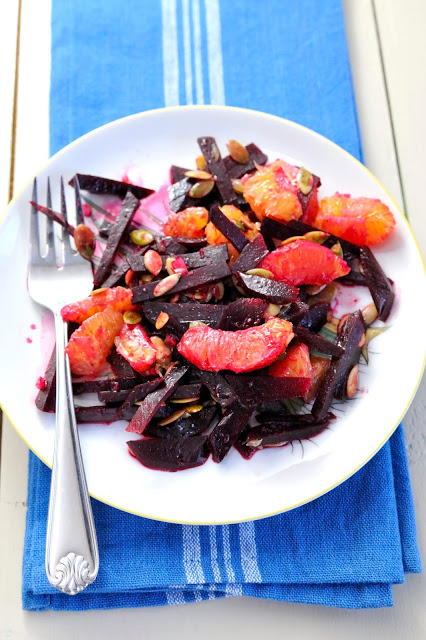
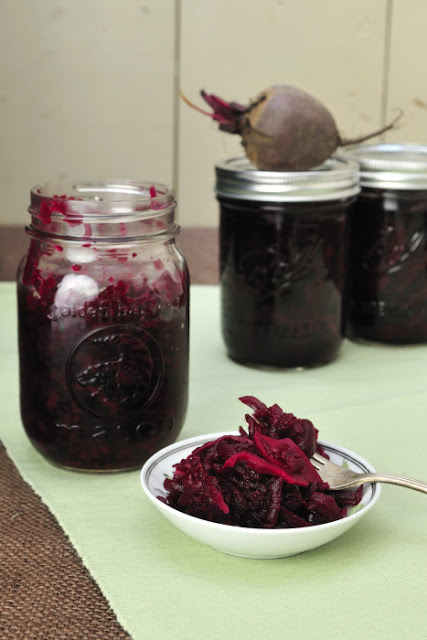
There always were jars with homemade pickled beets in my mom’s pantry, beets were grated and tasted so good. For many years I forgot about them, occasionally I’d by a jar in a Polish grocery store but I’ve never really enjoyed it like the ones my mom and grandmother made, maybe that is why I’m such sucker for…
Under a dull exterior of this root vegetable lies a delicious, sweet flavor packed with nutrients. High in folic acid, potassium, calcium and antioxidants and with also edible greens this vegetable is a garden jewel on its own. We decided to grow beets this year, planting seeds directly in the soil. They are so easy to grow, they…
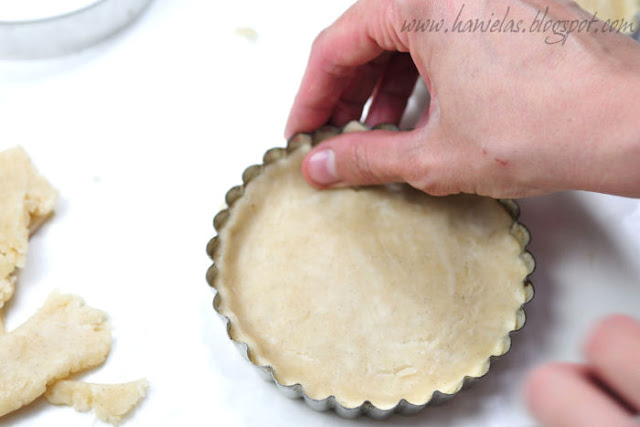
After a lot of testing I finally came up with an oil based crust recipe that is flaky, my neighbor Jim who grew up on a traditional lard pie, after testing one of my fruit tarts, he commented that it was as good as the lard one and hadn’t I told him I’ve made it…