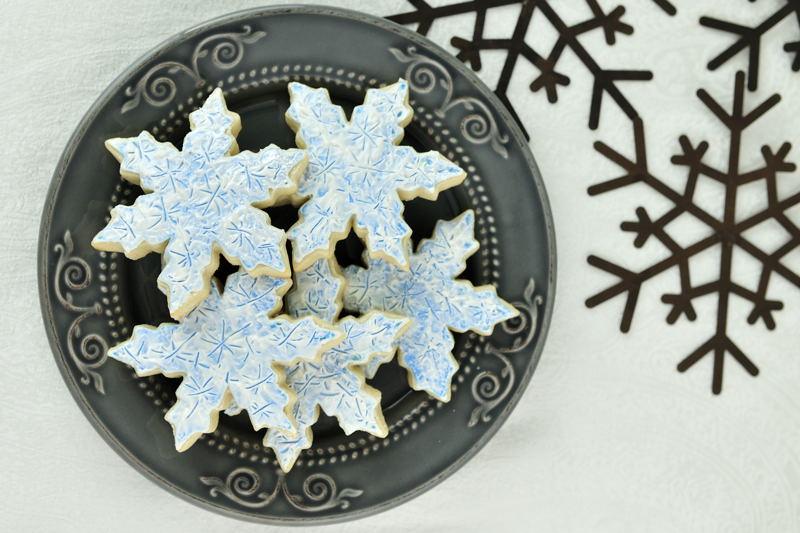
Icy Snowflake Cookies
Nature creates the most beautiful art.
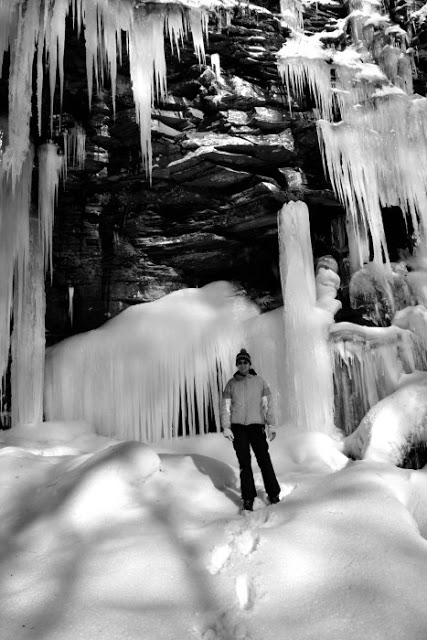 |
| That’s me, under the frozen waterfall. |
To make Icy Snowflake Cookies you need:
Baked cookies(Collection of cut out cookie recipes), you can use any shapes you like, rounds,trees and less complex shapes are really great to use when having kids decorate cookies with this technique.
Toothpick
Painter’s brush
Crumbled piece of plastic food wrap
- Outline cookie with white royal icing.
- Using a thin royal icing(about 5 second icing) apply a very thin layer of icing, distributing icing with a brush onto the cookie surface. Let dry completely.
- Reason I used a very thin icing for the 1st coat is because I wanted to avoid having 2 thick layers of icing on the cookies.
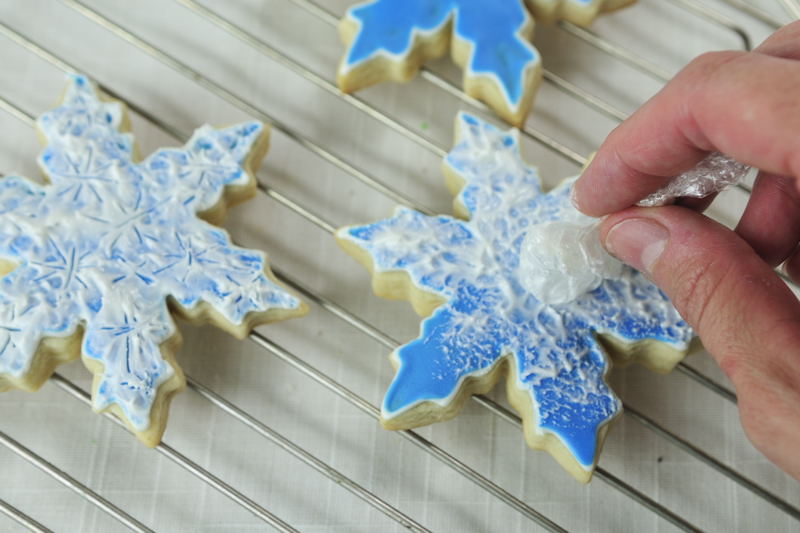
- Using a flood(10 to 15 second icing) icing and a crumbled piece of plastic wrap, apply white icing directly onto the blue layer. Dabbing away, almost as if you were faux painting the wall.
- Once you covered the whole cookies, take a toothpick and draw snowflake like lines, stars or such. You will need to wipe the toothpick few times while drawing. Once you made enough stars to cover the whole cookies, you can let the icing dry completely.
- Once icing has dried, spray the cookies with pearl spray for added shimmer.
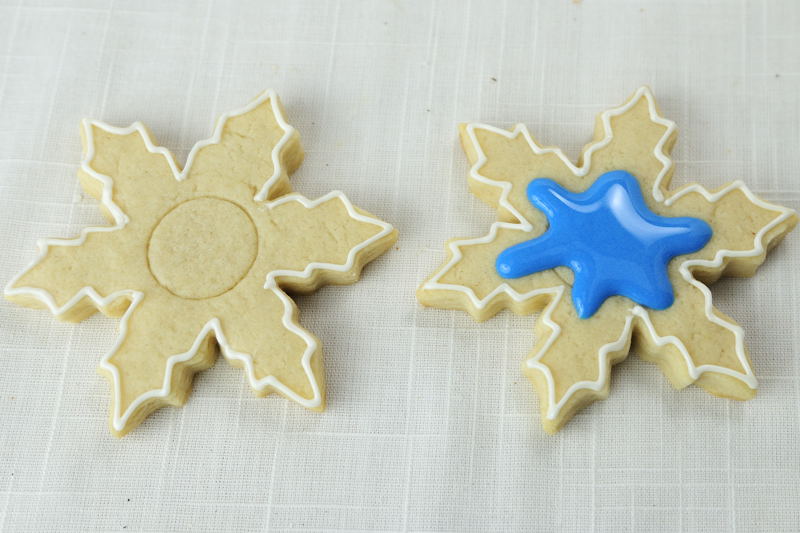 |
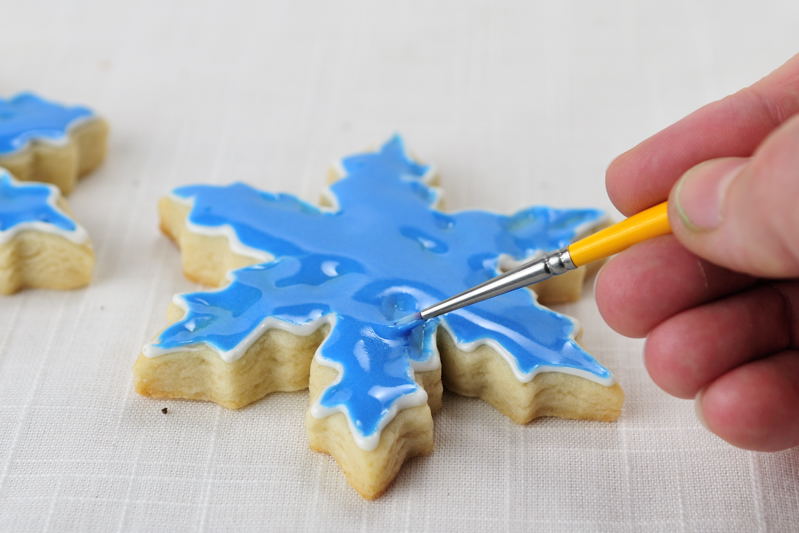
| Using outline royal icing consistency, outline with white and flood the cookie with a thin blue icing |
 |
| Spread and push the icing into the hard to reach areas with a small brush |


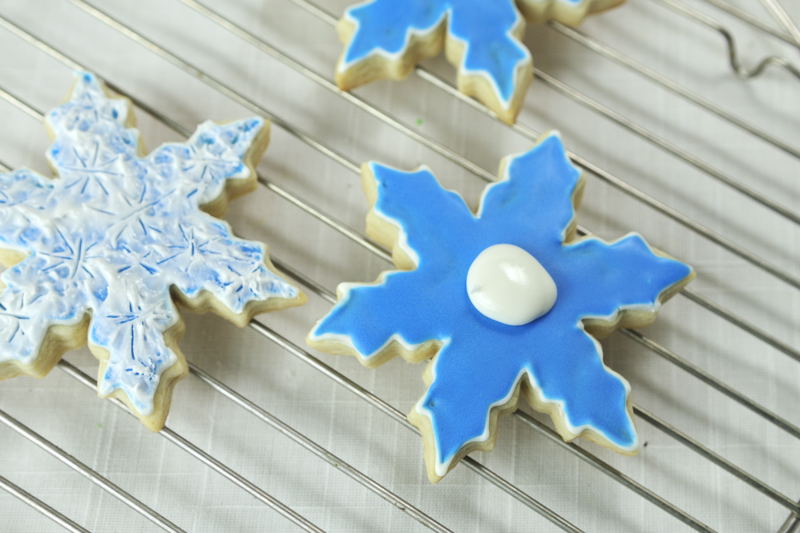 |
| Pipe little bit of flood consistency icing onto the cookie |
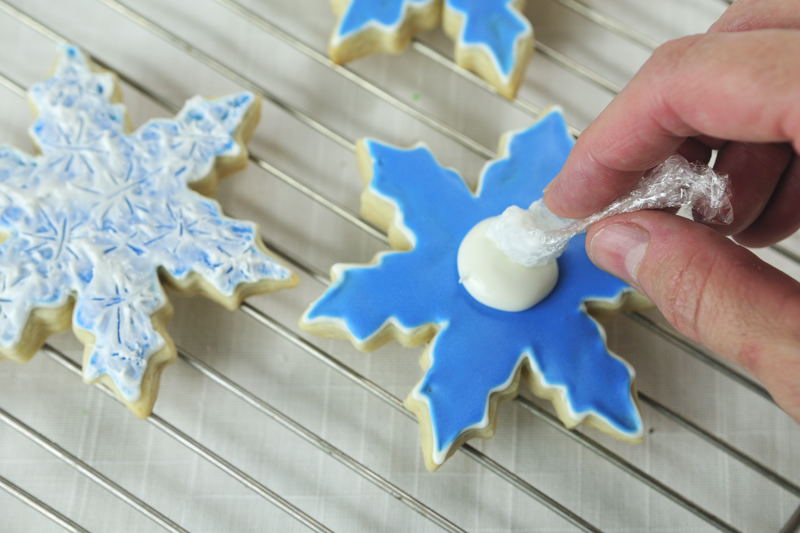 |
| Using crumbled piece of plastic wrap apply “Faux finish” onto the cookie, dabbing all over the blue layer |
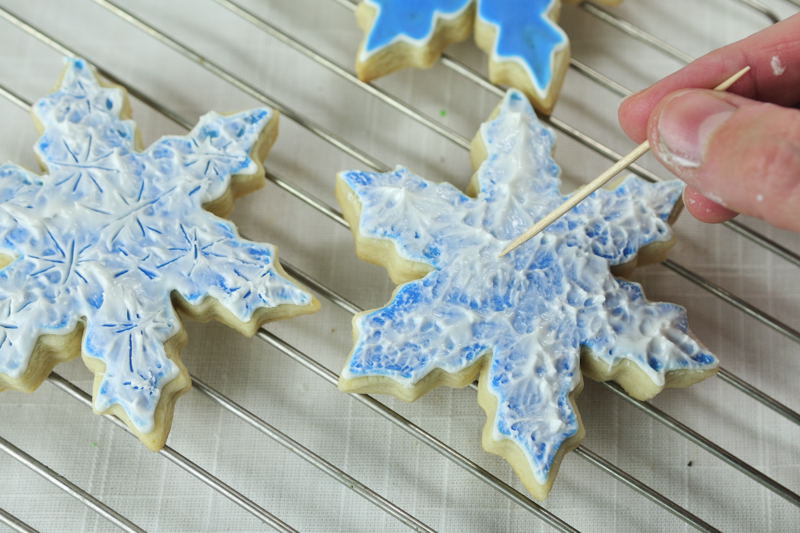 |
| Using a toothpick draw stars, snowflakes into the wet white icing |
 |
| Wipe the toothpick as needed |
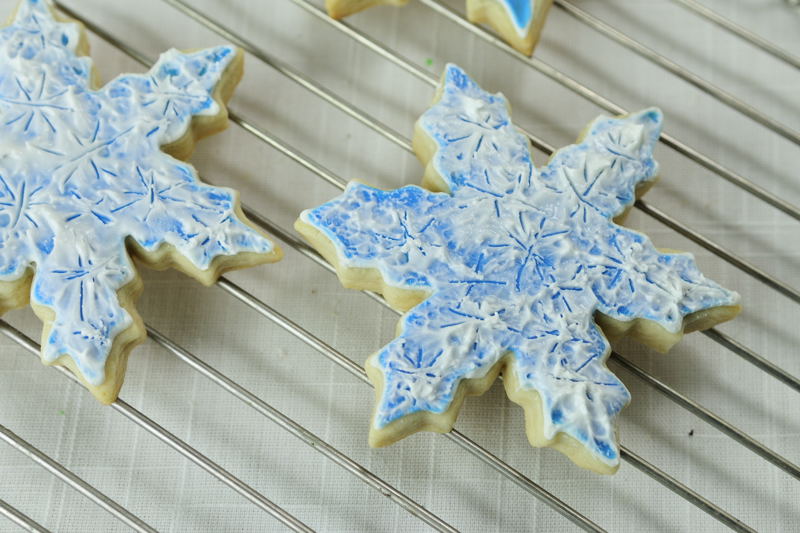 |
| Icy Snowflake cookie. Once icing is dry spray the cookies with Pearl Spray to add shimmer |

I used a similar technique to create a frosty window effect on my Gingerbread Bird House
Linking to Tidy Mom – I’m Lovin’ it.

Hi, I’m Hani
Welcome!
Thank you for visiting Haniela’s. On my blog, you’ll find delicious sweet & savory recipes made with simple ingredients. Why not start a new adventure? Discover a world of cookie decorating with my step-by-step tutorials.

Hi, I’m Hani
Welcome!
Thank you for visiting Haniela’s. On my blog, you’ll find delicious sweet & savory recipes made with simple ingredients. Why not start a new adventure? Discover a world of cookie decorating with my step-by-step tutorials.