DIY Stripe Stencil
Today I’m going to show how to make an easy DIY Stripe Stencil for cookie and cake decorating. Let’s get started.
HOW TO MAKE STRIPE COOKIE DECORATING STENCIL
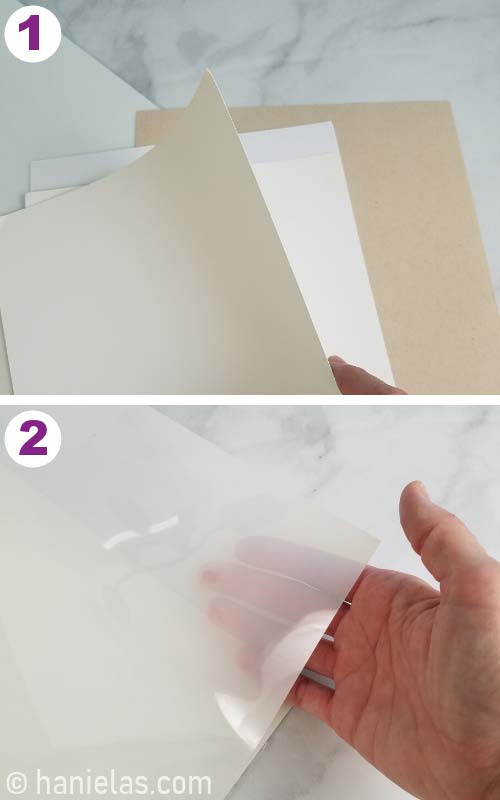
Stencils for cookie decorating are usually made from a thin plastic material (mylar). These plastic sheet stencils can be used to airbrush and they can also be used with royal icing. And they can be washed and reused many times.
That being said if you need a stencil for airbrushing and can’t get your hands on mylar stencil material you can also use card stock. I have done so many times in the past.
To cut out stencils you can use Stencil Cutting Machine or an exacto knife. Today I’m going to use an exacto knife to make an airbrushing stencil for cookie decorating.
STEP 1 – MATERIALS TO MAKE STENCILS
- Card Stock (sep 1) – is easily obtained, fairly easy to cut thru with an exacto knife, cheap but not as durable as plastic sheet. Card stock can’t be washed and can’t be used for stenciling with royal icing.
- Mylar Sheet (step 2) – it’s harder to find in stores, usually has to be ordered online. It’s harder to cut thru with an exacto knife. It’s very durable and can be used over an over even with royal icing. Plastic stencils can be washed. Mylar sheets (0.4 to 0.6 MIL) can be used with stencil cutting machines.
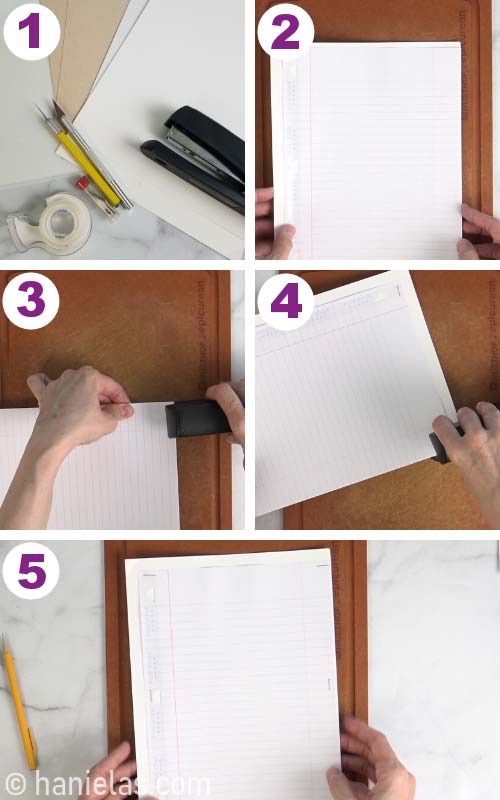
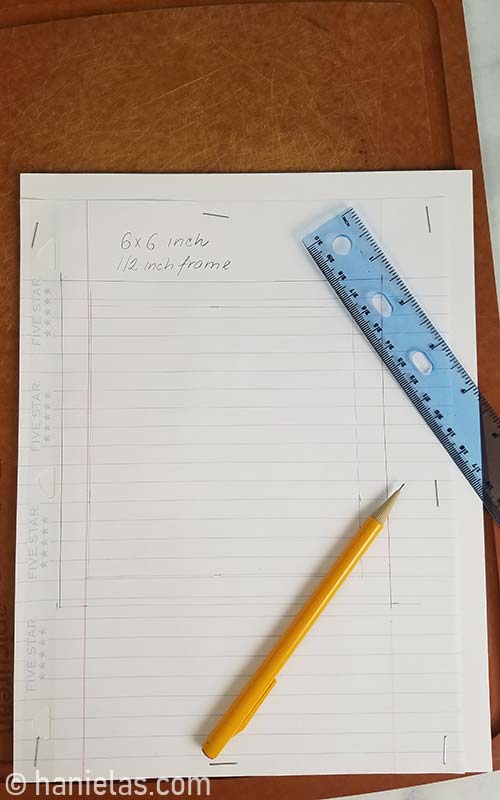
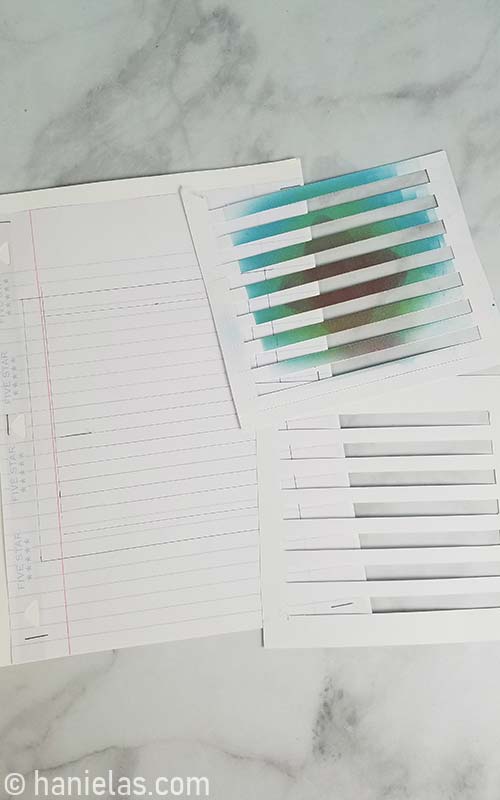
STEP 2 – USE LINED PAPER
Staple lined paper onto a card stock sheet. This will prevent template lined paper from shifting.
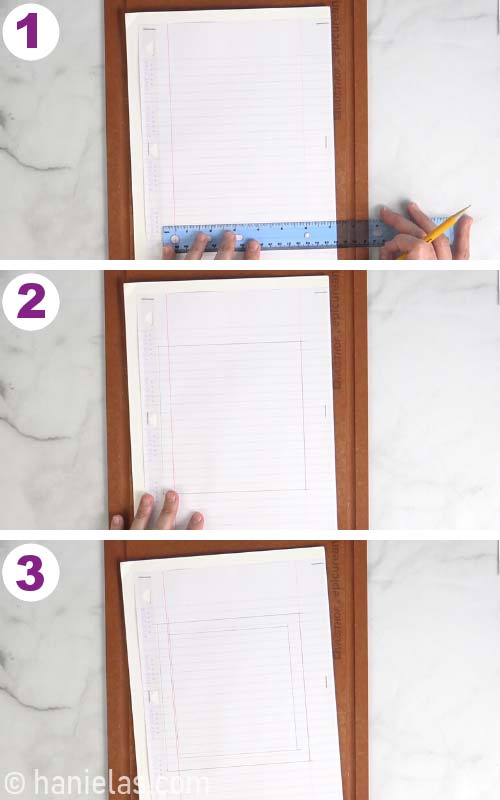
STEP 3 – DRAW A STENCIL FRAME
Most cookie decorating stencils are 6×6 inch in size. Some can be a little larger. I made my stencil 6×6 inch.
Start by drawing a 6×6 frame with about 1/2 to 3/4 inch border.
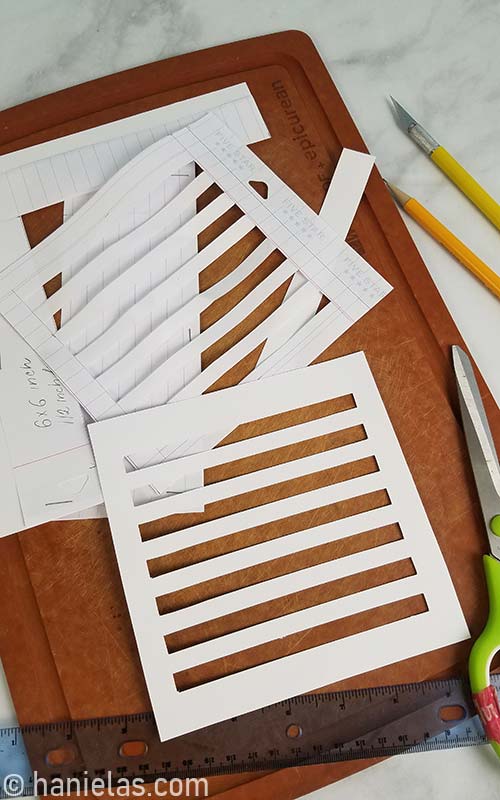
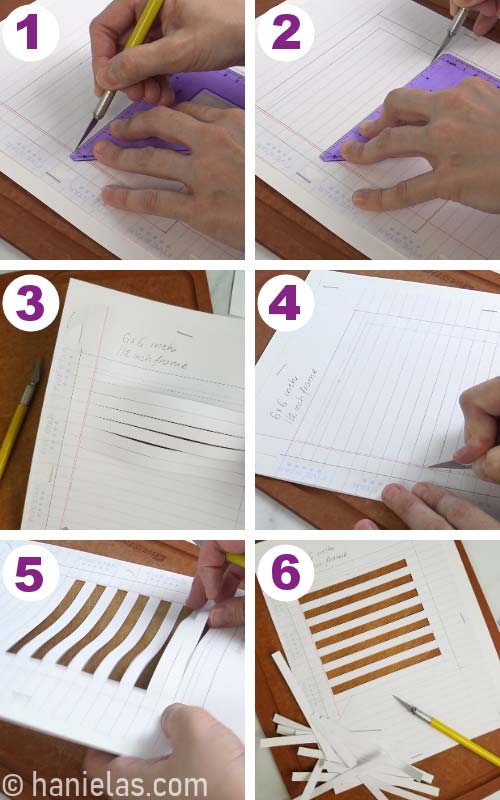
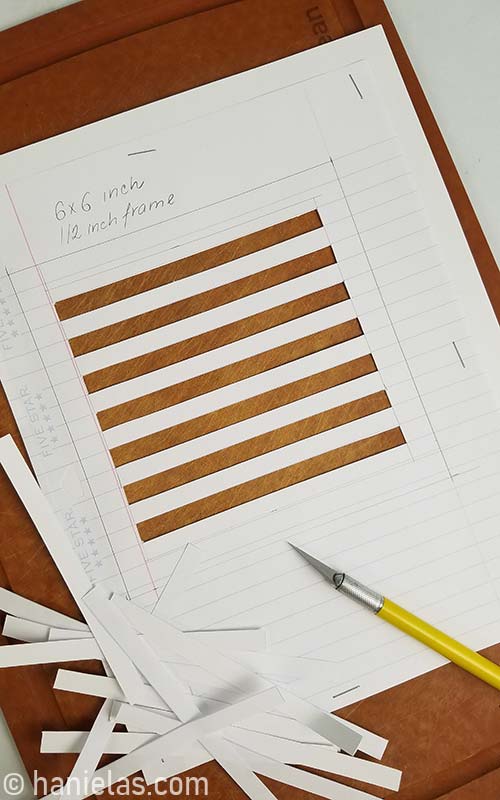
STEP 4 – CUT OUT STENCIL WITH AN EXACTO KNIFE
Place a card stock stapled with a lined paper onto a cutting board. Then with a ruler and an exacto knife cut straight lines through the card stock paper.Be sure to follow the lined paper stripe margins, (step 1-2). Once you have all the lines within the stencil frame cut you can start removing every other stripe. Cut out every other stripe, (step 3-6).
TIP : To prevent papers from shifting while cutting the stripes out you can also tape the papers onto a work surface. And additionally place an non-slip liner underneath the cutting board.
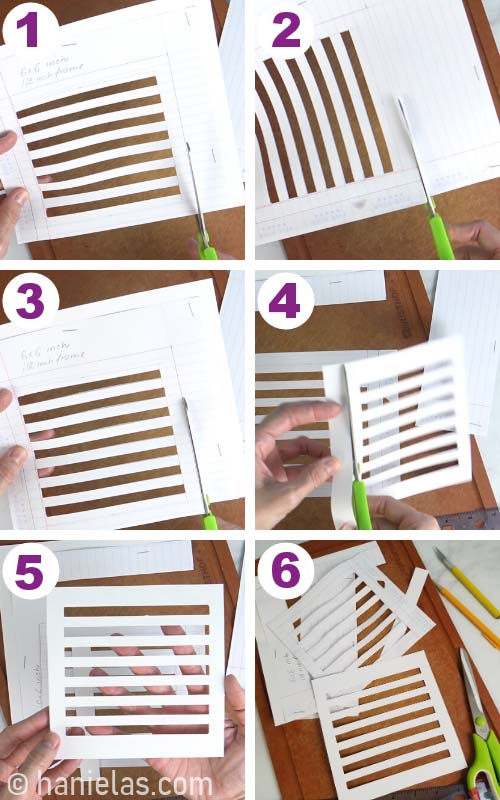
STEP 5 – CUT OUT STENCIL
Cut out stencil using a frame outline.
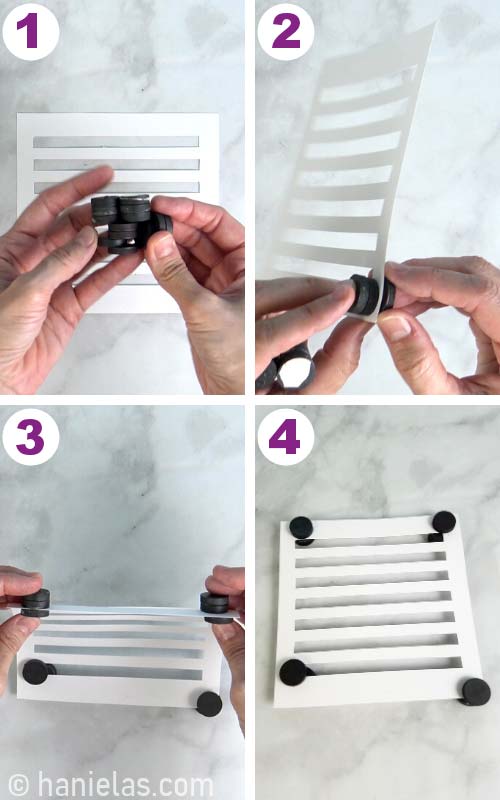
STEP 6 – HOW TO STABILIZE A STENCIL FOR AIRBRUSHING
To airbrush cookies using a stencil it’s best to stabilize stencil so it doesn’t move while you airbrush.
- To stabilize a stencil you can use :
- Stencil holder
- Magnets
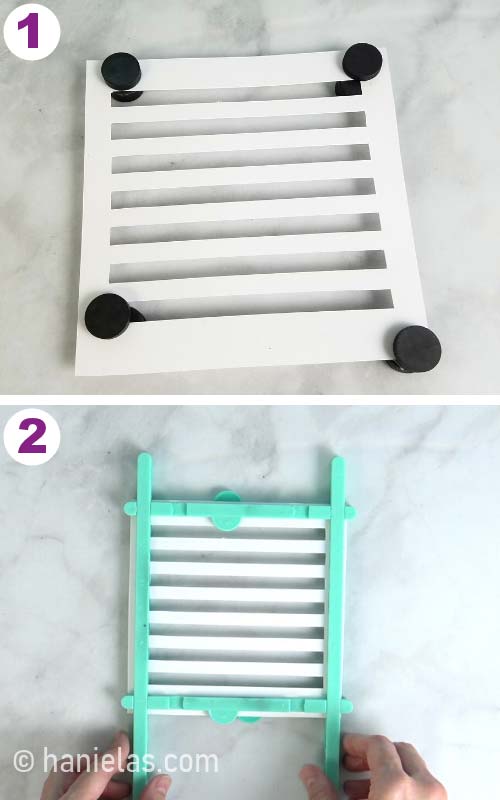
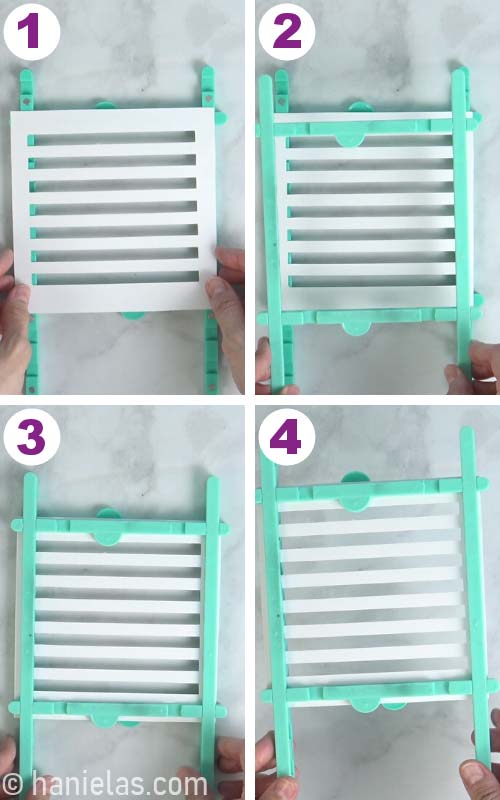
STENCIL HOLDER
There are number of stencil holders you can use with stencils. Be sure to check the tools section at the bottom of the post.
MAGNETS
And what if you don’t have a stencil holder? You can always use magnets instead.
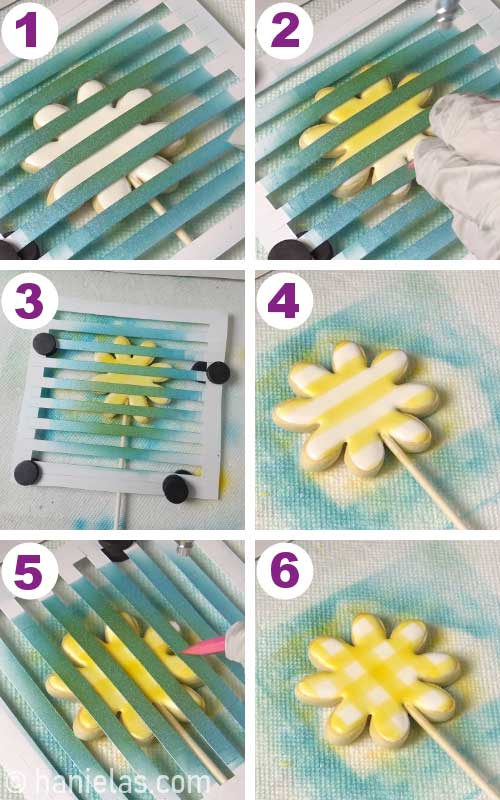
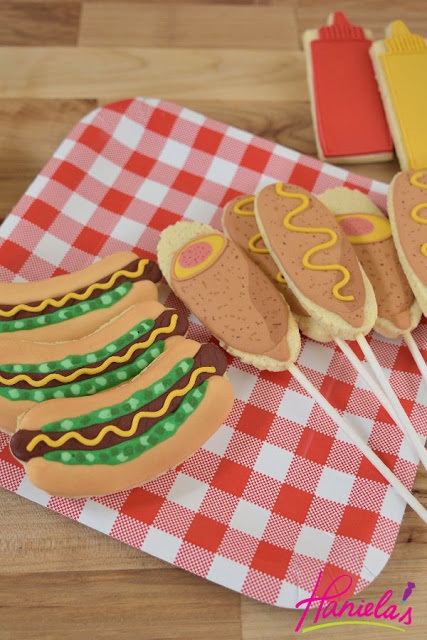
STEP 8 – HOW TO USE A STRIPE STENCIL TO AIRBRUSH
Here are several projects where I used card stock stripe stencil to create airbrushed pattern :
TO MAKE A STRIPE STENCIL YOU NEED
- TOOLS
- Video Tutorial with narration
- Find all the tools you in my Amazon Shop
- Card Stock
- Mylar Sheets (0.4 – 0.6 Mil, 0.6 are thicker than 0.4 Mil)
- Lined Paper
- Ruler, Exacto Knife, Pencil
- Stapler or a tape
- Cutting board – to protect work surface
- There are several stencil holders on the market : Sugarbelle, Stencil Genie or Sweet Stencil Holder
- Magnets
- Stencil Cutting Machine
This post contains Amazon affiliate links that earn me a small commission, at no cost to you. I only recommend products that I use and love. Learn more about my affiliate policy here.

Hi, I’m Hani
Welcome!
Thank you for visiting Haniela’s. On my blog, you’ll find delicious sweet & savory recipes made with simple ingredients. Why not start a new adventure? Discover a world of cookie decorating with my step-by-step tutorials.

Hi, I’m Hani
Welcome!
Thank you for visiting Haniela’s. On my blog, you’ll find delicious sweet & savory recipes made with simple ingredients. Why not start a new adventure? Discover a world of cookie decorating with my step-by-step tutorials.


No hablo ingles pero me lo jago traducir y me wncanta todods tus trabajos y consejos muchas gracias
Hi Yolanda,
Muchas gracias.
Hani
Thank You
You’re welcome.