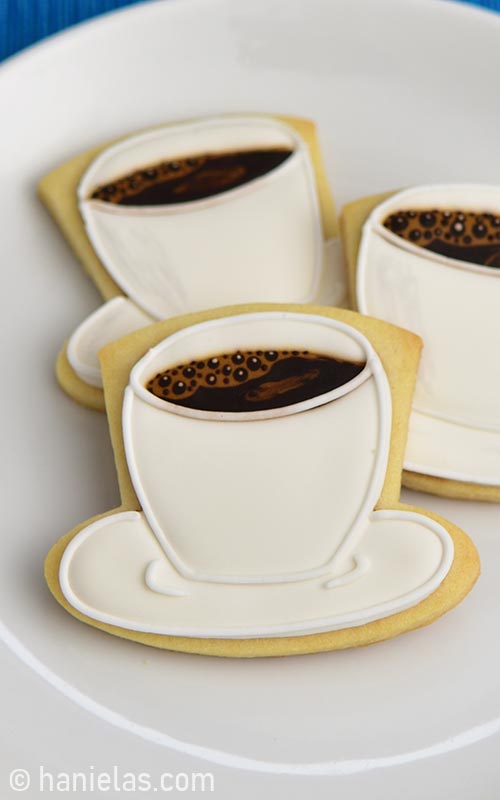
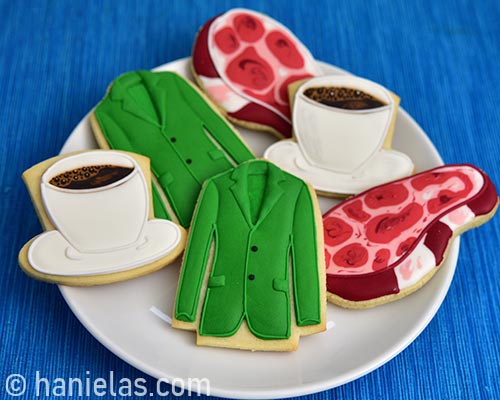
Espresso Cup Cookies
My friend Kathy asked me to make decorated Espresso Cup Cookies for her father-in-law, espresso coffee enthusiast. Let me show you how I did it.
HOW TO DECORATE ESPRESSO CUP COOKIES
To make the cookies I used my Sugar Cookie Recipe and to decorate I used Royal Icing. To make these birthday cookies even more special you can flavor coffee part of the design with an actual coffee.
HOW TO FLAVOR ROYAL ICING WITH COFFEE?
It’s quite simple really. All you need to do is dissolve some espresso powder in water. And then add to royal icing when you are thinning it down. Follow my Ultimate Guide to Royal Icing Consistency.
STEP 1 – ESPRESSO CUP COOKIE CUTTER
1st I needed an espresso coffee cup cookie cutter. Since I don’t have one I ended up using a top hat cookie cutter and I trimmed the top with a cookie cutter edger, you can also use a knife instead.
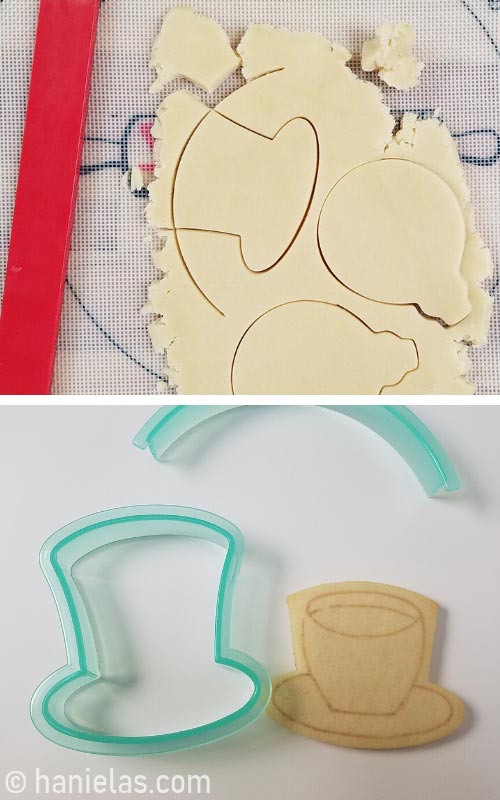
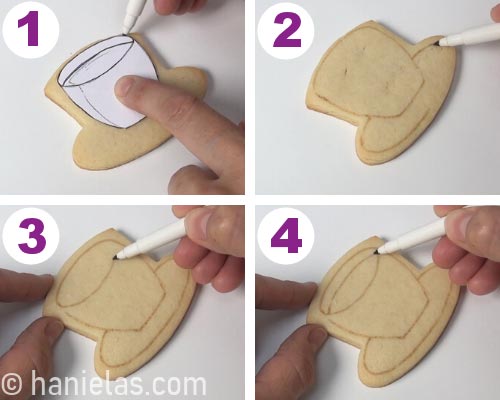
STEP 2 – COFFEE CUP TEMPLATE
Now with an edible marker trace the coffee cup outline onto a cookie.
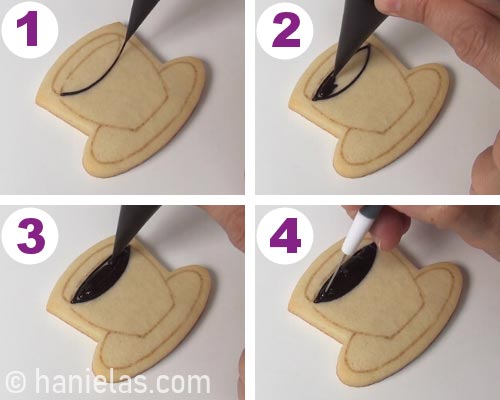
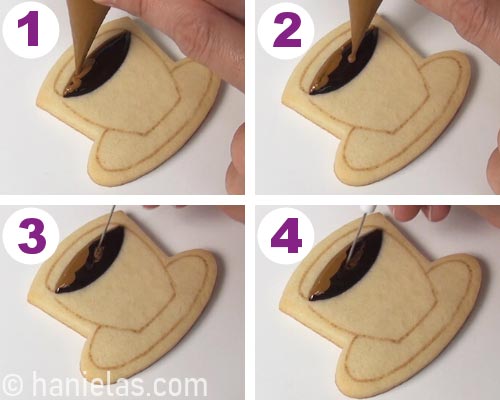
STEP 3 – HOW TO CREATE COFFEE BUBBLES
And here comes the fun part. Coffee bubbles. I was really focused on this detail. I wanted the finished design give the illusion of real coffee bubbles.
To make coffee bubbles I used dark, light brown along with white royal icing (15 second consistency)
Start by outlining and flooding the coffee section with dark brown royal icing (15 second consistency). Shape the icing while wet, and immediately follow with wet on wet application of light brown icing (see the picture below)
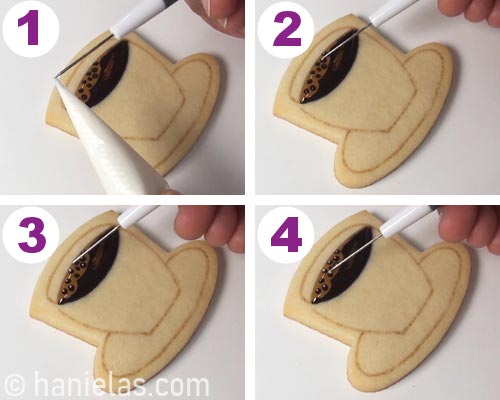
Immediately after flooding with dark brown icing pipe light brown (15 second consistency) onto the dark brown. Pipe a section along the top edge and a small dot in the middle. Swirl the middle dot to blend it into dark brown.
Don’t allow icing to crust, immediately use dark brown icing again and pipe dots onto the light brown icing.

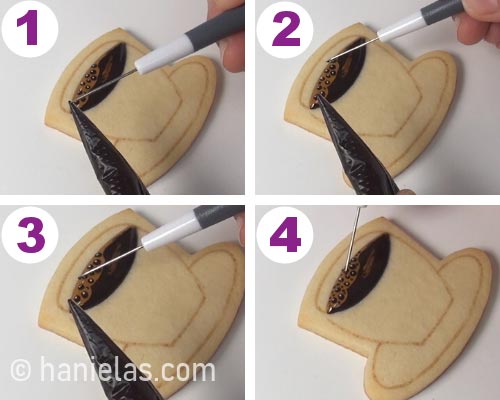
Now create reflection. Add small dots of white royal icing (15 second consistency) onto the dark brown dots you just piped. Use tip of a needle tool or a toothpick to pick a very small amount of white icing and place it onto the dark brown dot.
To finish coffee bubble design you need to add tiny dots of dark brown royal icing around dots with white reflection. Use a tip of a scribe needle tool to pick up tiny amounts of dark royal icing and place it onto light brown icing. Allow icing to crust before flooding with white icing.
STEP 4 – FLOOD COOKIES
Cup and saucer are flooded in steps. Outline and flood the saucer with white royal icing (15 second consistency). Allow icing to crust before flooding the cup section.
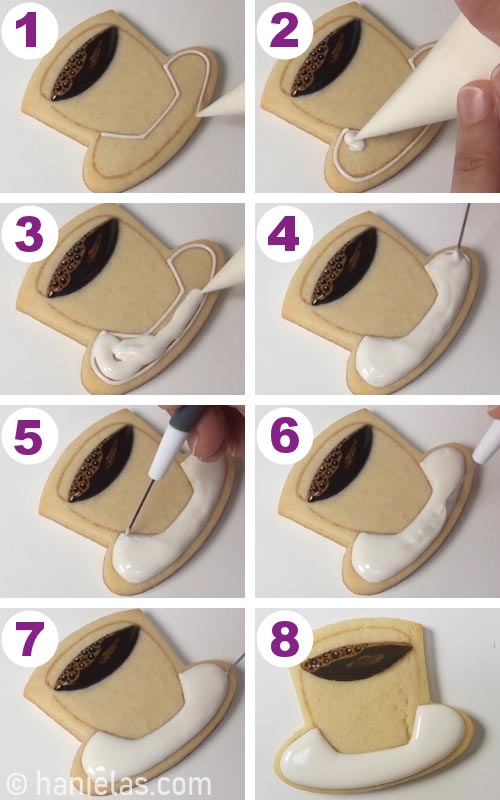
After saucer section is well crusted you can continue and outline and flood the cup with white royal icing (15 second consistency). Use a scribe needle tool to shape the icing while wet. Allow to crust well again.
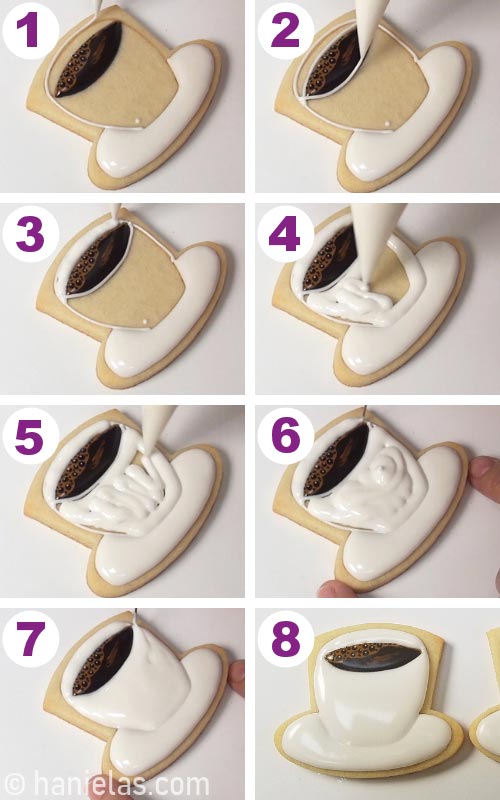
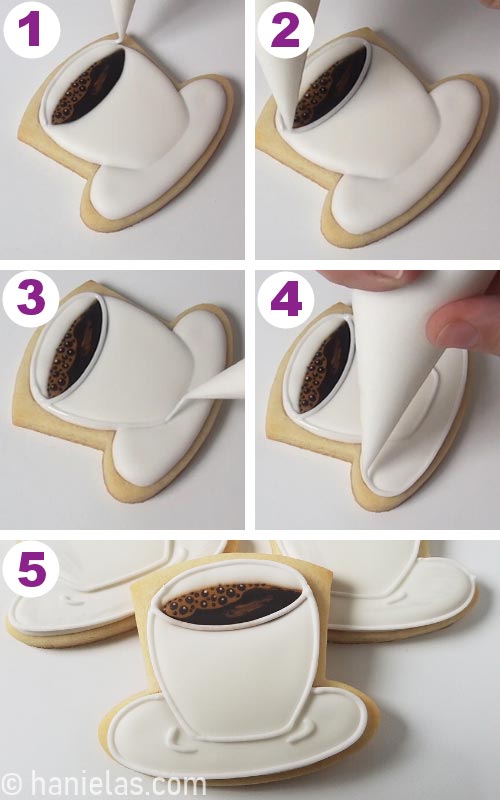
STEP 5 – OUTLINE
With piping consistency royal icing pipe an outline. And then allow to dry completely before packaging cookies.
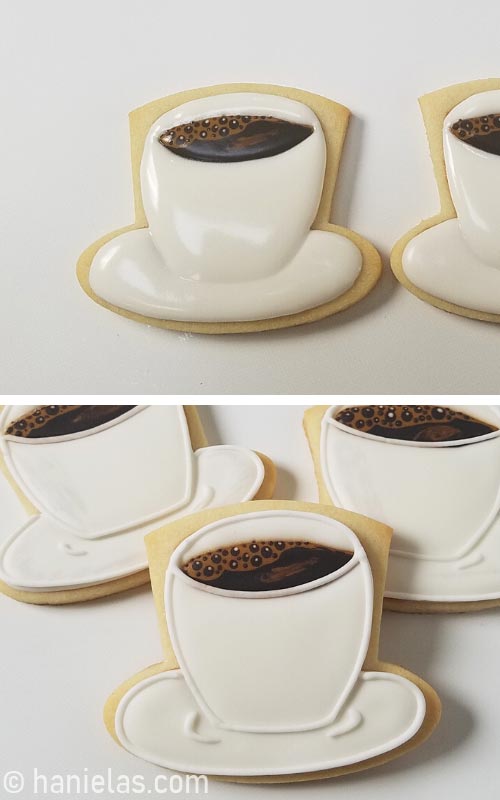
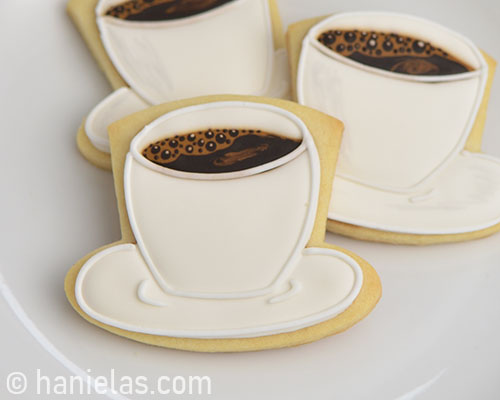
Coffee bubbles mission accomplished! I love how these turned out.
I hope you’ll try this technique soon. If you do, I’d love to see what you created. Be sure to tag hanielas on social media or send me pictures of your decorated cookies. See you next time.
TO MAKE DECORATED ESPRESSO CUP COOKIES YOU NEED
- RECIPES
- Step by step Video Tutorial with Narration
- Cut out Cookie Recipes (includes Vegan, Gluten, Chocolate Cookies)
- Royal Icing, Vegan Royal Icing
- Coffee Royal Icing – you’ll need espresso powder dissolved in a small amount of water. Use it to thin royal icing.
- TOOLS
- Find all the tools in my Amazon Shop.
- Cookies Cutters – use a small cup cutter, alternatively you can use a top hat cutter and trim the the top with an edger or a knife
- Piping Bags
- Scribe Needle Tool
- Food Colors : Chocolate Brown (Americolor Brand)
- Edible Marker – I use mostly FooDoodlers
This post contains Amazon affiliate links that earn me a small commission, at no cost to you. I only recommend products that I use and love. Learn more about my affiliate policy here.

Hi, I’m Hani
Welcome!
Thank you for visiting Haniela’s. On my blog, you’ll find delicious sweet & savory recipes made with simple ingredients. Why not start a new adventure? Discover a world of cookie decorating with my step-by-step tutorials.

Hi, I’m Hani
Welcome!
Thank you for visiting Haniela’s. On my blog, you’ll find delicious sweet & savory recipes made with simple ingredients. Why not start a new adventure? Discover a world of cookie decorating with my step-by-step tutorials.


Hanielas, I am always amazed at watching decorators use bags without tips. It seems you get much thinner lines with them. Can you explain to me what to order and how to use them?
HI Martha,
in this tutorial I used disposable piping bags. In the past I also used regular sandwich bags but I seldom use those. You can find disposable piping bags listed in my amazon shop. If you click on the shop tab at the top of the page, if on mobile it’s under MENU and then shop, they are listed there.