Captain America Shield Cookies
A friend asked me to make Captain America Shield cookies. Of course, no problem, I thought. Then I realized : all those circles, how am I going to pipe them?
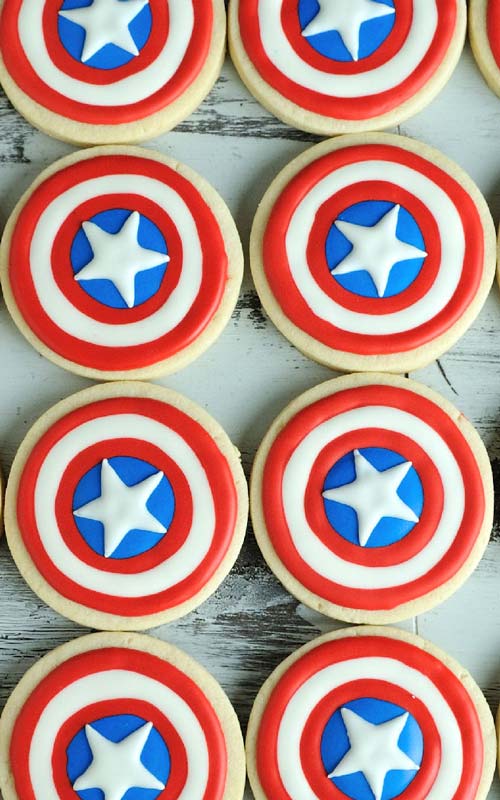
JUMP TO TUTORIAL | JUMP TO RECIPE AND TOOLS | PINT IT for later
Even after many years of cookie decoration I still don’t own a kopykake or a Pico projector. When decorating cookies I mostly I rely on my handmade templates.

CAPTAIN AMERICA SHIELD COOKIES
TEMPLATE
I made these shield cookies in 2015 and since then an airbrushing Shield Stencil came available. If airbrushing is your thing this stencil will definitely safe you some time when making the cookies.
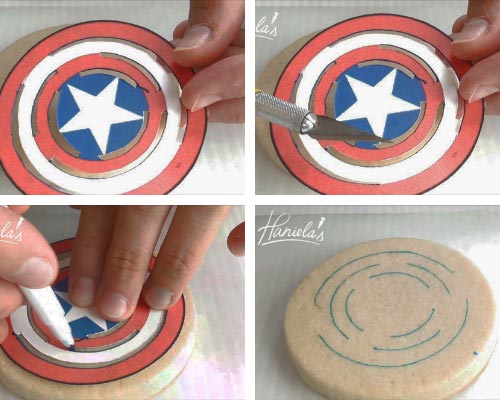
However if you are like me you can make a circle stencil and a star template. I used them to help me pipe even circles/rings and a white star.
To make a template I used a card stock and exacto knife to cut out the narrow slits in the template.
RED ROYAL ICING
To make my red royal icing I used Super Red gel food coloring by Americolor Brand. To safe myself a trouble of making red royal icing every time from white icing I always freeze any red icing leftovers for later. It really comes handy for projects like these.
If you haven’t frozen royal icing before check out my ultimate Guide How to Freeze and Reuse Frozen Royal icing.
If starting with white royal icing I add Super Red gel food coloring by Americolor brand until icing turns red with a pink hue. Then I let the colored icing overnight or even for couple of days at room temperature. As the colored icing matures it deepens in colors. After this if your icing is not desired red color you can add little more food coloring.
MORE CHARACTER COOKIES :
- 30 Cookies Designs with one Cookies Cutter
- LOL Surprise Doll Cookies (with templates)
- Woody Toy Story Cookies
TO MAKE CAPTAIN AMERICA SHIELD COOKIES YOU NEED
- RECIPES
- Sugar Cookie Recipe(with video and FAQ) or choose from these Cut-Out Cookie Recipes (Vegan, Gluten Free, Chocolate)
- Fresh Lemon Royal Icing or use Vegan Royal Icing Instead
- TOOLS
- Round Cookie Cutter – I used a 3 inch cutter
- Card stock Template
- Exacto Knife
- Needle Tool
- Edible Marker
- Black Edible Marker
- Meringue Powder
- Piping Bags
- Food Colors : super red and royal blue
- USEFUL TUTORIALS
- Guide To Royal Icing Consistency
- Royal Icing FAQ
- How to Freeze Royal Icing
Captain America Shield Cookies

How to decorate Captain America Shield Cookies with royal icing.
Materials
- Sugar Cookies
- Royal Icing
Tools
- Food Gel Colors : red, blue
- Edible Marker
- Templates - cut these out with an exacto knife
- Round Cookie Cutter
- Needle Tool
- Piping Bags
Instructions
- Trace outlines onto the cookies using a template and edible marker.
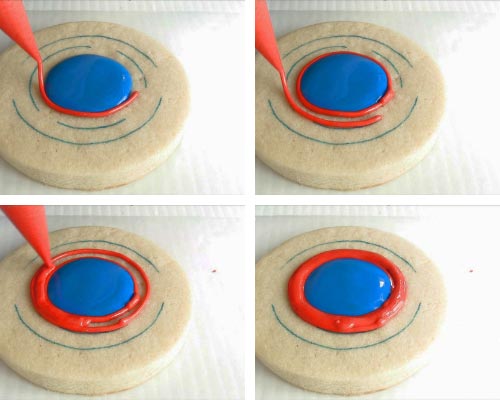
- With blue royal icing 15 second consistency flood the middle round. Follow drown guides to pipe an even circle. Smooth the icing with the needle tool. Let crust 10 minutes.
- Now we are going to pipe a red ring around the blue round. Take red royal icing 15 second consistency and pipe a line on the edge of blue round and 1st round perimeter. Flood with red icing and smooth with a needle tool. Let crust 10 minutes.
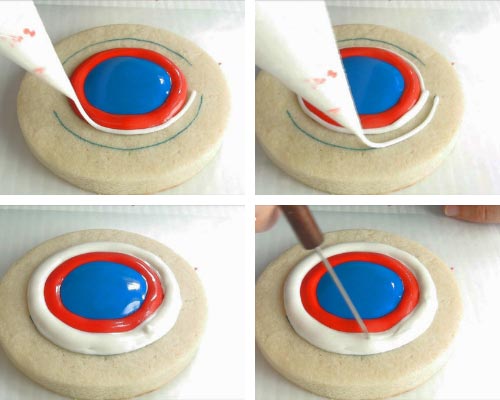
- In the same fashion but with white 15 second consistency royal icing pipe a line along the outer edge of red ring, and 1st circle perimeter. next to it. Fill the gap with white icing and smooth it with a needle tool. Let crust for 10 minutes.
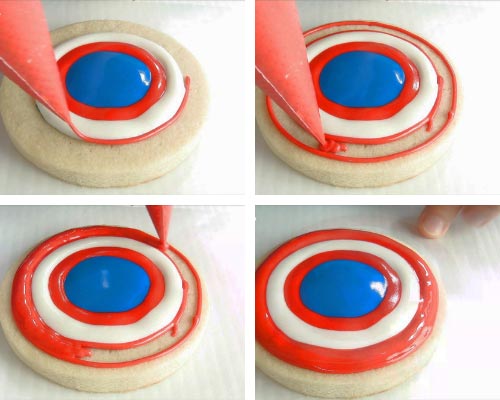
- Lastly with red royal icing 15 second consistency pipe a red ring around the white. Using 15 second consistency royal icing. Let dry overnight.
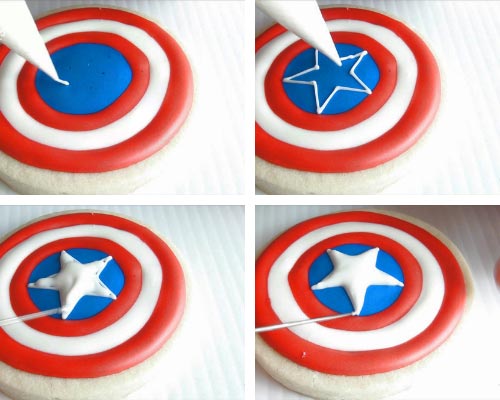
- To make star I decided to pipe it with royal icing. However you can also utilize a stencil if you have one. That will a lot faster. To pipe a star I traced the inner points of the star onto the dry blue icing using a star template and and edible marker.
- Pipe a star with white 15 second consistency royal icing. Pipe the outer outline first and then flood the inside. Use a needle to accentuate the points of the star. Let dry.
Notes
RECIPES
- See the bottom of the blog post for links to tools, recipes and useful tutorials.
PIN IT for later
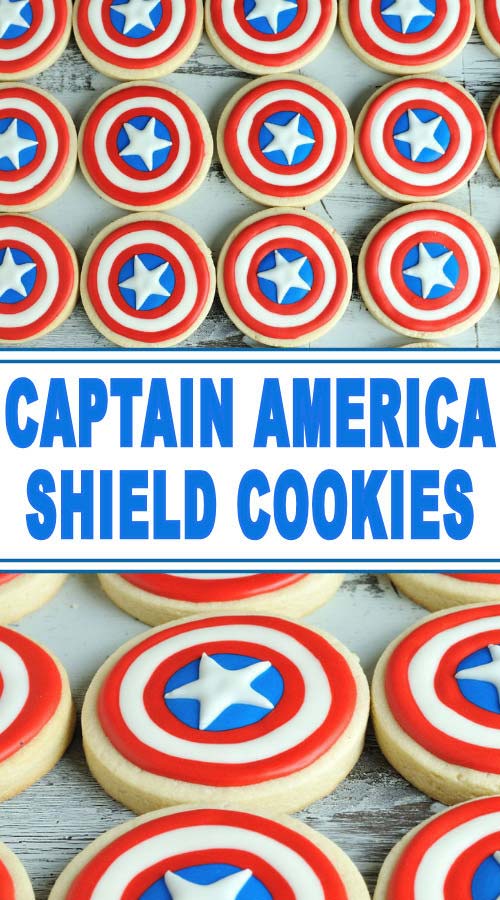
I updated this post from 2015 with a step by step picture tutorial, more written instructions and photos.
This post containsThis post contains Amazon affiliate links that earn me a small commission, at no cost to you. I only recommend products that I use and love. Learn more about my affiliate policy here.

