| |

Thanksgiving Table Setting Leaf Cookies

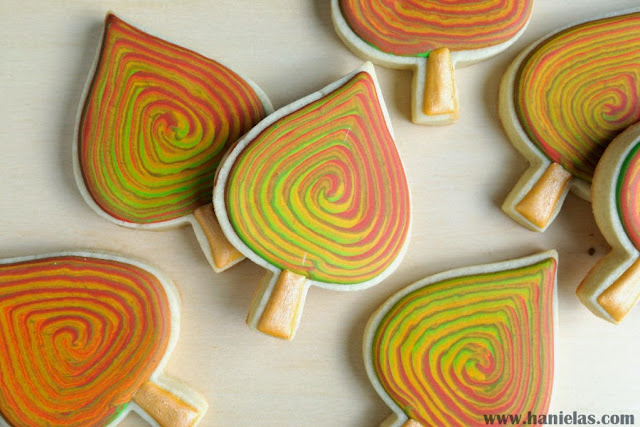
These rustic Thanksgiving table-setting leaf cookies are a charming addition to any fall event or family and friends gatherings. What I love about this design is that it is easy and quick to create, can be used on any leaf shape, and doesn’t require advanced decorating skills.

Decorated sugar cookies in a shape of an oak tree.

updated from 2010

TABLE SETTING LEAF COOKIES STEP-BY-STEP

Subscribe to Haniela’s Cookie Club on Patreon and get access to exclusive and ad-free tutorials, templates, sneaks peeks, and more.

THINGS YOU NEED

This post contains Amazon affiliate links that earn me a small commission, at no cost to you. I only recommend products that I use and love. Learn more about my affiliate policy here.

A close-up of decorated cookie painted with an edible paint.

BAKE COOKIES

For this project, I used an old-time favorite sugar cookie recipe and fresh lemon royal icing. To make the cookies more seasonal, add 1 tsp of ground cinnamon to the flour.

Alternatively, if you prefer a soft cookie with buttercream, you can use my Soft Pumpkin Cookie Recipe with Maple Buttercream. Instead of painting with edible gold luster dust paint, use edible shimmer or luster dust in a pump and spray the buttercream after shaping the leaf veins.

Hand holding a cookie cutter, cutting out cookies.

ROYAL ICING COLORS AND CONSISTENCIES

  • Ivory Icing: thick consistency
Undecorated cookies with holes in them.

SPREAD ICING ON A COOKIE

Spread thick royal icing onto the cookie. Start by making a thick outline and then pipe icing inside of the outline. Use a lightly damp palette knife to spread the icing across the cookie (steps 1-8).

Palette knife spreading icing onto a cookie.

CREATE TEXTURE IN ROYAL ICING

I used three paintbrushes in this tutorial: a large rounded paintbrush with coarse bristles, a small rounded liner paintbrush, and a fine liner paintbrush.

In this project, when using a paintbrush to create texture in thick royal icing, you want to use a lightly damp paintbrush. Dip it in water and dab it onto a dry paper towel to remove access water. You don’t want the brush to be oversaturated with water.

Glass jar with water, paintbrush dipped in water.

Smooth the thick icing onto the cookie using a lightly damp large paintbrush (steps 1-6).

Brushing icing onto a cookie.

Use lightly damp paintbrushes to create leaf veins. Clean the brush frequently in water and dab it onto a dry paper towel to remove excess water (steps 1-8). Let the icing dry.

Painting leaf veins into icing with a fine tip paintbrush.

PAINT WITH GOLD LUSTER DUST

Mix edible gold luster dust with Everclear, Vodka, or McCormick’s Lemon Extract. Use a fine-tip food-only paintbrush and paint the veins with edible metallic paint.

Painting leaf veins with gold luster dust paint.
A detail of a cookie decorated with icing and painted with gold luster dust.

PAINT WITH EDIBLE PAINT

In a food-only paint palette tray, mix a drop of gel food coloring with Everclear, Vodka, a non-alcoholic activator, or use readily available edible paints.

When you mix gel food coloring with clear alcohol/liquid, you’ll notice residue forming. This is normal. It will most likely stick to the bristles of your food-only paintbrush. Discard the residue (steps 1-5).

Paint palette tray filled with edible paint.

Paint the leaf veins with a fine-tipped liner paintbrush. Don’t oversaturate the paintbrush with edible paint. Have a piece of dry paper towel or kitchen towel on hand to absorb access paint as needed (steps 1-4).

Painting icing with edible food paint.

DECORATE WITH A RIBBON

To complete the table setting leaf cookies project, use a pretty ribbon and thread it through the hole in a cookie and tie a bow (steps 1-4).

Tying a ribbon on a cookie.

Are these pretty!? Use them to decorate your tablescape.

Cookies iced with icing and painted with edible paint and gold luster dust paint.

VIDEO TUTORIAL

MORE FALL-INSPIRED RECIPES

THANKSGIVING TABLE-SETTING LEAF COOKIES FROM THE PAST

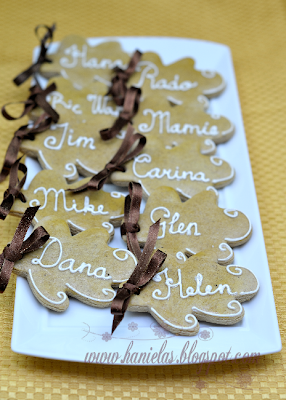
In the past, I’ve made leaf tablesetting cookies that were a bit more personalized. Personalization can be as simple as a piped monogram, or if you feel like it, you can pipe a name or use an edible marker and write it onto the icing

Light brown cookies, decorated with royal icing piped names on the top.

This cookie-decorating tutorial was published on November 25, 2010. On September 26 2024, I updated it with new step-by-step pictures, written text, and a video.

Similar Posts

3 Comments

Leave a Reply

Your email address will not be published. Required fields are marked *