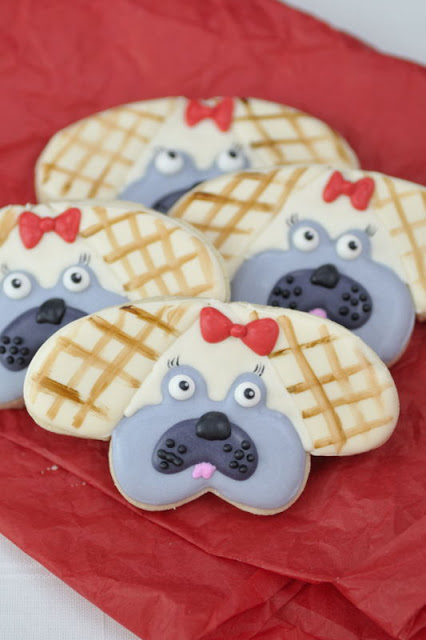
For the Love of Pug Cookies
| WWW.THECOOKIECUTTERCOMPANY.COM |
Also, be sure to check out new cookie cutter additions over at The Cookie Cutter Company. I’m loving their new Moustache Cutter.
need:
brush
food coloring
food coloring
food coloring
food coloring
- Using a heart cookie cutter and a knife
construct the dog shape cookie,bake the cookies. - Ice the ear parts with light ivory icing, let
dry. - Using a clean brush and a touch of brown food
coloring paint lines onto the ears. - If needed use a food coloring pen to give you
more confidence and draw the line for the facefeatures as a guide, then flood it with dark grey icing.
Let dry. - Continue with adding more details on the
face: pipe large white dots for eye, let crust over and then add black dots and finish with little white dot. Make the nose and mouth. - Use a tiny brush and black food coloring to
paint the eye lashes. - Tip: W painting with the brush and a food
coloring on cookies, make sure the icing on the cookie is completely dry, I
also recommend having a piece of paper towel and water on hand.Dip the
tip of the brush in the food coloring and then in the water, use paper
towel to remove any excess water, you want the brush to be just very lightly
damp not wet. This way you can also control the color intensity. Be sure not to make the cookie wet.
 |
| Using a knife cut the heart in half then attach halves to a full heart cookie , use a little bit of water to attach cookies |
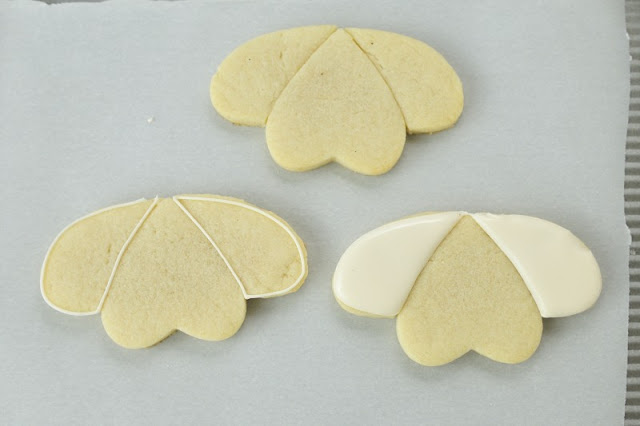 |
| Flood the ears |
 |
| Paint the ears using brown food colorin |
 |
| Using a food pen draw a piping guide for the face, then flood with icing, let dry |
 |
| Add the nose |
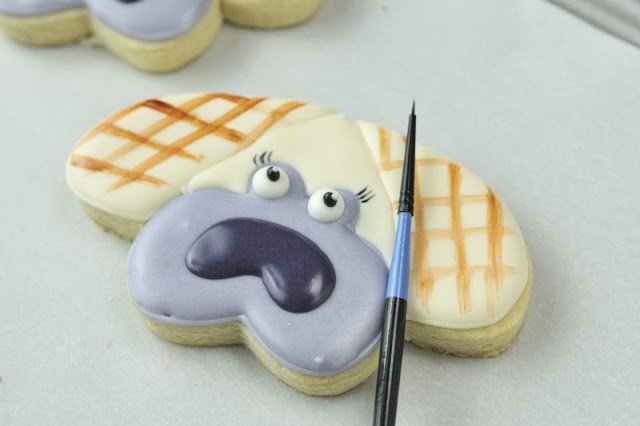 |
| Add eyes : pipe large white dots let crust over, pipe small black dots,let crust and then add white dots. Using a small brush paint eyelashes |
 |
|||||
| Add a ribbon |





You are ever so talented! Great tutorial!