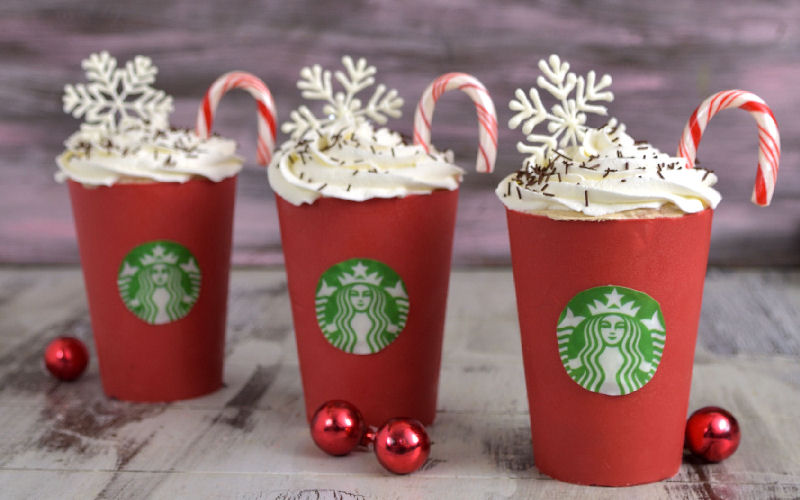
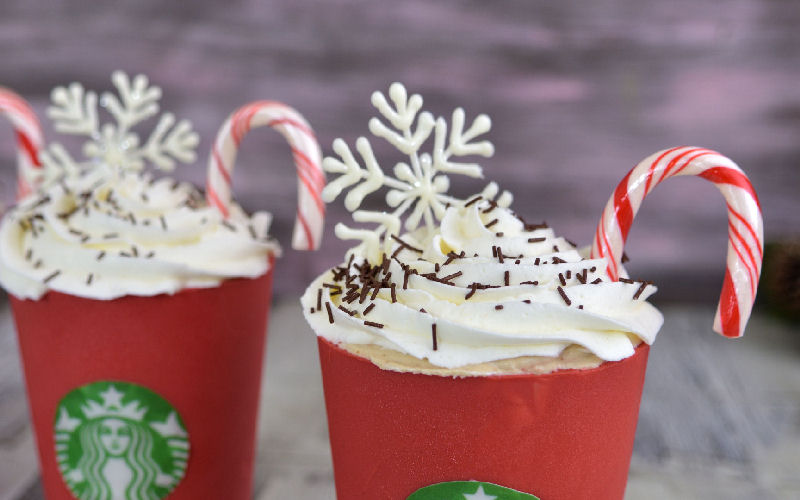
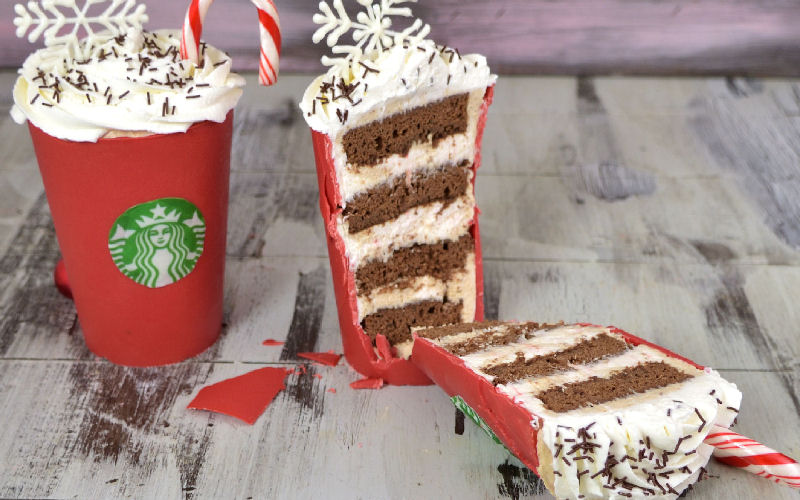
Starbucks Peppermint Mocha Cakes in Edible Red Cup
I’ll be honest I didn’t think this was going to work. I had my doubts. If you remember my Heineken Beer Can Cakes (here is also video – it’s a miracle I didn’t loose a finger) it was a bit of a pain to get the chocolate can out of the aluminum cans. I wasn’t sure if the paper cups would work but I just had to try. I bought wax coated paper cups and I tried several techniques with chocolate. At the end it was so simple and really easy. I can’t believe I haven’t tried it before!
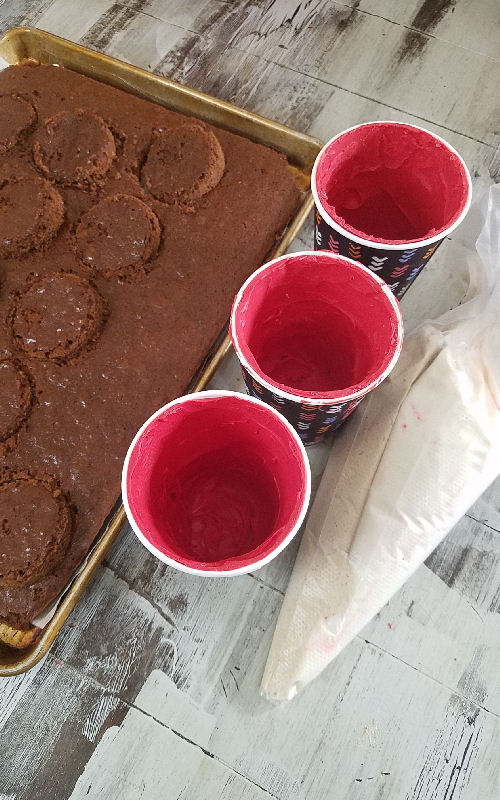
Basically you coat the inside of the cup, let the chocolate set in the fridge, coat again, especially around the top edge. Remember while the chocolate is setting up in the fridge gravity does its thing so I’d say upper half definitely needs another layer of chocolate. Make sure you let it set in the fridge not a freezer. I think sudden temperate change caused the thin layer of chocolate to crack and cups were not releasing nicely, too.
Let is chill in the fridge for good 30 minutes or more and then run a small blade along the top edge and they should release easily.
Obviously you can fill them with anything you like. I was inspired by Starbucks’ Peppermint Mocha and since so many of you requested this on my Facebook Page. I often ask for suggestions for future project there. If you follow me be sure to say hello.
For step by step video check my Video on Facebook
Or scroll down for a video tutorial.
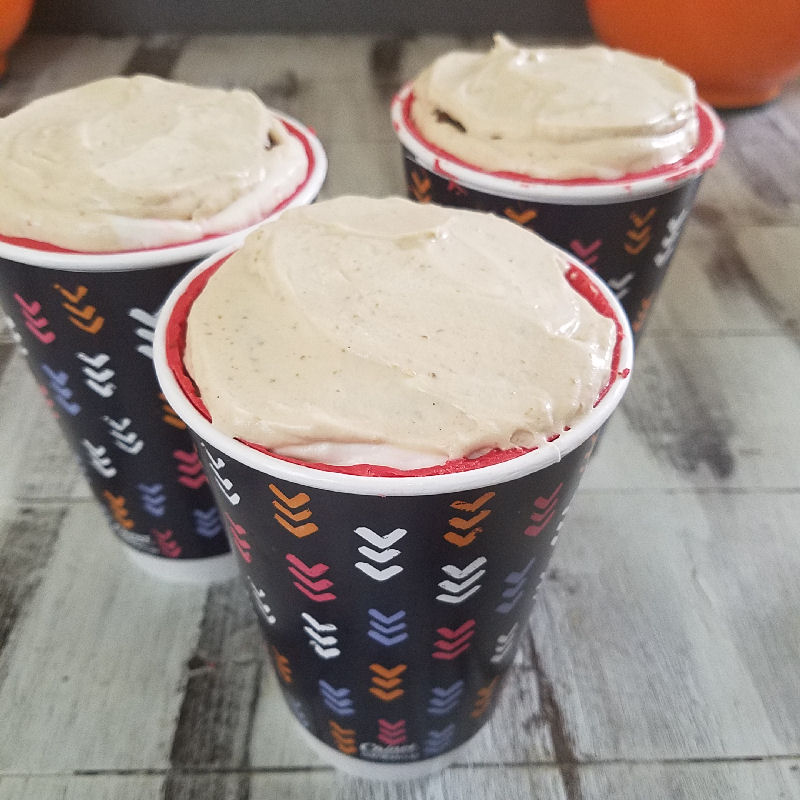
I kept the chocolate cups in the paper cups when I was filling them to prevent messing up the sides with the filling and my fingers.
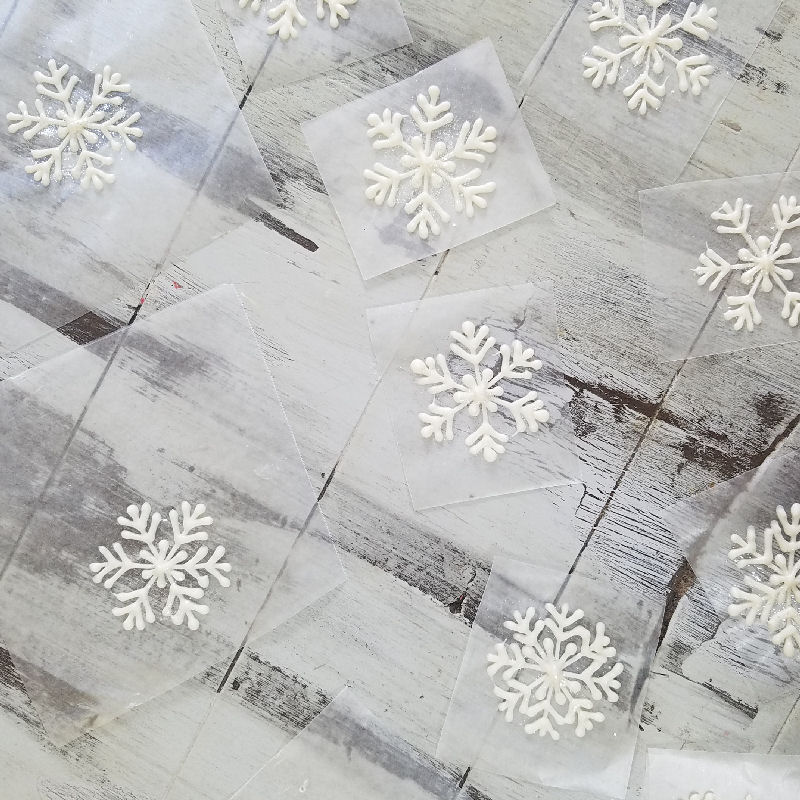
To garnish the top I used White Chocolate Snowflakes and Candy Cane candies.
To make the snowflake you need to melt white chocolate. I used White Ghirardelli Melting Wafers. I piped snowflakes on a piece of wax paper, I let them harden and then you can peep off the wax paper and use the snowflake as garnish. My only advise would be to make them a bit thicker, thinner they are easier they break. I also used some pretty Edible Jewel Dust, though this is is optional, it adds a really nice sparkle to the snowflakes.
You can use chocolate snowflake to decorate cupcakes, too. I decorated these Sweet Potato Almond Cupcakes with them and they are so pretty.

Adding a Starbucks logo is totally optional, I personally think they look nice without it but if you’d like to go an extra mile you can use edible frosting sheet image or draw the logo on a white frosting sheet with a green edible marker. Cut it out with scissors, remove backing paper and glue it on the chocolate cup using some white melted chocolate.

Chocolate Cups
Ingredients
- 1 package - 12 oz Red Candy Melts
- 3 large paper cups wax coated
Instructions
- Melt the chocolate, spread the chocolate inside, on the bottom and the sides of the cup with a small spatula. Refrigerate for 20 minutes, and then repeat especially concentrating on the areas that are thin like around the top edge. Refrigerate for 30 minutes. I had the best results setting the chocolate in the refrigerator. Using a blade of a knife run it along the top edge to release the chocolate cup.
Chocolate Mocha Cake
Ingredients
- 6 room temperature eggs separated
- 1 ½ cups granulated sugar
- ½ cup flour
- ½ cup cocoa powder
- 2 tbl espresso powder
- ½ tsp salt
- 1 tsp vanilla extract
Instructions
- Preheat oven to 350F.
- Line a rimmed baking sheet with parchment and spray with a non stick spray. Set aside.
- Separate egg yolks and egg whites. Add a pinch of salt to egg whites and beat them with a wire beater until soft peaks are form, gradually add about ½ of the sugar. Beat until stiff peaks are formed, don’t over beat. Scrape out the meringue into a bowl. Into the same bowl you used for the meringue add egg yolks and remaining sugar, beat until thick and pale in color (ribbon stage), add vanilla extract and beat well.
- In a separate bowl sift together flour, cocoa powder and espresso powder.
- Into the egg white mixture fold in flour alternating with meringue.
- Pour cake batter into a prepared baking sheet. Bake at 350 F for about 15 -18 minutes. Let cool completely before using.
- Cut out round based on the size of the cup you are using. Use the left overs for cake pops or freeze for later.
Cream Cheese White Chocolate Filling
Ingredients
Cream Cheese White Chocolate Filling
- 1 cup white chocolate melted, cooled
- 1 ½ packages of cream cheese room temperature
- ½ cup powdered sugar
- 1 tsp vanilla extract.
Coffee Cream Cheese White Chocolate Mousse
- 1 half of the Cream Cheese White Chocolate Filling
- 1 cup whipping cream
- 1 tbl espresso powder
- 1 tsp gelatin
- 3 tbl cold water
- ¼ cup to 1/3 cup powdered sugar or to taste
Candy Cane Cream Cheese White Chocolate Mousse
- 1 half of the Cream Cheese White Chocolate Filling
- 1 cup whipping cream
- 2 large candy canes crushed
- 1 tsp gelatin
- 2 tbl cold water
- ¼ cup powdered sugar
- 1/8tsp peppermint extract
Instructions
Cream Cheese White Chocolate Filling
- Beat cream cheese until smooth, gradually beat in melted and cooled white chocolate, powdered sugar and vanilla extract. Divide in half. 1st half for Coffee Cream Cheese White Chocolate Mousse and 2nd half for Candy Cane Cream Cheese White Chocolate Mousse
Coffee Cream Cheese White Chocolate Mousse
- Sprinkle gelatin and espresso powder over cold water, stir and let bloom for 5 minutes. Microwave on high for 3-5 seconds, stirring well until gelatin is dissolved. Let cool slightly. Beat whipping cream until soft peaks are formed beat in powdered sugar and then in one stream add dissolved and cooled gelatin, beat well, beat until medium stiff peaks are formed. It shouldn’t be super stiff. Gradually, starting with a small portion of whipped cream, fold whipped cream into 1 half of the Cream Cheese White Chocolate Filling. Fill the piping bag with the filling.
Candy Cane Cream Cheese White Chocolate Mousse
- Sprinkle gelatin over cold water, stir and let bloom for 5 minutes. Microwave on high for 3-5 seconds, stirring well until gelatin is dissolved. Let cool slightly. Beat whipping cream until soft peaks are formed beat in powdered sugar and then in one stream add dissolved and cooled gelatin, beat well, beat in peppermint extract, beat until medium stiff peaks are formed. It shouldn’t be super stiff. Gradually, starting with a small portion of whipped cream, fold whipped cream into 1 half of the Cream Cheese White Chocolate Filling,Fold in crushed candy cane candies. Fill the piping bag with the filling.
Whipping Cream Topping
Ingredients
- 1 cup whipping cream
- 3 tbl powdered sugar
- ½ tsp vanilla
Instructions
- Beat chilled cream until soft peaks are formed, add powdered sugar and vanilla, beat until stiff peaks are formed. Put the whipped cream into a piping bag, and with a Large Star Piping Tip 1M pipe the swirl on the atop of filled Red Chocolate Cups. Cover and store in the fridge for up to 3-4 days or serve immediately.

Hi, I’m Hani
Welcome!
Thank you for visiting Haniela’s. On my blog, you’ll find delicious sweet & savory recipes made with simple ingredients. Why not start a new adventure? Discover a world of cookie decorating with my step-by-step tutorials.

Hi, I’m Hani
Welcome!
Thank you for visiting Haniela’s. On my blog, you’ll find delicious sweet & savory recipes made with simple ingredients. Why not start a new adventure? Discover a world of cookie decorating with my step-by-step tutorials.


I’m considering making these for teacher gifts. Any idea how to package them up?
Hello Jennifer,
I’d probably make them little smaller for gifts. These cups I used, in my mind where huge for a single serving. Lol I’d use a cupcake liner, and nest the bottom of the chocolate cup in the liner and then I’d get clear poly bags, they sell taller ones for treats at craft stores. You can add a plastic spoon in the bag too, just having it standing by the chocolate cup. I’d tie a ribbon maybe a cute gift tag and voila. Have fun. Be sure to share these with me on Instagram if you are on there, would love to see how they turn out. Thank you.
WOW!!!! These are amazing! You are so talented! Starbucks should be paying you to make a commercial!
Thank you Gail, they were really fun to make.