Halloween Spider Cupcake Cookies, Royal Icing Transfers
Hello Friends!
Today, Montreal Confections and Haniela’s are kicking off Halloween Video Parade on You Tube. As you’ve probably noticed I’ve expanded my blog to You Tube. It’s been a really fun experience, and I’ve learned so much from it.
From October 4th till October 10th we’ll be (Marlyn and I) sharing 14 new video tutorials with you our fans, followers, subscribers, visitors. We invite you joins us on You Tube. I will also be posting each tutorial on the blog as well. So be sure to stop by.

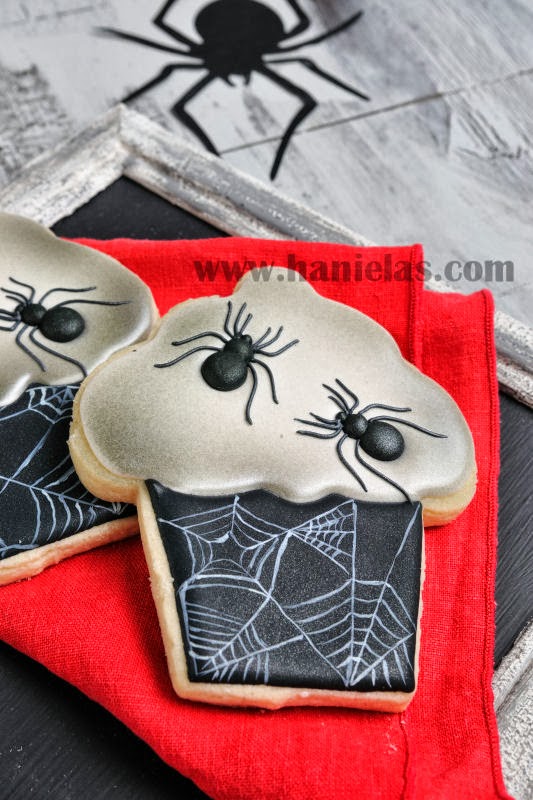
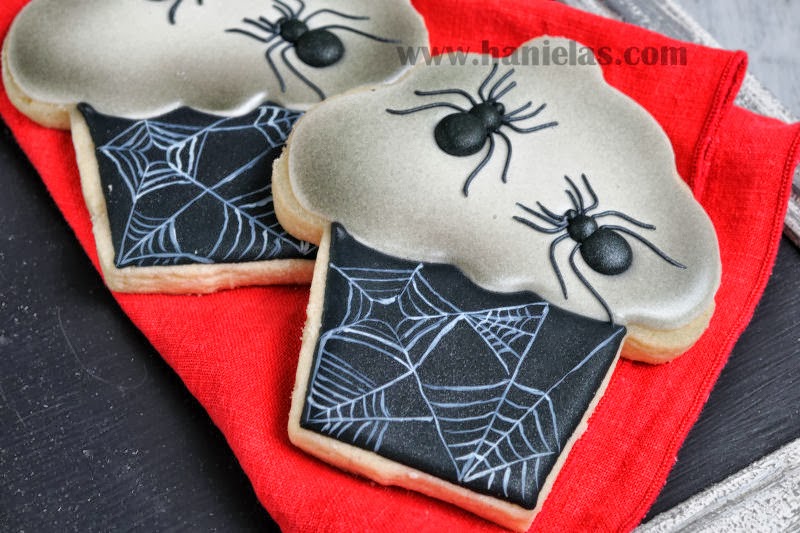
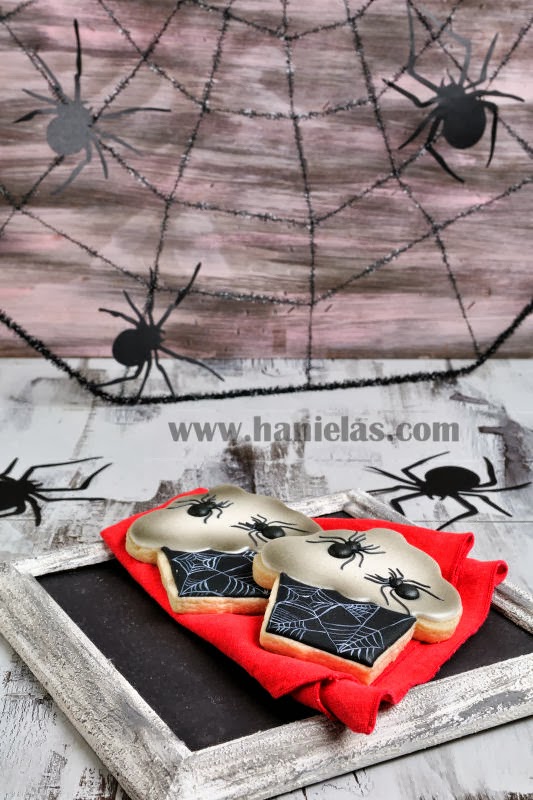
For my first tutorial I made Halloween Spider Cupcake Cookies.
To make these cookies you need:
15 second consistency royal icing : white, black,
20 second consistency royal icing : black –to make the royal icing transfer.
Black and Silver Airbrush Colors, or try and use Black Color Mist
and Silver Color Mist
if you don’t have an airbrush.
and Silver Color Mist
if you don’t have an airbrush.
White Gel Color
Small Painter’s Brush
Vodka and Paper Towel
Wax Paper
-
To make Spider Royal Icing Transfers, use the template below and a piece of wax paper.
-
Pipe the body parts onto the wax paper, let dry between each section.
-
Ice the cookies with black icing, let dry.
-
Ice the top portion of the cupcake with white, apply dried transfer onto the wet icing. Let dry.
-
Pipe spider legs.
-
Airbrush white icing with black and silver color.
-
Using white food gel color, vodka/water draw the spiderweb onto the black portion of the cookie. Use paper towel to remove excess liquid if needed.
Spider Template

Royal Icing Transfers
Halloween Spider Cupcake Cookies Video Tutorial

Hi, I’m Hani
Welcome!
Thank you for visiting Haniela’s. On my blog, you’ll find delicious sweet & savory recipes made with simple ingredients. Why not start a new adventure? Discover a world of cookie decorating with my step-by-step tutorials.

Hi, I’m Hani
Welcome!
Thank you for visiting Haniela’s. On my blog, you’ll find delicious sweet & savory recipes made with simple ingredients. Why not start a new adventure? Discover a world of cookie decorating with my step-by-step tutorials.

I have been trying to figure out a cool Halloween cupcake cookie, and I have yo say. This is still my favorite..
I have been trying to figure out a cool Halloween cupcake cookie, and I have yo say. This is still my favorite..