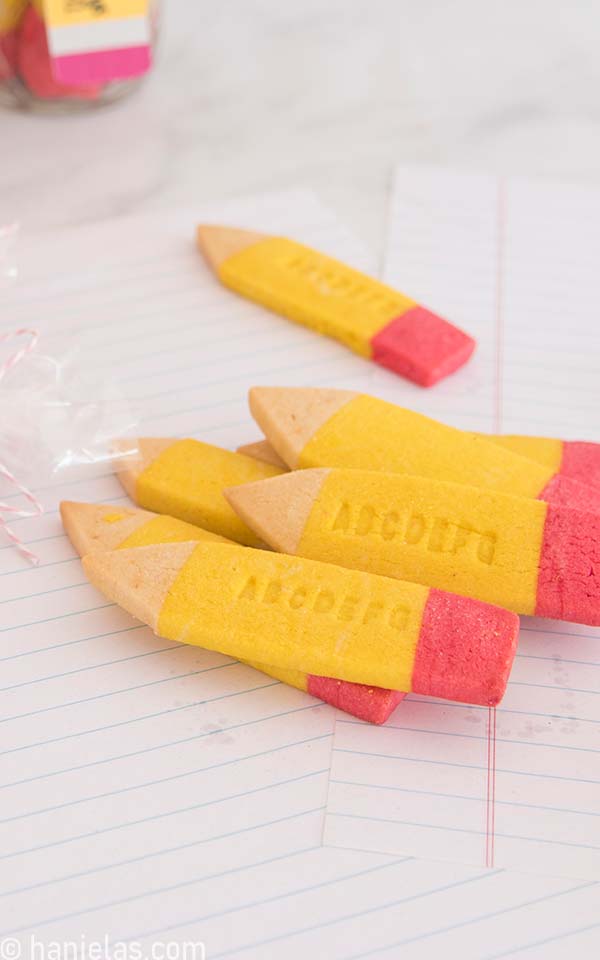
Colored Pencil Cookies
Are you looking for a cute and delicious back to school teachers’ gift idea? Look no further. Let me show how to make easy School Pencil Cookies using colored sugar cookie dough.
HOW TO MAKE COLORED PENCIL COOKIES
PREPARE SUGAR COOKIE DOUGH
To make the colored dough it’s best to use light-colored cookie dough. Here are 2 popular recipes from my blog that will work with this back-to-school cookie project.
- Cut Out Sugar Cookie Dough – uses granulated sugar and it’s a cross between sugar cookie and shortbread
- Tart Cookie Dough – uses powdered sugar and produces tender cookie.
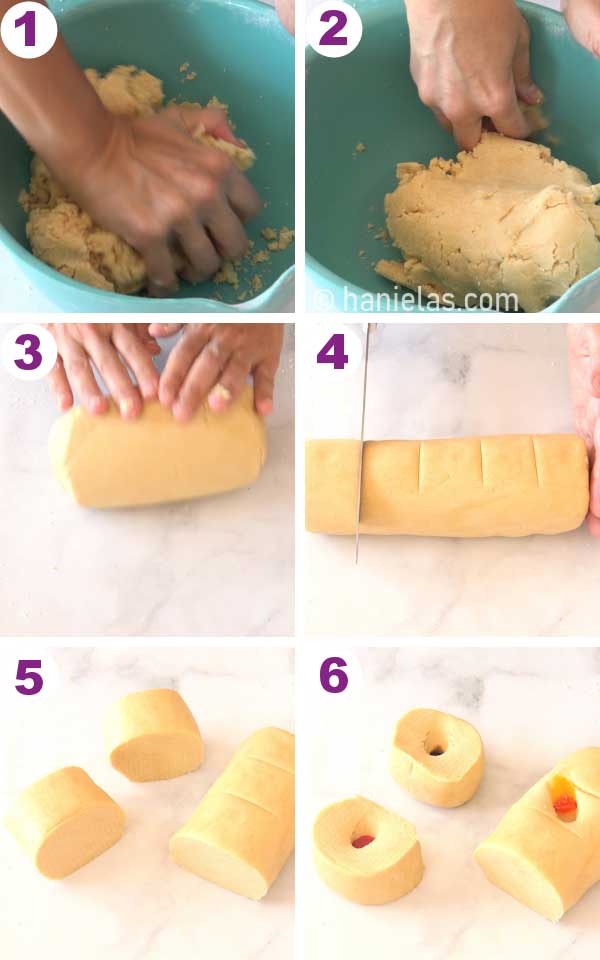
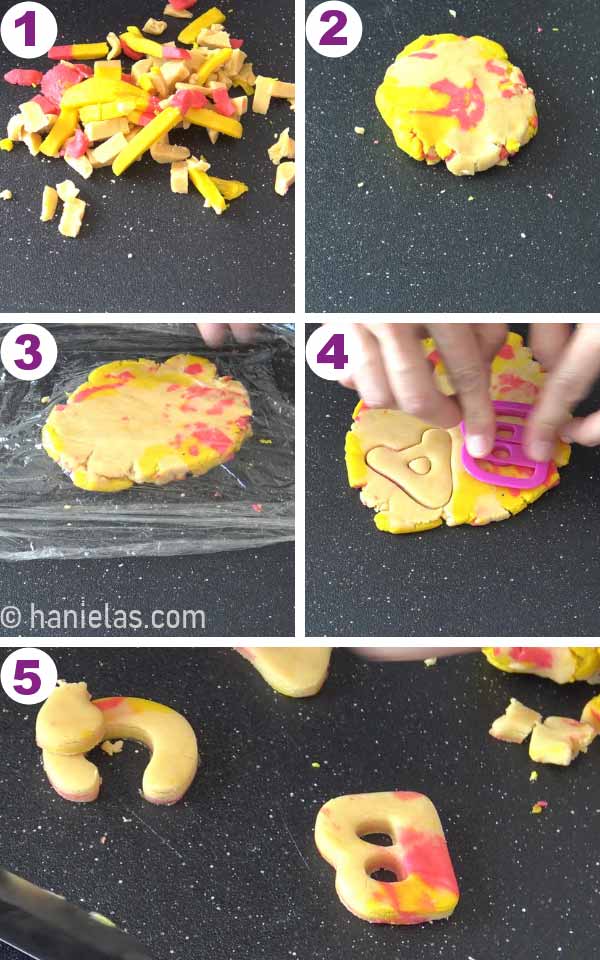
Choose a cookie dough recipe you like and prepare the dough (steps 1-2). It’s best to use the cookie dough recipe without a baking powder or baking soda. Then divide the cookie dough into 3 portions: 2 portions of about 1/5 of the whole cookie dough and 1 portion of about 3/5 of the whole cookie dough.
TIP: Shape the dough into an even log and make short cuts into the dough, dividing it into 5 disks. Cut 2 disks, and keep 3 disks whole (steps 3-5).
HOW TO COLOR SUGAR COOKIE DOUGH
It’s best to color the cookie dough right after you make it. Once chilled cookie dough doesn’t take the color as well and cookies don’t bake as nicely.
TIP: Use concentrated gel food colors. Liquid colors won’t work well and powdered colors might need to be dissolved in the liquid to activate them, before adding to the cookie dough.
By now you should have 3 cookie portions: 2 portions, each should equal about 1/5 of the cookie dough, and 1 portion equals to about 3/5 of the cookie dough.
- COLORED PENCIL COOKIE COLORS
- Color 1/5 of the cookie dough with pink food coloring
- Color 1/5 of the cookie dough with little bit of brown or ivory food coloring (check the troubleshooting section what to use in plac
- Lastly color 3/5 of the cookie dough with yellow food coloring
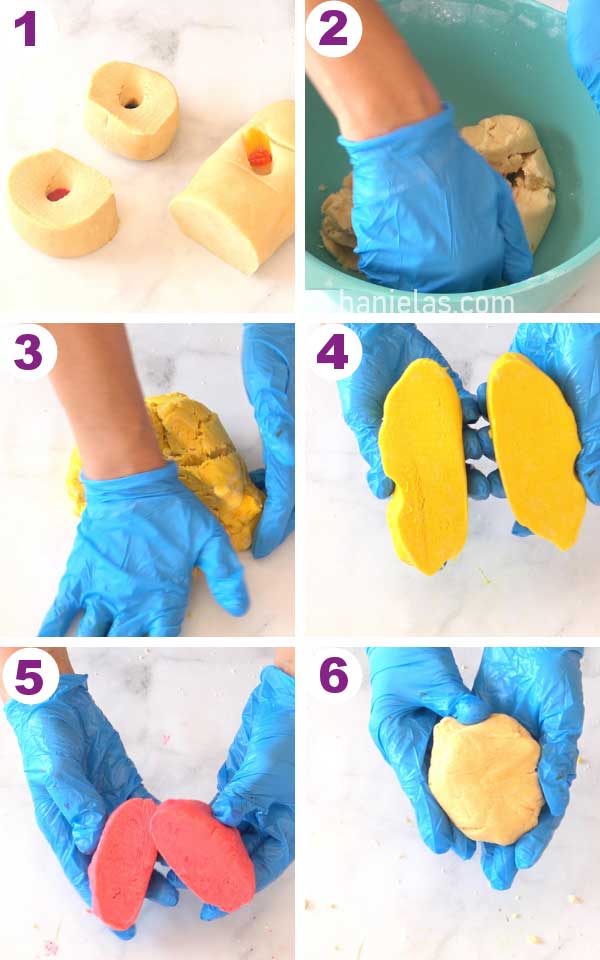
Make a dent in the cookie dough and pour food coloring into the dent (step 1).
Gently kneed the color into the cookie dough, until colored dough is homogeneous (steps 2-6).
TIP: Wear the gloves when coloring cookie dough with food dye.
SHAPE COLORED COOKIE DOUGH INTO A BRICK
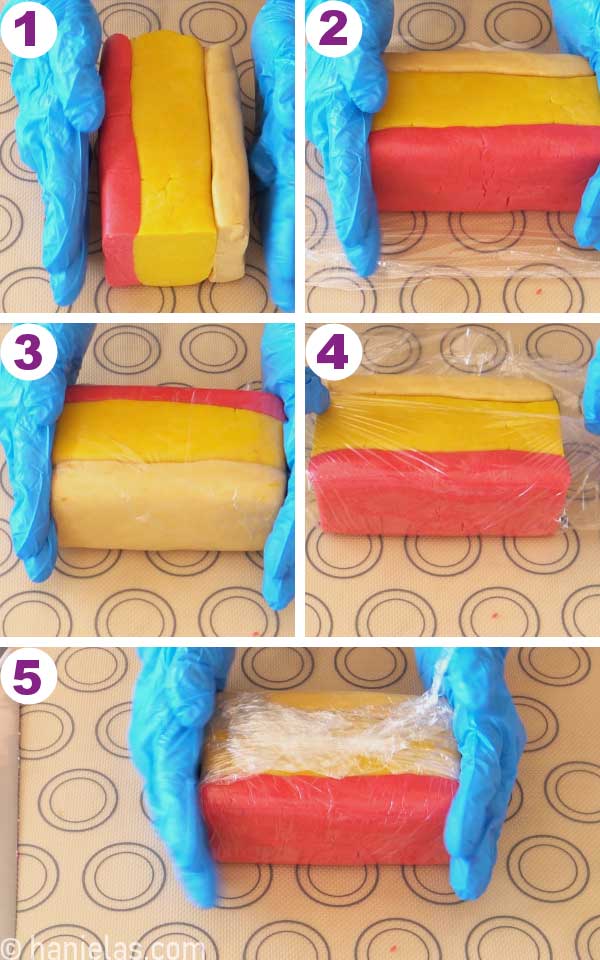
To create a pencil pattern I stacked colored cookie dough in this order: light brown, yellow and pink.
Depending on the size of the pencil cookies you’d like to make shape each piece of the dough to a log of the same size.
Than with a rolling pin flatten each log slightly. Pieces should be the same length and width. Remember the yellow piece of the cookie dough needs to be the thickest (step 1-2).
I made made colored cookie dough brick 3 inch wide.
Brush the cookie dough with a little bit of water, use the pastry brush very lightly. Water will work as glue so your cookies don’t separate in the oven.
Place pink cookie dough on top of the yellow. Gently press it onto the yellow cookie dough (steps 3-4). Then turn it over and layer light brown cookie dough from the other side. Yellow cookie dough should be between pink and brown dough (steps 5-8).

FREEZE COLORED COOKIE BRICK
Use your hands to even out the brick and wrap it into a food wrap (steps 1-5).
Freeze for 1-2 hours.
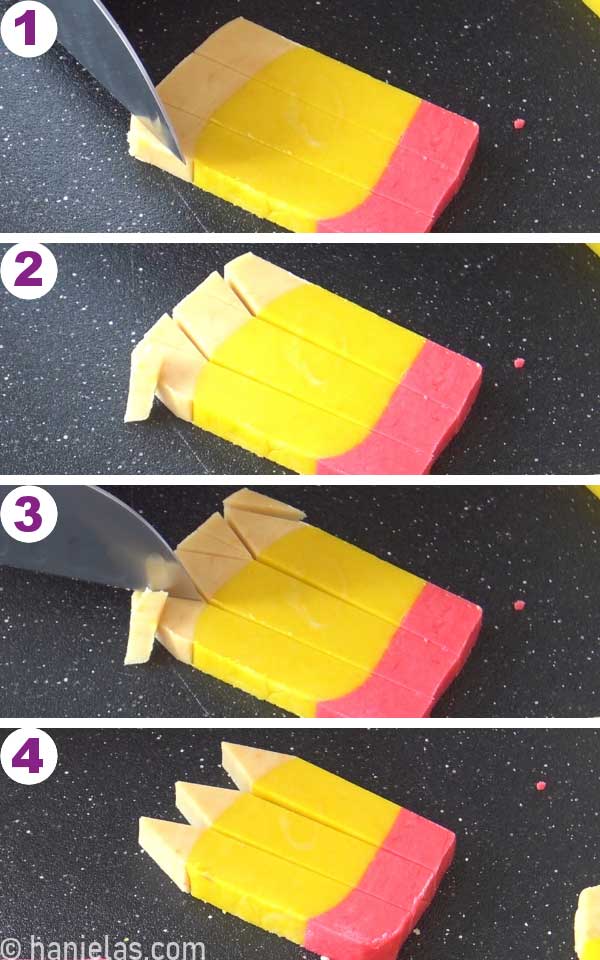
SLICE COLORED PENCIL COOKIES
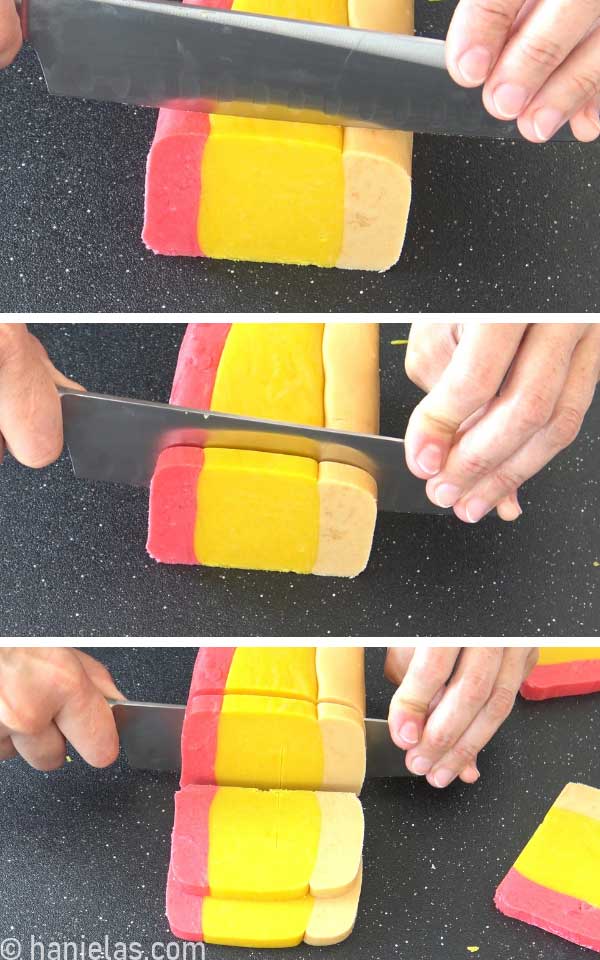
Take frozen cookie dough brick from the freezer. Remove the food wrap and place it onto a cutting board.
With a sharp knife slice the brick into about 1/4 thick slices.
Look how pretty, these would look great on a dessert plate just as they are.
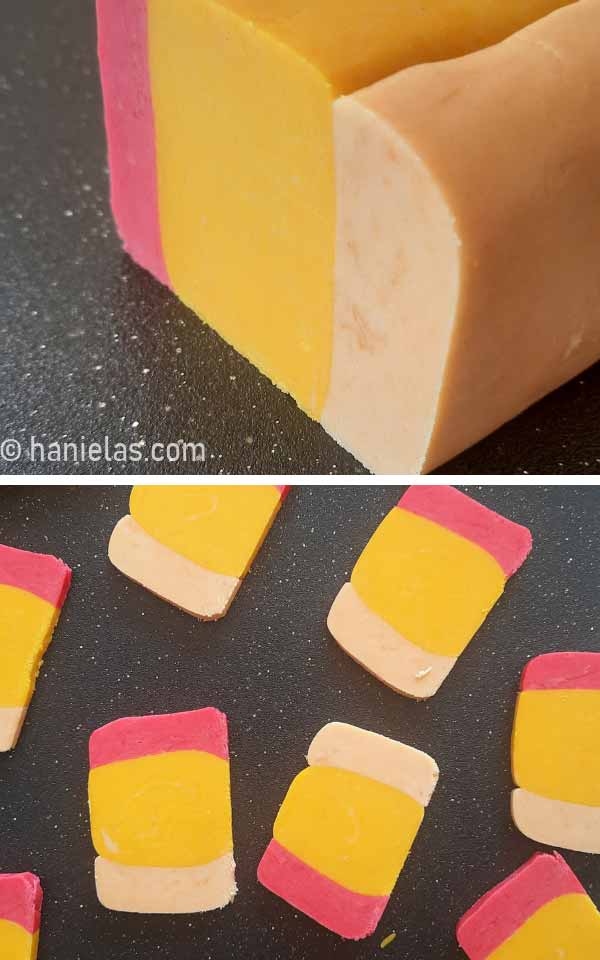
Trim the slices if needed to make the edges straight. Then cut each slice into 3 equal strips (steps 1-3). I was able to make 3 colored pencil cookies from one slice. Reserve the cookie dough scraps.


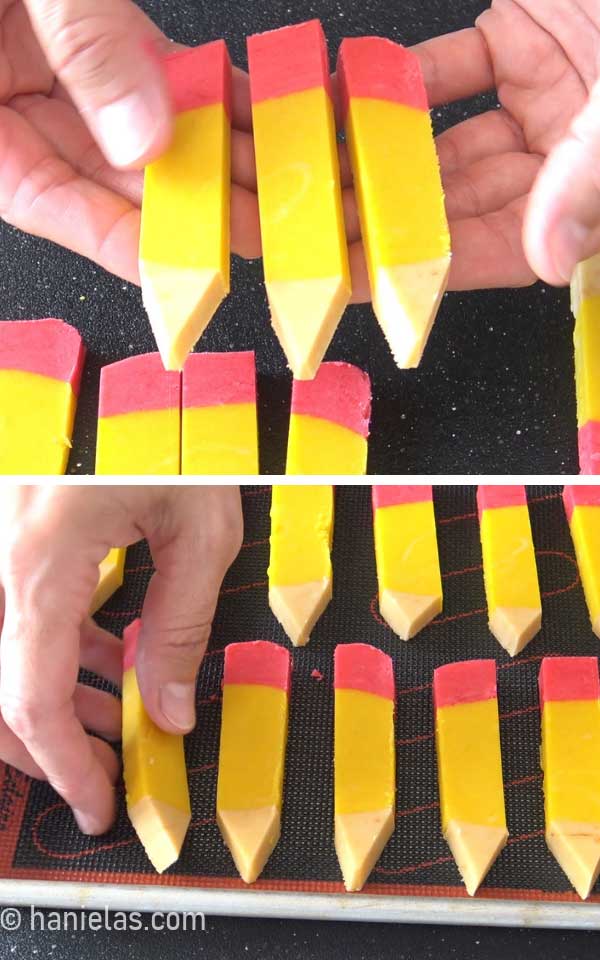
To sharpen the pencil cookies use a knife and trim the brown cookie part (step 1-4).
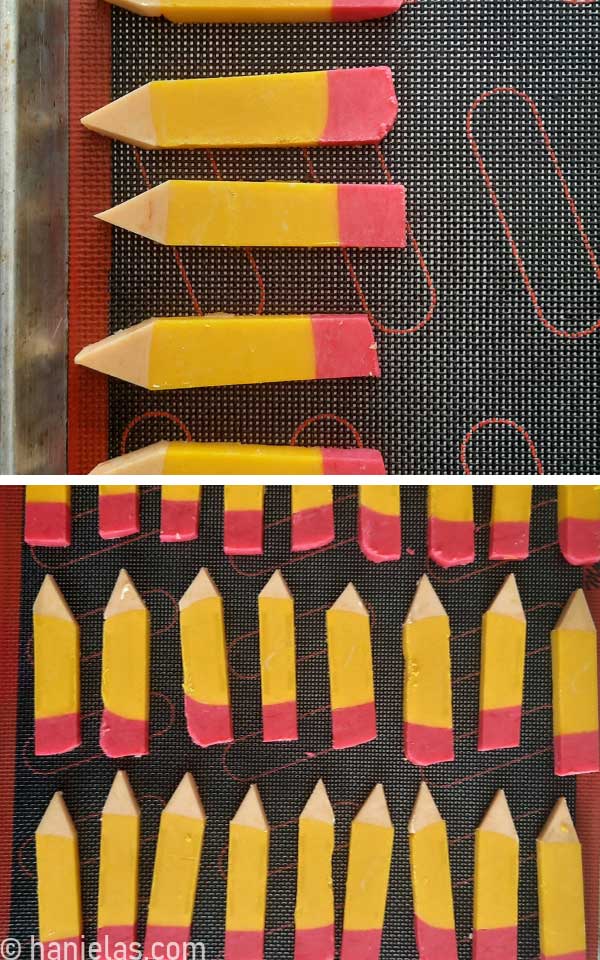
Colored pencil cookies at this point should still feel chilled. It’s easier to transfer them onto a baking sheet when they are firm.
Today I lined my baking sheet with perforated mats to bake the cookies. Have you tried it? It’s great to use for baking cut-out cookies. Cookies bake evenly with literally no spread.
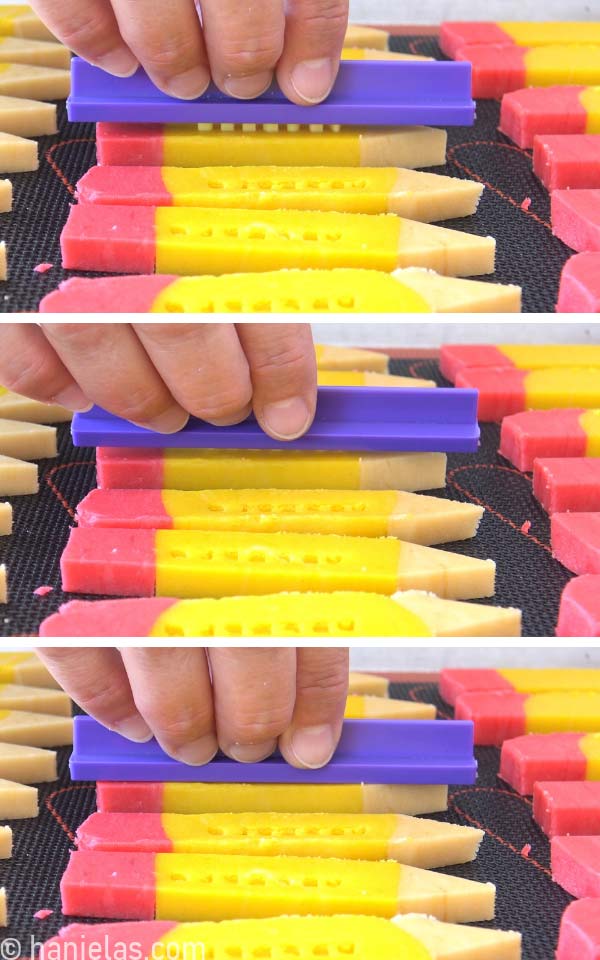
DECORATE WITH APHABET IMPRESSION SET
Use mini alphabet impression to set to personalize pencil cookies. Add names or sweet messages to your cookies.
It’s simple, find the letters you need and thread them into the track. Be sure to thread them mirrored.

If your cookies are still frozen solid, allow them to soften a little before using the impression tool. Cookie dough shouldn’t be soft, but it should give slightly.
Turn the holder over and position it onto a cookie. Press it into the cookie until the bottom of the purple holder is flush with the top of the cookie dough. Carefully lift up the impression tool and repeat.
BAKE COLORED PENCIL COOKIES
If your cookies become too soft, chill them in the fridge for 10 minutes before baking them.
Bake the cookies in the preheated oven at 350F (180C) for about 9-10 minutes.

Allow to cool on a baking sheet for 5-10 minutes and then transfer cookies onto a cooling rack to cool completely.

HOW TO USE COOKIE SCRAPS
I used cookie scraps to make some cute large alphabet letters. Gather cookie scraps together into a disk and roll it out to about 1/4 inch thick. Cut out shapes with a cookie cutter and bake as usual.
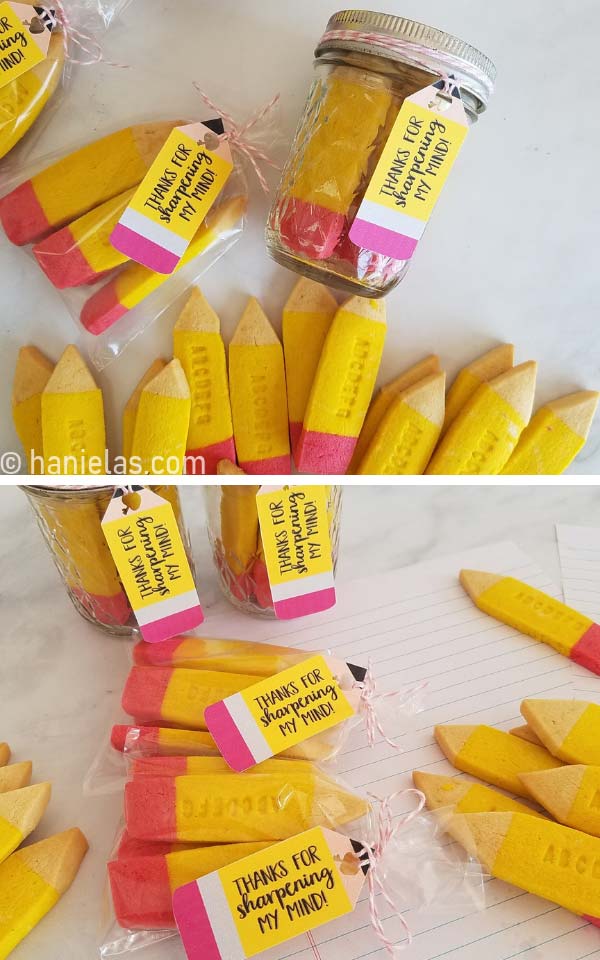
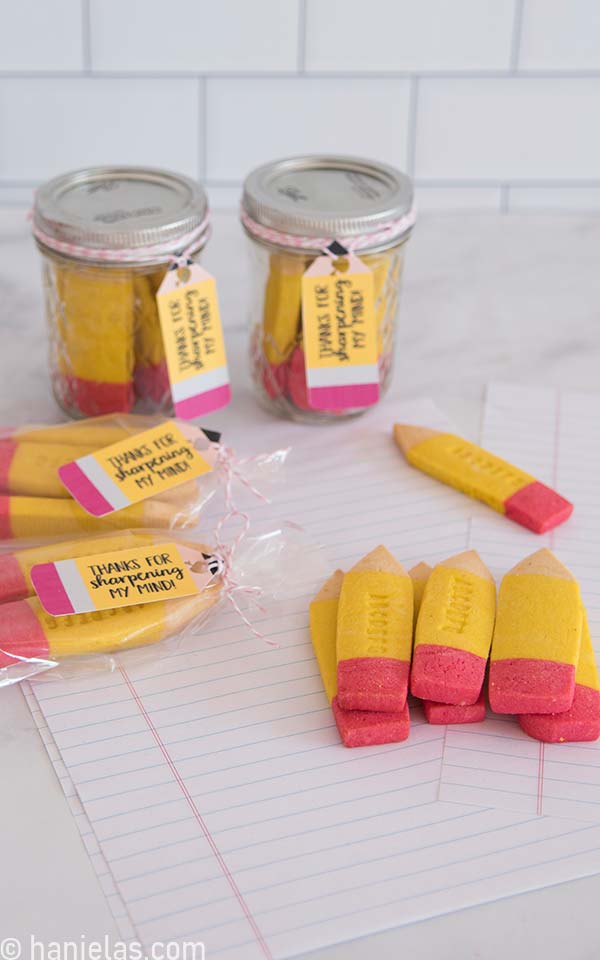
COOKIE GIFT PACKAGING
Gifting these cookies is really easy. I found adorable printable tags (see the link in the tools section). I resized the tag so it would fit on my small mason jars and 5×7 poly bags.
Cut the tag, make a hole in the point of the pencil and thread a baker’s twine thru. Fill mason jars with cookies, close with the lid and attach the tag onto the lid. Aren’t they adorable?!

Another alternative is to use poly bags. These are cheaper than mason jars. I use 5×7 and you can also use 4×6. It all depends on the size of your cookies.

BAKING TIPS AND TROUBLESHOOTING
- Use concentrated gel food colors to color cookie dough. Avoid using liquid food colors.
- Color cookie dough right after you make it. Don’t chill it and color, it doesn’t take color as well and cookies don’t bake as nice.
- Don’t have brown or ivory food coloring? Use 1/4 tsp cocoa powder mixed with 1/4 tsp milk or water instead. Knead it into the dough just like you would food gel coloring.
- Wear gloves when coloring cookie dough.
- Baked cookies, well stored in an airtight container keep for 2 weeks.
- If using an alphabet impression tool or texture mat, don’t use baking powder or baking soda in the cookie dough.
- Chill cookies with impressions for 10 minutes before baking.
- Bake cookies at 350F, for 8-10 minutes, depending on the size of the cookies. Look for a puffed up center that is no longer shiny. You don’t want these to brown too much.
- If you are looking for Vegan or Gluten Free Sugar Cookie Recipe to use, try my Cut-Out Vegan Sugar Cookies and my Gluten Free Sugar Cookies.
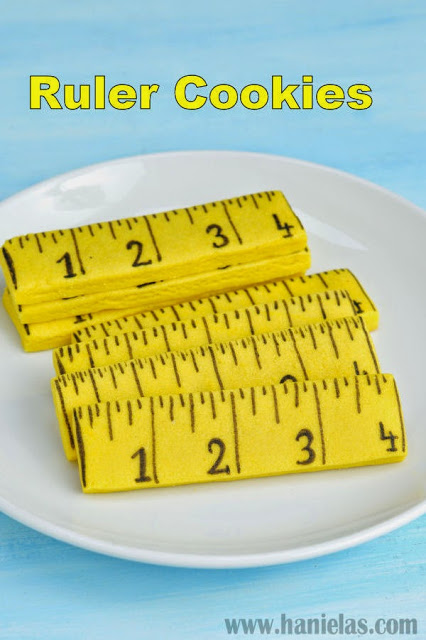
MORE BACK TO SCHOOL GIFT IDEAS
- Apple Pudding in a Jar
- Back to School Teacher Gift Basket Idea under $10 / from Lindsey Blogs
- Apple Cookies
- Peanut Butter Dip with Fresh Apples
TO MAKE COLORED PENCIL COOKIES YOU NEED
- Sugar Cookie Recipe – cookies are a cross between sugar cookies and shortbread cookies.
- Tart Cookie Recipe – this recipe uses powdered sugar and 3 egg yolks or 1 whole egg. It produces tender cookies, not with a hard crunch.
- Find all the tools in my Amazon Shop (Food Colors, Packaging and Stencil Tools Sections)
- Food Gel Colors: pink, yellow, brown or ivory.
- Alphabet Impression Tool
- Printable Labels / from See Vanessa Craft
- Small Mason Jars
- Poly Bags
- Bakers Twine
This post containsThis post contains Amazon affiliate links that earn me a small commission, at no cost to you. I only recommend products that I use and love. Learn more about my affiliate policy here.