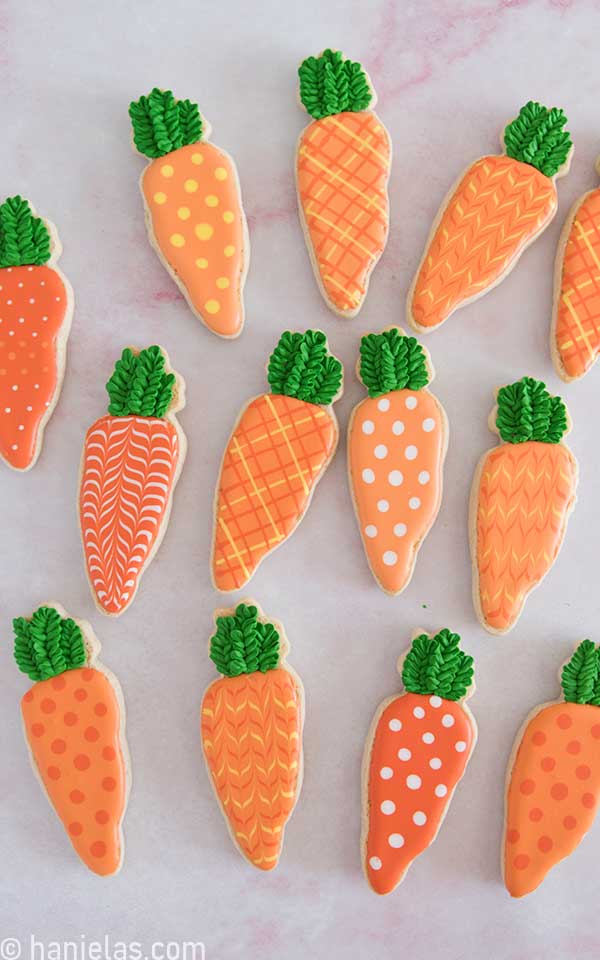
Decorated Carrot Cookies
Have you tried decorating cookies with wet-on-wet royal icing? I used this popular decorating technique to make these Easter decorated carrot cookies.
updated from 2014
How to Make Easter Decorated Carrot Cookies
Before I jump to my step-by-step tutorial, let me share a couple of useful links to get you started.
- Cookie Decorating Guide
- Beginner’s Guide To Cookie Decorating
- Ultimate Guide to Cut-Out Cookies (tips, tricks, troubleshooting)
- Royal Icing Recipe
- Small Batch Royal Icing Recipe
- Cookie Icing Recipes (includes vegan royal icing, glaze, fondant)
- Guide To Royal Icing Consistencies with Visual Help(what is stiff, flood icing, etc.)
- How To Freeze Royal Icing
- How To Make Royal Icing Transfers
- Royal Icing FAQ ( for example: how to make black icing, color bleeding, storage, and more)
- How To Make a Cookie Cutter Template
- Ultimate Guide To Cookie Decorating Tools

I used my sour cream Soft Sugar Cookie Recipe instead of my Classic Sugar Cookie For this fun cookie decorating project.
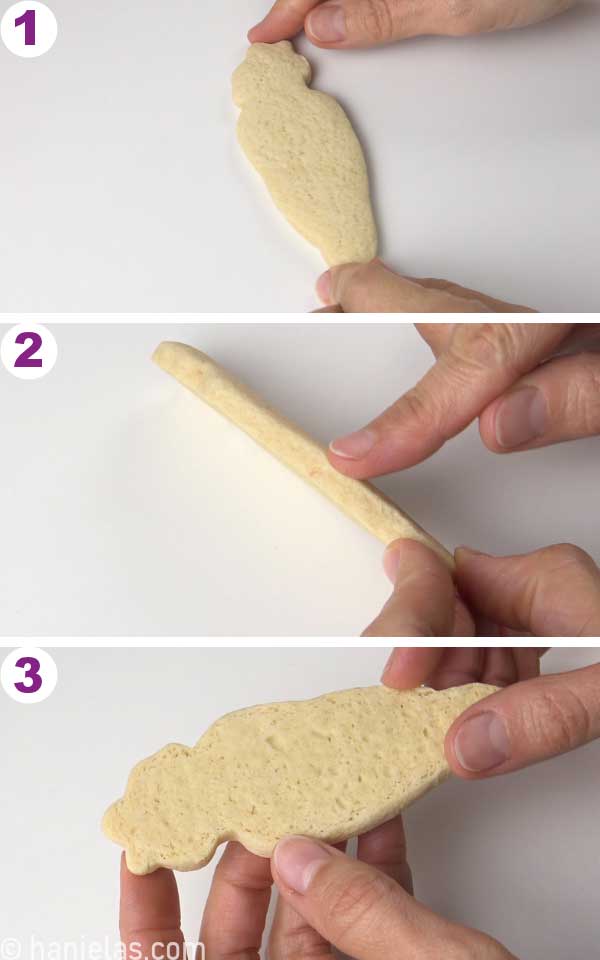
My soft sugar cookie recipe contains baking powder and baking soda and cookies bake with slightly rounded edges (steps 1-2). When decorating with royal icing, I prefer to decorate the underside of the cookie because it’s flat (step 3).
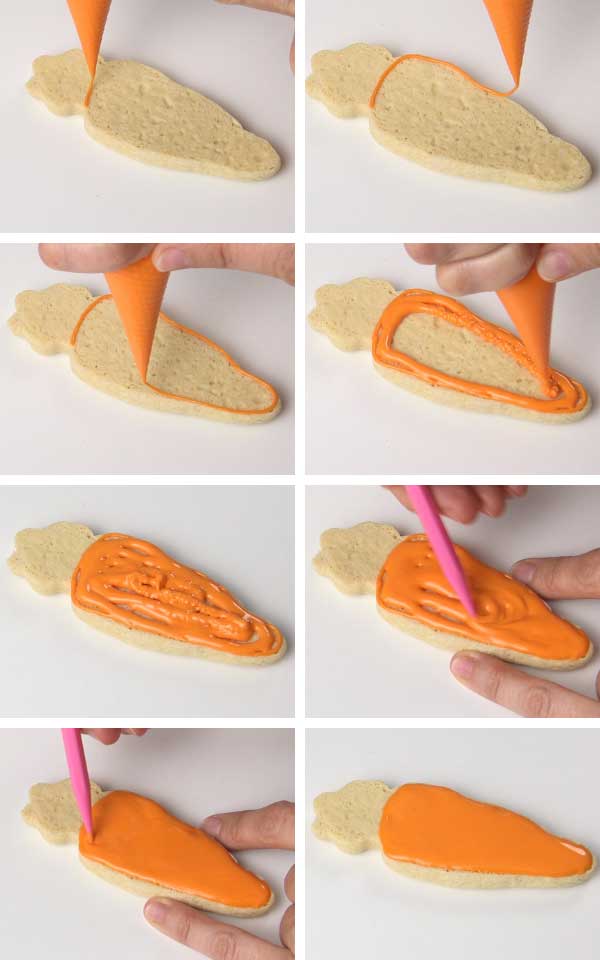
Decorate Cookies with Flood Icing
I include three fun wet-on-wet royal icing designs in this cookie decorating tutorial. All three start with the same first step: outlining and flooding the cookies.
Use 15-second consistency orange icing to outline and flood the carrot. Use a scribe to smooth and distribute the icing evenly. Don’t let icing crust and continue with the next wet-on-wet design.
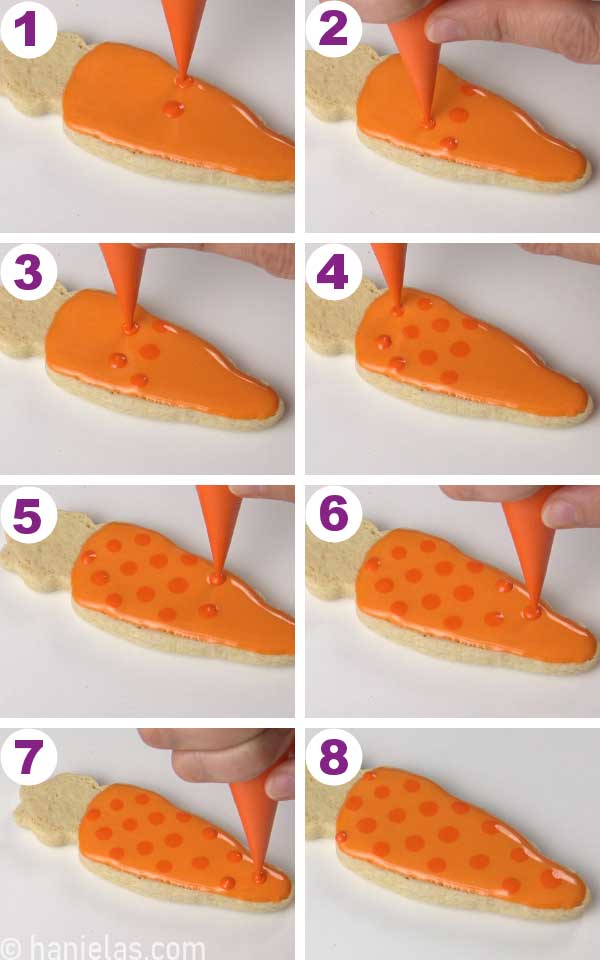
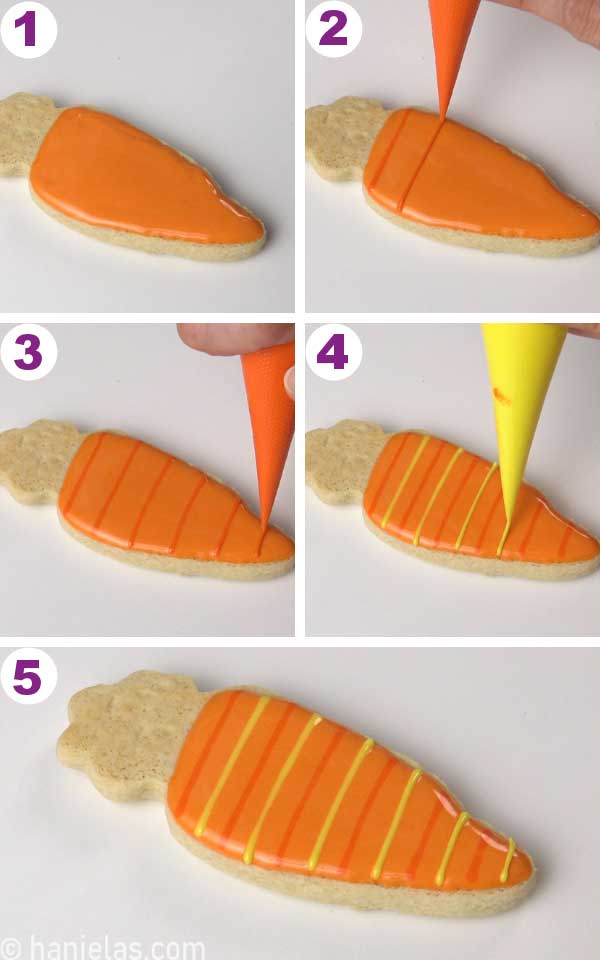
Wet-On-Wet Polka Dot Royal Icing Decorating
Immediately after you flood the cookie with the base layer take royal icing of different colors and start piping polka dots into the wet base layer. It’s important that the icing is also flood consistency, about 15-second consistency.
Start piping polka dots across the middle and then stagger them above and below the line (steps 1-8). Allow icing to crust or dry before the next step.
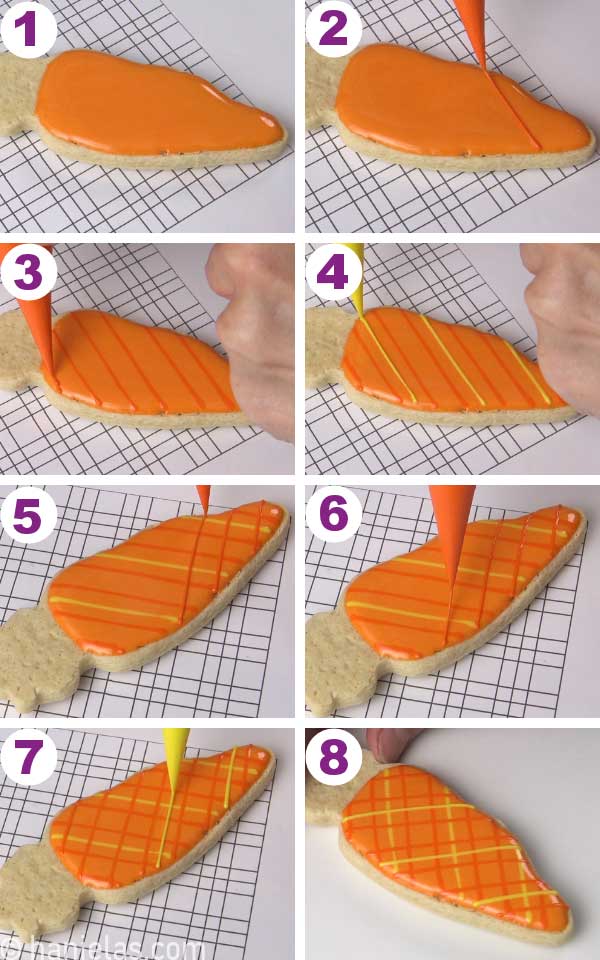
Plaid Wet-On-Wet Royal Icing Decorating
I used a plaid template to guide me with piping of straight lines to create a plaid pattern. The use of a plaid template is optional, but if you’d like to get this template, it’s available in my template shop. You can find all the tools I used at the bottom of this post.
Pipe straight lines across with dark orange and yellow royal icing. Both colors should be about 15-second consistency (steps 1-8).
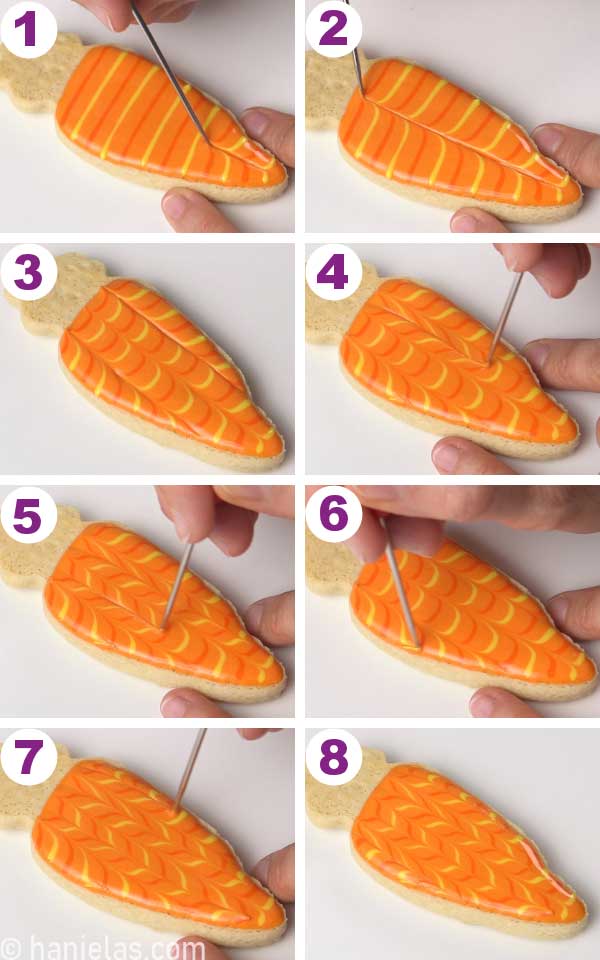
Marbled Wet-On-Wet Royal Icing
This following wet-on-wet technique is one of the most popular ones. Marbling is an easy decorating technique that adds a striking appearance to cookies and cakes alike. I’ve also used it many times on different projects, like beautiful Christmas Ornament Cookies or 50 Shades of Purple Cookies, to name a few.
Start by icing the cookie with the base layer using 15-second light orange icing (step1). Immediately pipe straight lines across with dark orange and yellow icing. Both icing colors should be about 15-second consistency (steps 1-5).
Immediately drag the tip of the scribe thru the piped lines in one direction (steps 1-3). And then in the opposite direction, between the first lines (steps 4-8).
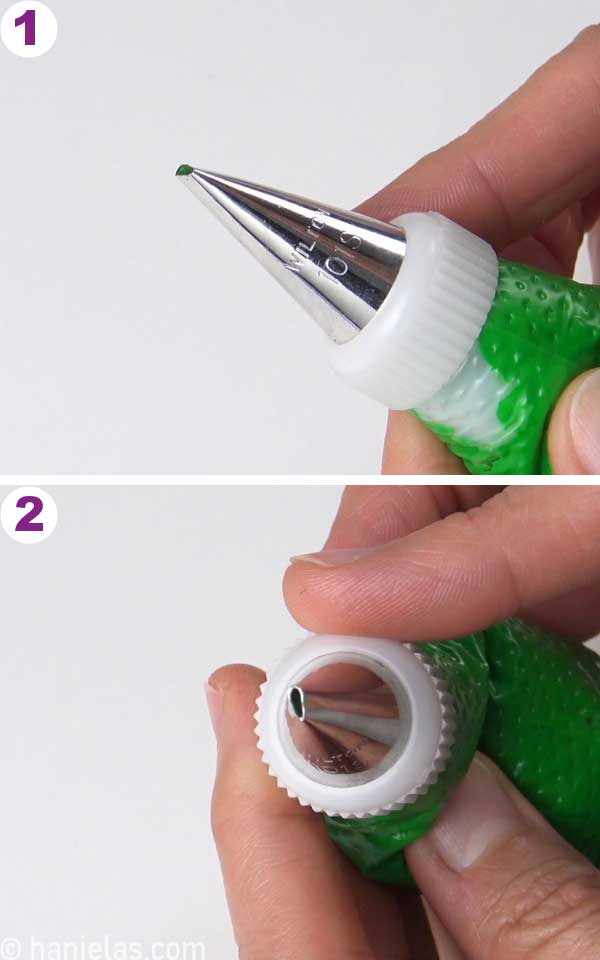
Pipe Leaves with Piping Tip 101S
To pipe ruffled royal icing leaves, I used thick royal icing and a petal tip #101s. I’ve used the same piping tip to make Pansy Pitcher Cookies.
Like any other petal tip, this tiny piping tip has a wide end and a narrow end. Please note it before you start piping, as it is important that the narrow part of the tip is facing out and the wide end is facing in.
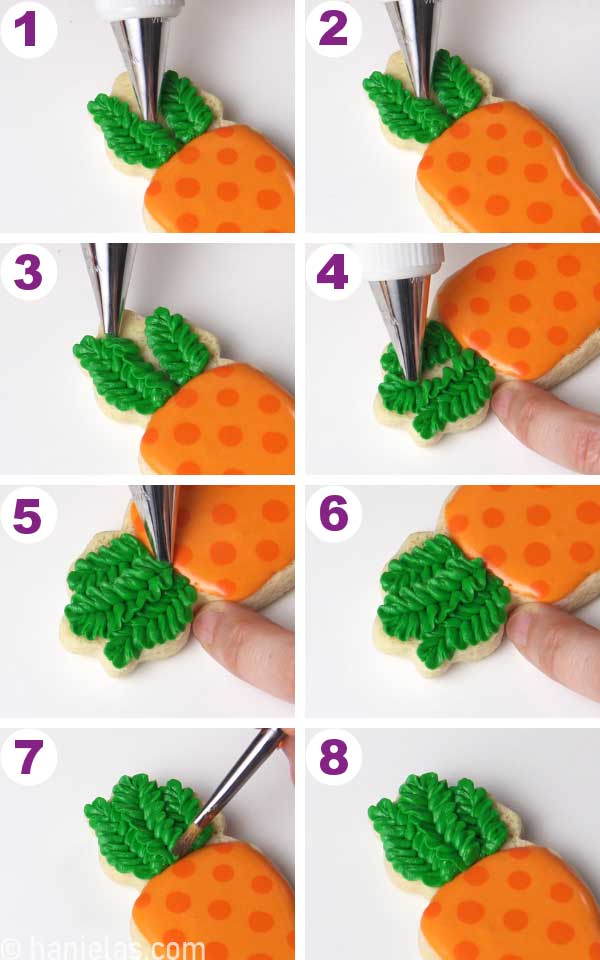
Holding the piping bag at about a 45-degree angle, move the piping tip back and forth, creating a ruffled line of icing. Then once you come to the edge of the cookie, turn the cookie and continue piping. If it’s difficult because of the flexibility of your wrist, don’t worry. I stopped piping, turned the cookie, and continued until I reached the orange icing (steps 1-5).
Continue to pipe ruffled leaf on the right side (steps 6-8).
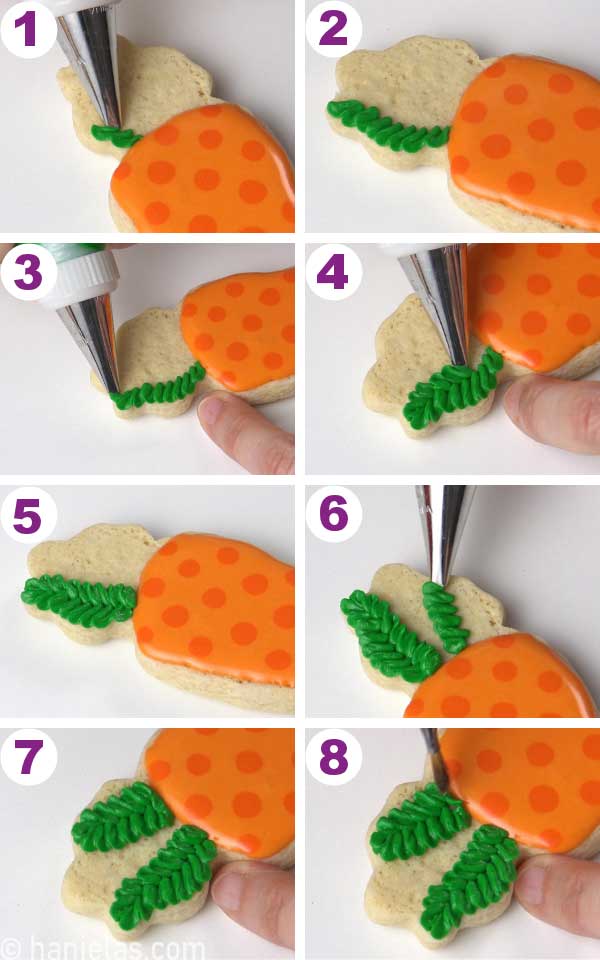
Lastly, pipe the middle leaf, slightly overlapping the left and right leaves (steps 1-8).

To Make Simple Decorated Carrot Cookies You Need
- RECIPES
- Sour Cream Soft Sugar Cookies
- Classic Sugar Cookies
- Fresh Lemon Royal Icing
- Vegan Sugar Cookies
- Vegan Royal Icing
- Gluten-Free Sugar Cookies
- TOOLS
- Shop all the tools in my Amazon Shop
- The plaid Template is available in my Template Shop
- Carrot Cookie Cutter
- Tipless Piping Bags
- Concentrated Gel Food Colors (I used Americolor brand)
- Petal Tip 101s
- Metal Scribe Tool
- MORE EASTER TREATS IDEAS
- Easter Carrot Cake via Cake by Courtney
- Pastel Easter Bunny Cookies
- Hot Cross Buns Recipe
- Cute Lemon Curd Easter Egg Cookies via The Loopy Whisk
- Coloring Pages Chick Cookies for Easter
This post was originally published on April 3rd, 2014. On April 20th, 2022 I updated this pose with new step-by-step pictures and written text.


How many seconds consistency do you recommend for the green leaves of the carrots? Thank you!
Hi Jill, I used thick icing, if it’s too runny it won’t hold its shape.