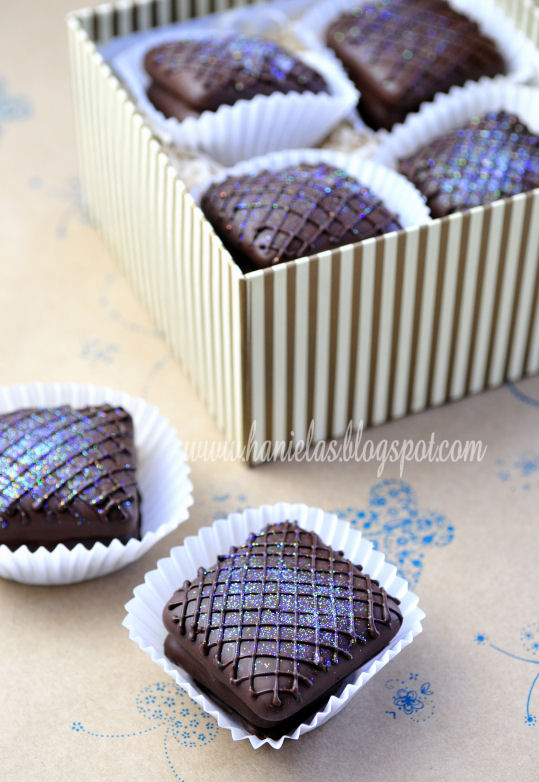
Gingerbread Sandwich Cookies
Cookie dough itself is made over the course of 3 days. There is one ingredient that differs from your usual cookies and that is Baker’s Ammonia. Baker’s ammonia is an old leaving agent and it is still used to make special cookies like those your grandmother made or beautiful Springerle cookies.
I didn’t believe it until I used Baker’s Ammonia. I have to say it is totally true what they say about it, it makes the cookies tastes so good, texture is fantastic, you feel like you are eating those yummy store bought cookies except they come from your kitchen, they are crispy a scrumptious.
You should also know that Baker’s Ammonia will evaporate if not tightly contained.
This gingerbread cookie dough doesn’t contain any fat, you need to use good jam instead of fat.One thing you should know, there are spices to be ground and lots of them, one in particular I recommend grounding fresh.
I’m a big fan of star anise in gingerbread, it has a sweet flavor that I really like, it adds a little magic to the cookie. I find that making your own ground star anise is the way to go, as with this spice sweet flavor tends to diminish over time, it is best to use fresh ground star anise. I use a blender or a coffee grinder to ground it and then I sift it through a fine mesh sieve. It works ever time and is worth the effort.
Gingerbread Sandwich Cookies
1. Day
Making Sugar Syrup
2 1/2 cups granulated sugar(500grams)
1cup water(250ml)
1/2tsp baking soda
In a small sauce pan combine water, sugar, stir in baking soda, bring to boil and cook for 5-8 minutes
Remove from heat, let cool to room temperature, and store in an airtight container at room temperature.
2.Day
Making the dough
7 3/4 cups all purpose flour(1100grams)
1/2tsp baking powder
4tsp baker’s ammonia(20grams), you can purchase it online at King Arthur Flour
1 1/2 tsp ground ginger
1tsp allspice
1 1/2 tsp ground cloves
1/2tsp ground cardamom
pinch of ground white pepper(optional)
1 1/2 tbl cinnamon
1tbl ground star anise
1/2tbl ground anise
1/4cup + 1tbl medium consistency plum jam
7oz honey(1/2cup +2tbl, 200gram)
2eggs
In a large bowl sift together all the dry ingredients, add all wet ingredients plus sugar syrup you made on the1st Day, stir with a wooden spoon until it starts to come together then dig in with you hands and make the dough. Dough is not suppose to be runny, if it is add more flour.You are looking for a medium soft, not sticky dough.
Wrap the dough in a plastic wrap, best to wrap it twice. Let rest in a cool dry place overnight. NOT in the fridge!
3. Day
Making/Baking Cookies
Preheat oven to 310F
Line your baking sheets with 2 layers of parchment paper(my oven is on strike these days, burning stuff I bake, so I decided to use 2 layers instead of one)
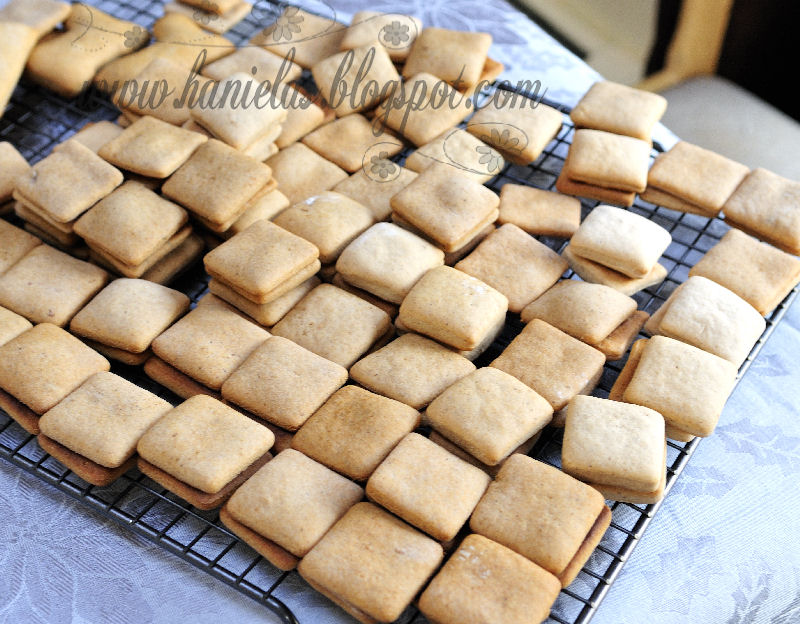
Take your cookie dough, flour your work surface, dust top of the dough with flour as well, roll the dough into about 2/16″(3mm)thick.Cookies will rise in baking. Use either round, rectangle or square cutter, or use a pastry wheel and cut the cookie dough into equally big rectangles/squares
Place the cut outs onto the baking sheet and bake for about 8-10 minutes, rotating sheet in halftime.When opening the oven door, stay slightly back allowing the fumes from baker’s ammonia to escape without getting into your nose, it smells a little bit, not too much.Once cookies have golden brown tops remove from the oven and let cool, transfer cookies onto the cooling rack. Repeat with remaining dough.
Filling Cookies
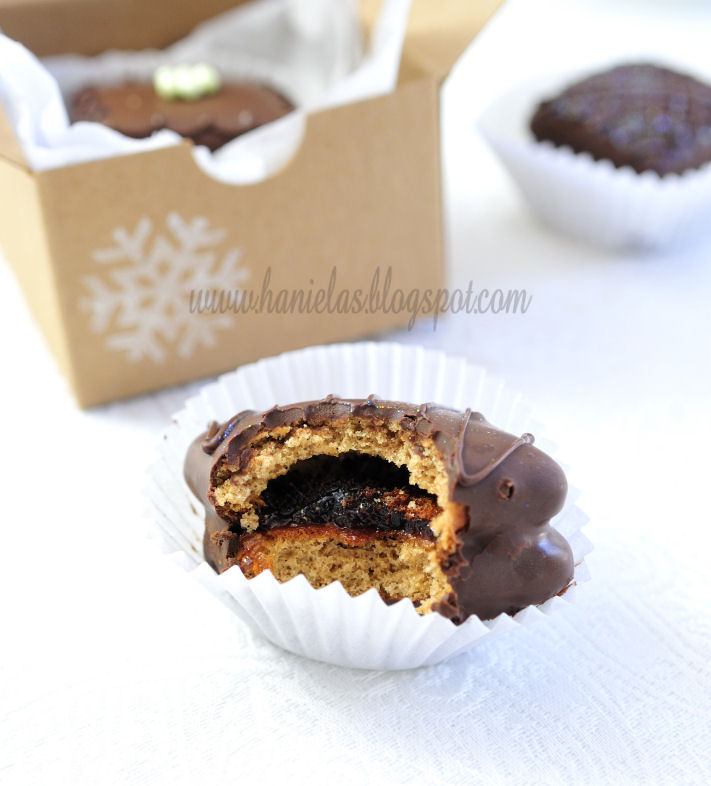
You need good jam to sandwich your cookies.
Use jam that you like, best to use kind that is not runny, I used plum and raspberry jam mixed together.
Generously fill cookies with jam and sandwich them together, let them rest covered for several hours, this helps to bind them together and makes is easier to dip them in chocolate so they don’t separate in the process
Dipping Cookies
24 oz(680grams) Milk or Dark Merckens Chocolate Wafers, I bought mine at local store but you can also get them online Merckens Chocolate Wafers
Medium size heat proof bowl, tempered glass or stainless steel.
Dipping fork, I used my carving fork for this, it worker like a charm.
Few trays or baking sheets lined with wax paper.
Place wafers into a heat proof bowl, place the bowl over the pan with simmering water, water is not suppose to be touching bowl with chocolate, steam will gently melt the chocolate wafers, stir gently. Once melted remove from heat and you can start dipping.
Drop the sandwich cookie into the melted chocolate, lift it up with the fork, hold it steady and gently tap the hand holding the fork and watch the excess chocolate to drop into the bowl.Gently place coated cookie onto the tray/sheet lined with wax paper. Continue with remaining cookies, once your sheet is full, place it into the fridge for 5 minutes and continue with remaining cookies. If you find that chocolate coating is getting too stiff, repeat melting process for several seconds, continue with dipping until you are done completely.
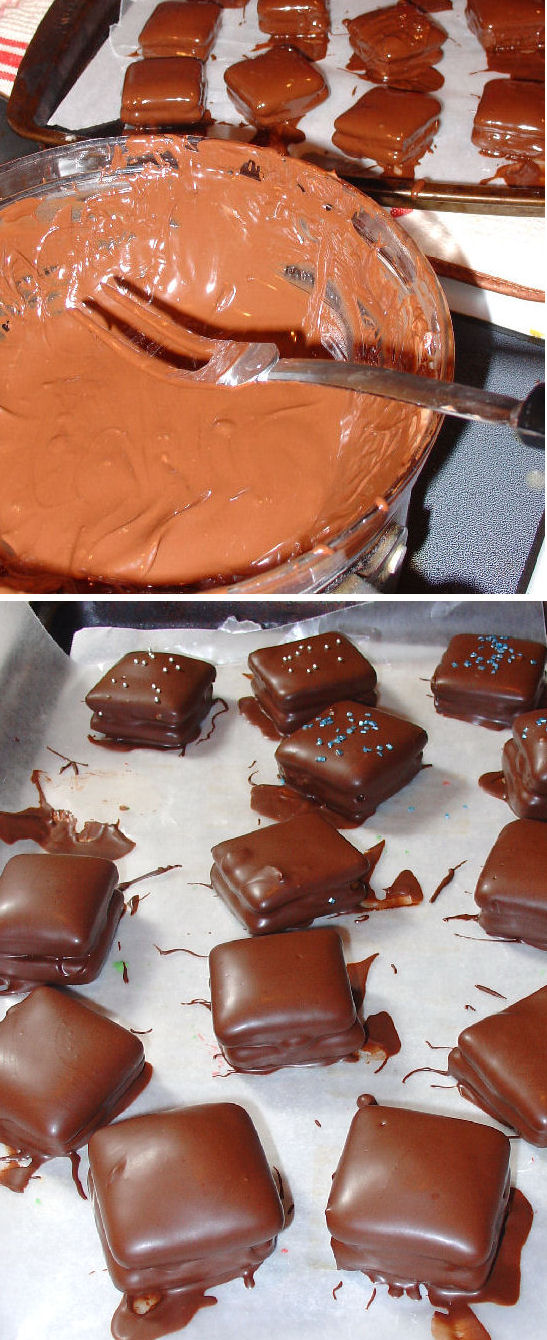
Once chocolate coating hardens you can gently lift the cookies of wax paper, trim any chocolate excess and reuse the chocolate trimmings. Place each cookie into a small dessert liner if desired, store cookies in a cool place in the airtight container. I find they are best after 2 days of resting. I’ve had these for at least a month with no problems, storing them in a cool place in the airtight container.
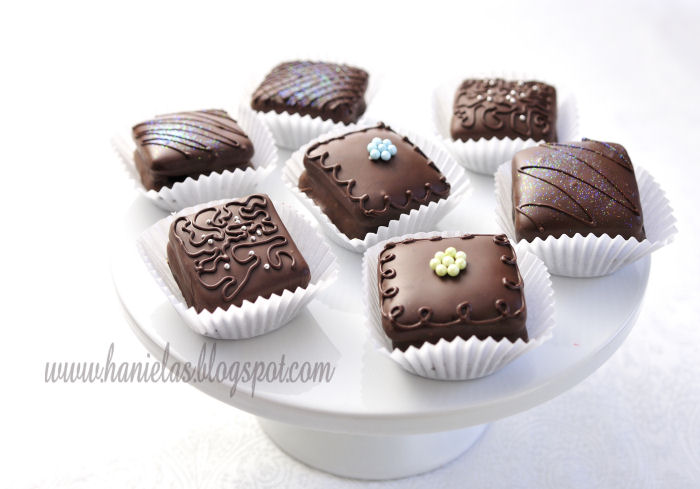
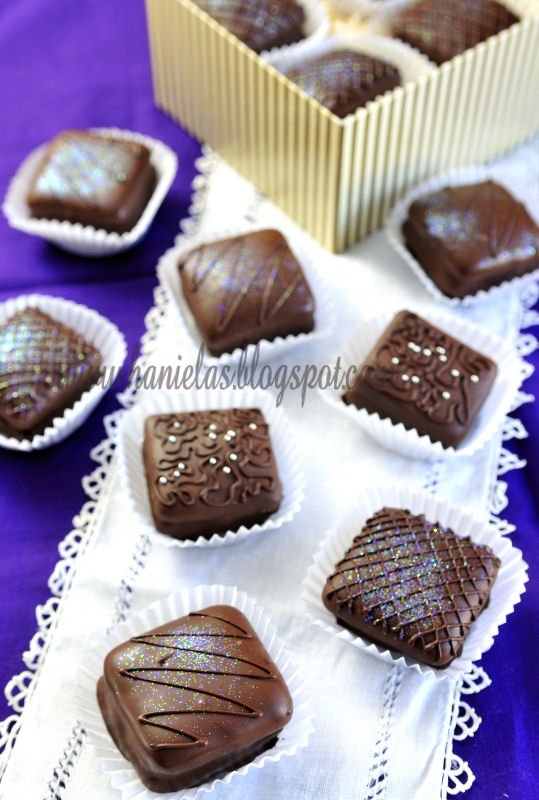
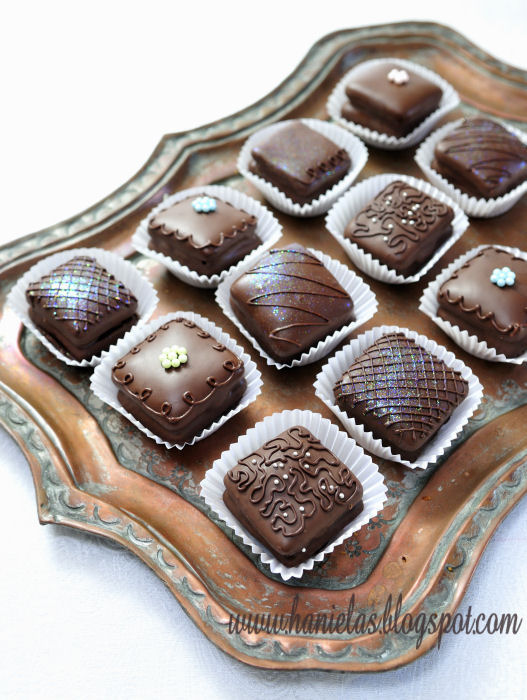
If you wish to make these extra pretty, use left over chocolate, spoon it into a little sandwich bag, snip of the small piece in the corner and you can either pipe swirls, lines, dots onto the cookies or use pretty pearls, using a dot of chocolate add pearls to your coated cookies(use tweezers to attach pearls onto the cookies)
When piping with melted chocolate, find the consistency that works best for you, I had to wait a little for chocolate to get more stiff so the flow wasn’t too fast and I was able to pipe swirls easily. Let your decorated cookies harden before you handle them. Store these in airtight container, in a cool place They should last for at least several months if stored properly.
They make for pretty favors too.