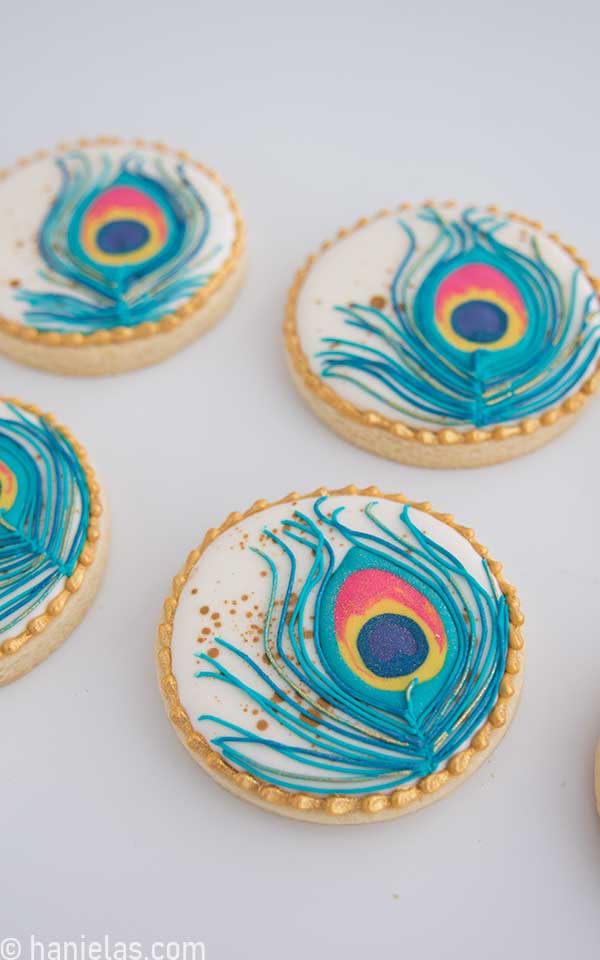
Peacock Feather Cookies
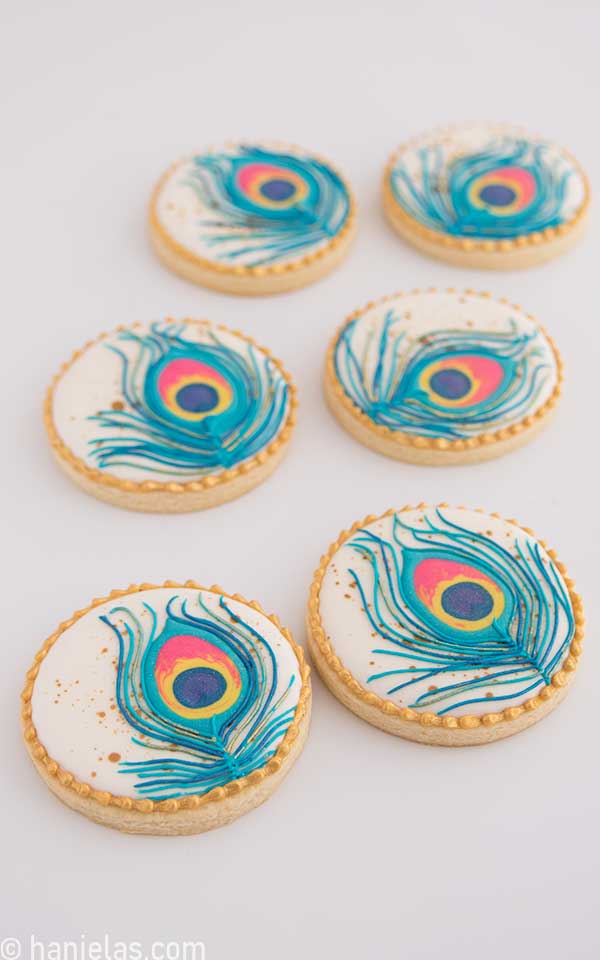
In this cookie decorating tutorial, I share how you can capture the mesmerizing beauty of peacock feathers with royal icing. The vibrant blues, greens, purples of feather eye, and delicately piped details all come together in these stunning peacock feather cookies.

updated from 2012
HOW TO MAKE DECORATED PEACOCK FEATHER COOKIES
- Cookie Decorating Guide
- Beginner’s Guide To Cookie Decorating
- Ultimate Guide to Cut-Out Cookies (tips, tricks, troubleshooting)
- Royal Icing Recipe
- Small Batch Royal Icing Recipe
- Cookie Icing Recipes (includes vegan royal icing, glaze, fondant)
- Guide To Royal Icing Consistencies with Visual Help(what is stiff, flood icing, etc.)
- How To Freeze Royal Icing
- How To Make Royal Icing Transfers
- Royal Icing FAQ ( for example: how to make black icing, color bleeding, storage, and more)
- How To Make a Cookie Cutter Template
- Ultimate Guide To Cookie Decorating Tools
Subscribe to Haniela’s Cookie Club on Patreon and get access to exclusive and ad-free tutorials, templates, sneaks peeks, and more.
THINGS YOU NEED
- Peacock Feather Eye Template
- Round cookie cutter ( I used a 3-inch cutter)
- Gel Food Colors: purple, royal blue, teal, yellow, pink, ivory/brown
- Scribe Tool
- Piping Bags – I used tipless piping bags
- Piping Tip #2
- Gold Luster Dust Pump Spray
- Gold Edible Paint or Gold Luster Dust
- Blue Metallic Paint or Blue Luster Dust
- Paint Palette Tray
- Dropper
- Paintbrushes
- Everclear via Wikipedia- or other clear high-proof content
This post containsThis post contains Amazon affiliate links that earn me a small commission, at no cost to you. I only recommend products that I use and love. Learn more about my affiliate policy here.
COOKIES AND ROYAL ICING
For this project, I used sugar cookies and royal icing. To cut out cookies, I used a 3-inch cookie cutter.
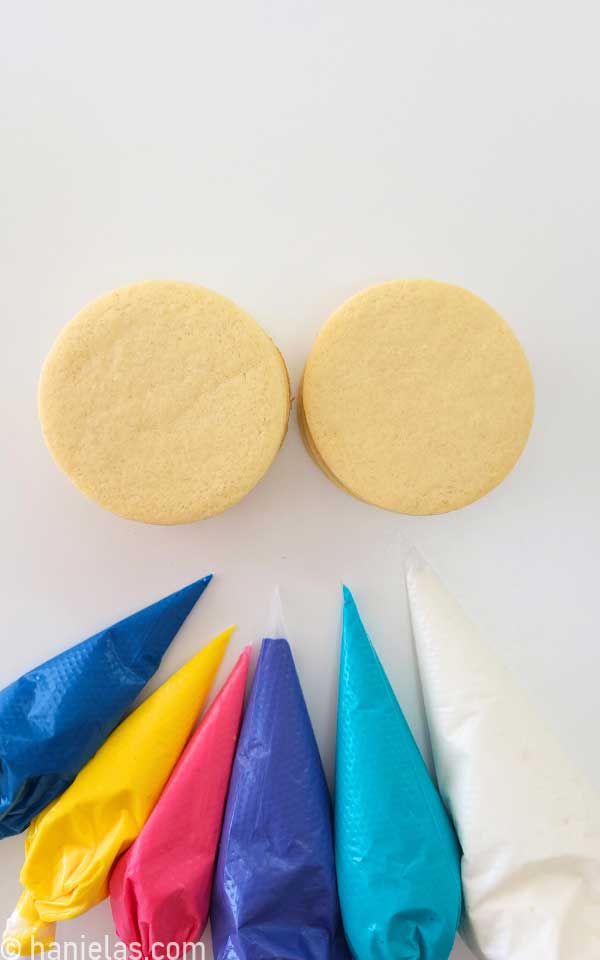
ROYAL ICING COLORS AND CONSISTENCIES
- White Icing: 15-second consistency (flood, base icing layer)
- Purple, Blue, Pink, Yellow, Teal Icing: 20-second consistency ( peacock feather eye)
- Teal Icing: piping consistency (barbs – lines around the peacock eye)
- Ivory or Light Brown Icing: piping to thick consistency (beaded boarder)- don’t make it too stiff as it will be difficult to pipe.
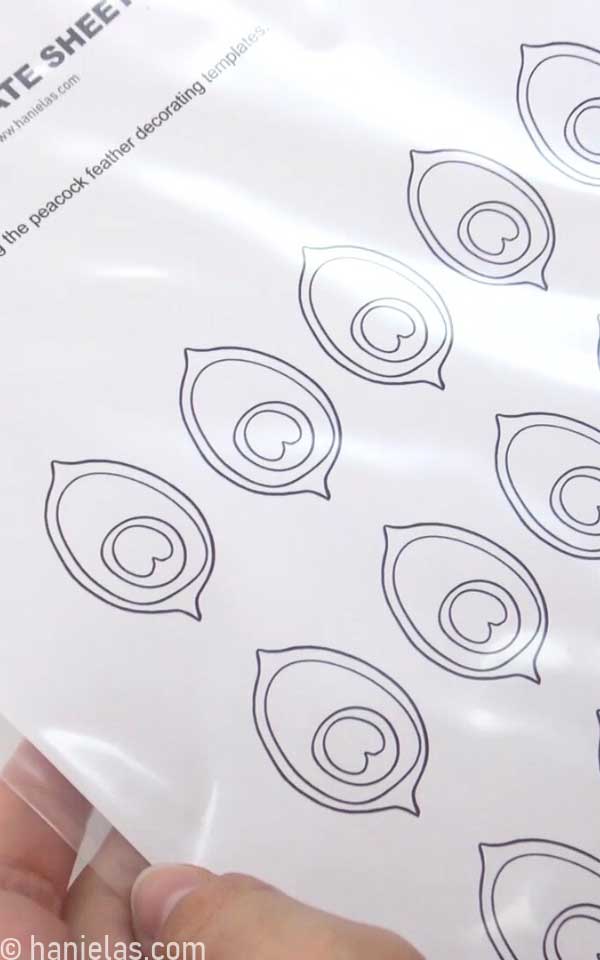
PEACOCK FEATHER EYE ROYAL ICING TRANSFER
I’m sure you’ve heard of royal icing transfers. To make the peacock feather eye, I used my handy peacock eye transfer sheet (see the tools section at the top of this tutorial) and royal icing. For the best results place the template into a clear smooth protector sheet. You can pipe royal icing directly onto a protector sheet.
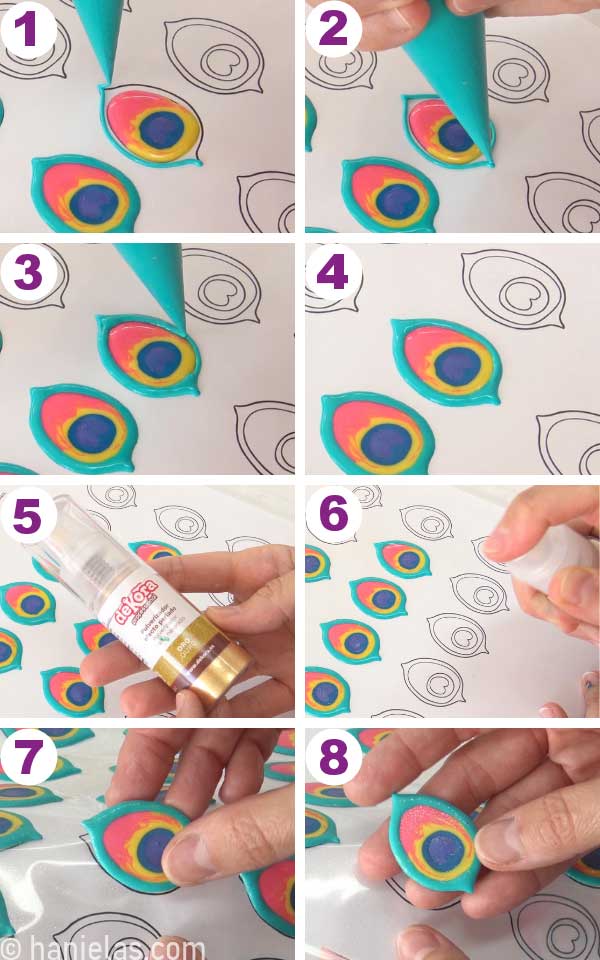
Start from the middle, fill the rounded heart shape with purple icing, then pipe blue icing around it. Use a scribe to shape the icing, and drag the icing from blue to purple to accentuate the “heart shape” (steps 1-4). Then, continue with yellow and pink icing. Use the tip of a scribe tool to gently marble pink and yellow icing (steps 5-8).
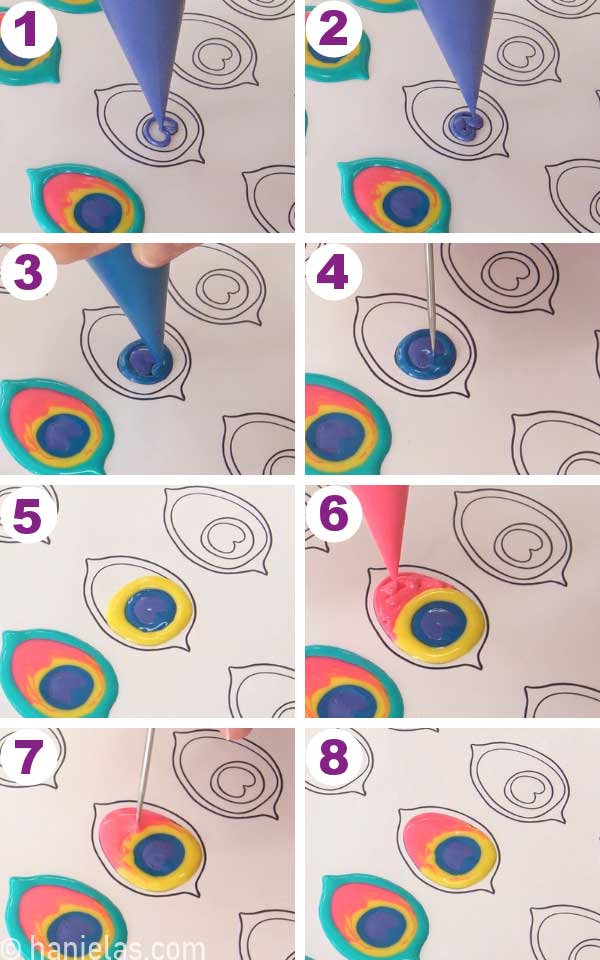
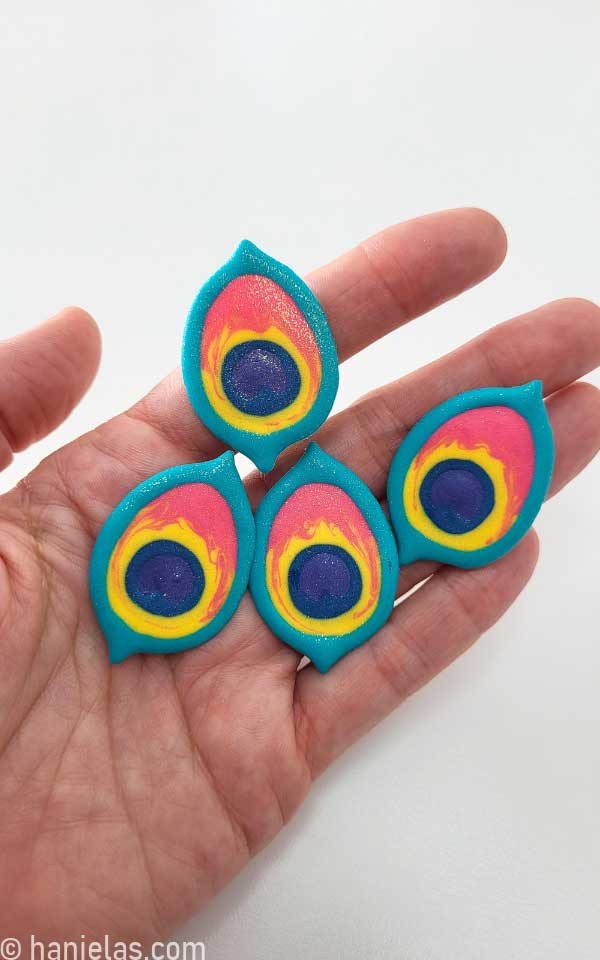
Take the teal icing (20-sec) and pipe an outline (steps 1-2). Fill in the gap between the pink-yellow section and the teal outline. Use a scribe to shape the points of the eye. Spray the royal icing with gold luster dust, using a spray pump (steps 5-6). Let royal icing transfers dry overnight and up to 12 hours. Then, once dry, carefully remove each transfer from the acetate protector sheet (steps 7-8).
It’s paramount that you let the icing transfers dry on a flat surface.
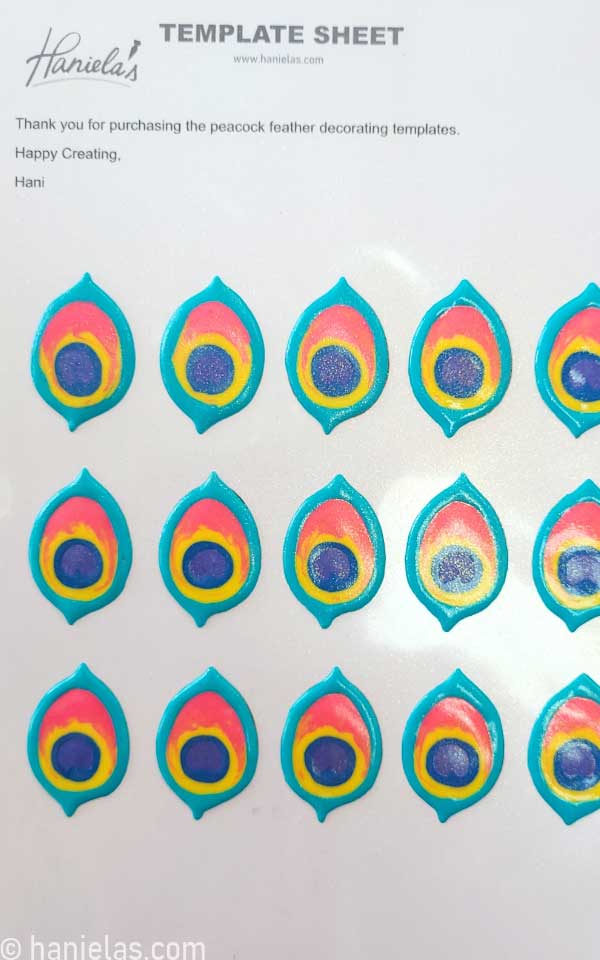
The beauty of royal icing transfers is that they can be made ahead of time. If stored properly, away from direct sunlight and moisture, royal icing transfers can last indefinitely.
FLOOD COOKIES WITH ICING
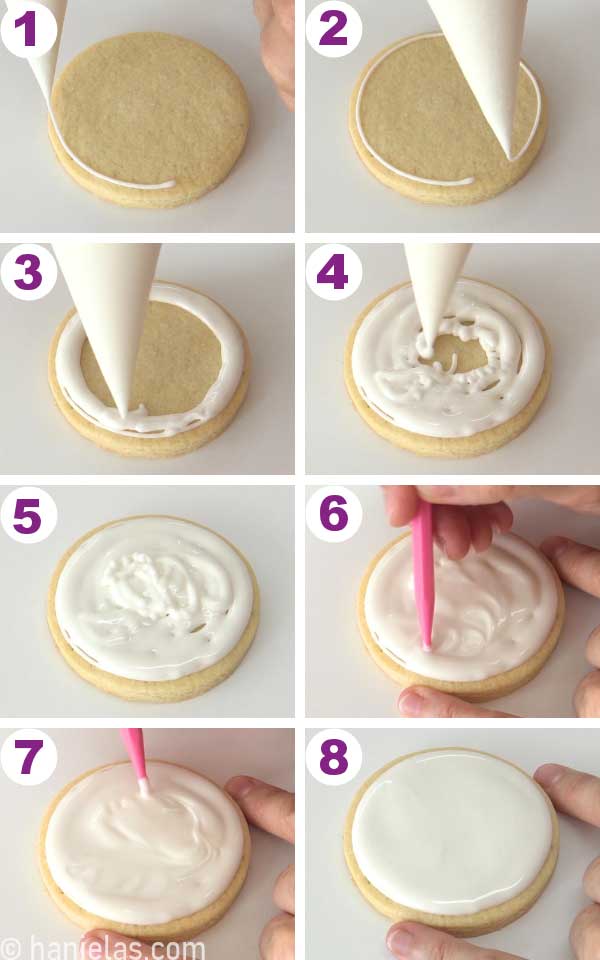
Outline and flood a cookie with white icing (15-sec), leaving a small gap between the edge of the cookie and the icing. Use a scribe to smooth and distribute the icing evenly (steps 1-8).
HOW TO MAKE GOLD SPLATTER ON ROYAL ICING
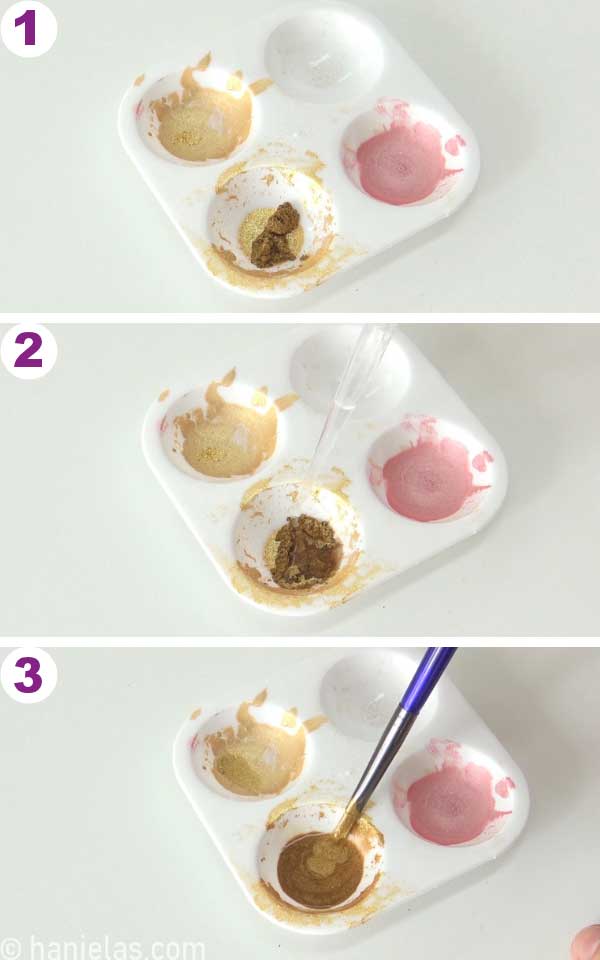
To make the splatter with gold paint, in a paint palette tray, I mixed dry gold luster dust with Everclear – high-proof grain alcohol (steps 1-3).
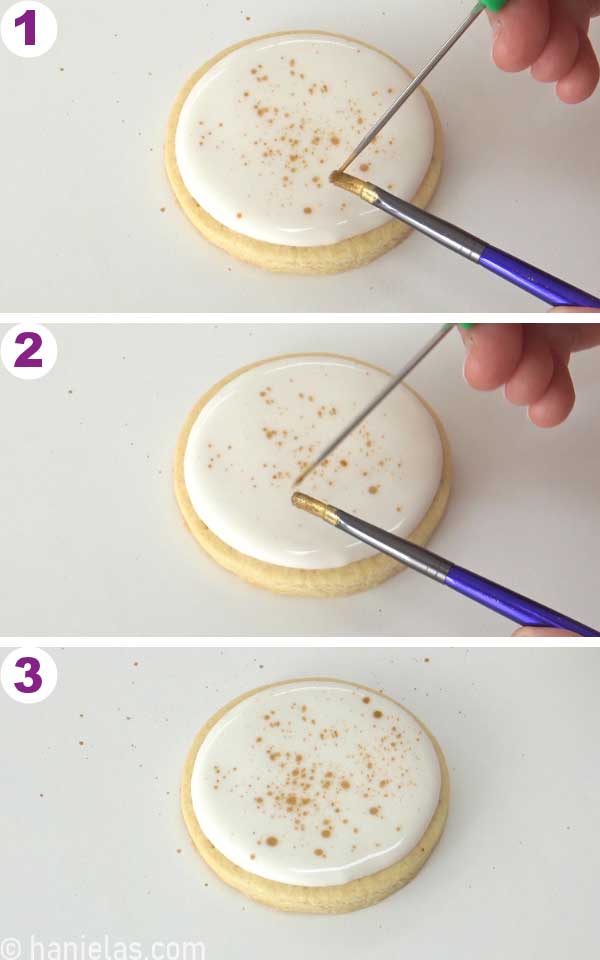
Before you do this, make sure there is nothing around you, or on your work surface that could accidently be tinted with gold splatter. What I mean is, don’t place another set of cookies close by, as splatter can land on them by chance. Protect your work area. To create splatter on wet icing, dip the paintbrush in gold luster dust paint. Hold the paint brush over the cookie with fresh icing layer. Slowly run a scribe tool thru the bristles to release the paint and create splatter on wet icing (steps 1-3).
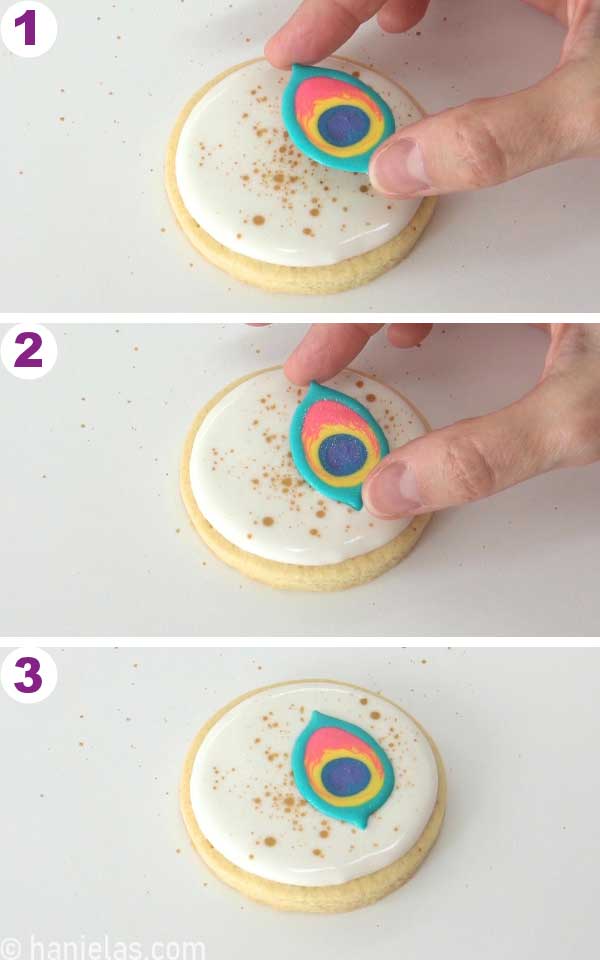
DECORATE WITH ROYAL ICING TRANSFER – PEACOCK FEATHER EYE
Pick up a peacock feather eye transfer and carefully drop it onto the wet icing (steps 1-3). Let the icing dry overnight.
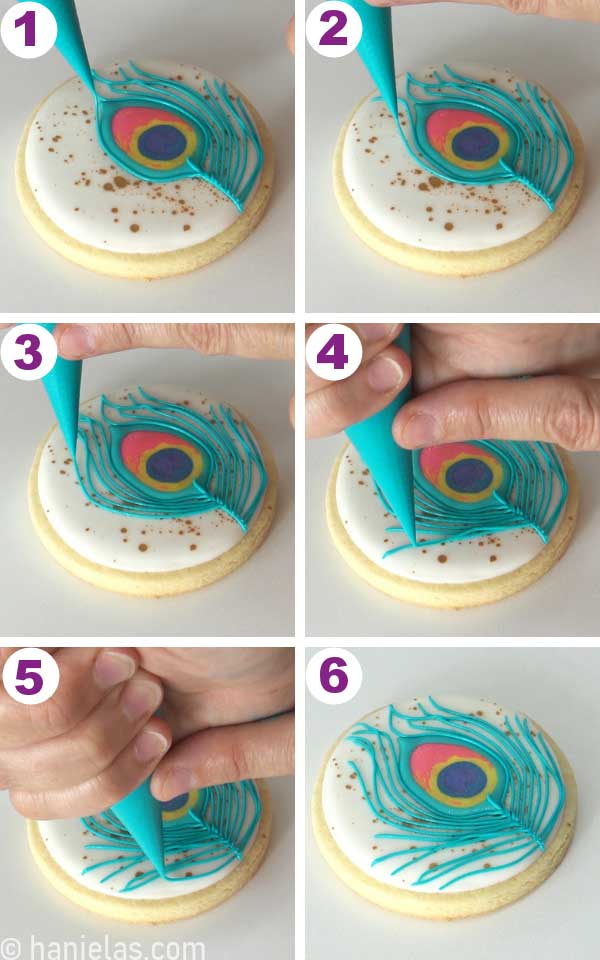
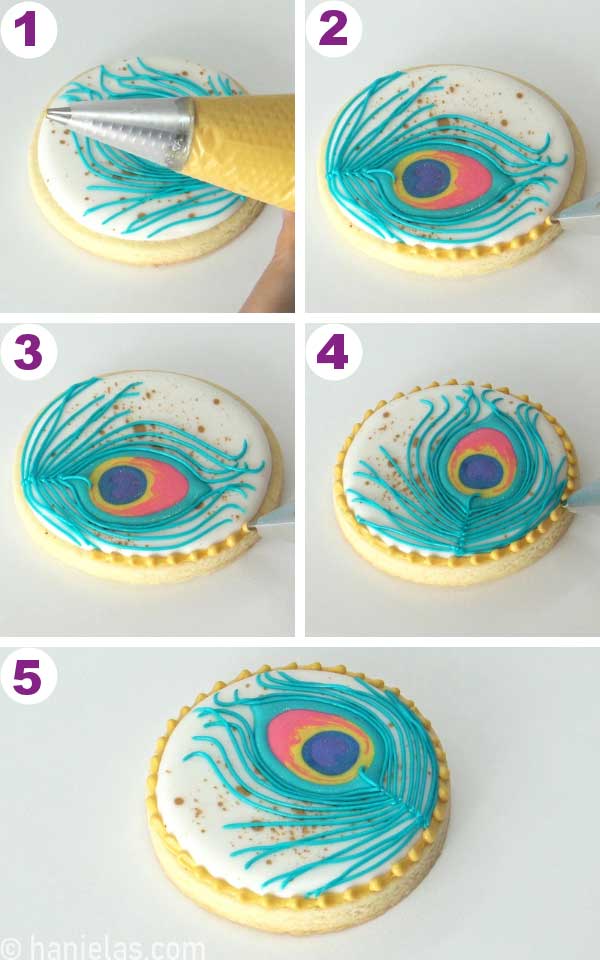
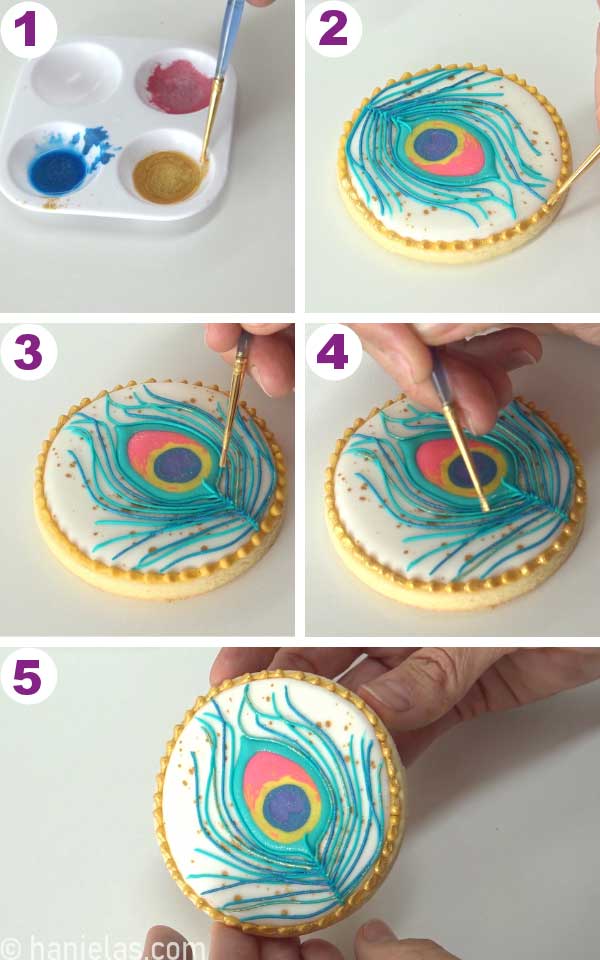
PIPE PEACOK FEATHER BARBS
Pipe thin lines of teal-colored icing (piping consistency) around the eye. It’s okay if some the lines overlap. Aim for 4-5 longer lines (steps 1-5) and then pipe them shorter as you move down, toward the bottom of the eye (steps 6-8).

Repeat on the other side.
BEADED BORDER
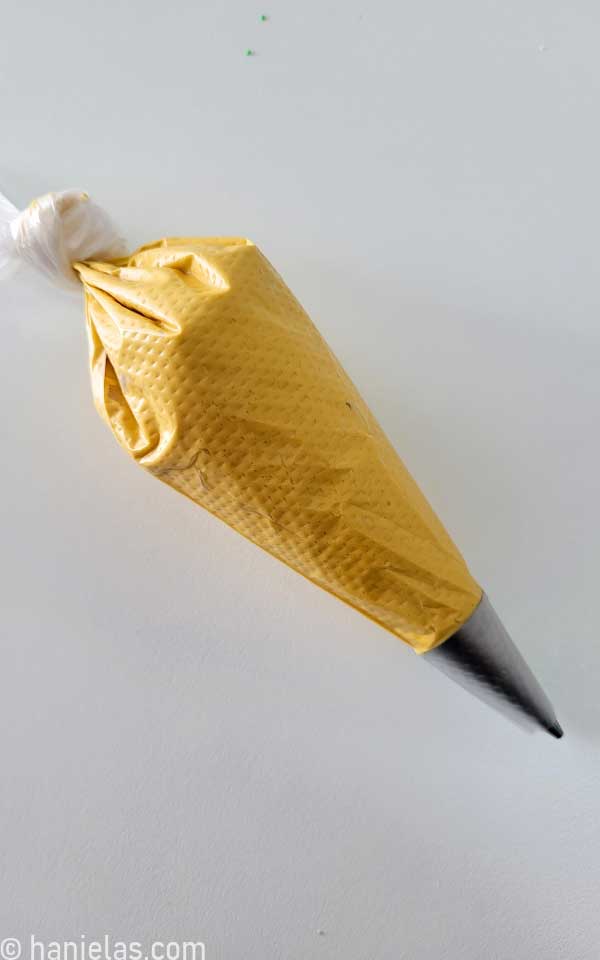
Lastly, prepare piping consistency ivory or light brown icing. Fit the piping bag with a round piping tip #2 and fill it with the icing.
Pipe a beaded border, turn the cookies as you pipe the border around the perimeter (steps 1-5). Let the icing dry.
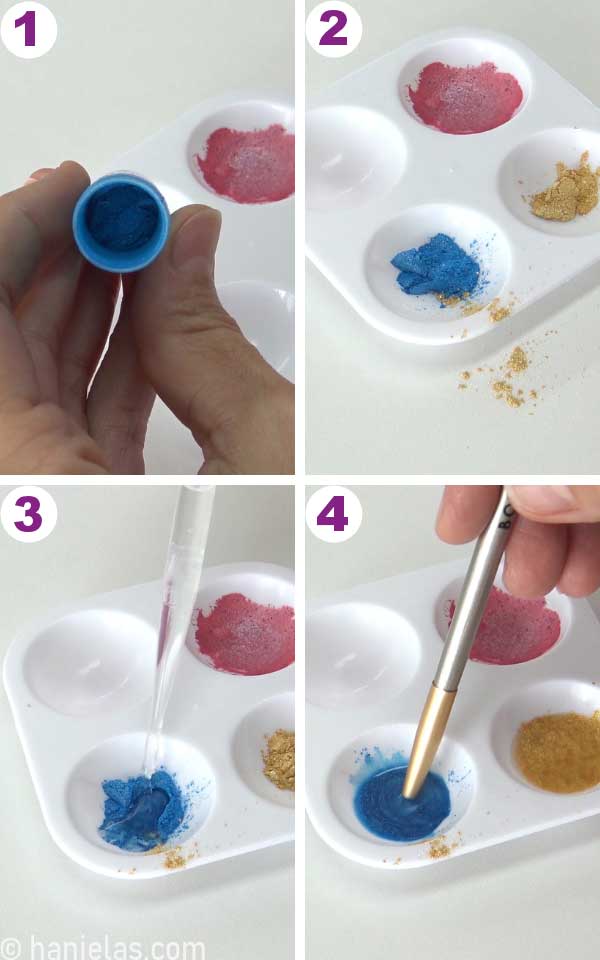
PAINT WITH EDIBLE LUSTER DUST PAINT
Prepare luster dust paint. I used blue luster dust along with gold luster dust. Into a paint palette tray, pour some luster dust and add a few drops of Everclear (high-proof grain alcohol). With a fine paintbrush, stir dust and alcohol until combined. If, by accident, you’ve added too much alcohol, and the paint is too runny, allow some of the alcohol to evaporate and subsequently color will thicken (steps 1-4).
Paint some of the lines with blue luster dust paint
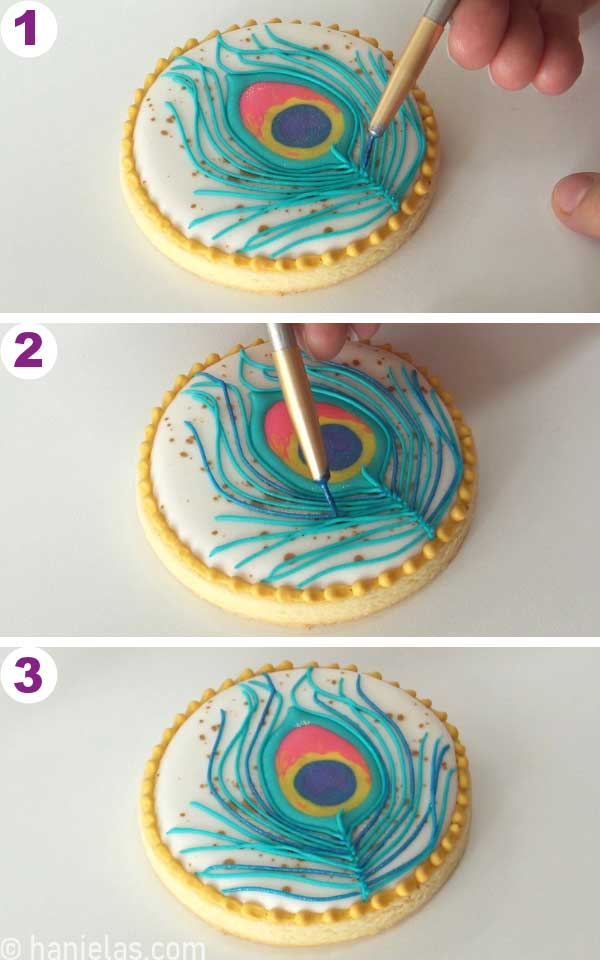
And after, switch to a clean paintbrush and paint beaded border with gold luster dust paint and also some of the royal icing lines around the eye (steps 1-5).
MORE DECORATED COOKIES
- Classic Wedding Cookies
- Wedding Calendar Cookies
- LOL Doll Cookies
- Easy Monogram Cookies via Sweet Sugarbelle
- Simple Brush Embroidery Flower Cookies
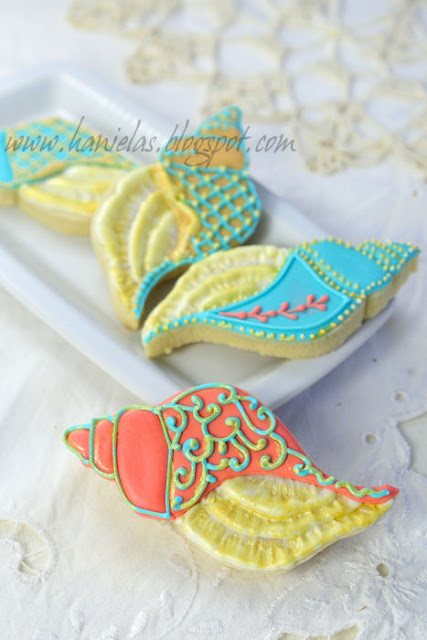
PEACOCK FEATHER COOKIES FROM THE PAST
In 2012, a friend asked me to make wedding favors for a peacock-inspired wedding. I made the cookies below.
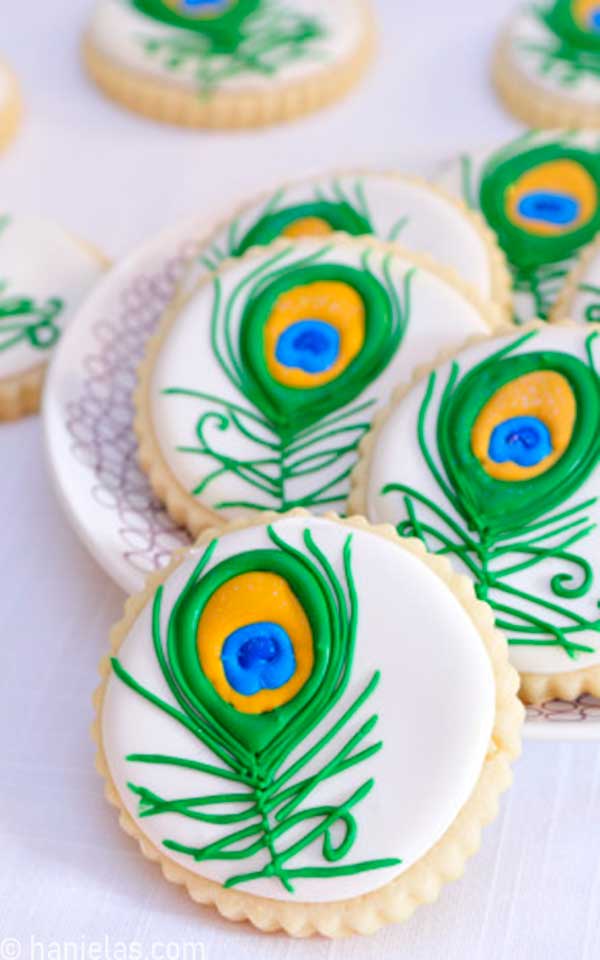
This post was originally published on August 1st, 2012. On August 18th, 2023, I updated this cookie decorating tutorial with new step-by-step pictures and written text.

Hello- I am wanting to ask, how do you prevent cookies from getting too dried out while waiting for the icing to dry between colors? I willl place a clear glass dish over the cookies with moistened pieces of bread, but not sure this worked that well. Cookies were good but had dried out too much by the time I served them. Thank you for the help.
Hello Barbara,
once the icing on the cookies hardens, you can store cookies in an airtight container, or
alternatively you can also seal them in polybags.
If you’d like to extend their shelf life, you can add 1 tablespoon of agave or invert sugar syrup to the
dough. They are both hygroscopic and draw moisture from the air, hence keeping the cookies moist for longer.
I recently had to make these and they weren't nearly as pretty as yours, Hani! Beautiful, as always!
Such a pretty design! And what a great top for inspiration… I will have to remember to search for invitations the next time I hit a road block!